FN
Smart
Function
Keys
Function
Key
Smart
Key
Labels
In
Out
Pan
Info
FN
Smart
Function
Keys
Function
Key
Function
Labels
MSG
MAP
IFR
VFR
A
B
MENU
ENTER
Menu
Item
Smart
Keys
Option
1
Option
2
Option
3
Option
4
Option
5
Option
6
Menu
Item
Labels
C
MX20
Quick
Refer
ence
Guide
2345
T
u
rner
Rd.,
S
.E.
Salem,
OR
97302
USA
800-525-6726
Canada
800-654-3415
International
(503)
391-341
1
F
A
X
(503)
364-2138
http://www
.garmin.com
Garmin
A
T
P
/N
561-0263-08
Rev
A
(Garmin
P
/N
190-00509-00
Rev
D)
November
2005
2005
by
Garmin,
Inc.
Printed
in
the
U.S.A.
All
Rights
Reserved
1.
T
urn
the
power
on
(press
key
turn
the
clockwise
past
the
detent
to
turn
power
on.
Press
and
hold
both
and
keys
turn
the
rotary
knob
fully
counterclockwise
to
turn
power
of
f).
The
screen
will
remain
dark
for
a
short
time
while
the
MX20
performs
start-up
and
self-test
operations.
2.
Adjust
the
brightness,
if
necessary
.
Press
to
increase
brightness.
Press
to
decrease
brightness.
Or
,
pull
the
knob
out
and
turn
the
knob
to
adjust
brightness
manually
.
T
o
return
to
automatic
brightness
control
press
and
hold
both
the
+
and
-
keys.
Release
the
keys
when
they
flash.
,
push
the
power
knob
in
to
return
to
automatic
brightness
control.
3.
Check
that
all
tests
pass
on
the
Start
Up
screen.
4.
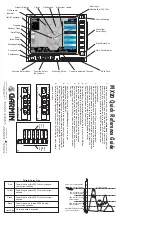
Press
the
key
to
view
available
functions.
Each
press
of
the
key
will
step
through
the
lists
of
available
functions.
5.
Press
the
“smart”
key
below
the
function
label
to
select
the
desired
function.
Press
the
key
again
to
view
functions.
.
6.
Once
a
function
is
selected,
the
function
labels
change
to
give
options
for
that
function.
Press
the
“smart”
keys
below
the
labels
to
choose
options.
.
7.
Once
a
function
is
selected,
the
key
is
used
to
give
additional
options.
.
8.
Press
the
key
next
to
the
displayed
option
to
choose
desired
capabilities.
Some
options
use
multiple
key
presses
for
dif
ferent
states
for
the
option.
Press
the
key
again
to
extinguish
the
option
display
or
it
will
extinguish
automatically
in
20
seconds.
.
9.
Refer
to
the
Detailed
Operation
section
of
the
’s
Guide
for
more
details
on
each
function.
+
o
r
rotary
knob
+-
o
r
+
-
Or
FN
FN
FN
Menu/Enter
Line
Select
Menu/Enter
See
Figure
A
See
Figure
B
See
Figure
C
See
Figure
C
Pilot
Terrain Color Key
Red
Yellow
Green
Black
Light Blue
Terrain that is within 500 feet, at, or above,
your current altitude.
Terrain that is within 1000 ft of your current
altitude.
Terrain that is within 2000 ft of your current
altitude.
Terrain that is more than 2000 ft below
your current altitude.
No terrain data is available.
1000 feet below your
current altitude
2000 feet below your
current altitude
Current Altitude
Highest Terrain
More than 2000 feet below
your current altitude
500 feet below or at
your current altitude
Above your current altitude
Y
ellow
Black
Red
Green
Red
MX20
FN
MENU
ENTER
ON
OFF
+
Power/Dimming
Graphic Display
Menu Item
Smart Keys
Menu/Enter Key
Data Card Ejector
Data Card
Function Smart Keys
Function Key
Function Smart
Key Labels
Currently Selected Function
Mounting Screw
Advisory Flags
Message Flag
Zoom
(Map Scale)
TO Waypoint
Identifier
Bearing to
Destination (TO) Wpt
Menu Item Labels
Data Flags
Photosensor
Ownship
Traffic
Traffic Thumbnail
Obstruction


