


3
2
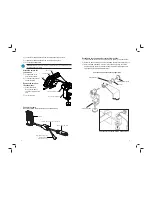
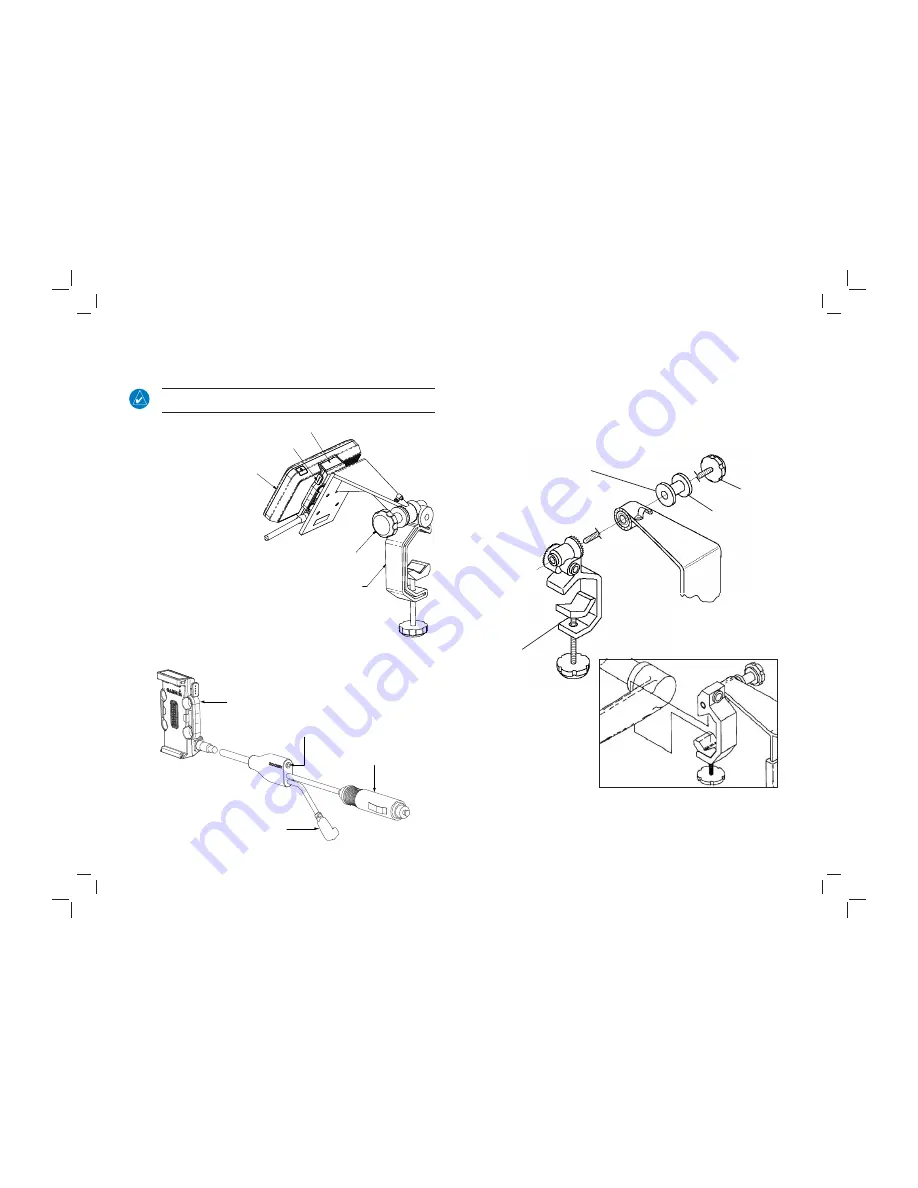
3) Loosen the Cradle Adjustment Knob, then orient the aera as desired.
4) Tighten the Cradle Adjustment Knob to hold the aera in place.
5) Connect power/data cables.
NOTE
:
5HDGMXVWWKHSRVLWLRQRIWKHDHUDWRSURYLGHWKHEHVWYLHZRIWKHGLVSOD\VFUHHQ
as lighting conditions change.
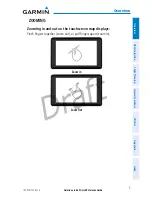
Attach the aera to the
yoke mount:
1) Fit the bottom of the
aera into the cradle.
2) Tilt the aera back until it
snaps into place.
Remove the aera from
the yoke mount:
1) Press the Release
Button on the side of
the mount to release the
aera.
2) Lift out the aera.
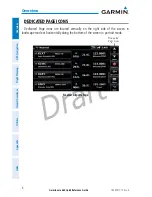
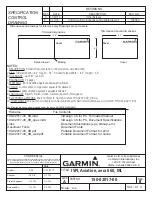
Connect the cable:
Make all applicable cable connections per the below drawing.
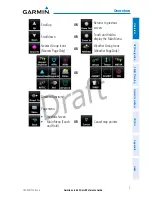
5HFRQ¿JXUHWKH\RNHPRXQWIRUFHQWHUFROXPQ\RNHV
1) Loosen and remove the Cradle Adjustment Knob, spacer, and rubber washer.
2) Rotate the clamp assembly 90
o
so that the clamp opening faces away from you.
3) Secure the clamp assembly to the rest of the yoke mount using the Cradle
Adjustment Knob, spacer, and rubber washer. Adjust the clamp angle before
fully tightening the Cradle Adjustment Knob.
<RNH0RXQWLQ)RUZDUG)DFLQJ&RQ¿JXUDWLRQ
<RNH0RXQWLQ&RQYHQWLRQDO&RQ¿JXUDWLRQ
Rubber Washer
Spacer
Clamp Assembly
Cradle Adjusment Knob
aera Cradle
Release Button
Cradle Adjustment Knob
aera
Yoke Mount Assembly
3.5mm Headphone/Audio Jack
Power Plug (3A Fuse)
Mini-USB Connector
to XM Receiver
(XM version only)
Cradle
Содержание AERA 660
Страница 1: ...model 660 Quick Reference Guide Draft...