background image

13

SAFETY  

02

2.3.2 Driver qualifications

The driver of the vehicle should at least as a minimum have read this complete user’s 

manual, have full knowledge and understanding of the use of this vehicle and be in  

possession of a valid driver’s license for motor vehicles. 

The driver is required to drive responsibly and safely, in order to avoid damage to 

property and/or injuries to others or him-/herself.

The driver must know about the rules and regulations for driving Golf Cars of the area 

where the vehicle is operated, and must follow these at all times. No persons under 

the age of 16 shall be allowed to operate the vehicle. 

In areas with pedestrians and other traffic, the driver must exercise caution, drive 

slowly and pay attention to the surroundings. 

2.3.3 Safety precautions when maintaining the vehicle

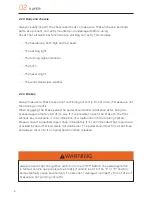
When maintaining the vehicle, make sure to follow all safety precautions located on 

the vehicle, described in this user’s manual, in the Garia Workshop Repair Manual and 

especially the following:

•  Ensure that the vehicle has been properly secured and cannot come move, when 

vehicle is being maintained.

•  Ensure that the vehicle has the correct lifting support before any repair and 

maintenance is carried out. 

•  Avoid fire hazards and ensure that there is proper fire extinguishing equipment 

within reach.

•  The electrical system must be disconnected before ANY work is carried out on 

this vehicle. (See chapter 4 for instructions on disconnecting power)

•  Make sure that warning and information labels are in a readable condition. If any 

label needs replacing to make the vehicle conform to the correct safety stand-

ards, please consult a qualified repair shop. It is recommended that maintenance 

is provided by an Authorized Garia Service Dealer. 

•  Always use correct insulated tools when working on and around electrical instal-

lations, such as batteries, on the vehicle. 

•  Maintain all components that have an effect on safety and the safe operation of 

the vehicle. This particularly includes the brakes, steering and warnings devices. 

Содержание 1st Edition

Страница 1: ...If you have additional questions regarding operation or maintenance of your Garia please contact your local Authorized Garia Service Dealer for immediate support Thank you for choosing Garia After Sal...

Страница 2: ...2 3 2 Driver quali cations 13 2 3 3 Safety precautions when maintaining the vehicle 13 2 3 4 Maintenance to ensure safety 14 03BATTERIES 3 1 Battery Safety Warning and Instructions 15 3 2 General Inf...

Страница 3: ...6 STORAGE ROOM UNDER BONNET 46 5 7 Bin 47 5 8 Multifunctional rear section 48 5 11 INTERIOR LIGHT OPTIONAL 54 06SERVICE 6 1 Service Intervals 59 6 2 Service symbol in Instrument cluster 59 6 3 Servic...

Страница 4: ...IV VEHICLE TECHNICAL SPECIFICATIONS 81 9 VEHICLE TECHNICAL SPECIFICATIONS 81 9 1 TECHNICAL INFORMATION 81 9 2 Declaration of conformity 83 10NOTES NOTES 85 11ALPHABETIC INDEX ALPHABETICAL INDEX 89...

Страница 5: ...ria com For warranty inquiries warranty garia com For support repair and other general inquiries support garia com Find your local contact at www garia com Garia A S and Garia Inc reserves the right t...

Страница 6: ...lt in severe injury or death to the Golf Car occupants a bystander or a person inspecting or repairing the Golf Car Failure to follow WARNING instructions could result in severe injury or death to the...

Страница 7: ...al contains all available information on the current product at the time of printing however there can be minor differences between your Golf Car and this manual If you have any questions concerning t...

Страница 8: ...VIII...

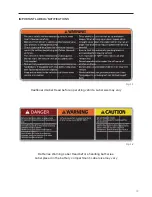
Страница 9: ...BELS NOTIFICATIONS Dashboard Label Read before operating vehicle Label size may vary Batteries Warning Label Read before handling batteries Label placed in the battery compartment Label size may vary...

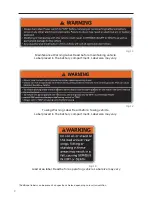
Страница 10: ...abel size may vary Load area label Read before operating vehicle Label size may vary Towing Warning Label Read before towing vehicle Label placed in the battery compartment Label size may vary Fig 1 5...

Страница 11: ...re performed according to the intervals speci ed by Garia Please refer to your quick guide and service book for the complete warranty terms and conditions Please contact your local dealer for any ques...

Страница 12: ...2 01 WARRANTY...

Страница 13: ...f vehicle Never allow more than one passenger in each seat This vehicle is restricted to two 2 occupants including the driver Do not operate while under the in uence of alcohol and drugs Do not drive...

Страница 14: ...e vehicle is used Before using the vehicle please check the following 1 Batteries 2 Tire conditions 3 Body and chassis 4 Brakes 5 Steering 6 Reverse warning indicator 7 Pedal operation 2 2 1 Batteries...

Страница 15: ...ecking tire wear Check tire surface for damages cracks and foreign objects When tire tread wears down to 2 0 mm 0 08 in it is recommended that the tire is replaced Please check local legislation for m...

Страница 16: ...e pedal the pedal should show resistance after being de pressed approximately 1 3 of its way If it is possible to push the brake to the oor without any resistance it is an indication of a malfunction...

Страница 17: ...wheel up and down and back and forth Turn steering wheel slightly left and right If too much free play is observed or any unusual sounds appear from any of the components consult a quali ed repair sh...

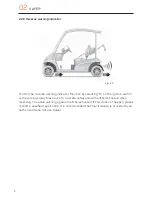
Страница 18: ...the ignition switch and reversing slowly Make sure to operate safely and with suf cient space when reversing The audio warning signal should be activated If this does not happen please consult a quali...

Страница 19: ...Vehicle can accelerate abruptly if vehicle is set to the F or R position and potentially cause severe injury to persons or damage to property 51 1 2 2 7 1 Accelerator pedal Before driving ensure that...

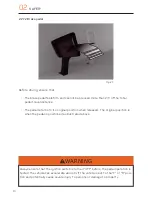
Страница 20: ...al returns to its original position when released The original position is when the pedal is positioned as illustrated above Always ensure that the ignition switch is turned OFF before the pedal opera...

Страница 21: ...rakes to reduce speed when driving down hill Golf Cars can cause serious injury or damage if used improperly or not maintained according to the vehicle s maintenance program Before the vehicle is put...

Страница 22: ...k the vehicle on as level grounds as possible Sharp or blind bends Use great caution round sharp or blind bends adjust the speed so the turn can be made in a safe manner Be prepared to stop the vehicl...

Страница 23: ...ribed in this user s manual in the Garia Workshop Repair Manual and especially the following Ensure that the vehicle has been properly secured and cannot come move when vehicle is being maintained Ens...

Страница 24: ...d correctly and the fol lowing is recommended to follow to obtain the best possible safety Maintenance is preventative Always service and maintain the vehicle according to maintenance schemes stated i...

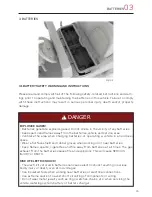
Страница 25: ...n charging batteries or operating a vehicle in an enclosed space Wear a full face shield and rubber gloves when working on or near batteries Keep ames sparks cigarettes and re away from batteries at a...

Страница 26: ...ectrolyte is poisonous and dangerous causing severe burns or other dam ages It contains sulfuric acid Avoid contact with skin eyes or clothing Do not transport store handle or operate batteries except...

Страница 27: ...s with the integrated Delta Q on board charger This charger is equipped with algorythms that allow the most optimal charging session at any state of charge It is carefully designed for the vehicle s b...

Страница 28: ...if the user has no prior experience of handling batteries Please refer to Trojan Battery s website for more information regarding battery handling www TrojanBattery com Watering a battery before char...

Страница 29: ...xposed 3 5 2 Using the HydroLink on board water ller system Lead acid batteries require frequent re lling of distilled or deionized water The Garia Golf Car is equipped with the Trojan HydroLink Water...

Страница 30: ...ate Couplers Insert the male coupler on the HydroLink Watering System into the female coupler on the Flow Rite Hand pump Fig 3 2 Fig 3 3 Fig 3 4 3 5 3 Using the ow rite hand pump To operate enclosed t...

Страница 31: ...couplers by depressing the push button on the female coupler Disconnecting before the bulb becomes rm will lead to under lled cells that will impact the battery s performance and shorten its life STEP...

Страница 32: ...the best possible treatment of the vehicle Check battery cables and connections ensure that all connections are in good working order and replace connections that are damaged and worn Tighten all loos...

Страница 33: ...must have an O ring and dust cover properly at tached 3 5 5 Cleaning batteries Clean the top of the battery the terminals and all connections with a cloth or brush with a solution of baking soda and w...

Страница 34: ...ry 2 4 weeks 3 6 2 Storage in cold environments less than 32 F 0 C Avoid locations where freezing temperatures are expected during storage if possible Batteries can freeze in cold temperatures if they...

Страница 35: ...they will deliver less than the rated capacity For example at 0 F 18 C batteries will deliver 50 of its capacity and at 80 F 27 C at battery will deliver 100 of its capacity When operating batteries...

Страница 36: ...03 BATTERIES 26...

Страница 37: ...OPERATION 04 27 4 OPERATION 4 1 OVERVIEW 1 2 3 4 5 6 Fig 4 1 1 Indicator stalk 2 Steering wheel 3 Instrument cluster 4 Brake pedal 5 Ignition switch 6 Accelerator pedal...

Страница 38: ...p 5 Roof 6 Seats 1 Speed handles 2 Rear wing 3 Rear wheel left 4 Rear fender 5 Load area 6 Multifunctional rear section 7 Rear lights 1 Pedals 2 Instrument cluster 3 Steering wheel 4 Batteries 5 Utili...

Страница 39: ...ns are in function affecting bat tery power Note To reverse turn key to N before turning to R The reverse warning indicator is activated when vehicle is reversing N Neutral The parking brake is engage...

Страница 40: ...hen storing the vehicle for longer periods of time it is recommended that the main power is switched off in order to experience as little discharging as possible When servicing or repairing the vehicl...

Страница 41: ...atic parking brake can be switched off for towing or repairing needs however note that this also enables most electrical functions on the vehicle When the vehicle is not driving the parking brake symb...

Страница 42: ...n the risk of being injured or damaged by the vehicle Push the accelerator pedal very gently and the vehicle will start to move Always accelerate carefully Never bring vehicle to a halt while using th...

Страница 43: ...r pedal is engaged If an emergency occurs the brakes are designed to handle an emergency braking in cident However after any emergency braking incident carry out a brake maintenance check Please consu...

Страница 44: ...op Rough terrain driving can cause situations that are damaging to the vehicle therefore always drive very cautiously Avoid driving in hilly areas and at tilted angles The weight distribution of the v...

Страница 45: ...hen the vehicle is moving mo tor braking will stop the vehicle immediately This type of braking can cause personal injury The parking brake will be engaged when the vehicle has come to a full stop Not...

Страница 46: ...vehicle is reversing follow the above mentioned steps only by turning the key switch to F instead of R 4 11 BRAKING WITH PARKING BRAKE If the parking brake should engage during driving at higher spee...

Страница 47: ...n holder and scorecard holder 4 Heated windshield button optional 5 Windshield wiper washer optional 6 Interior light button optional 7 Refrigerator button optional 8 Bonnet opener button 9 Storage sp...

Страница 48: ...with an adjustable seat arrangement optional it allows the user to choose from 4 different seating positions in order to create the best riding comfort The lever placed just above the bin will release...

Страница 49: ...d below the seats This contains the main power switch the towing switch the batteries the brake level uid indicator and the VIN vehicle identi cation number For access to the battery compartment tip t...

Страница 50: ...r unit combines all the information about the vehicle that the driver needs for proper operation 1 Low beam 2 Turn signal indicators 3 Battery indicator 4 High beam 5 Heated windshield optional 6 Brak...

Страница 51: ...age appears when service is needed 5 3 2 Button on instrument cluster left 5 3 1 Inner cluster explanation Fig 5 5 4 2 3 1 Fig 5 6 1 Push button to change between overall distance and time as well as...

Страница 52: ...nt cluster adjusts the clock To adjust hold down the button on the right side of the instrument cluster Hours will blink Push repeatedly to set hours Wait for approximately 5 seconds Minutes start bli...

Страница 53: ...6 5 43 VEHICLE EQUIPMENT 05 5 4 INDICATOR STALK Indicator stalk overview 1 Turn signal right 2 Turn signal left 3 High beam ash 4 High beam on off 5 Light off park light on low beam on 6 Horn Fig 5 8...

Страница 54: ...Golf Car is equipped with the Garia air scoop which allows air to reach the passengers while driving The air scoop is adjustable in various steps and also fully removable To open the air scoop push th...

Страница 55: ...To close the air scoop pull the lever downwards and the air scoop will close To fully remove the air scoop open the air scoop to its maximum position push the center lever to pull out the complete ha...

Страница 56: ...board This compartment offers a lockable storage space which enables the user to leave the vehicle without having to remove all loose items from the vehicle The bonnet can be opened by pushing the bu...

Страница 57: ...o not pull out the bin strap NEVER operate a vehicle under the in uence of alcohol Driving under the in uence of alcohol or drugs considerably reduces the ability to concentrate focus judge speed and...

Страница 58: ...clubs Place golf bags in an angled position and tighten the straps that secure the golf bags during transportation The construction of the multifunctional rear section can be a potential danger to peo...

Страница 59: ...unctional rear section can be mounted and removed by following the illus tration 5 8 2 1 Removing the multiholder arm 1 Open the lock lever 2 Turn the turn lever 3 Release the nger screw 1 2 3 Pull ou...

Страница 60: ...1 Turn the nger screw 2 Turn the turn lever 3 Lock the lock lever 1 2 3 5 8 2 2 Mounting the multiholder arm 50 05VEHICLE EQUIPMENT Fig 5 18...

Страница 61: ...d as possible Wrong adjustment can cause dangerous traf c situations and cause ac cidents resulting in severe personal injury death or material damage The mirror has a tip function for convenience to...

Страница 62: ...ration When turned on the refrigerator constantly provides cooling when the vehicle ignition switch is turned to F N or R The refrigerator will continue its cooling function for an additional 2 hours...

Страница 63: ...his 5 10 3 To defrost the refrigerator proceed as follows Remove the contents of the refrigerator If necessary place them in another cooling container to keep them cool Switch off the refrigerator Lea...

Страница 64: ...ior light Use only when vehicle is not in movement Never drive while interior light is on it can obstruct the vision of the driver especially when driving in the dark 127 The use of the interior light...

Страница 65: ...d washer function turn the button another step and release when suf cient washer uid has been applied to the window Ensure that the wiper blade is always in the optimum condition Always make sure that...

Страница 66: ...Always make sure to have suf cient window washer uid when driving Re ll with standard automotive windshield washer uid and keep the correct levels within the MAX and MIN markings on the windshield was...

Страница 67: ...off automatically after 30 minutes of operation unless power is turned off meanwhile When the heated windshield is in activation a symbol appears in the instrument clus ter Please see page 40 127 The...

Страница 68: ...58 05VEHICLE EQUIPMENT...

Страница 69: ...ia Golf Car If the vehicle is malfunctioning in any way not speci ed in this user s manual please consult a quali ed repair shop Garia recommends that any work is provided by an Authorized Garia Servi...

Страница 70: ...Wndscreen washer uid C C C C C C C Front brakes S CL S CL S CL S CL S CL S CL S CL Rear brakes Drum brakes S CL S CL S CL S CL S CL S CL S CL Discharge test S S S S S S S Heated windshield if present...

Страница 71: ...es battery shoes cable assembly acid etc visual inspection CR C Tire pressure and tire wear C C Functionality of the reverse warning indicator C C Brake uid level C Batteries acid level C 6 4 USER SEL...

Страница 72: ...62 06SERVICE...

Страница 73: ...t the cable plug for the bulb and turn the bulb socket of a turn counter clockwise The bulb will release from the lamp tting Turn the bulb an additional of a turn so the cable tting is facing upwards...

Страница 74: ...lb Touching the glass will shorten the life of a bulb re markably Use a glove or a cloth when handling a light bulb 3 2 1 Fig 7 2 1 Remove the connection plug from the 12V bulb socket 2 Turn the bulb...

Страница 75: ...ge compartment 2 Remove the insulation of the socket and then pull the socket out of the lamp t ting 3 Replace the lamp by pulling out the W5W bulb and replacing it with a new Then insert the socket i...

Страница 76: ...it has cooled off Never touch a lighted bulb 127 Never touch the glass of a bulb Touching the glass will shorten the life of a bulb signi cantly Use a glove or a cloth when handling a light bulb 7 1 3...

Страница 77: ...eplace lights if any LED is not functioning correctly 7 1 4 Replacing bulbs of the rear indicator The rear light LED system is a closed circuit and LEDs cannot be replaced separately Please consult a...

Страница 78: ...trated below Raise the car and remove all bolts The wheel can be removed and another can be mounted Always use the same size and type of wheel for all 4 wheels on the vehicle Use only original model s...

Страница 79: ...cle is stable and secure to work under Chocks should be placed at the wheels not being raised to prevent vehicle from roll ing Work with extreme caution since lifting causes great unstability in the v...

Страница 80: ...mixture proportions and other instructions Use a clean soft sponge or brush speci cally for automotive exterior cleaning for applying on vehicle exterior Wash off shampoo with running water e g a gar...

Страница 81: ...r parts of the interior of similar fabric wipe with warm water using a wrung cloth The water can contain mild detergents with mixture proportions according to manufacturer s speci cations Do not use r...

Страница 82: ...the brake uid warning level indicator It is recommended that a check of the brake uid level is made regularly The brake uid container is found under the seat in the battery compartment Check that the...

Страница 83: ...ned to the N position Furthermore it is necessary that the main power switch in the battery compartment is turned to the ON position Select TOW to activate the towing function Activating the towing fu...

Страница 84: ...sibility of activating the towing function through the towing switch the parking brake can be released by manually engaging the lever on the motor as illustrated above Push the lever to release the p...

Страница 85: ...ved automotive towing rope Do not tow vehicle on highways or other public roads not speci ed for Golf Car use Only tow one vehicle at a time The vehicle can roll unexpectedly at all times when parking...

Страница 86: ...peres as speci ed on the following page Replacing fuses for other amperes than speci ed can cause malfunctions or break downs on the electrical system 7 10 FUSE BOX Danger of damaging the device Only...

Страница 87: ...A K26 F F F F R1 R2 R3 R4 3 30 0 87 7 F5 F6 86 85 87a 3 30 0 87 7 86 85 87a 3 30 0 87 7 86 85 87a 3 30 0 87 7 86 85 87a R1 R2 R3 R4 3 30 0 87 7 86 85 87a 8 a 7 5A 15A 10A 5A 5A 3 30 0 87 7 86 85 87a 3...

Страница 88: ...tore in a safe place Clean the vehicle and apply a rust inhibitor on exposed locations Cover the vehicle with a suitable cover made from a breathable fabric and store the vehicle in a dry and properly...

Страница 89: ...se see next page for how to reset the vehicle Please consult a quali ed repair shop Preferably an Authorized Garia Service Dealer The vehicle has a lower range than usual One or more batteries can be...

Страница 90: ...ot work Turn ignition on turn to N and activate the refrigerator on the refrigerator button on the dashboard The refrigerator symbol in the instrument cluster will be lit if power is on and ignition s...

Страница 91: ...n Automotive approved laminated glass windshield MEASUREMENTS Length 2330 mm Width 1210 mm Height 1850 mm Ground clearance 165 mm WEIGHT Curb weight 550 kg incl batteries Maximum approved weight 900 k...

Страница 92: ...Total voltage 48V FRONT AXLE Independent suspension double wishbone with anti roll bar optional ball joint design front axle coil spring and shock absorbers REAR AXLE Rigid axle trailing links and Pa...

Страница 93: ...83 VEHICLE TECHNICAL SPECIFICATIONS 09 9 2 DECLARATION OF CONFORMITY...

Страница 94: ...84 09VEHICLE TECHNICAL SPECIFICATIONS...

Страница 95: ...85 NOTES 10...

Страница 96: ...86 10NOTES...

Страница 97: ...87 NOTES 10...

Страница 98: ...88 10NOTES...

Страница 99: ...king 33 Emergency braking 35 Paring brake 31 Braking pedal 10 Buttons on instrument layout 42 C Changing a Wheel 68 Charger Malfunctioning 74 Charging Batteries 17 Check ups before use 4 Cleaning 70 C...

Страница 100: ...nt indicator 65 The head light 63 The rear indicator 67 Troubleshooting 80 Low battery range 79 Low beam 43 M Main Power switch 30 Maintenance 14 Motor Motor braking 36 Multifunctional rear section 48...

Страница 101: ...er 37 Tires Pressure 5 Tire conditions 5 Tire wear 5 Towing Towing hook 75 Towing switch 73 Towing without battery power 74 Transportation of golf bags 48 Trash can 47 Trojan HydroLink on board water...

Страница 102: ...92...

Страница 103: ...93...

Страница 104: ...ed Any reprinting or unauthorized use without the written permission of Garia A S is expressly prohibited Copyrighted material This manual may not be reproduced in whole or in part without the ex pres...

Отзывы:

Похожие инструкции для 1st Edition