


www.AVOutlet.com
TIMER FUNCTIONS
CLOCK SET-UP
(
Note: The clock is in 24-hour format
)
1.
From the channels or groups screen, press and hold the circle
button
until
or
appe-
ars on the screen. Press the circle
button
again and the timer/ clock screen will appear.
2.
Press the
STOP button
to enter the menu.
3.
Set the hour by using the
UP /
DOWN
buttons and press
the
STOP button
to confirm.
4.
Set the minutes by using the
UP /
DOWN
buttons and press
the STOP button
to confirm.
5.
Select the day of the week using the
◄
LEFT/
►
RIGHT buttons and press
STOP button
to confirm.
Clock is now set.
6.
now appears on screen. By using the arrow buttons
(
◄
and
►
)
you can scroll between
and
to choose between having the clock displayed or not in stand-by mode.
Note: During operation, the clock is shown only in Automatic Mode or Random Mode (see section:
“Understan
-
ding and changing the operational
mode”)
CREATING OR EDITING A SCHEDULE
1.
After setting the clock, from either the channels or groups screen, press and hold the
button
until
or
appears on the screen. Press the
button
again two times until the
screen is
reached. Press
the
STOP
to enter the menu.
2.
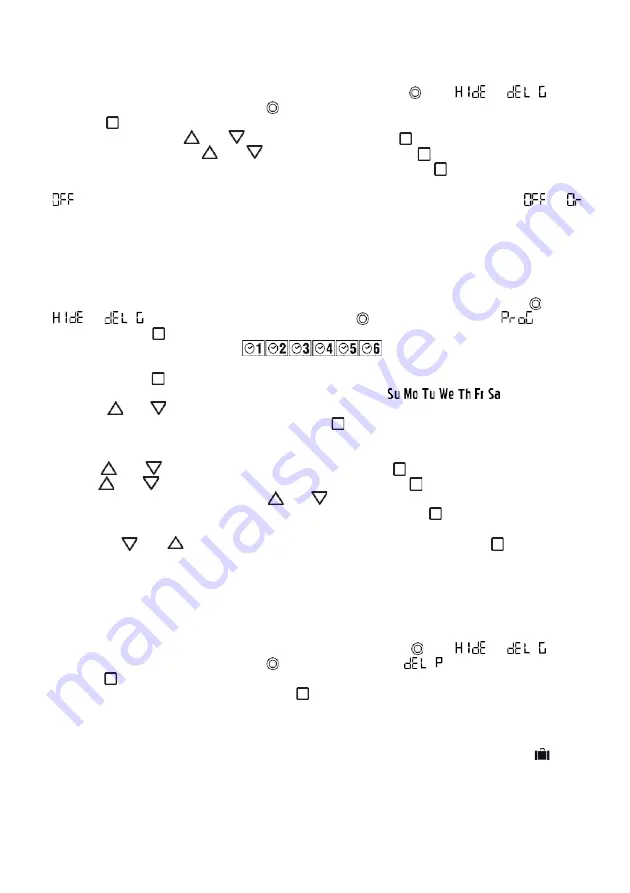
The 6 schedules can now be chosen:
3.
Use the
◄
LEFT/
►
RIGHT buttons to select the schedule to be created or edited. Once the schedule is
selected, press the
STOP
button to confirm.
4.
Use the
◄
LEFT/
►
RIGHT buttons to select the day of the week:
5.
Press the
UP /
DOWN
buttons to select or deselect one or multiple days of the week. Once the
day or days of the week have been selected, press
the
STOP
to confirm.
Note: When the day of the week is blinking slow, the day is not selected, and when the day of the week is
blinking fast, the day has been selected.
6.
Use the
UP /
DOWN
buttons to select the hour. Press
the
STOP
to confirm.
7.
Use the
UP /
DOWN
buttons to select the minutes. Press
the
STOP
to confirm.
8.
Choose the command to be sent. Use the
UP /
DOWN
buttons to select between the UP com-
mand, DOWN command, and Intermediate Position command. Press
the
STOP
to confirm.
9.
Choose the channels to add to the Scene. Use the
◄
LEFT/
►
RIGHT buttons to move between chan-
nels, and the
UP /
DOWN
buttons to select or deselect the channel. Press the
STOP
button to
create the schedule.
Note: When the channel is blinking slow, the channel is not selected, and when the channel is blinking fast,
the day has been selected.
The schedule is now created.
SCHEDULE DELETION
1.
From the channels or groups screen, press and hold the circle
button until
or
appe-
ars on the screen. Press the circle
button
again three times until
appears on screen.
2.
Press the
STOP
button to enter the menu.
3.
Select the schedule to be deleted and press the
STOP
button to confirm.
The schedule is now deleted.
UNDERSTANDING AND CHANGING THE OPERATIONAL MODE
The remote operational mode can be changed between Automatic Mode [
AUT
], Random Mode [
] and
Manual mode [
no icon
]. The operational mode can be changed by pressing the Left and Right buttons.
With each press of the button, the transmitter will change from manual to automatic, to random, to ma-
nual, etc. In automatic mode and random mode, the clock will appear on the screen instead of the channel
or group lettering.