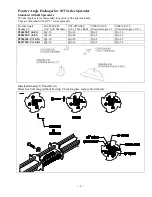
~
1
~
Cleaning of Spreader:
1)
Run spreader until it is empty or nearly so.
2)
Move the cam gauge to the highest position and empty hopper out.
Catch remaining material on a tarp or optional l calibration pans. Sweep out remaining material.
3)
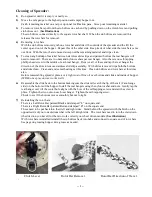
To remove rotor bars pull out the stub drives on each end by pushing down on the clutch lever and pulling
stub drives out. (
See Illustration)
The stub drives connect directly to the square rotor bar shaft. When the stub drives are removed this
releases the rotor bars for removal.
4)
Removing rotor bars.
With the stub drives removed grab one rotor bar and slide it the outside of the spreader and the lift the
center up and out of the hopper. Repeat this of the other side. Keep track of what side the rotor bars came
out from. With the rotor bars removed sweep out the remaining material and wipe clean.
5)
To clean any buildup of material between stainless slide strips and painted bottom the rear hangers will
need to removed. There are two nuts and nylon washers per rear hanger. Also there is on self-tapping
phillips head screw in the middle of each rear hanger. Remove all of these and tap the rear hanger the
direction of the slots to remove stainless slid strip assembly. With slides removed wipe both the bottom
and slides clean. Clean end and center bearings at this time. Clean stub drives and rotor bars at this time
also.
Before reassembling spreader place a very light coat of fine oil over bottom and slide and inside of hopper.
(WD40 or a spray on wax works well.)
6)
Reassemble the slide back to the bottom making sure the slide rails catch the lip of the rail (Cam-Gauge
side) on the bottom of the hopper. Install the rear hangers using the nylon washer and nuts. Gently tap the
rear hanger over till the center hole aligns with the hole of the self-tapping screw and start the screw in
place. Tighten the two nuts on each rear hanger. Tighten the self-tapping screw.
Check to see if the bottom moves smoothly but not to tight.
7)
Reinstalling the rotor bars.
There is a Left Rotor Bar painted Black and stamped “L” on square end.
There is a Right Rotor Bar painted Red and stamped “R” on the square end.
These need to be put back into their left and right sides. Stand behind the spreader with the hitch on the
opposite side of you to deuterium what is the left & right side. The rotor bars need to turn the claw down
(the direction you travel) for them to work correctly on wheel driven models.
(See illustration)
With rotor bars reinstalled reinstall the stub drives back into hubs and connect to square end of rotor bars.
See page on greasing hopper & re-grease as needed.
Clutch Lever
Rotor Bar Removel
Rotor Bar Direction of Travel
`
Содержание 10-Ft
Страница 2: ......


