background image

Installation

3

 · G&D DevCon-Center

Installation

Establishing a connection to up to two local networks

Network A: 

Insert a category 5 twisted pair cable (or better).

Network B: 

If you want to integrate the 

DevCon-Center

 appliance into another network, 

insert the category 5 (or better) cable into this interface.
Connect the other end of the cable to the local network.

Establishing the power supply

Main Power: 

Insert the supplied 

PowerCable-2 Standard

 power cable.

Red. Power: 

Insert the supplied 

PowerCable-2 Standard

 power cable. This provides the 

device with a second, redundant power supply.

Initiation

After the appliance has been properly installed, it is ready for operation. Switch on 

the 

Main Power

 and optionally the 

Red. Power

 power pack.

When choosing a location for the device,  please  ensure  to  comply  with  the 

ambient temperature limit (see 

Technical data

 on page 10 ff.) close to the device. 

The ambient temperature limit must not be influenced by other devices.

When installing the devices, make sure to only place a maximum of three devices 

directly on top of each other. This way, a good circulation of air is provided and 

mutual thermal interference can be avoided. After having installed three devices, 

provide for a distance (at least 2 cm).

Do not cover the ventilation openings. For reasons of electric safety, mount the 

device variants with ventilation openings only horizontally.

NOTE: 

Connect the other end of the cable to the network interfaces of any compu-

ter for the initial configuration of the network interface(s).
After the initial configuration (see page 4), the cable is connected to the local network.

NOTE: 

The interfaces 

USB 2.0

RS485

 and 

RS232

 are provided for future expansions.

Содержание DevCon-Center

Страница 1: ...G D DevCon Center Installation Guide...

Страница 2: ...l not accept warranty claims The devices were not used as intended The devices were repaired or modified by unauthorized personnel The devices offer extensive external damage that was not reported at...

Страница 3: ...2 Scope of delivery 2 Installation 3 Initiation 3 Initial configuration of the network settings 4 Adjusting a common database for all devices 6 Using the Reset button 7 Resetting the default settings...

Страница 4: ...lug or the power supply before installation Before installation ensure that the device has been disconnected from the power source Disconnect the main power plug or the power supply of the device Ensu...

Страница 5: ...d web application adds up to a KVM system which enables you to centrally configure and monitor the single devices Scope of delivery 1 DevCon Center 2 power cable PowerCable 2 Standard 1 service cable...

Страница 6: ...osing a location for the device please ensure to comply with the ambient temperature limit see Technical data on page 10 ff close to the device The ambient temperature limit must not be influenced by...

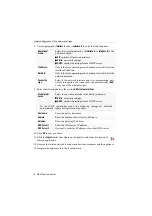
Страница 7: ...of the computer s network interface is part of the sub net to which the appliance s IP address belongs to 3 Switch the device on 4 Start the computer s web browser and enter the URL 192 168 0 1 in th...

Страница 8: ...rom a DHCP server IP address Only if the Static operating mode has been selected Enter the interface IP address Netmask Only if the Static operating mode has been selected Enter the network netmask Co...

Страница 9: ...ive device and log in with your user account 2 Click the tool symbol in the toolbar 3 Click the tabs Configuration Device 4 Use the Type field to select the Slave option 5 Use the gdcd IP row to enter...

Страница 10: ...booting resets the default setting of the DevCon Center appliance How to reset the default settings 1 Switch off the device if in operation 2 Press and hold the Reset button on the front panel of the...

Страница 11: ...data packets are compared to the netfilter rules If the currently adjusted netfilter rules prevent the access to the Config Panel web application they can be can temporarily deactivated in order to b...

Страница 12: ...ted to the power network Main on The power pack is switched on and supplies the necessary voltage off The power pack is switched off or the device is not connected to the power network Status Ready bl...

Страница 13: ...er supply Type internal power pack Connection IEC plug IEC 320 C14 Voltage AC100 240V 60 50Hz Current consumption Operation Main power supply 110mA 240VAC 220mA 100VAC Red power supply 110mA 240VAC 22...

Страница 14: ...Notes 11 G D DevCon Center...

Страница 15: ...Notes G D DevCon Center 12...

Страница 16: ...Guntermann Drunck GmbH Dortmunder Str 4a 57234 Wilnsdorf Germany Phone 49 2739 8901 100 Fax 49 2739 8901 120 http www GDsys de sales GDsys de A9200076...

Отзывы: