background image

9

Pulling Tension

To pull tension, wrap the free string clock-

wise around the gripper drum and position

the string between the gripper jaws.
The string must pass over the top half of the

gripper  before being placed between the

gripper  jaws, as the tension on the string

provides the clamping force to the gripper

jaws.
Gently  pull the string until all slack is re-

moved.

STRINGING THE FRAME

Getting Started

To begin stringing the main strings, thread

the two ends of the string through the two

center holes at the appropriate end of the

frame  and continue through the opposite

center holes. Thread one end of the string

through the adjacent grommet hole and pull

excess by hand.
Secure  one of the strings using a string

clamp.

To tension a string, push the tension switch

or  the foot pedal. The string gripper will

rotate  and slowly  apply tension to the

string.  When the set tension has been

attained, the gripper will stop rotating. As

the tensioned string stretches, the gripper

may  rotate intermittently, maintaining the

set tension.
To release the string after clamping, push

the tension switch or foot pedal. If the string

gripper  does not release the string, de-

press and hold the Gripper Reversing Switch

once to release the string.

WARNING:


KEEP FINGERS AWAY FROM GRIPPER

DRUM WHILE TENSIONING STRING. PUSH GRIPPER

REVERSING SWITCH IN CASE OF EMERGENCY.

Содержание X-ES

Страница 1: ...OWNER S MANUAL Issue 1 May 2004 Copyright 2004 GAMMA Sports All Rights Reserved X ES STRINGING MACHINE...

Страница 2: ...ng Clamp adjustment as described on page 11 Quick Action Clamp Base adjustment as described on page 11 and the cleaning procedures listed on page 13 GAMMA s obligation under this warranty is limited t...

Страница 3: ...arallel Jaw Rotating Gripper w Diamond Dust Coated Gripping Surfaces Professional Dual Action Rotating Diamond Dust Coated Fixed String Clamps High Strength Extruded Aluminum Frame with Durable Anodiz...

Страница 4: ...le pin into the bushing of the machine base Support Post Installation To install the support posts you must first remove the mounting bolt from the mounting plate that sets inside the central cavity o...

Страница 5: ...mounting bolt Repeat procedure on to attach the support post on the opposite side of the turntable String Clamp Installation The post of the string clamp and tube of the string clamp base are treated...

Страница 6: ...ng is between 110 V and 120 V 60 Hz and for the 230 V setting between 220 V and 240 V 50 to 60 Hz If you have any question regarding the input voltage supply for your area please ask your electric uti...

Страница 7: ...Support Slides by turning the adjustment knob clockwise until snug against the racquet frame and slight resis tance is felt Caution Overtightening the Center Sup ports will stretch the head of the rac...

Страница 8: ...mage may occur The supports should be tightened to the point where the racquet frame will not move in the mounting system when the handle is grasped and attempts are made to move it Should any support...

Страница 9: ...otation permitted by the slot in th clamp base String Clamp Operation The string clamps are a dual action design where the string clamp and clamp base operate independently of one another To clamp a s...

Страница 10: ...te center holes Thread one end of the string through the adjacent grommet hole and pull excess by hand Secure one of the strings using a string clamp To tension a string push the tension switch or the...

Страница 11: ...gs If applicable tie the first cross string using an appropriate starting knot STRINGING THE FRAME Weaving the Cross Strings Weave the cross strings over and under the main strings being careful to al...

Страница 12: ...wer back inside thebase and the latch with automatically lock into place Storage Drawers There are two storage drawers located in the base of the machine The drawers open from the right end of the bas...

Страница 13: ...ding pressure on the string slowly pull the sheath out of the grommet hole to leave the end of the string exposed The X ES includes the Pathfinder stringing awl which creates a pathway between or arou...

Страница 14: ...justments according to what string type construction and gauge you are using To adjust the gap clamping pressure between the clamp jaws insert the string through the racquet as if you were beginning t...

Страница 15: ...rew at 20 lbs can influence the tension at 60 lbs and visa versa repeat these steps until the set tension matchs the tension reading of the calibrator at both 20 and 60 lbs Replace the rectangular cov...

Страница 16: ...by removing the adjustment screw Using a small nylon brush such as a toothbrush scrub the inside surfaces until all debris is removed Clean the jaws with isopropyl alcohol and re assemble String Clamp...

Страница 17: ...16 NOTES...

Страница 18: ...SPRING ARM ADJUSTMENT KNOB ARM ADJUSTMENT SCREW SHOULDER V CLAMP GRIPPER DRUM PART 259 262 263 265 269 270 271 274 275 276 277 278 279 280 281 282 283 MDCSC10 285 286 287 288 70 MPSA MA 98A 108 109 16...

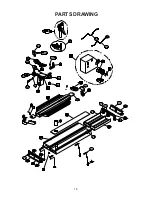
Страница 19: ...18 PARTS DRAWING...

Отзывы: