background image

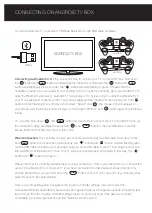
The Android devices can also be connected if you press “     ” and “         ” button simultaneousely. 
The function of “     ”+“         ” and “     ”+“         ” mode is totally the same, the first difference for those two 
modes is that few Android Smartphones can only recognize “     ”+“         ” mode. Most other Android 
Smartphones can recognize both “     ”+“         ” and “     ”+“         ”. The second difference is that, if you 
want to get the icon of mouse appears on your screen, you need to press“     ”+“         ” at first, press 
“Select” +“     ” after that. You can not get the icon of mouse after you press “     ”+“         ”.  

Please note that the controller will remember your last connection ,if this is your second time to connect T1 
to the same Android Phones, and your T1 is not been connected to other devices between the first time 
and the second time, there is no need to turn on the Bluetooth again for the second time, hold down the
“         ” button of your T1 for 3 seconds, the controller will be paired automatically. 

Open up a compatible game, navigate to the in-game controller settings menu and select the 
Gamepad/Controller option (Exact name varies from game to game). If the game supports remapping, feel 
free to do so from the in-game controller settings menu. If you do not know if the game is controller 
compatible, go to www.gamesir.hk and find “GameSir World” column. 

If this is your first time turning on your T1, hold down the “     ” button and “         ” button simultaneously for 
2 seconds, the “     ” button will start flashing in green. It means that the controller is ready to be connected 
to your Android Tablets or Phones. To pair the controller, go to your Android devices and follow the User 
Interface flow below: Settings>Turn on Bluetooth>Search for new devices>”GameSir-T1” will display on the 
screen. Click to connect via Bluetooth. If your T1 is paired and connected, the T1 will shock slightly and 
the “     ” Button will stay on green. The “     ” button will start flashing in red, when you hold down “Select “ 
and “     ”, the mouse icon will appears on your screen, and the “     ” button will stay on. Hold down” 
SELECT” and “     ” button again to exit Mouse Mode. 

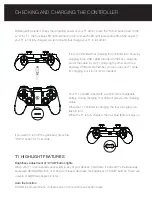
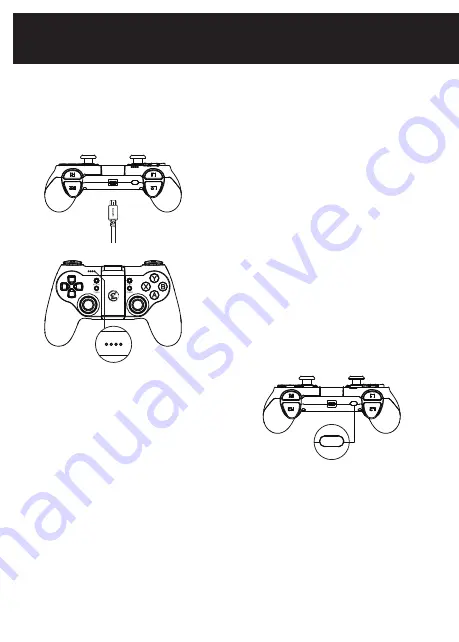
Before getting started, check the remaining power of your T1 at first, press the “Home” button next to the 
L2 of the T1, the four blue LED lights will flash in turn and each LED light represents 25% of the power. If 
your T1 is not fully charged, we recommand that charge your T1 to full at first. 

It is recommanded that charging the controller for 2 hours by 
plugging in the USB cable( provided in the box) –plug one 
end of the cable in your T1 and plug the other end into a 
powered USB port. Remember, you can use your T1 while 
it’s charging, but it is not recommanded. 

If you want to turn off the gamepad, press the 
“Home” button for 5 seconds. 

Your T1 controller is built with a Lithium Ion rechargeable 
battery. During charging, four LED will give you the charging 
status: 
While the T1 controller is charging, the four blue lights will 
flash in turn. 
When the T1 is fully charged, the four blue lights will stay on.

CHECKING AND CHARGING THE CONTROLLER

CONNECTING ON ANDROID ( TABLETS / PHONES )

B+HOME

A+HOME

HOME

HOME

HOME

HOME

HOME

HOME

HOME

HOME

HOME

HOME

HOME

HOME

HOME

Brightness adjustment of “XYAB” button lights 

When your T1 is connected successfully to any of your devices, hold down “L2+R2+R3” simultaneously, 
and press UP/DOWN button of D-Pad to increase/ decrease the brightness of “XYAB” buttons. There are 
4 levels of brightness degree in total. 

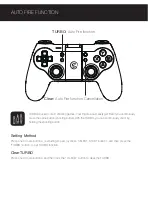
Auto fire function

TURBO is semi-automatic, it creates one or more continuous button press.

T1 HIGHLIGHT FEATURES

GameSir-T1

Содержание T1

Страница 1: ...GAMESIR T1 WIRELESS CONTROLLER Model No GameSir T1 ...

Страница 2: ...QUICK REVIEW GUIDE FOR USER MANUAL 3 Download T1 supported games 1 Check and charge your controller 2 Connecting the controller to your devices Bluetooth 4 0 Wired Happy Chick GameSir World ...

Страница 3: ...UCT OVERVIEW L3 Left Joystick R3 Right Joystick Y START SELECT CLEAR TURBO Power Indicators X B A D Pad Android iOS RESET Mouse Simulation Xinput L1 Left Joystick R1 Right Joystick R2 Charging Port L2 HOME ...

Страница 4: ...d System Requirements Android 4 0 or later Windows 7 or later Hardware compability Android Smartphone Android Tablet NVIDIA Tablet Android TV box Windows PC Samsung Gear VR PlayStation 3 Connections PACKAGE CONTENTS Micro USB Cable ...

Страница 5: ...ay affect the performance of the gamepad 4 Keeping away from fire the built in battery has danger of explosion 5 Charging voltage is USB 3 7 5 5V DC supply normal Android smart phone charging power can be used 6 Children should be under adult s supervision to use this product MORE INFORMATION Facebook Mygamesir GameSir hk Where to buy GameSir hk Support GameSir hk Product Manual ...

Страница 6: ...t to turn off the gamepad press the Home button for 5 seconds Your T1 controller is built with a Lithium Ion rechargeable battery During charging four LED will give you the charging status While the T1 controller is charging the four blue lights will flash in turn When the T1 is fully charged the four blue lights will stay on CHECKING AND CHARGING THE CONTROLLER HOME HOME HOME Brightness adjustmen...

Страница 7: ...s menu and select the Gamepad Controller option Exact name varies from game to game If the game supports remapping feel free to do so from the in game controller settings menu If you do not know if the game is controller compatible go to www gamesir hk and find GameSir World column If this is your first time turning on your T1 hold down the button and button simultaneously for 2 seconds the button...

Страница 8: ... be connected successfully via USB cable Hold down Turbo and button for 2 seconds simultaneously the button and button will start flashing take out the USB cable included in your package plug one end of the cable in your T1 and plug the other end into a USB port of the Android TV box Your T1 will be connected easily and quickly in that way The button and button will stay on Please note that the co...

Страница 9: ...her end into a USB port of the Windows PC Your T1 will be connected easily and quickly in that way The button light of your T1 will stay on Open up a compatible game navigate to the in game controller settings menu and select the Gamepad Controller option Exact name varies from game to game If the game supports remapping feel free to do so from the in game controller settings menu CONNECTING ON WI...

Страница 10: ...on will start flashing take out the USB cable included in your T1 package plug one end of the cable into your T1 and plug the other end into a USB port of the PlayStation 3 Your T1 will be connected easily and quickly in that way The and button light will stay on The PlayStation 3 can be connected via USB cable CONNECTING ON PLAYSTATION 3 Wired HOME TURBO HOME ...

Страница 11: ...tinuously shoot by holding the shooting button Press one or more buttons excluding D pad joysticks SELECT START button and then press the TURBO button to set TURBO function AUTO FIRE FUNCTION Setting Method Press one or more buttons and then click the CLEAR button to clear the TURBO Clear TURBO Clear Auto Fire function Cancellation TURBO Auto Fire function ...

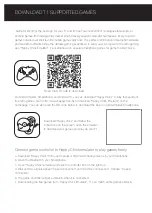
Страница 12: ...wnload Happy Chick Emulator on the homepage You can also scan the QR code below to download the App on Android Tablet Smartphone a Download Happy Chick from user manual or http www happychick hk in your Smartphone b Open the Bluetooth in your Smartphone c Open Happy Chick emulator and click the controller icon on the right top d Wait until two signals appear Speed connection and Common connection ...

Страница 13: ...ible driver needed to download for your GameSir T1 3 Installing the driver recommended by Drive the life when your GameSir T1 is recognized by your computer successfully you can connect T1 to your PC through USB cable next time 4 If the 3 steps above can not solve your problem please try to install X360 gamepad software for systems below WinXP including XP Q Why the gamepad does not vibrate A Chec...

Отзывы: