background image

Overview Of Main Components 

(Continued):

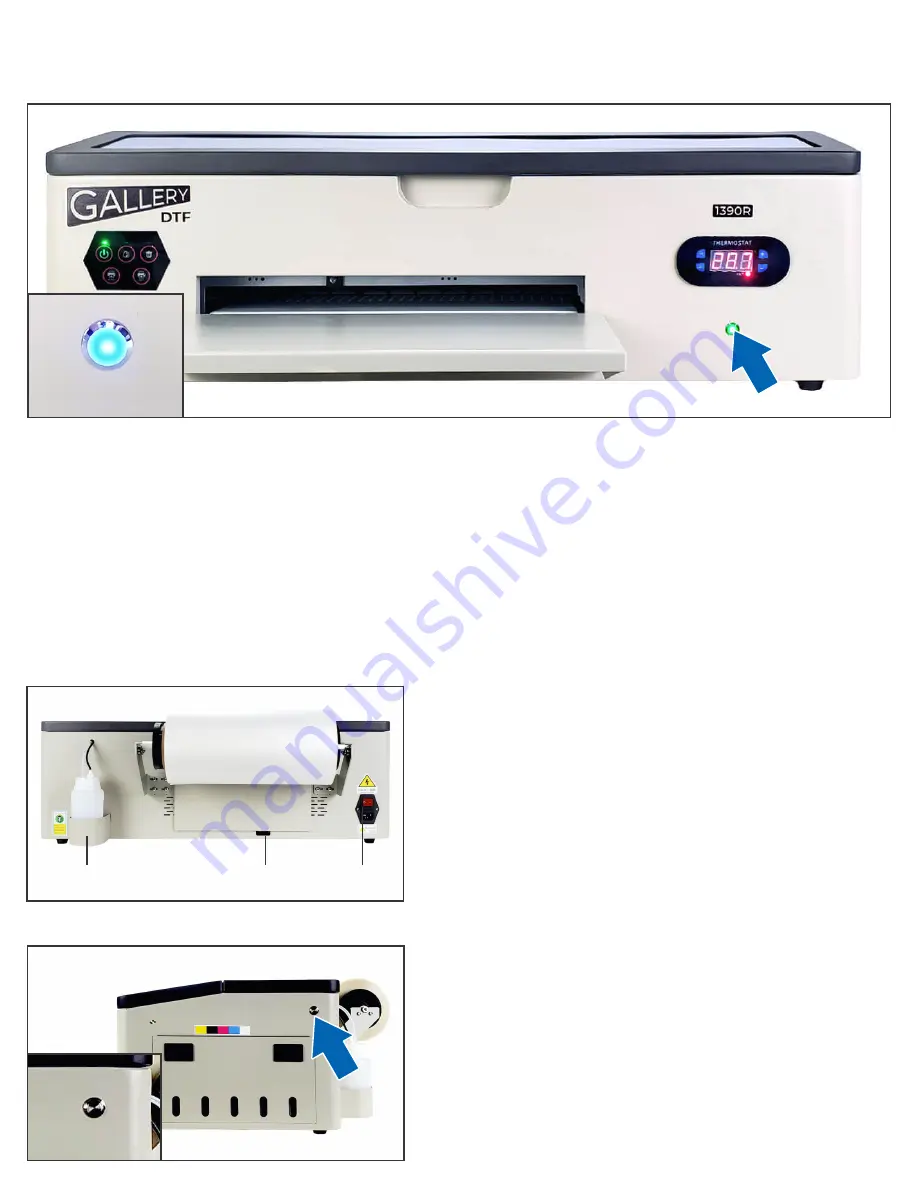
LED To Monitor White Ink Circulation 

The front right side of the printer has an LED show ink circulation status

BLUE

 = all parts of the ink circulation system are active and functioning correctly

GREEN

 - white ink stirring in the tanks is actively occurring

PURPLE

 - white ink circulation through the lines is actively occurring

A quick glance from across the room gives you the confidence to know that all is well with the printer

Back Of The Printer


The back of the printer has the USB port to connect to a 

Windows PC, as well as the main printer power switch.

The main power switch should always be left ON so that 

automatic ink circulation can occur.

The back of the printer also has screw holes to attach the 

film roller and holes for the waste ink bottle.

Waste Ink Bottle

USB Port

Main Power

Switch

Right Side Of Printer


The right side of the printer has the refillable ink tanks and 

the Auto-ink-priming button

The Auto-ink-priming button avoids the need for needles. 

Press and hold to pull ink through the lines

Auto-Ink-Priming

Button

LED To Monitor White 

Ink Circulation

Содержание 1390R

Страница 1: ...GALLERY 1390R DTF Printer User Manual V 1 5 December 2023...

Страница 2: ...r press during a job to cancel a job in progress 4 ENTER REVERSE pulls film back into the printer 5 EXIT FORWARD pushes film forward out of the printer Note that the front panel Green LED must be ON w...

Страница 3: ...e printer Back Of The Printer The back of the printer has the USB port to connect to a Windows PC as well as the main printer power switch The main power switch should always be left ON so that automa...

Страница 4: ...r and unscrew the bracket Step 2 Attach the waste ink bottle holder to the back of the printer Attach empty bottle to waste ink line Step 3 Screw the left and right film roller brackets to the back of...

Страница 5: ...ntrol panel to pull film through the printer Step 7 Before loading ink into the printer please install the software and run a blank test job to verify that no circuitry or connections were damaged dur...

Страница 6: ...ached and printer front power LED is Green Step C During install select EPSON Stylus Photo 1390 as the communications port This is what Windows calls the Gallery 1390 printer Step D Under the HELP men...

Страница 7: ...tep 8 Once software is installed load a test file and try to print it Observe that the printhead moves back and forth many times the film advances and the front control panel blinks green while printi...

Страница 8: ...heat pressed onto a garment A Prints properly stored should be able to be used up to a year from when they were created Q What is the shelf life of the inks A CMYK inks perform best when used within 9...

Страница 9: ...for assistance Red LEDs Flash Simultaneously This represents an error Most likely cause is that the encoder ribbon cable has dust that needs to be cleaned You can contact USA based support to assist...

Страница 10: ...Congratulations On Your Purchase Of The Gallery 1390R DTF Printer In order to get maximum benefit from your printer please familiarize yourself with the printer and its functions...

Отзывы: