background image


40/86 

Gala Gar, S.L. c/ Jaime Ferrán, 19 (Políg. Cogullada) | Tel.: (+34) 976 47 34 10 - 50014 ZARAGOZA | 

www.galagar.com 


SMART 210 TIG PULSE 


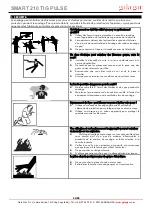
6. CAUTION. 


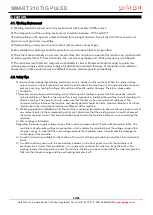
6.1. Working Environment 
1) Welding should be carried out in dry environment with humidity of 90% or less. 
2) The temperature of the working environment should be between -10

 and 40

3) Avoid welding in the open air unless sheltered from sunlight and rain. Keep it dry at all times and do not 

place it on wet ground or in puddles. 
4) Avoid welding in dusty area or environment with corrosive chemical gas. 
5) Gas shielded arc welding should be operated in environment without strong airflow. 
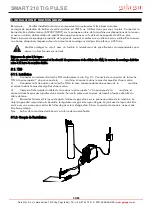
6) Place the machine directly on a secure, level surface. Do not place or operate this machine on a surface with 

an incline greater than 15° from horizontal. The machine may topple over if this procedure is not followed. 
7) The machines level of electro magnetic compatibility is class A. Equipment shall not apply to public low-

voltage power supply system power supply of residential environment. Because of conduction and radiation 

harassment, in these environments are difficult to ensure electromagnetic compatibility. 

6.2. Safety Tips 

Overcurrent/overvoltage/overheating protection circuit is installed in this machine. When the mains voltage, 

output current or inner temperature exceeds the set standard, the machine will stop automatically. However, 
excessive use (e.g. too high voltage) of machine will lead to welder damage. Therefore, please note: 

1)  Ventilation 
This welder can create powerful welding current that has strict cooling requirements that cannot be met with 

natural ventilation. Therefore the internal fan is very important in enabling the machine to work steadily with 
effective cooling. The operator should make sure that the louvers be uncovered and unblocked. The 
minimum distance between the machine and nearby objects should be 30cm. Good ventilation is of critical 
importance to the normal performance and lifespan of the machine. 

2)  Welding operation is forbidden while the machine is overload. Remember to observe the max load current at 

any moment (refer to the corresponding duty cycle). Make sure that the welding current should not exceed 
the maximum load current. Overload could obviously shorten the machine's lifespan, or even damage the 
machine. 

3)  Over-voltage is forbidden. 
Regarding the power supply voltage range of the machine, please refer to “Technical Parameters” table. This 

machine is of automatic voltage compensation, which enables the maintaining of the voltage range within 
the given range. In case that the input voltage exceeds the stipulated value, it would possibly damage the 
components of the machine. 

4)  An earth terminal is available for the machine. Connect it with an earth cable to avoid the static and electric 

shock.  

5)  A sudden halt may occur with the overheating indicator on the front panel on while the machine is of 

overload status. Under this circumstance, it is unnecessary to restart the machine. Keep the built-in fan 

working to lower the temperature inside the machine. Welding can be continued after the inner temperature 
falls into the standard range and the overheating indicator is off. 


Содержание SMART 210 TIG PULSE

Страница 1: ...instru es Este equipo debe ser utilizado por profesionales En beneficio de su trabajo lea atentamente este manual This equipment must be used by professionals To help you in your work carefully read...

Страница 2: ...40 CAPITULO 7 MAINTENANCE 41 CAPITULO 8 TROUBLESHOOTING 41 APPENDICES ELECTRICAL DRAWINGS AND REFERENCE PART LISTS 84 GENERAL GUARANTEE CONDITIONS 85 FR TABLE DES MATI RES Page CHAPITRE 1 S CURIT 42 C...

Страница 3: ...a mojada Aseg rese de estar aislado del suelo y de la pieza de trabajo Aseg rese de que todas sus condiciones de trabajo son seguras El humo puede ser perjudicial para la salud Mantenga la cabeza alej...

Страница 4: ...r eficazmente que los dispositivos de potencia y los circuitos de control resulten da ados por el polvo absorbido por el ventilador con lo que la fiabilidad de la m quina mejora considerablemente Toda...

Страница 5: ...de circuito anal gico y circuito digital el ajuste de la mayor a de los par metros debe lograrse a trav s del circuito correspondiente por lo que si hay m s par metros que ajustar el circuito ser a m...

Страница 6: ...a ambiente de 40 No todas las m quinas tienen el mismo dise o Pueden existir diferencias seg n los requisitos de los clientes Par metros de la antorcha de soldadura Modelo WP 26K E Corriente m xima 20...

Страница 7: ...a soldadura Cuando el sensor de corriente falla y el medidor digital muestra E 4 se puede seguir soldando Sin embargo el valor de corriente en ese momento es inexacto Opci n de pedal de control person...

Страница 8: ...4 DESCRIPCI N DEL PANEL 4 1 PANEL FRONTAL 1 Panel de control Para ajustar los par metros 2 Terminal de salida 3 Terminal de salida 4 Terminal de control Para conectar el cable de se al del disparador...

Страница 9: ...w galagar com SMART 210 TIG PULSE 4 2 PANEL TRASERO 7 Interruptor de encendido Interruptor de encendido apagado 8 Se al de advertencia 9 Entrada de alimentaci n Cable de entrada de alimentaci n 10 Ven...

Страница 10: ...ra 6 Indicador para TIG pulsado 7 Indicador para DC TIG 8 Indicador para MMA 9 Indicador para 2T 10 Indicador para 4T 11 Indicador para soldadura por puntos 12 Indicador de corriente de base 13 Indica...

Страница 11: ...jo normal y la seguridad personal y reducir la EMI la fuente de soldadura debe estar conectada a tierra de forma fiable 5 1 TIG 5 1 1 Instalaci n 1 Conecte correctamente la antorcha TIG seg n la Fig 9...

Страница 12: ...gar com SMART 210 TIG PULSE 5 1 3 Antorcha TIG Componentes principales de la linterna 1 Tapa trasera larga 2 Electrodo de wolframio 3 Cuerpo de la pinza 4 Cabezal de la linterna 5 Collet 6 Boquilla ce...

Страница 13: ...iempo de preflujo pulsando la tecla de selecci n del par metro de soldadura y ajuste el tiempo de preflujo Seleccione la funci n de ajuste del tiempo de subida pulsando la tecla de selecci n del par m...

Страница 14: ...a soldar y a continuaci n pulse el gatillo de la antorcha Una vez encendido el arco desaparece el crujido de la descarga de alta frecuencia la corriente aumenta hasta el valor preestablecido y se pued...

Страница 15: ...la tecla de selecci n de par metros de soldadura y ajuste la corriente de soldadura m xima Seleccione la funci n de ajuste de la corriente de base pulsando la tecla de selecci n del par metro de sold...

Страница 16: ...ulsos Una vez ajustados los par metros adecuadamente abra la v lvula de gas de la botella y ajuste el regulador de gas al valor deseado Presione el gatillo de la antorcha la v lvula solenoide funciona...

Страница 17: ...a antorcha a 2 4 mm de la pieza a soldar para encender el arco el HF se detiene y la corriente aumenta hasta el valor preestablecido suelte el gatillo de la antorcha y la soldadura contin a con la cor...

Страница 18: ...2 3 2 3 3 4 3 0 3 0 4 0 4 0 4 0 4 0 4 0 2 0 3 0 2 0 3 0 3 0 3 0 4 0 3 0 4 0 3 0 4 0 120 140 130 150 130 150 140 180 140 180 140 180 12 14 14 16 14 16 14 16 14 16 14 16 10 12 12 14 12 14 12 14 12 14 1...

Страница 19: ...ientras que no hay ning n requisito especial para electrodos cidos 5 2 2 Croquis de la instalaci n 5 2 3 Operaci n Preste atenci n a la polaridad de conexi n Generalmente DCEP y DCEN est n disponibles...

Страница 20: ...durante la soldadura Seleccione la funci n de ajuste de la corriente de fuerza del arco pulsando la tecla de selecci n de par metros de soldadura y podr ajustar la corriente de fuerza del arco en MMA...

Страница 21: ...ear una potente corriente de soldadura que tiene unos requisitos de refrigeraci n estrictos que no se pueden cumplir con la ventilaci n natural Por lo tanto el ventilador interno es muy importante par...

Страница 22: ...ficientes sobre el aspecto el ctrico y amplios conocimientos de seguridad Los operarios deben ser titulares de certificados de cualificaci n v lidos que puedan demostrar sus habilidades y conocimiento...

Страница 23: ...clothes Be sure you are insulated from ground and work piece Make sure all your working conditions are safe Smoke may be harmful to your health Keep your head away from fumes and gases while in weldin...

Страница 24: ...r channel can effectively prevent the power devices and control circuits from being damaged by the dust absorbed by the fan and the reliability of the machine is greatly improved thereby The whole mac...

Страница 25: ...aking for a welding machine with analogue circuit control or with analogue circuit digital circuit control the adjustment of most parameters should be achieved through the corresponding circuit so if...

Страница 26: ...5 277 Weight kg 6 125 under the environment temperature of 40 Not every piece of machine has the same design Differences may exist upon customers requirements Parameters of welding torch Model WP 26K...

Страница 27: ...es and then welding can be continued When the current sensor fails and the digital meter displays E 4 welding may still be carried out However the current value at this time is inaccurate Foot control...

Страница 28: ...agar com SMART 210 TIG PULSE 4 PANEL DESCRIPTION 4 1 FRONT PANEL 1 Operating panel To set the parameters 2 output terminal 3 output terminal 4 Control terminal To connect the signal wire of the TIG to...

Страница 29: ...g Cogullada Tel 34 976 47 34 10 50014 ZARAGOZA www galagar com SMART 210 TIG PULSE 4 2 BACK PANEL 7 Power switch Power ON OFF switch 8 Warning sign 9 Power input Power input cable 10 Cooling fan 11 Ga...

Страница 30: ...ting key 6 Indicator for pulsed TIG 7 Indicator for DC TIG 8 Indicator for MMA 9 Indicator for 2T 10 Indicator for 4T 11 Indicator for spot welding 12 Indicator for base current 13 Indicator for weldi...

Страница 31: ...s In order to ensure normal work and personal safety and reduce the EMI the welding source should be grounded reliably 5 1 TIG 5 1 1 Installation 1 Connect the TIG torch correctly according to Fig 9 1...

Страница 32: ...34 10 50014 ZARAGOZA www galagar com SMART 210 TIG PULSE 5 1 3 TIG torch Main components of the torch 1 Long back cap 2 Tungsten electrode 3 Collet body 4 Torch head 5 Collet 6 Ceramic nozzle 7 Insul...

Страница 33: ...ecting key Select pre flow time setting function by pressing the welding parameter selecting key and set the pre flow time Select upslope time setting function by pressing the welding parameter select...

Страница 34: ...n HF output Keep the torch 2 4mm away from the workpiece and then press the torch trigger After arc is ignited the HF discharge rustling disappears the current rises up to the preset value and welding...

Страница 35: ...ter selecting key and set the peak welding current Select base current setting function by pressing the welding parameter selecting key and set the base current Select downslope time setting function...

Страница 36: ...ps with gas keeping flowing for the post flow time and welding ends Operation mode function The operation mode function is available in pulsed TIG mode and DC TIG mode and it includes 2T 4T and spot w...

Страница 37: ...2 0 2 5 Square groove 1 1 1 1 1 1 5 2 0 2 0 2 0 3 0 2 0 3 0 1 0 1 0 2 0 1 0 2 0 1 0 2 0 2 0 30 50 40 60 60 80 80 110 110 120 8 10 8 10 10 12 12 14 12 14 6 8 6 8 8 10 10 12 10 12 14 16 14 16 14 16 16...

Страница 38: ...rode while there is no special requirement for acid electrode 5 2 2 Sketch map of installation 5 2 3 Operation Pay attention to the connection polarity Generally DCEP and DCEN are available in DC MMA...

Страница 39: ...ried out during welding Select arc force current setting function by pressing the welding parameter selecting key and arc force current in MMA can be set Besides arc force current setting can be carri...

Страница 40: ...his welder can create powerful welding current that has strict cooling requirements that cannot be met with natural ventilation Therefore the internal fan is very important in enabling the machine to...

Страница 41: ...OUBLESHOOTING WARNING The following operation requires sufficient professional knowledge on electric aspect and comprehensive safety knowledge Operators should be holders of valid qualification certif...

Страница 42: ...que vous tes isol du sol et de la pi ce travailler Assurez vous que toutes vos conditions de travail sont s res La fum e peut tre dangereuse pour la sant Gardez votre t te l cart des fum es et des gaz...

Страница 43: ...icacement les dispositifs de puissance et les circuits de commande d tre endommag s par la poussi re absorb e par le ventilateur et la fiabilit de la machine s en trouve grandement am lior e L ensembl...

Страница 44: ...c un circuit de contr le analogique ou un circuit de contr le analogique et num rique le r glage de la plupart des param tres doit tre r alis par le circuit correspondant donc si le nombre de param tr...

Страница 45: ...t pas le m me design Des diff rences peuvent exister en fonction des exigences des clients Param tres de la torche de soudage Mod le WP 26K E Courant maximal 200A Courant nominal 160A Mode de refroidi...

Страница 46: ...s puis le soudage peut tre poursuivi Lorsque le capteur de courant tombe en panne et que le compteur num rique affiche E 4 le soudage peut encore tre effectu Cependant la valeur du courant ce moment l...

Страница 47: ...IG PULSE 4 DESCRIPTION DU PANEL 4 1 PANNEAU FRONTAL 1 Panneau de commande Pour r gler les param tres 2 Borne de sortie 3 borne de sortie 4 Borne de commande Pour connecter le fil de signal de la g che...

Страница 48: ...alagar com SMART 210 TIG PULSE 4 2 PANNEAU ARRI RE 7 Interrupteur d alimentation Interrupteur d alimentation ON OFF 8 Panneau d avertissement 9 Entr e d alimentation C ble d entr e d alimentation 10 v...

Страница 49: ...du mode de soudage 6 Indicateur pour TIG puls 7 Indicateur pour TIG DC 8 Indicateur pour MMA 9 Indicateur pour 2T 10 Indicateur pour 4T 11 Indicateur pour le soudage par points 12 Indicateur du couran...

Страница 50: ...ravail normal et la s curit des personnes et de r duire les EMI la source de soudage doit tre mise la terre de mani re fiable 5 1 TIG 5 1 1 Installation 1 Connectez correctement la torche TIG conform...

Страница 51: ...ww galagar com SMART 210 TIG PULSE 5 1 3 Torche TIG Principaux composants de la torche 1 long capuchon arri re 2 lectrode en tungst ne 3 corps de la pince 4 t te de torche 5 collet 6 buse en c ramique...

Страница 52: ...pr coulement en appuyant sur la touche de s lection des param tres de soudage et r gler le temps de pr coulement S lectionner la fonction de r glage du temps de mont e en appuyant sur la touche de s...

Страница 53: ...d une sortie de gaz puis une sortie HF Maintenez la torche 2 4mm de la pi ce souder puis appuyez sur la g chette de la torche Apr s l amor age de l arc le bruissement de la d charge HF dispara t le co...

Страница 54: ...uche de s lection des param tres de soudage et r gler le temps de mont e S lectionner la fonction de r glage du courant de soudage de pointe en appuyant sur la touche de s lection des param tres de so...

Страница 55: ...la fr quence d impulsion en appuyant sur la touche de s lection des param tres de soudage et r gler la fr quence d impulsion Apr s avoir r gl les param tres de mani re appropri e ouvrez la vanne de g...

Страница 56: ...HF commence maintenez la torche une distance de 2 4 mm de la pi ce usiner pour allumer l arc l arc HF s arr te et le courant augmente jusqu la valeur pr d finie rel chez la g chette de la torche et l...

Страница 57: ...2 3 2 3 3 4 3 0 3 0 4 0 4 0 4 0 4 0 4 0 2 0 3 0 2 0 3 0 3 0 3 0 4 0 3 0 4 0 3 0 4 0 120 140 130 150 130 150 140 180 140 180 140 180 12 14 14 16 14 16 14 16 14 16 14 16 10 12 12 14 12 14 12 14 12 14 12...

Страница 58: ...ner et de l application de l lectrode En g n ral la connexion DCEP est recommand e pour l lectrode de base tandis qu il n y a pas d exigence particuli re pour l lectrode acide 5 2 2 Croquis de l insta...

Страница 59: ...ion devient la fonction de r glage du temps de soudage par points en mode de soudage par points TIG en appuyant sur la touche de s lection des param tres de soudage et le temps d allumage de l arc en...

Страница 60: ...Tableau des param tres de soudage pour r f rence uniquement Diam tre de l lectrode mm Courant de soudage recommand A Tension de soudage recommand e V 1 0 20 60 20 8 22 4 1 6 44 84 21 76 23 36 2 0 60 1...

Страница 61: ...tion Cette soudeuse peut cr er un courant de soudage puissant qui a des exigences de refroidissement strictes qui ne peuvent pas tre satisfaites avec la ventilation naturelle C est pourquoi le ventila...

Страница 62: ...n cessite des connaissances professionnelles suffisantes sur l aspect lectrique et des connaissances compl tes en mati re de s curit Les op rateurs doivent tre titulaires de certificats de qualificat...

Страница 63: ...e de que est isolado do solo e da pe a de trabalho Assegure se de que todas as suas condi es de trabalho s o seguras O fumo pode ser prejudicial para a sua sa de Mantenha a cabe a longe de fumos e gas...

Страница 64: ...jei o de calor do canal de ar pode efectivamente impedir que os dispositivos de pot ncia e os circuitos de controlo sejam danificados pelo p absorvido pelo ventilador e a fiabilidade da m quina assim...

Страница 65: ...circuito anal gico e circuito digital o ajuste da maioria dos par metros deve ser conseguido atrav s do circuito correspondente por isso se houver mais par metros a ajustar o circuito ser mais compli...

Страница 66: ...todas as pe as da m quina t m o mesmo desenho Podem existir diferen as em fun o dos requisitos dos clientes Par metros da tocha de soldadura Modelo WP 26K E Corrente m xima 200A Corrente nominal 160A...

Страница 67: ...ontinuada Quando o sensor de corrente falha e o contador digital exibe E 4 a soldadura pode ainda ser efectuada No entanto o valor actual neste momento impreciso Op o de controlo de p s personalizado...

Страница 68: ...210 TIG PULSE 4 DESCRI O DO PAINEL 4 1 PAINEL FRONTEIRO 1 Painel de opera es Para definir os par metros 2 terminal de sa da 3 terminal de sa da 4 Terminal de controlo Para ligar o fio de sinal do gati...

Страница 69: ...GOZA www galagar com SMART 210 TIG PULSE 4 2 PAINEL DE VOLTA 7 Interruptor de alimenta o Interruptor de ligar desligar 8 Sinal de advert ncia 9 Entrada de energia Cabo de entrada de energia 10 ventila...

Страница 70: ...eccionando a chave 6 Indicador para TIG pulsado 7 Indicador para DC TIG 8 Indicador para MMA 9 Indicador para 2T 10 Indicador para 4T 11 Indicador para soldadura por pontos 12 Indicador de corrente de...

Страница 71: ...trabalho normal e a seguran a pessoal e reduzir a IME a fonte de soldadura deve ser ligada terra de forma fi vel 5 1 TIG 5 1 1 Instala o 1 Ligar correctamente a tocha TIG de acordo com a Fig 9 1 Ligar...

Страница 72: ...OZA www galagar com SMART 210 TIG PULSE 5 1 3 TIG tocha Principais componentes da tocha 1 Tampa traseira longa 2 El ctrodo de Tungst nio 3 corpo de collet 4 Cabe a de tocha 5 Collet 6 bico de cer mica...

Страница 73: ...ni o do tempo de pr fluxo premindo a tecla de selec o do par metro de soldadura e definir o tempo de pr fluxo Seleccionar a fun o de ajuste do tempo de subida premindo a tecla de selec o do par metro...

Страница 74: ...e HF Manter a tocha 2 4mm afastada da pe a de trabalho e depois premir o gatilho da tocha Ap s a igni o do arco o ru do de descarga de HF desaparece a corrente sobe at ao valor predefinido e a soldadu...

Страница 75: ...ra premindo a tecla de selec o do par metro de soldadura e definir o pico da corrente de soldadura Seleccionar a fun o de defini o da corrente de base premindo a tecla de selec o do par metro de solda...

Страница 76: ...etro de soldadura e definir a frequ ncia de pulso Ap s os par metros terem sido ajustados adequadamente abrir a v lvula de g s do cilindro e ajustar o regulador de g s para o valor desejado Pressionar...

Страница 77: ...ocha 2 4mm afastada da pe a de trabalho para inflamar o arco HF p ra e a corrente sobe para o valor predefinido Soltar o gatilho da tocha e a soldadura continua sob a corrente predefinida Premir novam...

Страница 78: ...3 4 3 0 3 0 4 0 4 0 4 0 4 0 4 0 2 0 3 0 2 0 3 0 3 0 3 0 4 0 3 0 4 0 3 0 4 0 120 140 130 150 130 150 140 180 140 180 140 180 12 14 14 16 14 16 14 16 14 16 14 16 10 12 12 14 12 14 12 14 12 14 12 14 16...

Страница 79: ...ito de aplica o de el ctrodo Geralmente a liga o DCEP recomendada para el ctrodo b sico enquanto que n o h nenhum requisito especial para el ctrodo cido 5 2 2 Esbo o do mapa de instala o 5 2 3 Opera o...

Страница 80: ...o muda para a fun o de ajuste do tempo de soldadura por pontos no modo de soldadura por pontos TIG premindo a tecla de selec o do par metro de soldadura e o tempo de igni o do arco no MMA pode ser aj...

Страница 81: ...Tabela de par metros de soldadura apenas para refer ncia Di metro do el ctrodo mm Corrente de Soldadura Recomendada A Tens o de Soldagem Recomendada V 1 0 20 60 20 8 22 4 1 6 44 84 21 76 23 36 2 0 60...

Страница 82: ...uma corrente de soldadura potente que tem requisitos rigorosos de arrefecimento que n o podem ser satisfeitos com ventila o natural Por conseguinte o ventilador interno muito importante para permitir...

Страница 83: ...icientes sobre o aspecto el ctrico e conhecimentos abrangentes sobre seguran a Os operadores devem ser titulares de certificados de qualifica o v lidos que possam comprovar as suas compet ncias e conh...

Страница 84: ...ltage Frequency 3 No of parts description and reference of it EXAMPLE SMART 210 TIG PULSE Ref 22300210TS 1 Unit Complete drive system Ref 12345678 FR ANNEXES PLANS LECTRIQUES ET LISTE DES PI CES DE RE...

Страница 85: ...ort expenses will be on the user s account Damage or unforeseen or indirect expenses resulting from an incorrect use will not be the responsibility of GALA GAR CONDITIONS G N RALES DE GARANTIE GALA GA...

Страница 86: ...M Gala Gar S L c Jaime Ferr n 19 Pol g Cogullada Tel 34 976 47 34 10 50014 ZARAGOZA www galagar com...

Отзывы: