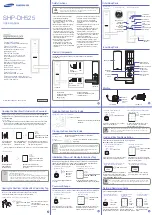
Step 4: Re-handing & Latch Adjustment
4.1
Check latch to determine if handing
is
correct
4.2
To re-hand the latch, remove cap,
turn the latch, head screw counter-
clockwise with a manual screw driver
until the back of the latch comes out
of the faceplate so it can be rotated
4.3
Rotate the latch head 180 degrees
and
re-tighten the scre
w fixing
4.4
To increase the latch projection
turn the latch screw counter-clockwise
4.5
Latch projection can be increased
by a maximum of 2mm from original
position
4.6
Replace cap after adjustments are
complete
Step 3: Mounting Accessories
3.1
Insert the spindle into the
square hub of the lock
3.2
Insert the cylinder into the
cylinder hole and secure with
the cylinder retaining screw
3.3
Mount the internal and
external hardware onto the
spindle and cylinder
3.4
If using snib furniture, align snib
arm to snib slot in lock body
3.5
Secure furniture with supplied
fixing
screws


