


34
COMMISSIONING 5
COMMISSIONING 5
COMMISSIONING 5
COMMISSIONING 5
COMMISSIONING 5
5-1
Commissioning Checks
IMPORTANT It is the responsibility of the installer to ensure that the
Electrastream System is properly commissioned.
Should the commissioning not be carried out, then the manufacturers
guarantee and any extended warranty, will become null and void.
The Guarantee Form MUST be completed and returned to GAH (HEATING
PRODUCTS) in the prepaid envelope provided.
5-1.1 Commissioning Procedure
1.
1.
1.
1.
1. CHECK THAT ALL WIRING HAS BEEN DONE CORRECTL
CHECK THAT ALL WIRING HAS BEEN DONE CORRECTL
CHECK THAT ALL WIRING HAS BEEN DONE CORRECTL
CHECK THAT ALL WIRING HAS BEEN DONE CORRECTL
CHECK THAT ALL WIRING HAS BEEN DONE CORRECTLY AND CONFORMS TO
Y AND CONFORMS TO
Y AND CONFORMS TO
Y AND CONFORMS TO
Y AND CONFORMS TO
REGULATIONS.
REGULATIONS.
REGULATIONS.
REGULATIONS.
REGULATIONS.
2.
2.
2.
2.
2. CHECK IMMERSION HEATER CO
CHECK IMMERSION HEATER CO
CHECK IMMERSION HEATER CO
CHECK IMMERSION HEATER CO
CHECK IMMERSION HEATER COVER , ELECTRASTREAM CONTROLLER CO
VER , ELECTRASTREAM CONTROLLER CO
VER , ELECTRASTREAM CONTROLLER CO
VER , ELECTRASTREAM CONTROLLER CO
VER , ELECTRASTREAM CONTROLLER COVER
VER
VER
VER
VER
AND ALL OTHER ELECTRICAL CO
AND ALL OTHER ELECTRICAL CO
AND ALL OTHER ELECTRICAL CO
AND ALL OTHER ELECTRICAL CO
AND ALL OTHER ELECTRICAL COVERS ARE CORRECTL
VERS ARE CORRECTL
VERS ARE CORRECTL
VERS ARE CORRECTL
VERS ARE CORRECTLY FITTED.
Y FITTED.
Y FITTED.
Y FITTED.
Y FITTED.
3. *Check accumulator pressure is 1.5 Bar below the mains pressure - minimum 0.5
Bar.
4. Check the Tundish is correctly installed to conform to the Building Regulations G3.
5. Check all pipe connections are tight and no joints have been left unsoldered.
6. Check ALL drain cocks are closed.
7. Check ALL wiring connections have been made.
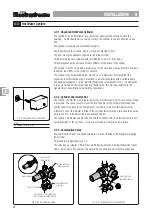
Check cylinder temperature sensor is connected to ‘temp sensor’ terminals 3 & 4.
Check cylinder thermal cut out is connected to ‘O-T’ terminals 1 & 2.
8. Check the required earth continuity conductors have been fitted.
9. Check the Immersion Heater has its cover and gasket fitted and is tight in the
cylinder.
10. If fitted, check that the Scale Protection Device or Water Softener has been fitted
according to manufacturers instructions.
11. Open all shut off valves.
12. Turn on Mains Stop Cock and allow the system to fill.
13. Open all domestic taps in turn to purge air.
14. Check system for leaks including around the Immersion Heater.
15. Check the installation of the hot water system tundish and discharge complies with
the Building Regulations.
16. Check the installation of the heating system TPRV discharge complies with the
Building Regulations.
17. Check no water is discharging from any TPRV or PRV.
18. Test the operation of the TPR Valves by turning the manual test cap and ensure the
water flows freely and safely to waste.
19. Test the operation of the Combination Valve by turning the manual test cap and
ensure the water flows freely and safely to waste.
20. Set hot water Mixing Valve to required temperature.
HEATING SYSTEM
21. Connect the Filling Loop and fill the system, bleeding all radiator and bleed valves.
22. Check for leaks.
23. Set pressure gauge black arrow to the red arrow (cold fill pressure).
24. Switch on Electrastream mains isolator.
On Electrastream Controller - see 2-2
25. Set date and time.
* Electrastream Plus only
IMPORTANT
The final fill of the heating system
should include the correct dose of a
suitable scale/corrosion inhibitor.
Note
Error code 3 will be displayed if ‘O-T’ and
‘temp sensor’ connections are transposed.
55555
Содержание Electrastream
Страница 40: ...39 Notes ...


