


17
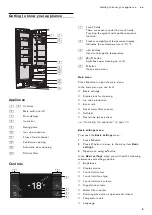
Operating the appliance
en
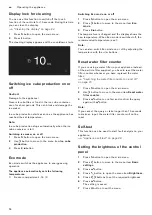
Rest mode
The appliance switches off the following:
▯
Automatic door opening
Note:
With handle-free installation, please note that you
will not be supported when opening the door during
this time. To open the door in this case, reach from
below under the bottom panel of the unit.
▯
Ice maker
▯
Audible signals
▯
Interior lighting
▯
Messages on the display
▯
Background illumination of display is reduced
Switching rest mode on or off
Displaying or hiding Rest mode in the main menu
To use Rest mode, you first have to display the function
in the main menu:
1
Press
à
button to open the main menu.
2
Press
B
button to move to the menu item
Basic
settings
.
3
Press
™
button.
4
Press
B
button to move to the menu item
Rest
mode
. Press
%
button.
5
Press
C
buttons to move to the menu
item
Available
or
Not available
. Confirm by
pressing
™
button.
6
Press
'
button to exit the menu.
The function is displayed or hidden in the main menu.
Switching Rest mode on
1
Press
à
button to open the main menu.
2
Press
/
button to open the view
Rest mode
duration
.
3
Use
A
/
@
buttons to change the duration.
4
Press
I
button to start.
The appliance switches all listed functions off.
Switching Rest mode off
▯
After the selected time elapses, the appliance
switches to normal operation.
▯
To end Rest mode before expiry of the selected
time, press
&
button.
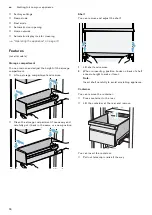
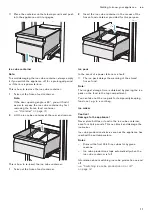
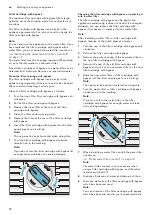
Automatic door opening
The automatic door opening function supports you in
opening the door.
As soon as you activate this function, automatic door
opening moves out and supports you in opening the
door.
Caution!
Repeatedly closing the door too early will cause
automatic door opening to fail or wear out.
Do not close the door as long as automatic door
opening is still moved out.
If you have nevertheless closed the door, leave it closed
for 5 minutes. Automatic door opening will re-adjust
itself.
Open the menu item Automatic door opening:
1
Press
à
button to open the main menu.
2
Use
B
button to move to the
Basic settings
menu.
3
Press
™
button to open the menu.
4
Use
B
button to move to the menu item
Automatic
door opening
.
5
To change the setting, press
%
button.
Switching on Push-to-open system
In an installation situation without handles you can
select the Push-to-open system. Your appliance will then
open a crack if you press lightly on the door.
Note:
Please note that automatic door opening is disabled if
Rest mode is activated.
1
Open the menu item
Automatic door opening
.
2
Select menu item
Push-to-open system
.
3
Press
™
button to open the menu item.
4
Select
Opening force
.Here you can select the level
of force required to activate automatic door
opening.
5
Select
Opening duration
.Here you can select how
long the door should remain open a crack before it
closes again automatically.
Note:
If the door remains open a crack, the appliance
checks once a second whether the door is still
ajar.After the selected opening duration elapses,
the appliance will close the door automatically.
Содержание RF411904
Страница 1: ...en User manual RF411904 RF461904 Freezer...
Страница 29: ...8001135564 8001135564 9904 en...


