background image

10

5080003004ind03     en 08.03 EB

6.3 Installation

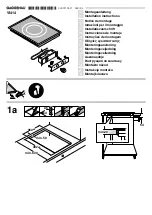
Produce the recess 

for one or several Vario

appliance(s) in your worktop. Proceed as
indicated on the installation sketch and the
dimension table. The dimension table contains
details of the space requirement for the trim
between the appliances.

Important:

the angle between the cut surface

and the worktop must amount to 90° (Fig. 7).

Mark the centre

of the recess 

exactly

. Secure 

the longer securing rail on the rear edge of the
recess. Make sure that the lugs of the securing
rail lie on the worktop and that the centre
marking of the securing rail is precisely flush
with the centre marking on the recess. (Fig. 8)

Secure the two shorter securing rails on the
front edge of the recess.

Make sure that the

lugs of the securing rails lie on the worktop and
that the inner sides of the securing rails are
precisely flush with the centre marking on the
recess (Fig. 8).

Lower the appliance into the worktop.

Make

sure that the engaging lugs on the appliance 
lie exactly on the clamping springs. Press the
appliance firmly into the worktop. The engaging
lugs on the appliance “snap" into the clamping
springs (Fig. 9).

Note: 

When installing the appliance in granite 

or marble worktops, have the holes produced by 
a specialist or stick on the securing rails with a
temperature-resistant 2-component adhesive (metal
on stone).
Several appliances can also be installed in indi-
vidual recesses, as long as a minimum clearance of
40 mm is kept to between the appliances.

Note:

Please note that a distance of 10 mm from the base
cabinet must be observed for safety reasons.

When an intermediate shelf is installed, the
distance from the bottom edge of the housing
trough and the shelf or the next combustible 
item of furnishing must be at least 50 mm.

min. 35

min. 50

490

680

min. 60

48

8,5

700

510

400

200

58

Fig. 7

Fig. 8

Fig. 9

Содержание CK 270

Страница 1: ...Operating and Assembly Instructions CK 270 Glass ceramic hob with Superquick cooking zones 0 1 9 3 7 0 1 9 3 7 0 1 9 3 7 0 1 9 3 7 ...

Страница 2: ...ciple Page 5 2 1 Structure Page 5 2 2 Operating principle Page 5 2 3 Energy saving tips Page 5 3 Operation Page 6 4 Cleaning and care Page 7 5 Maintenance Page 8 5 1 Overview Page 8 5 2 Remedying slight malfunctions yourself Page 8 6 Assembly instructions Page 9 10 6 1 Technical data Page 9 6 2 Important notes on installation Page 9 6 3 Installation Page 10 1 ...

Страница 3: ...ions contain important notes on use installation and maintenance of the appliance On the following pages you will find important notes on safety and operation These will serve to ensure your personal safety and the lasting value of your appliance You will find notes on Page 3 that you ought to observe before operating the appliance for the first time The chapters entitled Structure and operating p...

Страница 4: ...sitive to high temperatures or which pose a fire hazard e g cleaning agents or spray cans in drawers or cupboards under the appliance Technical modifications reserved 1 2 Operating for the first time Before operating the appliance for the first time please pay attention to the following notes The appliance must only be connected by an authorised specialist Keep the rating plate on the enclosed she...

Страница 5: ...oblem has nothing to do with the power supply please contact your specialist dealer or your responsible Gaggenau after sales service Built in temperature protection prevents over heating of the appliance and of build in furniture Use of aluminium kitchenware or stainless steel kitchenware with aluminium bases may produce mother of pearl coloured stains on your cooker These will not have a detrimen...

Страница 6: ...ion This is done to protect the glass plate against overheating and to ensure a uniform supply of heat from the hotplate to the saucepan The range features an individual residual heat display It lights up in the residual heat display panel as a red dot for each cooking zone When this red dot lights up the cooking zone concerned cannot be touched not even after switching off Always cook with the li...

Страница 7: ...ou require Switching off Turn the control knob to 0 Note The control knobs cannot be switched from the combination position directly to the 0 position Settings table 0 OFF 1 Keeping warm 2 Melting soaking 3 Thawing warming up 4 Cooking continued cooking 5 Steaming stewing 6 Stewing 7 Baking and gentle roasting 8 Roasting 9 Deep frying bringing to the boil Only switch to the highest cooking level f...

Страница 8: ...e any commercially available stainless steel cleaners as these may be aggressive to the printed markings Do not use any abrasive or nitro polishing agents for cleaning Do not use any abrasive sponges either Use commercially available window cleaner and apply it to a soft moist cloth Please refer to the enclosed brochure for further notes on cleaning Remove baked in food remainders and coarse dirt ...

Страница 9: ... fault in the list below If you are not successful in remedying the fault with the aid of the list below then contact your Gaggenau after sales service 8 5 Maintenance Fault Possible cause Remedy Appliance cannot be Mains plug removed or Insert the mains plug or switched on domestic fuse has tripped check the domestic fuse The cooking zone no longer This mechanism protects the cooking lights up br...

Страница 10: ...dged for any damage resulting from failure to observe these instructions When the appliance is installed in a base cabi net with a width of less than 60 cm the housing can lie on the side walls of the cabinet These cabinet side panels must be modified so that the appliance is not in contact with them Note Please note that a distance of 10 mm from the base cabinet must be observed for safety reason...

Страница 11: ...of the securing rails are precisely flush with the centre marking on the recess Fig 8 Lower the appliance into the worktop Make sure that the engaging lugs on the appliance lie exactly on the clamping springs Press the appliance firmly into the worktop The engaging lugs on the appliance snap into the clamping springs Fig 9 Note When installing the appliance in granite or marble worktops have the h...

Страница 12: ...GAGGENAU HAUSGERÄTE GMBH CARL WERY STR 34 D 81739 MÜNCHEN Y 089 45 90 03 FAX 089 45 90 23 47 www gaggenau com ...

Отзывы: