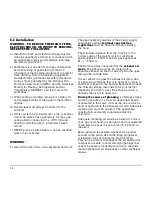
Gaggenau AH 530-720 Скачать руководство пользователя страница 9

8

The 

Int

key for the intensive level should be 

pressed when browning and frying in an open pan 
(see Fig. 6).
If you have switched on the hood by selecting the
intensive level, it will be switched off again 
automatically after 5 minutes.

If you press the 

Int

key while the hood is running at

fan level 

1, 2

or 

3

, the electronic control will switch

back automatically to the previously selected fan
level after 5 minutes (see Fig. 7).

If you would like to end the intensive level before
the five minutes have elapsed, press the 

0

key

(“Motor off”) or select a different level (see Fig. 8).
You can of course switch off the hood’s extraction
function at any time by pressing the 

0

key (“Motor

off”).

Fig. 6

Fig.. 8

Fig. 7

Содержание AH 530-720

Страница 1: ...Operating and assembly instructions AH 530 790 AH 530 720 Extractor hood...

Страница 2: ...4 5 1 1 For your safety Page 4 1 2 Operating for the first time Page 5 1 3 About use Page 5 2 Features Page 6 3 Operation Page 7 9 4 Cleaning and care Page 10 11 5 Maintenance Page 12 6 Assembly inst...

Страница 3: ...n important notes on use installation and maintenance of the appliance On the following page you will find important notes on safety and operation These will serve to ensure your personal safety and t...

Страница 4: ...Always turn hood ON when cooking at high heat or when cooking flaming foods c Clean ventilating fans frequently Grease should not be allowed to accumulate on fan or filter d Use proper pan size Alway...

Страница 5: ...e with a steam cleaning apparatus or with water pressure because this poses a risk of short circuits Isolate the appliance from the mains during every maintenance operation To do this actuate the corr...

Страница 6: ...ng the appliance for the first time Remove the packaging from the appliance and dispose of it properly Pay attention to the fact that there are accessories in the packaging Keep packaging elements out...

Страница 7: ...8 6 2 20 2 66 m LK 530 020 for ceiling heights of 8 6 10 1 2 66 3 15 m Aluminium design ventilation duct LK 530 011 for ceiling heights of 7 3 8 6 2 20 2 66 m LK 530 021 for ceiling heights of 8 6 10...

Страница 8: ...on or off regardless of whether the wall extractor is in operation by pressing the key see Fig 4 When you briefly press the key the lighting is increased up to the maximum level You can dim the light...

Страница 9: ...the Int key while the hood is running at fan level 1 2 or 3 the electronic control will switch back automatically to the previously selected fan level after 5 minutes see Fig 7 If you would like to en...

Страница 10: ...ff time for all levels is ten minutes After these ten minutes the ventilation switches off but the lighting stays on Interval ventilation Interval ventilation is a special feature of this appliance wh...

Страница 11: ...r repeat the operation for the other grease filters You can clean the stainless steel grease filters in a dishwasher at a maximum temperature of 150 F 65 C where it should be supported vertically to a...

Страница 12: ...ind three openings on the upper side through which you can lift the glass plates singly with a blunt object e g handle of a wooden spoon to detach them with greater ease If they are extremely soiled t...

Страница 13: ...safety of the appliance Unauthorised tampering with the appliance will invalidate any warranty claims Only ever use original spare parts Lamp replacement Caution Disconnect the power supply before re...

Страница 14: ...ble for perfect functioning of the appliance at its installation location He must explain the operating principle of the appliance to the user with refe rence to the operating instructions He must exp...

Страница 15: ...ations must be observed when installing the hood The minimum distance from the worktop to the bottom edge of the wall hood is for electrical appliances 24 600 mm and for gas appliances 27 1 2 700 mm T...

Страница 16: ...ater from an uncovered exhaust air shaft our condensate separator RV 060 150 must be installed in the exhaust air line The condensate separator must still be acciessible after installation The duct un...

Страница 17: ...with the countersunk screws c Make sure that the hooks lie flatly on the wall In certain circumstances you may have to countersink the drill holes Fit the included dowels a in the other drill holes No...

Страница 18: ...op Put both chimney parts onto the hood Pull the chimney top duct up into its final position and secure the top duct unit with 2 screws on the ceiling holder Fig 22 Note Avoid scratching the surface w...

Отзывы: