


INSTALL NOTE:
A-NK6
LANDSCAPE & ARCHITECTURAL LIGHTING
| Learn more. Visit fxl.com
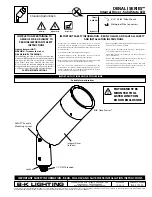
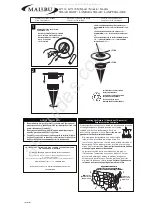
3. Product Installation
1. Install construction sleeve (“sleeve”) inside
the wall using provided L-brackets, mounting
to structural supports (e.g., 2"x4" (50 mm x
100 mm) framing studs). For lighting in the
downward direction, ensure the arrow in the
sleeve is pointing upward.
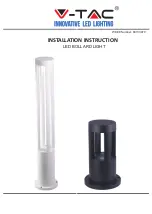
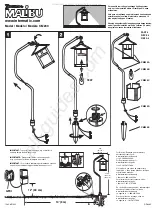
Wiring Chart (North America)
Wiring Chart (International)
Black
Line/Hot/Switching
White
Common
Green (via stud or
green lead)
Ground
Gray*
0-10V (-)
Purple*
0-10V (+)
FIX
TURE
FIX
TURE
BUILDING
BUILDING
*For use with 0-10V driver only
*For use with 0-10V driver only
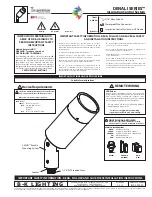
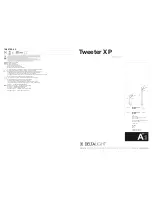
Front View
3/4 View
①
Brown
Line/Hot/Switching
Blue
Common
Green/Yellow
Ground
Black*
0-10V (-)
Grey*
0-10V (+)