background image

4CH User Guide

[Picture1-4] System Setup

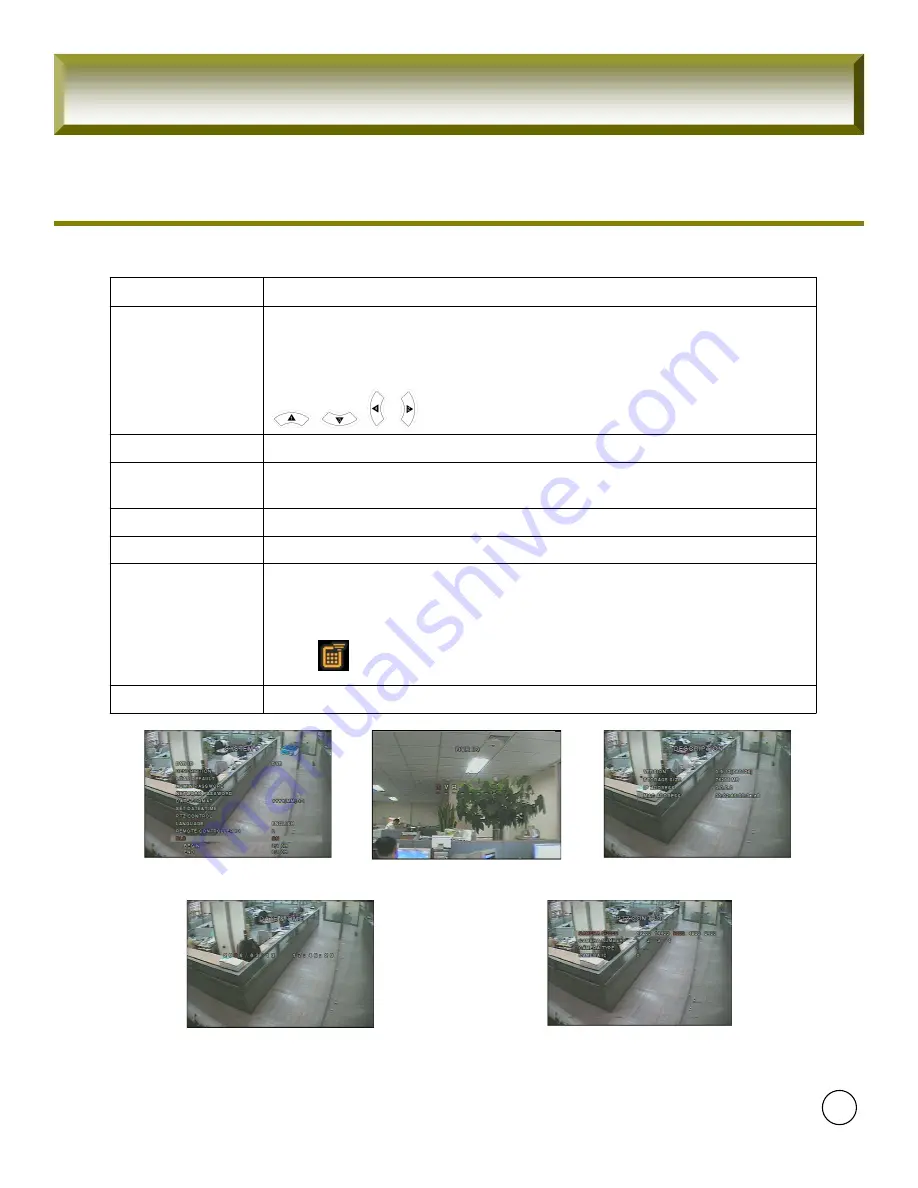
[Picture1-4-1] Name Setup

[Picture1-4-2] Information Setup

[Picture1-4-3] Date and Time Setup

[Picture1-4-4] PTZ Control Setup

Select a language. 

LANGUAGE 

Set the camera speed, number, type and ID 

PTZ CONTROL 

Set the present date and time. If DLS function is ON, user can not enter into this
menu and change date and time. 

SET DATE & TIME 

Select the preferred date and time display. 

DATE FORMAT 

Set the password of network client. Once this menu is selected, the DVR will ask 
you current password and new password. The DVR will guide you through the
entire process of setting up the user password. The password numbers (1,2,3,4)
can be inputted by using direction keys.

,         ,      ,     respectively.The default password is 1111.

NETWORK 

PASSWORD 

User can set to ON or OFF for DLS (Daylight Saving) by using LEFT or RIGHT 

DLS 

Select an ID for the remote controller.
1. Select ID from 1 to 9.
2. Press the same number as ID set in DVR on the remote controller

3. The          icon will be displayed on the Live screen of the DVR that responded 
to the            remote controller.

REMOTE 

CONTROLLER ID 

Description

Item

23

Содержание FZ04

Страница 1: ......

Страница 2: ...17 1 1 Setup 17 1 2 Display Setup 19 1 3 Recording Setup 20 1 3 1 Motion Detection Setup 21 1 3 2 Schedule Setup 21 1 4 System 22 1 5 Network 24 1 5 1 Port 25 1 5 2 Classification 25 1 6 Recording Equ...

Страница 3: ...rough Network S W 42 4 NETWORK 43 4 1 Overview 43 4 2 Minimum PC requirements 44 4 3 Installing the program 44 4 4 Live viewer 45 4 2 1 Main user interface 45 4 2 2 Main control panel 45 4 5 Search an...

Страница 4: ...rty responsible for compliance could void the user s authority to operate the equipment Note This equipment has been tested and found to comply with the limits for a Class A digital device pursuant to...

Страница 5: ...rating Temperature 5 C 40 C Place the system away from debris that may fall into the ventilation slots of the system Ensure the power switch is in the OFF position prior to installation Place the syst...

Страница 6: ...stem but do not use water thinner or other organic solvents This may damage the surface of the system as well as causing a system breakdown or an electric shock Do not install the system in a humid du...

Страница 7: ...ectric shock Install the system in a flat place that is not sealed Do not stand the system vertically or lean the system When the system falls down this may result in injuries Keep at least 15cm of th...

Страница 8: ...er s instructions This may cause an explosion If the HDD passes its service life image data stored in the HDD may not be recoverable If broken images are displayed while playing data stored in the HDD...

Страница 9: ...the system in a place with an appropriate moisture level and the temperature Prevent substances from entering into the system This may cause a system breakdown Do not put a heavy object on top of the...

Страница 10: ...he air in the system operation room and firmly fix the system cover A system breakdown might be resulted in by inappropriate environments In order to keep the system performance have your system regul...

Страница 11: ...RA CONTROL 1 RS 232C CONSOLE SERIAL PORT IR Type Remote Control and Front keys CONTROL UNIT Record playback and transfer TRIPLEX MULTI TASK By Resolution fps Quality METHOD Manual Motion Sensor and Sc...

Страница 12: ...Package Contents Package Contents Mouse CLIENT SOFTWARE CD MANUAL Power Cable DC 12V ADAPTOR Please check the below listed contents prior to installation If there is missing content Please contact you...

Страница 13: ...de Configuration Configuration Configuration USB Connector Camera CH And CH Division System LED Playback Buttons Remote Controller Direction and Selection button Monitor Power MENU SEARCH PTZ AUDIO ES...

Страница 14: ...rward per 60 Sec 12 Play and Pause 11 Play Backward per 60 Sec 10 Go back to Last Setup Menu or Cancel Setup 9 ESC DOWN Button for Menu or Number 3 for Camera and Password Right Button for Menu or Num...

Страница 15: ...DIE 8M 7200RPM 250GB E IDE 8M 7200RPM 160GB E IDE 2M 7200RPM 80GB Western Digital E IDE 2M 7200RPM 160GB E IDE 2M 7200RPM 80GB Samsung E IDE 8M 7200RPM 250GB E IDE 8M 7200RPM 160GB E IDE 2M 7200RPM 8...

Страница 16: ...0 2 0 SUB Series Samsung Electronics Uninstall shielding Software Up to 4GB 1 0 2 0 CELLDISK2 0 Series Up to 4GB 1 0 2 0 Cruzer Micro Series Up to 4GB 1 0 2 0 Xtick Series LG Up to 4GB 1 0 2 0 Zibn2 0...

Страница 17: ...nfiguration 1 1 Setup Press 1111 Default Password with pushing CH1 Button four times to enter into Main Menu Picture 1 1 Configuration Menu Reference This Manual is written mainly for the Remote Contr...

Страница 18: ...DING MOTION ZONE MOTION SENSIVITY SENSOR TYPE PRE RECORD POST EVENT RECORD ALARM ALARM DURATION AUDIO SCHEDULE SYSTEM DVR ID DESCRIPTION LOAD DEFAULT ADMIN PASSWORD NETWORK PASSWORD DATE FORMAT SET DA...

Страница 19: ...the specified channel to be included in sequential display mode SEQ LIST Enable disable display of the video channel in live display mode DISPLAY Select the channel for applying the following settings...

Страница 20: ...for the specified channel Control the motion sensitivity from 1 to 9 MOTION SENSITIVITY Select Full Zone or Partial Zone for motion sensing If the Partial Zone is selected screen will be change as sho...

Страница 21: ...Buttons Check selected cells with different color Picture1 3 1 Motion Detection Configuration 1 3 2 Schedule Recording You can select your type of recording Motion Sensor or Continuous at one hour int...

Страница 22: ...er by pressing the LEFT and RIGHT buttons UP DOWN buttons are used to change character for each location DVR ID Set the password for the administrator Once this menu is selected the DVR will ask you c...

Страница 23: ...client Once this menu is selected the DVR will ask you current password and new password The DVR will guide you through the entire process of setting up the user password The password numbers 1 2 3 4...

Страница 24: ...DNS Server will also be registered occasionally DDNS IP Input IP Address for DVR GATEWAY Register Gateway for Network SUBNET MASK Register Subnet Mask for Network LAN Selected for ADSL Connection at P...

Страница 25: ...ation 1 Static IP Refer to Network Manager 2 Connected with Router on ADSL With setting up DMZ or Port Forwarding Router itself grants Internal Static IP Address Every router is different and if you h...

Страница 26: ...rk connection does not allow additional IP addresses then an IP sharing device will be needed In this case forwarding may be needed to allow for a network connection For more information on port forwa...

Страница 27: ...ample abcd umbddns com DDNS Server Name ddns umbddns com is fixed as default Do not change this DDNS Server Name E Mail Notification In dynamic IP Application changed IP Address is forwarded and infor...

Страница 28: ...r This folder name should be upgrade After the upgrade firmware is copied into the USB memory stick do the following 1 Connect USB memory stick into the USB port 2 Go to the STORAGE and select the USB...

Страница 29: ...4CH User Guide 29 Figure1 6 Storage setup screen...

Страница 30: ...4CH User Guide 30 Figure1 7 Storage setup USB UPGRADE Figure1 8 Storage setup SAVE SETUP TO A USB Figure1 9 Storage setup LOAD SETUP FROM A USB...

Страница 31: ...he meanings of the indicators Figure2 1 Live display screen Indicates that sequencing mode is enabled Indicates no alarm event Motion alarm recording in progress Sensor alarm recording in progress Man...

Страница 32: ...a USB device ARCH Press to go to the search menu Event search Time line search Log Archive search SEARCH Press to launch SETUP menu SETUP Press to start and stop manual recording RECORD Press to contr...

Страница 33: ...gin searching Use the LEFT or RIGHT button to navigate through the day Use the UP or DOWN button to change the values 2 Once you have selected the date press the SEL button to move to the CHANNEL sele...

Страница 34: ...OWN button to scroll through the onscreen listings 8 Use the LEFT and RIGHT buttons to display events that happened previous to or after the current selection 9 Once the desired event has been selecte...

Страница 35: ...e LEFT or RIGHT button to select a time zone on the 24 hours time table Once you have selected the time zone press the DOWN button to move to the 60 minutes time table and select all or each channel f...

Страница 36: ...screen Picture 2 2 4 GO TO search screen 2 2 3 GO TO You can search for specified data by setting the time and date in this menu Use the LEFT or RIGHT button to move from left to right in this menu Us...

Страница 37: ...selecting this item 2 2 7 ARCHIVE Search The ARCHIVE SEARCH window is used to find the stored video 1 Select the date on the calendar to begin searching by using the LEFT or RIGHT button 2 Once you ha...

Страница 38: ...4CH User Guide 38 Picture 2 2 6 Archive search screen Picture 2 2 7 Archive search list screen...

Страница 39: ...Once you press the PTZ button the screen will appear as in figure 4 3 1 Highlight the item to select and control the cameras by using the UP and DOWN or LEFT and RIGHT buttons Please refer to the tabl...

Страница 40: ...Press the ARCH button to archive the video into HDD ARCH Press to rewind the footage at 1x 2x and 4x speeds Reverse playback speed is shown as 1x normal 2x 2 times normal and 4x 4 times normal at the...

Страница 41: ...ore the still image Once you press the ARCH button the screen will be displayed as shown in Figure 3 1 Figure3 1 Archive mode screen 41 In playback mode the DVR will ask whether to store still image o...

Страница 42: ...rchive search screen 42 Figure3 3 Archive search screen Press the SEL button to retrieve lists of archived image or video NOTICE During the backup the DVR will operate in Simplex 3 3 Playing AVI video...

Страница 43: ...e monitoring will follow the recording frame rate 4 1 Overview The remote software supports remote live viewing search playback and system configurations By installing the remote software on a Window...

Страница 44: ...8 1 Higher DirectX 8 1 or Higher OTHERS 10 100 Base T 10 100 Base T NETWORK Professional XP Professional XP Windows 2000 Windows 2000 OS 10MB 10MB DISK SPACE 1024 X 768 1024 X 768 RESOLUTION 64MB 16MB...

Страница 45: ...terface 4 4 2 Main control panel Click this icon to connect to the DVR Displays the current date and time Description Button 45 4 4 Live viewer When installation is complete double click the icon on y...

Страница 46: ...It should be same as the DVR s network password The default password is 1111 The Remote access should be set to on in the NETWORK setup menu on DVR Once you click the lock or unlock icon this pop up w...

Страница 47: ...in setup menu RECORD Click this icon to pause live video PAUSE Click this icon for Sequential display of each channel in full screen mode SEQUENCE Quad screen Full screen Alarm indicators for each cha...

Страница 48: ...t from the operations of client software Displays the recording time of the selected data by adjusting of scale in the middle of the bottom of the main user interface Description Button 48 4 5 1 Main...

Страница 49: ...f the recorded video in AVI format after you have selected the time to end on the timeline MARK OUT Click this icon to set the beginning time for backup of the recorded video in AVI format after you h...

Страница 50: ...ing the scale Please click MARK IN icon when the scale of the Green timeline is located on the target time as the beginning time of backup 2 Set the ending time on the blue timeline by dragging the sc...

Страница 51: ...ord the receiving video for Backup and still image for Capture Automatic reconnection If a user selects this function client S W will automatically try to connect the latest connected IP address after...

Страница 52: ...change the channel title 4 6 3 Event You can set event items the amount of local disk space you want to allow and the save path for the log 52 LOG Select to save event log into log file ICON Select t...

Страница 53: ...Guide 4 6 4 Record You can set the recording conditions for Always Event or Auto recording You can also select individual channels or all channels to record 53 You can search and check the recorded l...

Страница 54: ...allow the program to use for recording You can also select the option to overwrite data or stop recording when the maximum amount of disk space is full 54 When you set the recording condition to event...

Страница 55: ...4CH User Guide 55 4 6 7 About About provides network client version information 4 6 6 Video Setup the display color in Client Program This is dependant on the installed Video Card in your computer...

Страница 56: ......

Отзывы: