00031823.DOC, Version 1.0
50/62
For a few seconds the program is being loaded, then the controller enters the program edition.
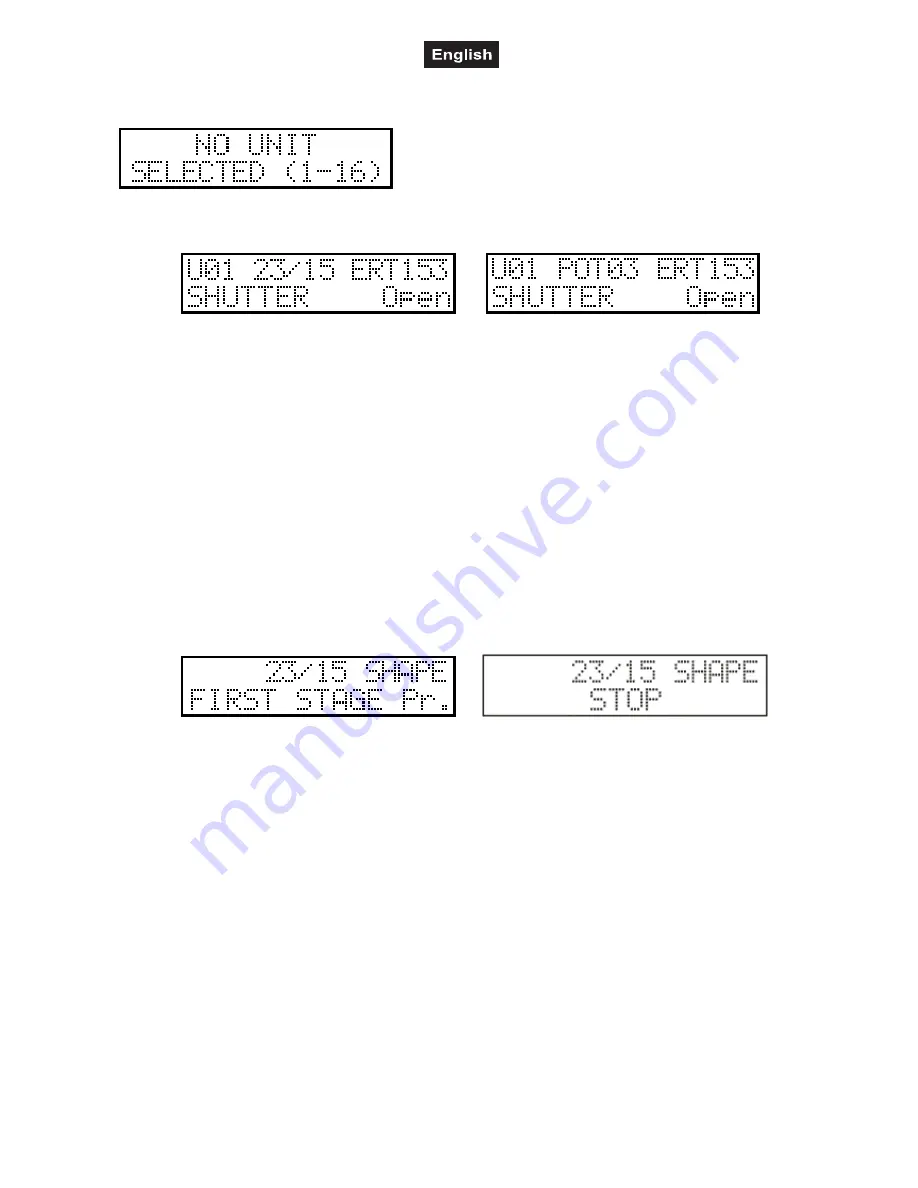
The caption warns that a unit has to be selected with buttons 1-16, since the program cannot be modified
without it. Select one or more units with buttons 1-16.
Preparation of a program scene:
If a unit was selected (the LEDs that correspond to the selected units are flashing on buttons 1-16), the
display always indicates data of the modified channel of the last selected unit. After letter U (Unit) in the
upper line the number of the last selected unit is shown . In the middle the number of the last moved
potentiometer, the number of the edited program and the number of the program scene currently being
edited is shown alternately. At the end of the line the current value of the channel appears.
In the lower line the name of the modified channel effect and the type name corresponding to the current
value appears.
Units can be selected with buttons 1-16, its LED will flash, or the selection can be stopped, its LED will glow
at half intensity again. The channels of the selected units can be modified with potentiometers 1-8 and the
SLIDER button. With the JOG discs the mirror and the head movement of the selected units can be set. If
you have set a scene, press the ENTER button to save the scene. On the display the number of the program
scene will increase by one, then the next scene can be set in the mentioned way. A program can consist of a
maximum of 99 steps.
Setup of a shape into a program scene:
Any of the 64 shapes to be edited can be assigned to a program scene. For this press the SHAPE
(MANUAL) button.
The number of the edited program and the scene appears in the middle of the upper line of the display. In
the lower line name the shape assigned to the current step or ‘STOP’ caption appears, or the line is empty.
The empty line means that no shape is assigned to the current step, the ‘STOP’ caption means that each
shape drawing will stop in the current step. If there is a name in the lower line, one is flashing on the LEDs 1-
16, this means the number of the selected shape. A shape can be selected with buttons 1-16, if you want to
stop the shape drawing in the current step, the LEFT button has to be pressed, if you do not want any
change in the shape drawing until now, press the RIGHT button. It is possible to set the initial position of a
shape as well and to save these positions in a scene. With the significance that the beams add the initial
positions for the shape drawing from the previous program scene, then they start drawing in the next step.
After selecting the shape (buttons 1-16) press the GROUP1 button for this.
By pressing the SHAPE (MANUAL) button again, you can return to the scene editions.
Setting program scene time:
If the program scene time is activated, you can program a time for every scene you edit. Switch off all units
with buttons 1-16 and rotate the wait slider. On the display the current scene time appears. In the maximal
and minimal position of the slider you will see the off info. In this position the program scene will not modify
the wait time.
Reviewing the program scenes:
It is possible to review the program scenes before you log off from the program edition. You can scroll
between the program scenes with the UP-DOWN buttons, and the current scene is called out by pressing
the RECALL button. Thus it is possible to copy a scene to the place of another on. Select the number of the
scene to be copied, press the RECALL button, the scene will be loaded. Find the scene with the UP/DOWN


