


BESKRIVELSE
ANIHEATER®
Volt 220 – 240
Forbrug
100W – eller 150W
Tilslutning
Vælg det stik/tilslutning
som passer til stald
Sæt indhold
Aniheater-skabelon
Monterings sæt
Omgivelses
temperaturer
`-10/+40 grader
IP Klasse
IPX9K
Fordele ved Aniheater
®
•
Reducerer strømforbrug
Reduktion af energiforbruget i stalde med op til 50%, når de kombineres med
vores kontakter
•
Bedre fordeling af varmen
Giver mere jævn fordeling af varme end traditionelle varmelamper. Det sikrer
bedre fødeindtagelse og højere overlevelsesrate blandt smågrise såvel som
reducerer brugen af medicin.
•
Vandtæt IPX9K godkendt
Nem at rengøre og vedligeholde. For at rense Aniheater® bruger du en
højtryksrenser, hvilket betyder at du ikke behøver at fjerne Aniheater®. Dette
hjælper med at opretholde et højt hygiejne niveau.
•
Lang levetid
Aniheater® bruger ikke glødelamper som traditionelle varmelamper
1 års garanti.
•
Lav brandrisiko
Aniheater® arbejder ved en lavere temperatur end traditionelle varmelamper
som reducerer risikoen for brand.
100%
VEDLIGEHOLDELSES
FRI
100%
VANDTÆT
Depending on where you want to place ANIHEATER® use placement (1 or 2)
Depending on stable equipment type, if you want to place ANIHEATER® on the
triangular lit, select placement (1)
If housing inventory is already prepared for ANIHEATER® This point can be skip
ped. If you want to place ANIHEATER® on the inside square, select placement (2)
Before assembly
Make sure that the lid can be opened and closed after ANIHEATER® is mounted,
and make sure that the safety distance to floor and flammable material remains in
compliance with applicable laws and recommendations.
Warning!
Before drilling, you must be check that there are no pipes, fittings,
or anything else in the way of the drilling.
INSTALLATION
PREPARATION
ANIHEATER®
OF 2
1
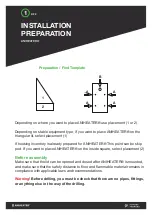
Preparation / Find Template
Depending on where you want to place ANIHEATER® use placement (1 or 2)
Depending on stable equipment type, if you want to place ANIHEATER® on the tri-
angular lit, select placement (1)
If housing inventory is already prepared for ANIHEATER® This point can be skipped.
If you want to place ANIHEATER® on the inside square, select placement (2)
Before assembly
Make sure that the lid can be opened and closed after ANIHEATER® is mounted, and
make sure that the safety distance to floor and flammable material remains in
compliance with applicable laws and recommendations.
Warning!
Before drilling, you must be check that there are no pipes, fittings,
or anything else in the way of the drilling.
1
A
A
A
A
B
2
INSTALLATION
PREPARATION
ANIHEATER®
OF 2
1
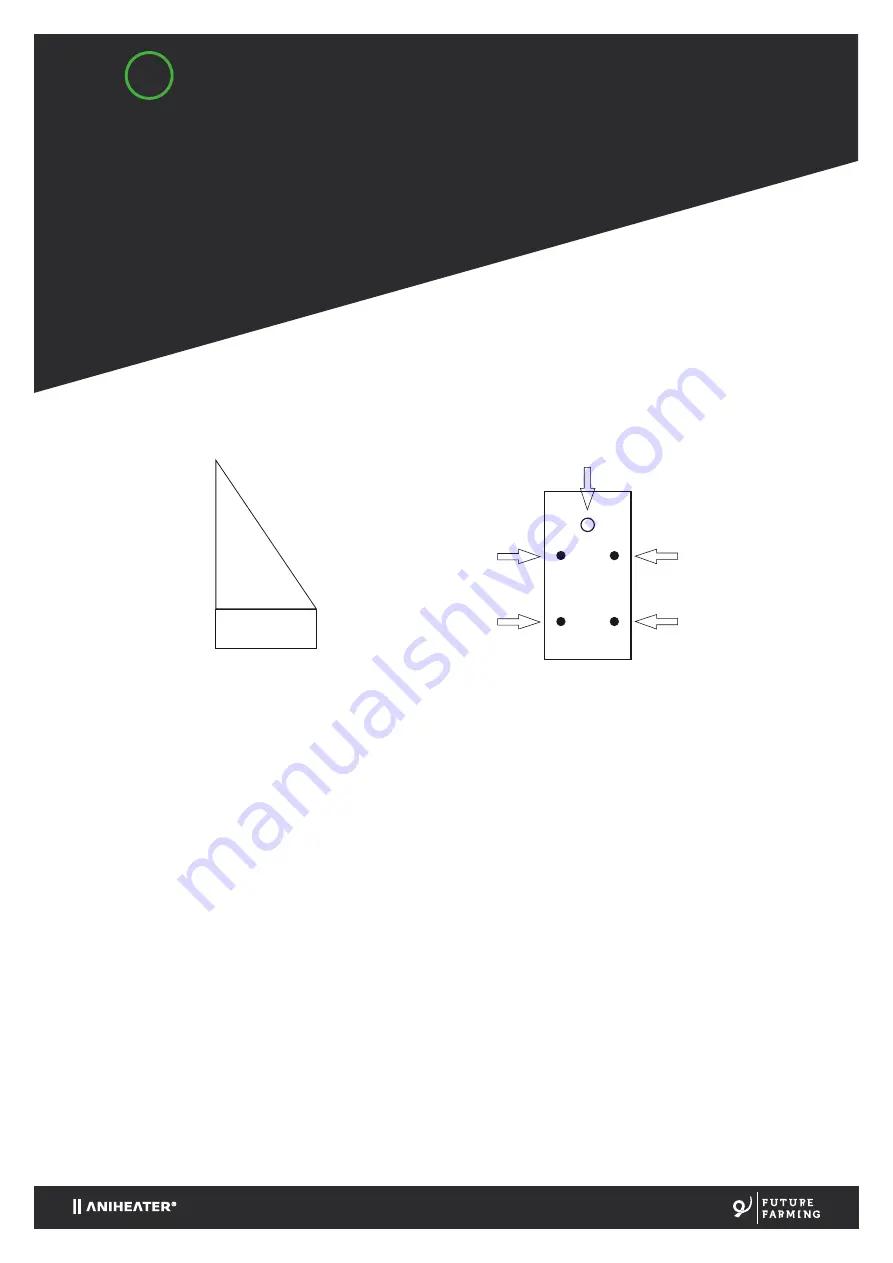
Preparation / Find Template
Depending on where you want to place ANIHEATER® use placement (1 or 2)
Depending on stable equipment type, if you want to place ANIHEATER® on the tri-
angular lit, select placement (1)
If housing inventory is already prepared for ANIHEATER® This point can be skipped.
If you want to place ANIHEATER® on the inside square, select placement (2)
Before assembly
Make sure that the lid can be opened and closed after ANIHEATER® is mounted, and
make sure that the safety distance to floor and flammable material remains in
compliance with applicable laws and recommendations.
Warning!
Before drilling, you must be check that there are no pipes, fittings,
or anything else in the way of the drilling.
1
A
A
A
A
B
2