background image

In

st

all

at

io

n

S

ta

ge

  6

Page 10 of 12 // email [email protected]  tel: +44 (0) 1438 833577  fax: +44 (0) 1438 833565

PS-VESA - Plasma Swivel Bracket

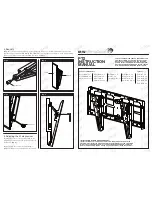
Fitting the Bracket to the Wall

Firstly, remove the screen and screen mount
from the bracket. Make sure that the mount plate
is still left connected to the rear of the screen.

Bearing in mind the relative distance
from the top of the screen to the top
mounting holes, place the wall plate
against the wall, and mark where the
holes need to be on the wall. Take care
with making sure the wall plate is level.  

Bracket Position
It is important to remember the limitations of the bracket when deciding on its position on the wall.
The bracket enables a screen to rotate through a maximum of 60 degree clockwise and 60 degree
anti-clockwise from initially being parallel to the wall behind.

Wall Fixings
There are no wall fixings supplied with this product.
The wall plate has 10mm diameter holes for the fixings. Therefore, it is recommended that fixings
of minimum 8mm diameter are used.
It is recommended that either rawlbolts, large diameter plastic wall bolts, or resin anchors are used
to fix this product to the wall.
Suitability of fixings will depend on the type of wall the product will be fixed to.

Содержание PS-VESA 42

Страница 1: ...stallationInstructions PS VESA PlasmaSwivelBracket Design Highlights Unique Scissor Design Allows Easy One Handed Operation Solid Steel Construction Holds Screen Securely Dedicated VESA Mounting Point...

Страница 2: ...as accurate as possible However Future Automation makes no claim that the information contained herein covers all details conditions or variations nor does it provide for every possible contingency i...

Страница 3: ...s 3 Tool Indicator Icons 3 Installation Parts List 4 Package Contents 4 Stage 1 Before You Start Check 5 Removing the Cross Plates From the Mount Plate 5 Stage 2 Adjustment Mounting 6 Stage 3 Screen M...

Страница 4: ...y misuse or damage accidental or otherwise or service modification by persons not authorised by Future Automation or the use of any non Future Automation supplied parts Any electrical or other environ...

Страница 5: ...wivelBracket 1 2 1 3 1 4 1 1 1 Package Contents 1 Wall Bracket 1 1 Wall Plate 1 2 Scissor Arms 1 3 Mount Plate 1 4 Cross Plate Nuts Bolts Multipack A range of nuts bolts washers and spacers to help ad...

Страница 6: ...ollowing The product is in good condition No damage to any parts The bracket is in the closed position Removing the Cross Plates From the Mount Plate The product is supplied with the cross plates atta...

Страница 7: ...floor Take care not to damage the screen If the screen has a VESA 400 bolt pattern you can secure the mount plate straight onto the back of the screen Make sure to get the mount plate as central as p...

Страница 8: ...ers in order to attach the uprights to the screen It is also recommended that a minimum of 15mm of bolt thread is screwed into the case of the screen without bottoming out It may be necessary to use s...

Страница 9: ...1438 833565 PS VESA PlasmaSwivelBracket Mounting the Screen to the Bracket Mount the screen over the bracket and locate the mount plate over the centre bar Secure the screws through the caps and mount...

Страница 10: ...44 0 1438 833565 PS VESA PlasmaSwivelBracket Take this opportunity to measure the distance from the top of the screen down to the top mounting holes of the wall plate This will be useful when gauging...

Страница 11: ...re the wall plate is level Bracket Position It is important to remember the limitations of the bracket when deciding on its position on the wall The bracket enables a screen to rotate through a maximu...

Страница 12: ...the bracket sitting flat against the wall hook the screen mount plate over the centre bar Lock into postion by tightening the top and bottom screws on the centre bar Usage Take care when using the PS...

Страница 13: ...60Kg 132 3lb 60Kg 132 3lb Standard Colour Black Black Depth From Wall 70mm 2 8 70mm 2 8 Control Manual Manual Shipping Details Dimensions W D H 760x570x100mm 29 9x22 4x3 9 760x660x100mm 29 9x26x3 9 We...

Страница 14: ...e Automation Unit 2 Kimpton Enterprise Park Claggy Road Kimpton Hertfordshire SG4 8HP United Kingdom Tel 44 0 1438 833 577 Fax 44 0 1438 833 565 Email info futureautomation co uk www futureautomation...

Отзывы: