11
Do as follows to import the setting file that was exported to the USB flash memory before replace-
ment.
1. Press the power switch on the control unit to turn the system on.
2. Insert the USB flash memory that contains the setting file to the USB port on the processor unit.
3. While pressing and holding down the
MENU/ESC
key, press
F1
,
F3
,
F5
in order.
4. Close, then re-open the menu. Press the
MENU/ESC
key twice.
The system menu appears.
5. Select
[Others]
→
[Explorer].
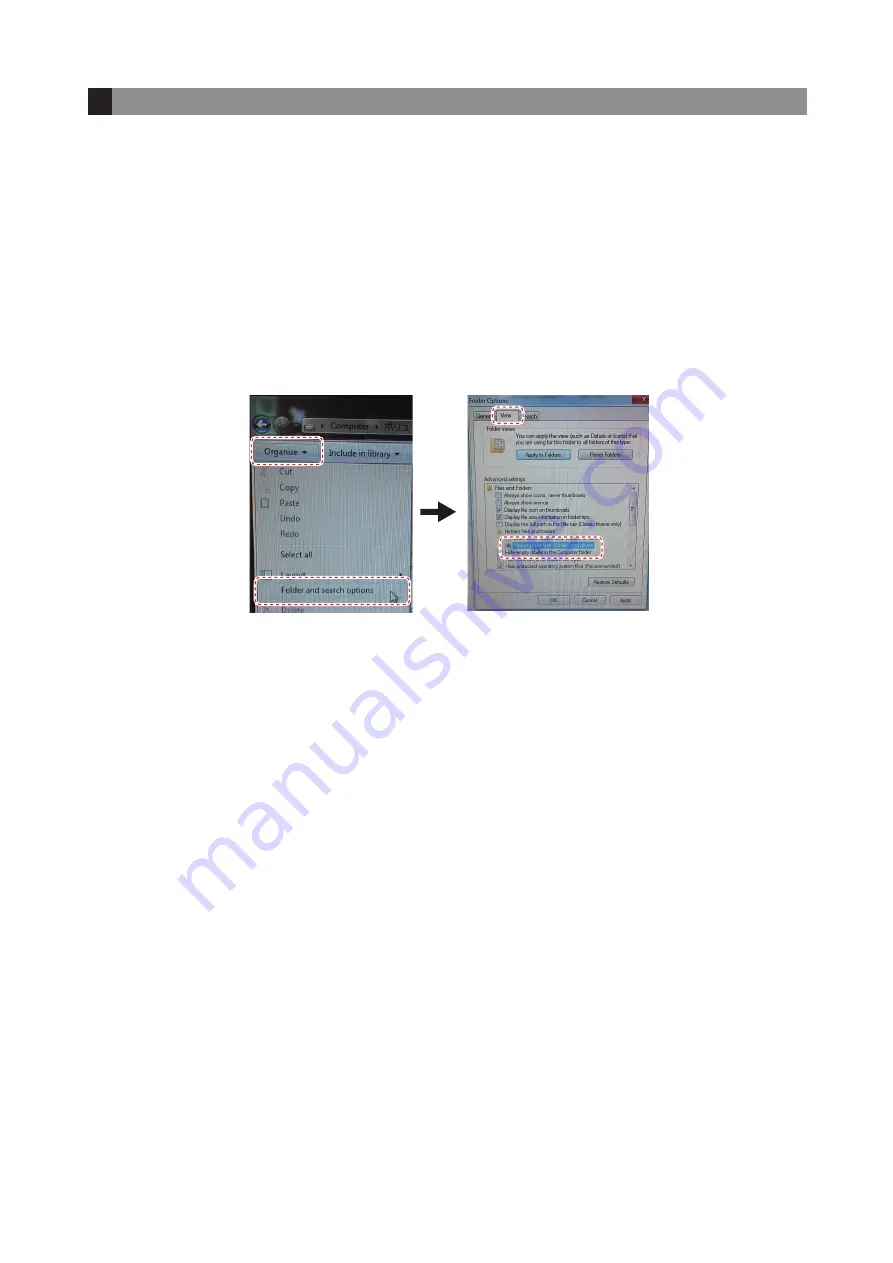
6. Click
[Organize]
→
[Folder and search options].
7. Click the [View] tab and activate the [Show hidden files and folders] radio button.
8. Click the [Apply] button, then click the [OK] button.
9. Click the “OriginalFile.ini” file in the [Backup] folder of the USB flash memory.
10. Select [Copy] from the [Edit] menu on the menu bar.
11. Click [D:] on the file explorer window.
12. Click the [Backup] folder in the D drive.
13. Select [Paste] from the [Edit] menu on the menu bar.
Note
: When the message “This folder already contains a folder named ‘OrignalFile.ini’.” ap-
pears, click the [OK] button to overwrite the existing setting file. If you do not want to overwrite
the file, click the [NO] button then rename the existing file in the [D:Backup] folder.
14. Close the file explorer window.
15. Open the menu and select [Others]
→
[Initial Setting]
→
[Initialization]
→
[Recall Ship’s Org] to
import all menu settings.
16. Turn the system off, then remove the USB flash memory.
17. Restart the system and check the setting file is imported correctly.
How to Import the Setting File
6


