


10
Operation
English
Your refrigerator must stand on a flat
surface. If the appliance is to be placed
onto the carpet, support it with a wooden
board. Do not put the appliance directly
onto the carpet, because the heat from
the compressor may cause the carpet to
fade.
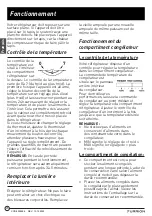
Temperature Control
The temperature
0
7
4
control is located
inside the
refrigerator
compartment on
the top. The temperature control ranges
from 0 to 7 (from cold to coldest). The
first time the unit is turned on, adjust the
temperature control knob to a higher
(colder) setting and run for at least 24
hours before readjusting the temperature
and placing food inside. This will ensure
the cabinet is thoroughly chilled before
food is placed into the refrigerator.
If you choose to change the thermostat
setting, adjust the thermostat by
one increment at a time. After each
movement of the control knob, allow
several hours for the unit to adjust
completely. Large amounts of food
may lower the cooling efficiency of the
appliance.
NOTE:
If losing power during working
time, the refrigerator will rework after 3
to 5 minutes automatically.
Replacing the Interior Light
Switch off the fridge. Failure to do so may
result in electrical shock or personal
injury. Replace the old bulb with a new
bulb of the same wattage and size.
Freezer Compartment
Operation
Temperature Control
Y
our refrigerator has one control for
regulating the temperature in the freezer
compartment. The freezer temperature
control is located on the interior back
panel of freezer compartment. For the
best performance, leave the freezer
control at the midpoint and adjust
the refrigerator
compartment
temperature control.
Adjust the freezer
control one increment at a time until the
desired temperature is reached.
NOTE:
• Do not store the canned food or store
the food with glass containers in the
freezer compartment.
• MIN stands for the setting of "cold".
MAX stands for the setting of
"coldest".
The Freezer Compartment
• This compartment is designed to
store the frozen food for a long period
of time. The storage life varies by the
frozen food and should not exceed the
recommended time.
• Place frozen food into the freezer as
early as possible after purchased.
Follow the packaging's instruction on
recommended storage time.
REV: 10.12.2022
CCD-0005596
Содержание FCR10DCBTA-BL
Страница 47: ...46 REV 10 12 2022 CCD 0005596...


