background image

Scanning Multiple Documents at Once (SV600)

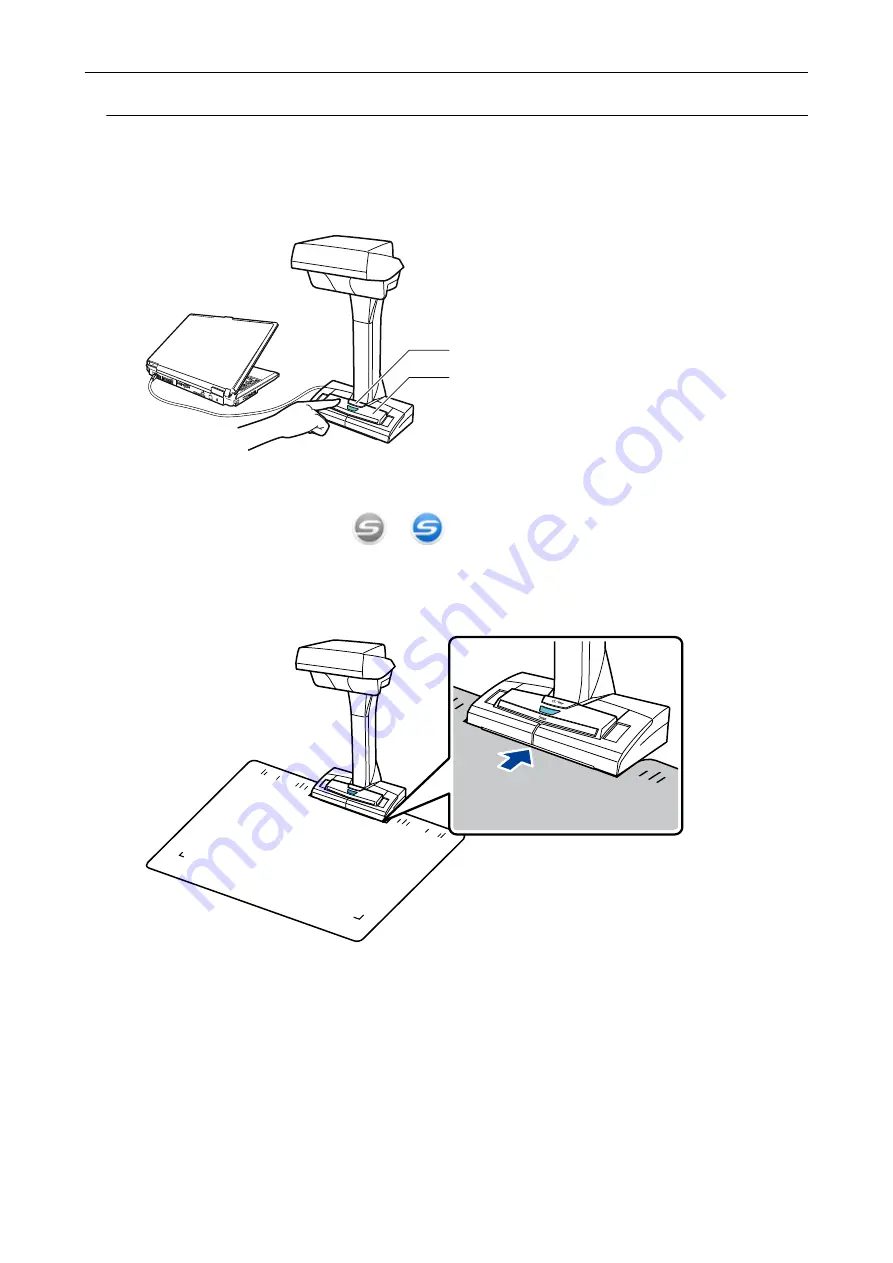
1.

Press the [Scan] or [Stop] button on the ScanSnap to turn the power on.

[Scan] Button

[Stop] Button

a

The power LED lights up in blue.
In addition, the ScanSnap Manager icon in the notification area located at the far right of

the taskbar changes from 

 to 

.

2.

Place the Background Pad on the front side of the ScanSnap.

Place the Background Pad so that it is in contact with the ScanSnap.

3.

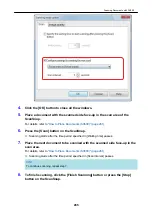
Place documents in the scan area of the ScanSnap and press the [Scan]
button.

For details, refer to 

"How to Place Documents (SV600)" (page 261)

.

Scanning Documents with SV600

274

Содержание SV600

Страница 1: ...P3PC 6912 01ENZ2 Basic Operation Guide Windows ...

Страница 2: ...ile Device or the ScanSnap Cloud Server iX1500 iX500 iX100 49 ScanSnap Overview 50 What You Can Do with the ScanSnap 51 What You Can Do with iX1500 52 What You Can Do with iX500 55 What You Can Do with iX100 57 What You Can Do with SV600 60 What You Can Do with S1300i 63 What You Can Do with S1100i 64 Parts and Functions 67 Parts and Functions of iX1500 68 Parts and Functions of iX500 70 Parts and...

Страница 3: ...X500 133 Connecting the ScanSnap to a computer or mobile device via Wireless LAN iX100 134 Connecting the ScanSnap to a Computer in Access Point Connect Mode iX100 135 Connecting the ScanSnap to a Mobile Device in Access Point Connect Mode iX100 137 Connecting the ScanSnap to a Computer Directly in Direct Connect Mode iX100 138 Connecting the ScanSnap to a Mobile Device in Direct Connect Mode iX10...

Страница 4: ...h the Carrier Sheet iX100 250 Scanning Documents Such as Photographs and Clippings iX100 255 Scanning Documents with SV600 259 Documents to Scan SV600 260 How to Place Documents SV600 261 Scanning Documents SV600 264 Scanning Books SV600 269 Scanning Multiple Documents at Once SV600 274 Scanning Books Using Page Turning Detection SV600 279 Scanning Documents Using Timed Mode SV600 283 Scanning Doc...

Страница 5: ... Is Scanned SV600 387 When Multiple Documents Are Scanned at Once SV600 390 Correcting the Scanned Image Orientation SV600 391 Modifying the Crop Area SV600 394 Adding the Necessary Scanned Images SV600 396 Deleting Unnecessary Scanned Images SV600 398 Uninstalling Software Troubleshooting during Uninstallation 401 How to Find Your Solution 402 If Your First Attempt to Install Failed 403 If You Ha...

Страница 6: ...king the Status of Consumables iX500 S1300i 456 Replacing Consumables for iX1500 457 Replacing Consumables for iX500 464 Replacing Consumables for S1300i 471 Replacing the Pad Assy S1300i 472 Replacing the Pick Roller Assembly S1300i 475 Appendix 480 Updating the Software 481 Updating the Firmware 482 Uninstalling the Software 483 Part Number of the Background Pad SV600 485 Part Number of the Carr...

Страница 7: ... 8 l Manuals page 9 l Trademarks page 12 l Manufacturer page 13 l Symbols Used in This Manual page 14 l Arrow Symbols in This Manual page 15 l Screen Examples in This Manual page 16 l Abbreviations Used in This Manual page 17 About This Manual 7 ...

Страница 8: ...rmation The attached Safety Precautions manual contains important information about the safe and correct use of the ScanSnap Make sure that you read and understand it before using the ScanSnap Safety Information 8 ...

Страница 9: ...ed Operation Guide This manual describes operations including various scanning methods and useful usages of the ScanSnap You can refer to this manual at the following website https www pfu fujitsu com imaging downloads manual advanced win en topics index html ScanSnap Manager Help This Help file describes the windows operational troubles and the solutions as well as messages of the ScanSnap Manage...

Страница 10: ...e This Help file can be accessed by one of the following methods l The Scan to Mobile icon is displayed in the menu that appears when you click in the notification area located at the far right of the taskbar Right click the Scan to Mobile icon and select Help from the menu that appears l Press the F1 key on the keyboard while a window is displayed l Click the Help button in any window When Updati...

Страница 11: ...h Toolbar l Press the F1 key on the keyboard while a window is displayed l Click the Help button in any window ABBYY FineReader for ScanSnap User s Guide This manual describes the overview and operations of ABBYY FineReader for ScanSnap This manual can be accessed by one of the following methods l Press the F1 key on the keyboard while a window is displayed l Click the Help button in any window Ho...

Страница 12: ...ch as software copyrighted under the GNU General Public License GPL or the GNU Lesser General Public License LGPL For details concerning the conditions of the licenses for Open Source Software OSS refer to the screen that appears when you press the settings icon in the lower right of the home screen on the ScanSnap touch panel and then press Scanner settings and License For iX500 Users Besides the...

Страница 13: ...Manufacturer PFU Limited YOKOHAMA i MARK PLACE 4 4 5 Minatomirai Nishi ku Yokohama Kanagawa 220 8567 Japan PFU Limited 2020 Manufacturer 13 ...

Страница 14: ...statements The symbols indicating warning levels and their meanings are as follows Indication Description WARNING This indication alerts operators of an operation that if not strictly observed may result in severe injury or death CAUTION This indication alerts operators of an operation that if not strictly observed may result in safety hazards to personnel or damage to the product Symbols Used in ...

Страница 15: ...Arrow Symbols in This Manual Right arrow symbols are used to connect icons or menu options you should select in succession Example Select Start menu Computer Arrow Symbols in This Manual 15 ...

Страница 16: ...splayed in the notification area drag the icon and drop it onto the notification area The notification area is located at the far right of the taskbar The explanations in this manual use the case in which the ScanSnap Manager icon is always displayed in the notification area HINT If the ScanSnap Manager icon is not displayed in the notification area start ScanSnap Manager Start ScanSnap Manager in...

Страница 17: ...indows 8 1 or Windows 7 Microsoft Office Microsoft Office Word Microsoft Word Excel Microsoft Excel PowerPoint Microsoft PowerPoint SharePoint Microsoft SharePoint Server Microsoft SharePoint Foundation Microsoft SharePoint Online Internet Explorer Internet Explorer Outlook Microsoft Outlook NET Framework Microsoft NET Framework Kofax Kofax Adobe Acrobat Adobe Acrobat Adobe Acrobat DC ABBYY FineRe...

Страница 18: ...Abbreviation Used Designation ScanSnap Color Image Scanner ScanSnap series 1 1 The ScanSnap N1800 series is not included Abbreviations Used in This Manual 18 ...

Страница 19: ...0 page 22 l Setting Up iX500 page 28 l Setting Up iX100 page 31 l Setting Up SV600 page 36 l Setting Up S1300i page 41 l Setting Up S1100i page 45 l Connecting the ScanSnap to a Mobile Device or the ScanSnap Cloud Server iX1500 iX500 iX100 page 49 Setting Up the ScanSnap 19 ...

Страница 20: ...ScanSnap operates in desktop mode 2 ScanSnap Home cannot be used on Windows 10 Enterprise 2015 LTSB 3 The software bundled with the ScanSnap operates as a desktop application 4 Service Pack 1 or later is required 5 When the font size is large some screens may not be displayed correctly In such a case use a smaller font size 6 To save scanned images more free space is required For details about est...

Страница 21: ...b is USB 1 1 l The actual disk space used for the installation of the software and the disk space required for the installation may be different because of the disk management in your Windows system l To scan a document a disk space that is approximately three times larger than the size of the file to be saved is required l If characters are not correctly displayed when you use the following funct...

Страница 22: ...cardboard sheet 2 from the ScanSnap 1 2 The procedure to set up the ScanSnap is as follows 1 Configuring the Settings of the ScanSnap 2 Downloading the Software 3 Installing the Software Connecting the ScanSnap 4 Checking the Scanning Operation 1Configuring the Settings of the ScanSnap 1 Connect the power cable to the power connector on the ScanSnap and the AC outlet Use only the AC adapter and ca...

Страница 23: ...f the ScanSnap by following the instructions on the touch panel Set the display language of the touch panel the startup mode and a device that is used with the ScanSnap When the USB Connection screen is displayed on the touch panel the setting procedure for the ScanSnap is complete Setting Up iX1500 23 ...

Страница 24: ... 1 Run the installer that you saved on your computer 2 Follow the instructions on the ScanSnap Installer window that appears When you are asked whether you accept the license agreement terms read the confirmation message and select I agree to all terms and conditions 3 When Installation complete appears click the Complete button 4 When the About ScanSnap s Auto Power OFF function window appears re...

Страница 25: ...u need to connect the ScanSnap to the mobile device or the ScanSnap Cloud server For details refer to Connecting the ScanSnap to a Mobile Device or the ScanSnap Cloud Server iX1500 iX500 iX100 page 49 4Checking the Scanning Operation 1 Load a document in the ScanSnap Load a document face down and head first with the back facing you when loading multiple documents the last page is on the top For de...

Страница 26: ...cular action appears the check process for the scanning operation is complete Clicking an icon on the Quick Menu allows you to save images created from documents that you scanned with the ScanSnap to your desired folder or attach them to an e mail Setting Up iX1500 26 ...

Страница 27: ...4 AC adapter 1 5 Receipt Guide 6 Welcome Guide 7 Safety Precautions 8 License certificate of Kofax Power PDF Standard Kofax Power PDF Standard for Mac License certificate of Nuance Power PDF Standard Nuance Power PDF Standard for Mac or License certificate of Nuance Power PDF Standard Nuance PDF Converter for Mac 1 An AC cable which is connected to the AC adapter is called a power cable Setting Up...

Страница 28: ... ScanSnap 1 2 3 The data on the card may be lost if the black magnetic part of a magnetic card or IC card is in contact with the magnetic part 3 The procedure to set up the ScanSnap is as follows 1 Downloading the Software 2 Installing the Software Connecting the ScanSnap 3 Checking the Scanning Operation 1Downloading the Software 1 Turn on the computer and log on as a user with Administrator priv...

Страница 29: ...e instructions on the ScanSnap Connecting the ScanSnap window to connect the ScanSnap to a computer 6 On the ScanSnap wireless network setup window select whether to configure the wireless settings in order for the ScanSnap to be connected to a wireless LAN If you want to configure the wireless settings click Setup now and follow the instructions on the window that appears If you do not want to co...

Страница 30: ...ument refer to Scanning Documents with iX500 page 200 2 Press the Scan button to start scanning Once the Quick Menu for selecting an application to perform a particular action appears the check process for the scanning operation is complete Clicking an icon on the Quick Menu allows you to save images created from documents that you scanned with the ScanSnap to your desired folder or attach them to...

Страница 31: ...ap and the computer with a USB cable and charge the battery until the battery indicator light turns off ATTENTION Do not open the feed guide until the instructions are displayed on the window for installing software The ScanSnap can be charged with the supplied USB cable or optional USB power adapter For details about purchasing the USB power adapter refer to Suppliers of Consumables Optional Part...

Страница 32: ... Run the installer that you saved on your computer 2 Follow the instructions on the ScanSnap Installer window that appears When you are asked whether you accept the license agreement terms read the confirmation message and select I agree to all terms and conditions 3 When Installation complete appears click the Complete button 4 When the About ScanSnap s Auto Power OFF function window appears read...

Страница 33: ... details refer to Connecting the ScanSnap to a Mobile Device or the ScanSnap Cloud Server iX1500 iX500 iX100 page 49 3Checking the Scanning Operation 1 Insert a document in the ScanSnap Insert the document straight into the feeding section of the ScanSnap with the scanning side facing up For details about how to scan a document refer to Scanning Documents with iX100 page 229 2 Press the Scan Stop ...

Страница 34: ...icular action appears the check process for the scanning operation is complete Clicking an icon on the Quick Menu allows you to save images created from documents that you scanned with the ScanSnap to your desired folder or attach them to an e mail Setting Up iX100 34 ...

Страница 35: ...0 Make sure that all items are included in the package before you set up the ScanSnap Items that come with the ScanSnap are as follows 1 2 3 4 1 ScanSnap 2 USB cable 3 Welcome Guide 4 Safety Precautions Setting Up iX100 35 ...

Страница 36: ...d tape seal 2 from the ScanSnap 1 2 l Attach the extenders to the ScanSnap ATTENTION The following preparations are required before you attach the extenders Wipe off dust and dirt such as oily dirt on the place where the extenders will be attached Peel the protective tape off the bottom of the extenders Leaving about 3 to 5 mm of space between the extenders and the back and side of the ScanSnap pu...

Страница 37: ...stall the following software programs l ScanSnap Manager l ScanSnap Online Update l ScanSnap manual Install software applications other than the above if needed For the overview for each software program refer to Overview of the Software Related to the ScanSnap page 84 2Installing the Software Connecting the ScanSnap 1 Run the installer that you saved on your computer 2 Follow the instructions on ...

Страница 38: ...he Scanning Operation 1 Place the Background Pad with a document towards the ScanSnap so that they are in contact with the ScanSnap 1 and then press the Scan button 2 to start a scan Place a document with the scanning side facing up on the Background Pad For details about how to scan a document refer to Scanning Documents with SV600 page 259 1 2 2 Click the Finish Scanning button in the ScanSnap M...

Страница 39: ...for selecting an application to perform a particular action appears the check process for the scanning operation is complete Clicking an icon on the Quick Menu allows you to save images created from documents that you scanned with the ScanSnap to your desired folder or attach them to an e mail Setting Up SV600 39 ...

Страница 40: ...adapter 1 5 Welcome Guide 6 Safety Precautions 7 License certificate of Kofax Power PDF Standard Kofax Power PDF Standard for Mac License certificate of Nuance Power PDF Standard Nuance Power PDF Standard for Mac or License certificate of Nuance Power PDF Standard Nuance PDF Converter for Mac 8 Background Pad 9 Extenders 1 An AC cable which is connected to the AC adapter is called a power cable Se...

Страница 41: ... the Software Connecting the ScanSnap 3 Checking the Scanning Operation 1Downloading the Software 1 Turn on the computer and log on as a user with Administrator privileges 2 Access the download web pages of the software programs http scansnap fujitsu com global dl 3 Select your model and operating system and click Display software list to display the list of software programs to be installed 4 Dow...

Страница 42: ...function window appears read the message and click the Next button 5 Follow the instructions on the ScanSnap Connecting the ScanSnap window to connect the ScanSnap to a computer HINT If there are available updates for ScanSnap Online Update on the server you will be asked whether you accept the license agreement terms for ScanSnap Online Update For details about ScanSnap Online Update refer to the...

Страница 43: ...on to perform a particular action appears the check process for the scanning operation is complete Clicking an icon on the Quick Menu allows you to save images created from documents that you scanned with the ScanSnap to your desired folder or attach them to an e mail Setting Up S1300i 43 ...

Страница 44: ... set up the ScanSnap Items that come with the ScanSnap are as follows 1 2 3 4 5 6 7 1 ScanSnap 2 USB cable 3 AC cable 1 4 AC adapter 1 5 USB bus power cable 6 Welcome Guide 7 Safety Precautions 1 An AC cable which is connected to the AC adapter is called a power cable Setting Up S1300i 44 ...

Страница 45: ...ftware 1 Turn on the computer and log on as a user with Administrator privileges 2 Access the download web pages of the software programs http scansnap fujitsu com global dl 3 Select your model and operating system and click Display software list to display the list of software programs to be installed 4 Download ScanSnap Installer from the software list that is displayed in Those using ScanSnap M...

Страница 46: ...ne Update on the server you will be asked whether you accept the license agreement terms for ScanSnap Online Update For details about ScanSnap Online Update refer to the ScanSnap Online Update Help 3Checking the Scanning Operation 1 Insert a document in the ScanSnap Insert a document straight into the feeding section of the ScanSnap with the scanning side facing up For details about how to scan a ...

Страница 47: ...cular action appears the check process for the scanning operation is complete Clicking an icon on the Quick Menu allows you to save images created from documents that you scanned with the ScanSnap to your desired folder or attach them to an e mail Setting Up S1100i 47 ...

Страница 48: ...i Make sure that all items are included in the package before you set up the ScanSnap Items that come with the ScanSnap are as follows 1 2 3 4 1 ScanSnap 2 USB cable 3 Welcome Guide 4 Safety Precautions Setting Up S1100i 48 ...

Страница 49: ...ia Wireless LAN iX500 iX100 page 127 1 Install ScanSnap Connect Application on the mobile device Obtain ScanSnap Connect Application from one of the following application stores in accordance with your mobile device l App Store l Google Play l Amazon Appstore 2 Start up ScanSnap Connect Application Perform operations while following the instructions For details about how to operate ScanSnap Connec...

Страница 50: ...tions page 67 l Charging the Battery iX100 page 82 l Overview of the Software Related to the ScanSnap page 84 l ScanSnap Manager Icon page 85 l Right Click Menu page 86 l ScanSnap Setup Window page 88 l Turning the ScanSnap On or Off page 90 l Screens and Operations on the Touch Panel iX1500 page 102 l Attaching the Receipt Guide iX1500 page 109 ScanSnap Overview 50 ...

Страница 51: ...n Do with iX1500 page 52 l What You Can Do with iX500 page 55 l What You Can Do with iX100 page 57 l What You Can Do with SV600 page 60 l What You Can Do with S1300i page 63 l What You Can Do with S1100i page 64 What You Can Do with the ScanSnap 51 ...

Страница 52: ...e 175 Scanning Small Size Documents such as Receipts in One Go If the Receipt Guide is attached to the ScanSnap a batch of small size documents such as receipts can be loaded and scanned in the ScanSnap at the same For details refer to Scanning Small Size Documents such as Receipts in One Go iX1500 page 189 Scanning Documents That Cannot Be Loaded Directly in the ScanSnap You can use the optional ...

Страница 53: ...refer to Scanning Documents Such as Photographs and Clippings iX1500 page 196 Connecting the ScanSnap via Wireless LAN You can connect the ScanSnap and a computer or mobile device via wireless LAN To configure the wireless settings for the ScanSnap use the ScanSnap Wireless Setup Tool which is installed together with ScanSnap Manager or use the touch panel of the ScanSnap For details refer to Conn...

Страница 54: ...What You Can Do with the ScanSnap 54 ...

Страница 55: ...nts iX500 page 205 Scanning Documents That Cannot Be Loaded Directly in the ScanSnap You can use the optional Carrier Sheet to scan the following documents l Documents that are larger than A4 Letter size and not larger than A3 size For details refer to Scanning Documents Larger Than A4 or Letter Size iX500 page 221 l Documents that can be damaged quite easily such as photographs or non standard si...

Страница 56: ...u can connect the ScanSnap and a computer or mobile device via wireless LAN To configure the wireless settings for the ScanSnap use the ScanSnap Wireless Setup Tool which is installed together with ScanSnap Manager For details refer to Connecting the ScanSnap via Wireless LAN iX500 iX100 page 127 What You Can Do with the ScanSnap 56 ...

Страница 57: ...g scanned dual scan When scanning small size documents such as business cards and postcards you can insert two documents at a time in the ScanSnap Alternatively you can insert the next document while another document is being scanned In either method you can scan up to 20 documents continuously in a single scanning operation These scanning methods are referred to as dual scans For details refer to...

Страница 58: ...anSnap You can use the optional Carrier Sheet to scan the following documents l Documents that are larger than A4 Letter size and not larger than A3 size For details refer to Scanning Documents Larger than A4 or Letter Size with the Carrier Sheet iX100 page 250 l Documents that can be damaged quite easily such as photographs or non standard size documents such as clippings For details refer to Sca...

Страница 59: ...r or mobile device is directly connected to the ScanSnap Select a suitable connection mode depending on whether there is wireless LAN in a place where you use the ScanSnap or not To configure the wireless settings for the ScanSnap use the ScanSnap Wireless Setup Tool which is installed together with ScanSnap Manager For details refer to Connecting the ScanSnap via Wireless LAN iX500 iX100 page 127...

Страница 60: ...matically l When a booklet like document is scanned The page distortion is corrected automatically l When multiple documents are scanned at once The scanned images are cropped into separate images for respective documents In addition continuous scanning can be started automatically and scanned images can be corrected after documents are scanned Page Turning Detection When a page is turned the Scan...

Страница 61: ...ime period for the ScanSnap to start the next scan when a document is scanned continuously For details refer to Scanning Documents Using Timed Mode SV600 page 283 Correcting Scanned Images After the documents are scanned with the ScanSnap the scanned images can be corrected The following functions are available When a document is scanned l Filling in Fingers Captured in a Scanned Image When a Docu...

Страница 62: ... Image Orientation SV600 page 391 l Modifying the Crop Area SV600 page 394 l Adding the Necessary Scanned Images SV600 page 396 l Deleting Unnecessary Scanned Images SV600 page 398 Scanning Documents with Two ScanSnaps Connected to a Computer You can use SV600 and another ScanSnap connected to a computer For details refer to Scanning Documents with Two ScanSnaps Connected to a Computer SV600 page ...

Страница 63: ...ed into the ScanSnap for scanning For details refer to Scanning Documents S1300i page 290 Using the USB Bus Powered Drive that Does Not Require Any Power Supply You can use the ScanSnap in an environment where no power supply is available such as outside or on a business trip by connecting the ScanSnap to a USB port on a computer USB Cable USB Bus Power Cable What You Can Do with the ScanSnap 63 ...

Страница 64: ...g scanned dual scan When scanning small size documents such as business cards and postcards you can insert two documents at a time in the ScanSnap Alternatively you can insert the next document while another document is being scanned In either method you can scan up to 20 documents continuously in a single scanning operation These scanning methods are referred to as dual scans For details refer to...

Страница 65: ...Snap You can use the optional Carrier Sheet to scan the following documents l Documents that are larger than A4 Letter size and not larger than A3 size For details refer to Scanning Documents Larger than A4 or Letter Size with the Carrier Sheet S1100i page 325 l Documents that can be damaged quite easily such as photographs or non standard size documents such as clippings For details refer to Scan...

Страница 66: ...What You Can Do with the ScanSnap 66 ...

Страница 67: ...ns of iX1500 page 68 l Parts and Functions of iX500 page 70 l Parts and Functions of iX100 page 72 l Parts and Functions of SV600 page 75 l Parts and Functions of S1300i page 78 l Parts and Functions of S1100i page 80 Parts and Functions 67 ...

Страница 68: ... Opening it turns on the ScanSnap Then you can load a document on it 2 ADF top section Open it to remove jammed documents replace the Roller Set or clean the inside of the ScanSnap 3 Extension Pull out when scanning long documents 4 Side guide Adjust to the width of documents to prevent them from getting skewed 5 ADF release tab Pull this tab to open the ADF top section Parts and Functions 68 ...

Страница 69: ... off function either press the touch panel or close the ADF paper chute cover then open it again to turn the ScanSnap back on For details refer to Automatic Power OFF iX1500 iX500 iX100 SV600 S1300i page 98 Back 9 10 11 12 No Name Description 9 USB connector Slide the cover of the USB connector up to open it and then connect the USB cable to the USB connector The cover of the USB connector slides ...

Страница 70: ...Opening it turns on the ScanSnap Then you can load a document on it 2 ADF top section Open it to remove jammed documents replace the Roller Set or clean the inside of the ScanSnap 3 Extension Pull out when scanning long documents 4 Side guide Adjust to the width of documents to prevent them from getting skewed 5 ADF release tab Pull this tab to open the ADF top section Parts and Functions 70 ...

Страница 71: ...s the Scan button this will not start scanning or close the ADF paper chute cover then open it again to turn the ScanSnap back on For details refer to Automatic Power OFF iX1500 iX500 iX100 SV600 S1300i page 98 Back 9 10 11 12 13 14 15 No Name Description 9 Tape seal Remove this tape seal after installing the software 10 Security cable slot Used to connect an anti theft security cable commercially...

Страница 72: ...ains the names and functions of the ScanSnap parts Front 3 1 2 4 7 6 5 No Name Description 1 Feed guide 1 Open it to use the ScanSnap Opening it turns on the ScanSnap Then you can place a document on it to insert the document Parts and Functions 72 ...

Страница 73: ...or Indicates the remaining battery power and battery charging status When the ScanSnap is turned on Blue lit Fully charged Orange lit Charging Orange flashing Low battery When the ScanSnap is turned off Orange lit Charging 6 Wi Fi indicator Indicates the status of the ScanSnap connected via wireless LAN as follows Blue lit Connected Access Point Connect mode Blue flashing Standby Green lit Connect...

Страница 74: ...software 9 USB connector Used to connect a USB cable Back 10 11 No Name Description 10 WPS button Press this button to connect to a WPS compatible device by using the push button method 11 Wi Fi switch Turn this switch on to connect the ScanSnap via wireless LAN Parts and Functions 74 ...

Страница 75: ...Blue flashing Scanning Orange flashing Error 7 White sheet Used to determine the starting position for scanning documents and is also the standard color reference for the color of documents when documents are scanned 8 Centering mark When placing a book or standard size document align the center of the document with the centering mark 1 If the ScanSnap has turned off automatically because of the a...

Страница 76: ...and neck Do not carry the scanner by the head Back 9 10 11 No Name Description 9 Security cable slot Used to connect an anti theft security cable commercially available 10 USB connector Used to connect a USB cable 11 Power connector Used to connect the AC cable Scanning Unit Operates when documents are scanned Parts and Functions 76 ...

Страница 77: ...s page turning and glossy papers 13 Infrared LED Irradiates the scan area with infrared to detect page turning and glossy papers 14 Glass Protects the lens used to scan a document 15 Lamp Illuminates the document to be scanned Parts and Functions 77 ...

Страница 78: ... 4 Side guide Adjust to the width of documents to prevent them from getting skewed 5 ADF release tab Pull this tab to open the ADF top section 6 Scan button 1 Starts scanning Indicates the status of the ScanSnap as follows Blue lit Ready Blue flashing Scanning Orange flashing Error 1 When the ScanSnap has turned off automatically because of the automatic power off function either press the Scan bu...

Страница 79: ...e this tape seal after installing the software 8 Security cable slot Used to connect an anti theft security cable commercially available 9 Power connector Used to connect a power cable 10 USB connector Used to connect a USB cable Parts and Functions 79 ...

Страница 80: ...ap Then you can place a document on it to insert the document 2 Output guide Open it to eject documents from the front of the ScanSnap Select an ejection method depending on the document type you are scanning For details about documents that can be scanned with the ScanSnap refer to Documents to Scan S1100i page 305 l When the output guide is closed l When the output guide is open Parts and Functi...

Страница 81: ...100i page 448 4 Scan Stop button Press this button to start or finish scanning Indicates the status of the ScanSnap as follows Blue lit Ready Blue flashing Scanning Orange flashing Error 5 Feeding section Insert the document here to load Side 6 7 No Name Description 6 Tape seal Remove this tape seal after installing the software 7 USB connector Used to connect a USB cable Parts and Functions 81 ...

Страница 82: ...tery in the following environments Places which are subject to high humidity dust or vibration Places near conventional phones televisions or radios l Check that the ScanSnap does not get wet before charging l The battery can be charged while the ScanSnap is being used Although the following symptoms may occur during a charge it does not affect the ScanSnap in any way It takes time until charging ...

Страница 83: ...ttery indicator lights up in orange When charging completes the battery indicator turns off HINT You can use the optional USB power adapter to charge the battery in a shorter time Charging the Battery iX100 83 ...

Страница 84: ...isplay image data PDF or JPEG files without opening them create folders and arrange files as you like CardMinder You can use this application to efficiently digitalize a large number of business cards Text recognition can be performed on business cards and you can create a database to facilitate card data management and searches Data in the database can be printed and linked with various applicati...

Страница 85: ...0 iX500 iX100 When the ScanSnap is connected to a computer via wireless LAN the following icon is displayed Not communicating iX1500 When the touch panel is being used or ScanSnap is used from another computer or mobile device the following icon is displayed iX500 iX100 When the ScanSnap is connected to a mobile device via wireless LAN the following icon is displayed HINT Turn the ScanSnap on to b...

Страница 86: ...ay a window in order to change the scan settings or preferences for ScanSnap and ScanSnap Manager For details refer to the ScanSnap Manager Help Example Right Click Menu for iX1500 HINT When SV600 and either iX1500 iX500 iX100 S1300i or S1100i are connected to a computer the Right Click Menu displays items relevant to each of the connected ScanSnap models For details refer to the ScanSnap Manager ...

Страница 87: ...Example When SV600 and iX1500 are connected to a computer Right Click Menu 87 ...

Страница 88: ...o use the Quick Menu You can also use the profile buttons and detail setting tabs to specify scan settings according to your scanning needs For details refer to the ScanSnap Manager Help Profile Buttons Detail Setting Tabs Example ScanSnap setup window for iX500 HINT For SV600 when SV600 and either iX1500 iX500 iX100 S1300i or S1100i are connected to a computer you can change the scan settings for...

Страница 89: ...ScanSnap Setup Window 89 ...

Страница 90: ...on or off l Turning the ScanSnap On page 91 l Turning the ScanSnap Off page 94 l Startup Mode iX1500 page 96 l Sleep Mode page 97 l Automatic Power OFF iX1500 iX500 iX100 SV600 S1300i page 98 l Checking the Remaining Battery Power iX100 page 101 Turning the ScanSnap On or Off 90 ...

Страница 91: ...r ScanSnap Manager Windows 8 1 Click on the lower left side of the Start screen and select ScanSnap Manager under ScanSnap Manager on the All apps screen Windows 7 Select Start menu All Programs ScanSnap Manager ScanSnap Manager l If ScanSnap Manager does not automatically start when you log on to your computer change the setting in the following procedure 1 Right click the ScanSnap Manager icon i...

Страница 92: ...blue The button returns to being lit normally when document scanning is enabled iX100 S1100i Open the feed guide of the ScanSnap Example iX100 a The Scan Stop button flashes in blue The button returns to being lit normally when document scanning is enabled Press the Scan or Stop button on the ScanSnap Turning the ScanSnap On or Off 92 ...

Страница 93: ...ger icon in the notification area to change to depending on computer performance operating environment or loading for example when many software programs are running at the same time l When the ScanSnap is turned on a notification informs you of the ScanSnap s communication status To disable notifications of the ScanSnap s communication status change the setting in the following procedure 1 Right ...

Страница 94: ...iX500 S1300i Close the ADF paper chute cover of the ScanSnap Example iX500 a The Scan button turns off iX100 S1100i Close the feed guide of the ScanSnap Example iX100 a The Scan Stop button turns off SV600 Press the Stop button on the ScanSnap for three seconds or longer Turning the ScanSnap On or Off 94 ...

Страница 95: ...For iX500 iX100 if the Wi Fi switch is off the power of the ScanSnap and the computer is used to operate both devices If you keep the ScanSnap connected to the computer you do not have to worry about turning the power ON OFF l For S1300i S1100i the power of the ScanSnap is linked with the power of the computer to which the ScanSnap is connected If you keep the ScanSnap connected to the computer yo...

Страница 96: ...he ScanSnap is turned off when the ADF paper chute cover is closed The procedure to change the setting for the startup mode of the ScanSnap is as follows 1 Click the ScanSnap Manager icon in the notification area located at the far right of the task bar and select Exit from the Right Click Menu page 86 a ScanSnap Manager exits 2 Press on the touch panel of the ScanSnap to display the Settings scre...

Страница 97: ...en the ScanSnap is on and has not been used for the following period of time it enters sleep power saving mode iX1500 SV600 15 minutes iX500 14 minutes iX100 S1300i S1100i 1 minute Turning the ScanSnap On or Off 97 ...

Страница 98: ... l Close the ADF paper chute cover and open it again HINT To continue using the ScanSnap reset the time until auto power off by performing one of the following l Load a document in the ScanSnap l Press the touch panel of the ScanSnap l Close the ADF paper chute cover and open it again iX500 S1300i To turn the ScanSnap back on perform one of the following operations l Press the Scan button on the S...

Страница 99: ...t the far right of the task bar and select Exit from the Right Click Menu page 86 a ScanSnap Manager exits 2 Press on the touch panel of the ScanSnap to display the Settings screen 3 Press to display the Scanner settings screen 4 Press Automatic power off to display the Automatic power off screen 5 Press the setting field for ScanSnap will automatically power off to display a list 6 Change the set...

Страница 100: ...2 In the Power list change the settings for Power setting based on how it is connected Turning the ScanSnap On or Off 100 ...

Страница 101: ...Click Menu page 86 HINT l The remaining battery power can be checked also in the ScanSnap Manager Scanner and driver information window To open the ScanSnap Manager Scanner and driver information window select ScanSnap information in the Right Click Menu page 86 l A notification appears in the following cases The remaining battery power is 10 or less No battery power remains and the ScanSnap is tu...

Страница 102: ...anel iX1500 l Screens on the Touch Panel iX1500 page 103 l Entering Characters on the Touch Panel iX1500 page 107 l Checking the Notification Displayed on the Touch Panel iX1500 page 108 Screens and Operations on the Touch Panel iX1500 102 ...

Страница 103: ... Displays the connection statuses of the ScanSnap Displays the signal status between a wireless access point and the ScanSnap in four levels When the ScanSnap is searching for a wireless access point or is not connected to a wireless access point appears Appears when the ScanSnap and the computer are connected via a USB cable Appears when the ScanSnap and the computer or mobile device are connecte...

Страница 104: ... that occupies the ScanSnap is a computer or a mobile device that is connected via wireless LAN Disconnects the connection between the ScanSnap and the computer or mobile device Scan button Scanning starts When is displayed on the Scan button scanning does not start Follow the message that is displayed when you press to solve the problem Appears if ScanSnap Manager is not running Pressing displays...

Страница 105: ...the following cases appears on l When dirt on the glass is detected l When the scanned page count exceeded the replacement cycle l When the latest firmware is available Displays the Scanner settings screen The following operations can be performed in the Scanner settings window l Checking the information on the ScanSnap wireless LAN or network l Specifying the ScanSnap name Automatic power off or ...

Страница 106: ... for the ScanSnap When there is a device with the same IP address as that of the ScanSnap on the network is displayed on The Connecting Devices screen is displayed Shows the folder which necessary software for connecting a new computer or a new mobile device is downloaded to Displays the Help screen Shows the reference page on ScanSnap Help Screens and Operations on the Touch Panel iX1500 106 ...

Страница 107: ...isplayed when you press in the input field 1 2 3 4 6 5 7 No Description 1 To switch between upper case and lower case for characters to be input 2 To switch the letter types for characters to be input A Alphabets 1 Numbers 3 To switch the keyboard to enter symbols 4 To enter a space 5 To move the cursor 6 To finish entering 7 To delete a letter on the left of the cursor Screens and Operations on t...

Страница 108: ...is displayed on Dust detection When the consumables need to be replaced is displayed on Check consumable status When the latest firmware is available is displayed on Update firmware 5 Check the content of the notification and then clean the glass replace the consumables or update the firmware For details about how to clean the ScanSnap replace the consumables or update the firmware refer to the fo...

Страница 109: ...ap Therefore you do not need to attach and remove the Receipt Guide every time you use it HINT Attaching the Receipt Guide on the ScanSnap limits the number of sheets that can be loaded in the ADF paper chute cover Remove the Receipt Guide from the ScanSnap when scanning a large number of documents 1 2 3 Loading section 1 2 3 Document type Business cards and receipts Receipts Office paper Paper we...

Страница 110: ... Chute Cover 2 Slide the side guides all the way out 3 Fit the protrusions on the Receipt Guide in the slots on the ScanSnap 4 Slide the Receipt Guide down along the guide Attaching the Receipt Guide iX1500 110 ...

Страница 111: ...ress the protrusions on the right and left firmly to fit them in the slots until it clicks You can remove the Receipt Guide by holding it with one hand and pulling it Attaching the Receipt Guide iX1500 111 ...

Страница 112: ...reless access point l Direct Connect mode When a wireless LAN environment has not been configured or the ScanSnap cannot establish a connection to a wireless access point the ScanSnap and the computer or mobile device are connected directly via wireless LAN The wireless mode can be switched from the touch panel of the ScanSnap l Preparations for Connecting the ScanSnap via Wireless LAN iX1500 page...

Страница 113: ...the manual for the wireless access point ATTENTION Do not place the following within 100 mm 3 9 in of the ScanSnap or near your wireless access point Obstacles that block radio waves such as walls and metal plates Devices that may cause signal interference such as microwaves and cordless phones and wireless devices l ScanSnap Connect Application To connect the ScanSnap and a mobile device you need...

Страница 114: ...to a computer or a mobile device directly For details refer to the following l Connecting the ScanSnap to a Computer Directly in Direct Connect Mode iX1500 page 123 l Connecting the ScanSnap to a Mobile Device in Direct Connect Mode iX1500 page 125 l Connecting the ScanSnap to a Wireless Access Point by Using the ScanSnap Wireless Setup Tool iX1500 page 115 l Connecting the ScanSnap to a Wireless ...

Страница 115: ... menu ScanSnap Manager ScanSnap Wireless Setup Tool l Windows 8 1 Click on the lower left side of the Start screen and select ScanSnap Wireless Setup Tool under ScanSnap Manager on the All apps screen l Windows 7 Select Start menu All Programs ScanSnap Manager ScanSnap Wireless Setup Tool a The ScanSnap Wireless Setup Tool will start running 2 Click the Wireless Network Setup Wizard button in the ...

Страница 116: ... Wi Fi connect mode to display the Wi Fi connect mode screen 5 Select Access point connection 6 Press to return to the Wi Fi settings screen 7 Press Access point connection to display the Access point connection screen 8 Press Access point connect settings to display the Connection information configuration method screen 9 Connect the ScanSnap to a wireless access point When connecting the scanner...

Страница 117: ...and press OK 6 Press the Complete button in the Check Connection Results screen 7 Press to display the home screen When connecting the scanner by entering information of a wireless access point 1 Select Configure manually 2 Press the Next button to display the Enter connection information screen 3 Enter the information of the wireless access point to be used and press the Next button The items whi...

Страница 118: ...t 3 Open the window for setting the WPS for the wireless access point in a computer or mobile device and enter the PIN for the ScanSnap The wireless access point is ready to be connected from the ScanSnap HINT For details about the WPS function refer to the manual of your wireless access point 4 Go back to the touch panel of the ScanSnap and press the Next button in the WPS PIN screen within two m...

Страница 119: ...0 page 120 l Connecting the ScanSnap to a Mobile Device in Access Point Connect Mode iX1500 page 122 l Connecting the ScanSnap to a Computer Directly in Direct Connect Mode iX1500 page 123 l Connecting the ScanSnap to a Mobile Device in Direct Connect Mode iX1500 page 125 Connecting the ScanSnap to a computer or mobile device via Wireless LAN iX1500 119 ...

Страница 120: ...ap Manager icon changes to If the icon does not change go to step 2 HINT l If the Connect automatically to previous ScanSnap by Wi Fi checkbox is selected and the previously connected ScanSnap is available for the connection the computer is connected to the ScanSnap automatically l The computer can be connected to only one ScanSnap l Only one computer can be connected to the ScanSnap via wireless ...

Страница 121: ...NT When the ScanSnap and a computer are connected via wireless LAN a notification informs you of the communication status Connecting the ScanSnap to a computer or mobile device via Wireless LAN iX1500 121 ...

Страница 122: ... your mobile device a The mobile device will automatically be connected to an available ScanSnap on the same network HINT l If more than one available ScanSnap is detected or if ScanSnap Connect Application is set not to connect a mobile device to a ScanSnap automatically then tap the ScanSnap that you want by name in order to connect to the mobile device under ScanSnap on the Connect to screen Fo...

Страница 123: ...gs screen 4 Press Wi Fi connect mode to display the Wi Fi connect mode screen 5 Select Direct connection 6 Press to return to the Wi Fi settings screen 3 Connect the ScanSnap and a computer directly by using a direct connection 1 Press Direct connection to display the Direct connection screen 2 Press Direct Connection Guide to display the Direct Connection Guide screen Take note of the network nam...

Страница 124: ... at the far right of the taskbar and select Connect by Wi Fi from the Right Click Menu page 86 a The ScanSnap Manager Connect by Wi Fi window appears 5 From the list of the ScanSnap units to be connected select the ScanSnap that you want to connect and click the Connect button ATTENTION If the intended ScanSnap for connection does not appear in the list of the ScanSnap units to be connected refer ...

Страница 125: ...ode screen 5 Select Direct connection 6 Press to return to the Wi Fi settings screen 2 Connect the ScanSnap and a mobile device directly by using a direct connection 1 Press Direct connection to display the Direct connection screen 2 Press Direct Connection Guide to display the Direct Connection Guide screen Take note of the network name SSID and security key that are displayed in the screen in ca...

Страница 126: ...ce and connect the ScanSnap and the mobile device directly For details about how to connect the ScanSnap to a mobile device refer to the Basic Operation Guide Mobile Connection Connecting the ScanSnap to a computer or mobile device via Wireless LAN iX1500 126 ...

Страница 127: ... the ScanSnap Wireless Setup Tool is detected even if the wireless access point is not connectable the mode is not switched from the Access Point Connect mode to the Direct Connect mode To switch the mode to the Direct Connect mode turn off the ScanSnap and then turn it on again in an environment in which no wireless access point is detected l Even if the wireless access point that was set in the ...

Страница 128: ...not place the following within 100 mm 3 9 in of the ScanSnap or near your wireless access point l Obstacles that block radio waves such as walls and metal plates l Devices that may cause signal interference such as microwaves and cordless phones and wireless devices If the wireless access point has two types of SSID 2 4 GHz and 5 GHz the 2 4 GHz SSID needs to be used l ScanSnap Connect Application...

Страница 129: ...canSnap Wireless Setup Tool l Windows 10 Select Start menu ScanSnap Manager ScanSnap Wireless Setup Tool l Windows 8 1 Click on the lower left side of the Start screen and select ScanSnap Wireless Setup Tool under ScanSnap Manager on the All apps screen l Windows 7 Select Start menu All Programs ScanSnap Manager ScanSnap Wireless Setup Tool a The ScanSnap Wireless Setup Tool will start running 2 C...

Страница 130: ... or Mobile Device via Wireless LAN iX500 l Connecting the ScanSnap and a Computer iX500 page 131 l Connecting the ScanSnap and a Mobile Device iX500 page 133 Connecting the ScanSnap to a Computer or Mobile Device via Wireless LAN iX500 130 ...

Страница 131: ...ted to only one ScanSnap l Only one computer can be connected to the ScanSnap l When you automatically connect a computer and the ScanSnap that had been connected via wireless LAN before if the password for the ScanSnap to be connected is changed a notification informs you of the status 2 Right click the ScanSnap Manager icon in the notification area located at the far right of the taskbar and sel...

Страница 132: ...ss LAN and the ScanSnap Manager icon changes to HINT When the ScanSnap and a computer are connected via wireless LAN a notification informs you of the communication status Connecting the ScanSnap to a Computer or Mobile Device via Wireless LAN iX500 132 ...

Страница 133: ...ame network HINT l If more than one available ScanSnap is detected or if ScanSnap Connect Application is set not to connect a mobile device to a ScanSnap automatically then tap the ScanSnap that you want by name in order to connect to the mobile device under ScanSnap on the Connect to screen For details refer to the Basic Operation Guide Mobile Connection for your mobile device l A notification ap...

Страница 134: ...00 page 135 l Connecting the ScanSnap to a Mobile Device in Access Point Connect Mode iX100 page 137 l Connecting the ScanSnap to a Computer Directly in Direct Connect Mode iX100 page 138 l Connecting the ScanSnap to a Mobile Device in Direct Connect Mode iX100 page 140 Connecting the ScanSnap to a computer or mobile device via Wireless LAN iX100 134 ...

Страница 135: ... the computer is connected to the ScanSnap automatically l The computer can be connected to only one ScanSnap l Only one computer can be connected to the ScanSnap via wireless LAN l When you automatically connect a computer and the ScanSnap that had been connected via wireless LAN before if the password for the ScanSnap to be connected is changed a notification informs you of the status 2 Right cl...

Страница 136: ...anSnap Manager Help a The ScanSnap is connected to a computer via wireless LAN and the ScanSnap Manager icon changes to HINT When the ScanSnap and a computer are connected via wireless LAN a notification informs you of the communication status Connecting the ScanSnap to a computer or mobile device via Wireless LAN iX100 136 ...

Страница 137: ...nSnap on the same network HINT l If more than one available ScanSnap is detected or if ScanSnap Connect Application is set not to connect a mobile device to a ScanSnap automatically then tap the ScanSnap that you want by name in order to connect to the mobile device under ScanSnap on the Connect to screen For details refer to the Basic Operation Guide Mobile Connection for your mobile device l A n...

Страница 138: ...TENTION If the ScanSnap Manager icon is exit ScanSnap Connect Application on the mobile device a The ScanSnap is automatically connected to the computer via wireless LAN and the ScanSnap Manager icon changes to If the icon does not change go to step 3 HINT l If the Connect automatically to previous ScanSnap by Wi Fi checkbox is selected and the previously connected ScanSnap is available for the co...

Страница 139: ...ScanSnap Wireless Setup Tool For details refer to the ScanSnap Wireless Setup Tool Help l If the intended ScanSnap for connection does not appear in the list of the ScanSnap units to be connected refer to the ScanSnap Manager Help a The ScanSnap is connected to the computer via a wireless access point and the ScanSnap Manager icon changes to HINT When the ScanSnap and a computer are connected via ...

Страница 140: ...connect a mobile device to the ScanSnap in Direct Connect mode you do not need to configure settings in the ScanSnap Wireless Setup Tool For details refer to the Basic Operation Guide Mobile Connection Connecting the ScanSnap to a computer or mobile device via Wireless LAN iX100 140 ...

Страница 141: ...ool is running while the ScanSnap is being connected to the computer with a USB cable exit the ScanSnap Wireless Setup Tool l If scanning is currently being performed from ScanSnap Manager or a mobile device end the scanning operation HINT Button names and operating procedures may differ depending on the wireless access point For details refer to the manual for your wireless access point 1 Turn on...

Страница 142: ...int iX500 WPS Button iX100 WPS Button a The ScanSnap is connected to the wireless access point and the Wi Fi indicator lights up in blue If connection cannot be established the Wi Fi indicator blinks or lights up in orange ATTENTION If you cannot connect the ScanSnap to a wireless access point refer to Troubleshooting in the ScanSnap Manager Help HINT For details about the Wi Fi indicator status r...

Страница 143: ...l iX100 Parts and Functions of iX100 page 72 Reconnecting to a Wireless Access Point Using the ScanSnap WPS Button iX500 iX100 143 ...

Страница 144: ...connected to or check network information how to change a wireless access point which you want to connect the scanner to and how to switch the wireless mode l Registering a Certificate Checking the Wireless LAN Settings iX1500 page 145 l Changing the Wireless LAN Connection Method iX1500 page 151 l Access Point Connect Settings iX1500 page 161 Wireless Settings for the ScanSnap iX1500 144 ...

Страница 145: ...ate iX1500 page 146 l Checking the Wireless LAN Settings iX1500 page 147 l Checking the IP address of the ScanSnap iX1500 page 148 l Checking the DNS Server of the ScanSnap iX1500 page 149 l Checking the MAC address of the ScanSnap iX1500 page 150 Registering a Certificate Checking the Wireless LAN Settings iX1500 145 ...

Страница 146: ...e the ScanSnap Wireless Setup Tool Follow the procedure below to start the ScanSnap Wireless Setup Tool l Windows 10 Select Start menu ScanSnap Manager ScanSnap Wireless Setup Tool l Windows 8 1 Click the down arrow on the lower left side of the Start screen and select ScanSnap Wireless Setup Tool under ScanSnap Manager on the All apps screen l Windows 7 Select Start menu All Programs ScanSnap Man...

Страница 147: ...ted at the far right of the task bar and select Exit from the Right Click Menu page 86 a ScanSnap Manager exits 2 Press on the touch panel of the ScanSnap to display the Settings screen 3 Press to display the Wi Fi settings screen 4 Press Wi Fi information a Current wireless LAN information is displayed Registering a Certificate Checking the Wireless LAN Settings iX1500 147 ...

Страница 148: ... 3 Press to display the Wi Fi settings screen 4 Check that the name of a network which is currently connected is displayed in Access point connection If Access point connection is disabled or if a network name is not displayed refer to Connecting the ScanSnap to a Computer in Access Point Connect Mode iX1500 page 120 and connect the ScanSnap to a wireless access point 5 Press Wi Fi information to ...

Страница 149: ... 3 Press to display the Wi Fi settings screen 4 Check that the name of a network which is currently connected is displayed in Access point connection If Access point connection is disabled or if a network name is not displayed refer to Connecting the ScanSnap to a Computer in Access Point Connect Mode iX1500 page 120 and connect the ScanSnap to a wireless access point 5 Press Wi Fi information to ...

Страница 150: ...uch panel of the ScanSnap to display the Settings screen 3 Press to display the Wi Fi settings screen 4 Check that Wi Fi connect mode is set to Access point connection or Direct connection If Wi Fi connect mode is set to Wi Fi off press Wi Fi connect mode and set it to Access point connection or Direct connection 5 Press Wi Fi information to display the ScanSnap information screen 6 Check the MAC ...

Страница 151: ...onnection to Direct Connection iX1500 page 154 l Changing the Connection Method from Direct Connection to Access Point Connection iX1500 page 156 l Changing the Frequency for Connecting the ScanSnap iX1500 page 158 l Turning Off the Wireless LAN Connection iX1500 page 159 l Resetting the Wireless LAN Settings iX1500 page 160 Changing the Wireless LAN Connection Method iX1500 151 ...

Страница 152: ...e Settings screen 3 Press to display the Wi Fi settings screen 4 Press Access point connection to display the Access point connection screen 5 Press Access point connect settings to display the Connection information configuration method screen 6 Select Select an access point 7 Press the Next button to display the Select network screen 8 From the list of wireless access points that appears select ...

Страница 153: ... a password Press the input field and enter a value for User ID and Password respectively and then press OK l To perform the authentication with an external ID Press the input field for External ID enter the external ID and press OK 3 Press the Complete button in the Check Connection Results screen 4 Press to return to the home screen Changing the Wireless LAN Connection Method iX1500 153 ...

Страница 154: ...ct Exit from the Right Click Menu page 86 a ScanSnap Manager exits 2 Press on the touch panel of the ScanSnap to display the Settings screen 3 Press to display the Wi Fi settings screen 4 Press Wi Fi connect mode to display the Wi Fi connect mode screen 5 Select Direct connection 6 Press to return to the Wi Fi settings screen 2 Press Direct connection to display the Direct connection screen 3 Pres...

Страница 155: ...6 Go back to the touch panel of the ScanSnap and tap the Complete button in the Direct Connection Guide screen 7 Press to return to the home screen Changing the Wireless LAN Connection Method iX1500 155 ...

Страница 156: ...splay the Settings screen 3 Press to display the Wi Fi settings screen 4 Press Wi Fi connect mode to display the Wi Fi connect mode screen 5 Select Access point connection 6 Press to return to the Wi Fi settings screen 2 Connect the ScanSnap to a wireless access point 1 Press Access point connection to display the Access point connection screen 2 Press Access point connect settings to display the ...

Страница 157: ...ation with an external ID Press the input field for External ID enter the external ID and press OK 8 Press the Complete button in the Check Connection Results screen 9 Press to display the home screen 3 Click the Network icon in the notification area at the far right of the taskbar on the computer 4 In the window that appears select the wireless access point which the ScanSnap is connected to 5 Wh...

Страница 158: ...ncy for the connection 1 Click the ScanSnap Manager icon in the notification area located at the far right of the task bar and select Exit from the Right Click Menu page 86 a ScanSnap Manager exits 2 Press on the touch panel of the ScanSnap to display the Settings screen 3 Press to display the Wi Fi settings screen 4 Press Access point connection to display the Access point connection screen 5 Pre...

Страница 159: ...cated at the far right of the task bar and select Exit from the Right Click Menu page 86 a ScanSnap Manager exits 2 Press on the touch panel of the ScanSnap to display the Settings screen 3 Press to display the Wi Fi settings screen 4 Press Wi Fi connect mode to display the Wi Fi connect mode screen 5 Select Wi Fi off 6 Press to return to the home screen Changing the Wireless LAN Connection Method...

Страница 160: ...ask bar and select Exit from the Right Click Menu page 86 a ScanSnap Manager exits 2 Press on the touch panel of the ScanSnap to display the Settings screen 3 Press to display the Wi Fi settings screen 4 Press Initialize Wi Fi settings to display the Initialize Wi Fi settings screen 5 Press the Initialize button 6 Press to return to the home screen Changing the Wireless LAN Connection Method iX150...

Страница 161: ...Point with a User ID and Password iX1500 page 163 l Authenticating a Wireless Access Point with an External ID iX1500 page 164 l Setting an IP Address for the ScanSnap iX1500 page 165 l Using a DNS Server for the Internet Connection iX1500 page 167 l Using a Proxy Server for the Internet Connection iX1500 page 168 Access Point Connect Settings iX1500 161 ...

Страница 162: ...s screen 4 Press Access point connection to display the Access point connection screen 5 Press Access point connect settings to display the Connection information configuration method screen 6 Select Select an access point 7 Press the Next button to display the Select network screen 8 From the list of wireless access points that appears select a wireless access point that you want to connect to 9 ...

Страница 163: ...creen 4 Press Access point connection to display the Access point connection screen 5 Press Access point connect settings to display the Connection information configuration method screen 6 Select Select an access point 7 Press the Next button to display the Select network screen 8 From the list of wireless access points that appears select a wireless access point that you want to connect to 9 Pre...

Страница 164: ...y the Wi Fi settings screen 4 Press Access point connection to display the Access point connection screen 5 Press Access point connect settings to display the Connection information configuration method screen 6 Select Select an access point 7 Press the Next button to display the Select network screen 8 From the list of wireless access points that appears select a wireless access point that you wa...

Страница 165: ... to display the Access point connection screen 5 Press IP address to display the IP address screen 6 Press the setting field for Configuration method to display a list 7 Set an IP Address When obtaining an IP address from the DHCP server and automatically assigning it to the ScanSnap select Obtain automatically DHCP When setting an IP addresses manually select Configure IP address manually and con...

Страница 166: ... the same IP address as the ScanSnap on the network is displayed on in the Settings screen Change the IP address which has been set for the ScanSnap to avoid an IP address conflict on the network Access Point Connect Settings iX1500 166 ...

Страница 167: ...e touch panel of the ScanSnap to display the Settings screen 3 Press to display the Wi Fi settings screen 4 Press Access point connection to display the Access point connection screen 5 Press DNS Server to display the DNS Server screen 6 Turn on Use of DNS Server 7 Press the input field for Primary DNS enter the IP address of the primary DNS server and then press OK 8 Press the input field for Sec...

Страница 168: ...ay the Wi Fi settings screen 4 Press Access point connection to display the Access point connection screen 5 Press Proxy Server to display the Proxy Server screen 6 Turn on Use of Proxy Server 7 Press the input field for Host Name IP address enter the host name or the IP address and press OK 8 Press the input field for Port Number enter the port number and press OK 9 When the proxy server requires...

Страница 169: ... iX1500 page 170 l Scanning Documents with iX500 page 200 l Scanning Documents with iX100 page 229 l Scanning Documents with SV600 page 259 l Scanning Documents with S1300i page 287 l Scanning Documents with S1100i page 304 Scanning Documents 169 ...

Страница 170: ...age 180 l Scanning Documents of Different Widths or Lengths in One Batch iX1500 page 184 l Scanning Small Size Documents such as Receipts in One Go iX1500 page 189 l Scanning Documents Larger Than A4 or Letter Size iX1500 page 192 l Scanning Documents Such as Photographs and Clippings iX1500 page 196 Scanning Documents with iX1500 170 ...

Страница 171: ...he following types of documents must not be scanned Documents attached with the metals such as paper clips or staples that can damage the inside of the ScanSnap Remove the metals for scanning Documents on which the ink is still wet Wait until the ink dries completely to scan these documents Documents larger than 216 863 mm 8 5 34 in width length Documents other than paper such as fabric metal foil...

Страница 172: ...hs and clippings Conditions for documents that can be scanned using the Carrier Sheet are as follows l Do not use a damaged Carrier Sheet Otherwise it may damage or cause the ScanSnap to malfunction l Be careful not to cut your finger on the edge of the Carrier Sheet Document type Documents that cannot be loaded directly into the ScanSnap Paper weight Up to 209 g m2 55 7 lb When scanning documents...

Страница 173: ...s with an uneven surface such as envelopes and paper sheets with attached materials Wrinkled or curled documents Folded or torn documents Tracing paper Coated paper Photographs photographic paper Perforated or punched documents Documents that are not rectangular or square Carbon paper or thermal paper Documents with memo papers or sticky notes attached ATTENTION l Using the Carrier Sheet Be carefu...

Страница 174: ...irect sunlight or near a heating apparatus for a long time Also do not use the Carrier Sheet in high temperature places The Carrier Sheet may be deformed To avoid deformation store the Carrier Sheet on a flat surface without any weight on it Scanning Documents with iX1500 174 ...

Страница 175: ...of the document stack under 5 mm 0 2 in ATTENTION If you try to scan more than the maximum amount that can be loaded the following problems may occur l Files cannot be properly created due to excessive file size l Paper jams occur during scanning 2 Fan the documents 1 Hold both ends of the documents and fan them a few times 2 Rotate the documents 90 degrees and fan them in the same manner 3 Straig...

Страница 176: ...ut the extension and the stacker on the ADF paper chute cover Extension Stacker 6 Load the documents in the ADF paper chute cover Load the document face down and head first with the back facing you when loading multiple documents the last page is on the top Adjust the number of documents so that they do not go beyond the reference marks and are kept within the side guides when they are loaded Scan...

Страница 177: ... and bottom edge down To open the Scanning mode option window click the Option button in the Scanning tab of the ScanSnap Setup Window page 88 7 Adjust the side guides to the width of the documents Hold each side guide in the middle to adjust them Otherwise the documents may be fed skewed Documents 8 Press the Scan button in the home screen on the touch panel to start scanning the documents Scanni...

Страница 178: ...ow appears a The Quick Menu appears when the scanning is completed 9 In the Quick Menu click the icon of the application to link with ScanSnap Manager For details about linking the following applications with ScanSnap Manager refer to Useful Usages page 353 l Save Documents l Save Business Cards l Save Receipts l Save Photos HINT The following applications are displayed in the Quick Menu when Scan...

Страница 179: ... or rename scanned images using other applications while the Quick Menu is displayed HINT l Clicking displays the description of an application Placing the mouse cursor over the icon of another application displays the description of the application l Performing a scan while an application that can be automatically linked with is active automatically starts the linkage between ScanSnap Manager and...

Страница 180: ...re 360 mm 14 17 in or less in length refer to Scanning Documents iX1500 page 175 1 Open the ADF paper chute cover of the ScanSnap ADF Paper Chute Cover a The touch panel is activated In addition the ScanSnap Manager icon in the notification area located at the far right of the taskbar changes from to 2 Pull out the extension and the stacker on the ADF paper chute cover Extension Stacker Scanning D...

Страница 181: ... documents are ejected from the ScanSnap and pick up the documents with your hands to prevent them from falling off the unit where the ScanSnap is placed on l Do not perform the following operations during scanning Doing so will stop scanning Connect or disconnect the ScanSnap and other USB devices Close the ADF paper chute cover Switch users Allow the computer to enter sleep mode HINT When you sc...

Страница 182: ...ap Manager When you select Save Documents you can manage scanned images by folder with ScanSnap Home For details refer to Managing Paper Documents by Folder on a Computer with ScanSnap Home page 354 HINT ScanSnap Organizer is displayed in the Quick Menu when ScanSnap Organizer is installed To manage scanned images by folder with ScanSnap Organizer refer to Managing Paper Documents by Folder on a C...

Страница 183: ... or rename scanned images using other applications while the Quick Menu is displayed HINT l Clicking displays the description of an application Placing the mouse cursor over the icon of another application displays the description of the application l Performing a scan while an application that can be automatically linked with is active automatically starts the linkage between ScanSnap Manager and...

Страница 184: ... refer to Documents to Scan iX1500 page 171 1 Open the ADF paper chute cover of the ScanSnap ADF Paper Chute Cover a The touch panel is activated In addition the ScanSnap Manager icon in the notification area located at the far right of the taskbar changes from to 2 Pull out the extension and the stacker on the ADF paper chute cover Extension Stacker Scanning Documents with iX1500 184 ...

Страница 185: ...ettings from the Right Click Menu page 86 a The ScanSnap setup window appears 4 In the Paper tab select Automatic detection in Paper size 5 Select None in Multifeed Detection 6 Click the OK button to close the ScanSnap setup window 7 Load documents in the ScanSnap 1 Align the edges of the documents Scanning Documents with iX1500 185 ...

Страница 186: ...ller documents so that they can be scanned straight If the documents are skewed during scanning the following problems may occur Part of the document does not appear in the scanned image Slant lines appear in the scanned image The documents are scanned in a wrong paper size If the documents are not scanned straight it is recommended that you select the Continue scanning after last page checkbox in...

Страница 187: ...canning and file saving window appears a The Quick Menu appears when the scanning is completed 9 In the Quick Menu click the icon of the application to link with ScanSnap Manager When you select Save Documents you can manage scanned images by folder with ScanSnap Home For details refer to Managing Paper Documents by Folder on a Computer with ScanSnap Home page 354 HINT ScanSnap Organizer is displa...

Страница 188: ... or rename scanned images using other applications while the Quick Menu is displayed HINT l Clicking displays the description of an application Placing the mouse cursor over the icon of another application displays the description of the application l Performing a scan while an application that can be automatically linked with is active automatically starts the linkage between ScanSnap Manager and...

Страница 189: ...nt sized documents according to the size of each document by using three kinds of guides at the same time 1 Open the ADF paper chute cover of the ScanSnap ADF Paper Chute Cover a The touch panel is activated In addition the ScanSnap Manager icon in the notification area located at the far right of the taskbar changes from to 2 Pull out the extension and the stacker on the ADF paper chute cover Ext...

Страница 190: ...ouch panel to start scanning the documents ATTENTION Do not perform the following operations during scanning Doing so will stop scanning l Connect or disconnect the ScanSnap and other USB devices l Close the ADF paper chute cover l Switch users l Allow the computer to enter sleep mode a Scanning is displayed on the touch panel while documents are being scanned The ScanSnap Manager Image scanning a...

Страница 191: ... Menu is displayed Either select an icon from the Quick Menu and finish the process or close the Quick Menu before you perform the next scan l Do not move delete or rename scanned images using other applications while the Quick Menu is displayed HINT l Clicking displays the description of an application Placing the mouse cursor over the icon of another application displays the description of the a...

Страница 192: ...ption button in the Scanning tab of the ScanSnap Setup Window page 88 HINT Both sides of a double sided A4 Letter size document or smaller can also be scanned and merged into a single image 1 Right click the ScanSnap Manager icon in the notification area located at the far right of the taskbar and select the Scan Button Settings from the Right Click Menu page 86 a The ScanSnap setup window appears...

Страница 193: ...ingle sided is selected the ScanSnap outputs the same result as performing a simplex scan in two separate images front and back mode 5 Place the document inside the Carrier Sheet 1 Fold the document in half with the sides to be scanned facing out Fold it tightly and smooth out any creases Scanning Documents with iX1500 193 ...

Страница 194: ...hite pattern at the top and a thick vertical line in the upper right hand corner 6 Place the end with the black and white pattern as the leading edge in the direction of the arrow Secure the Carrier Sheet with the side guides to avoid skewing 7 Press the Scan button in the home screen on the touch panel to start scanning the documents a Both sides of the document are scanned and saved as one doubl...

Страница 195: ...rier Sheet Settings window an optimal size will be selected automatically from the available standard sizes A3 B4 or 11 17 in in Paper size Note that the size of the image may become smaller than the original document depending on the document Example When characters and illustrations are printed to fit in A4 size in the center of an A3 size document the scanned image is output in B4 size To outpu...

Страница 196: ...To open the Scanning mode option window click the Option button in the Scanning tab of the ScanSnap Setup Window page 88 1 Right click the ScanSnap Manager icon in the notification area located at the far right of the taskbar and select the Scan Button Settings from the Right Click Menu page 86 a The ScanSnap setup window appears 2 In the Paper tab select Automatic detection in Paper size and then...

Страница 197: ...et and place the top of the document against the top center of the Carrier Sheet 6 Place the end with the black and white pattern as the leading edge in the direction of the arrow Place the back side of the document towards you Secure the Carrier Sheet with the side guides to avoid skewing Scanning Documents with iX1500 197 ...

Страница 198: ...indow an optimal size will be selected automatically from the available standard sizes in Paper size Note that the size of the image may become smaller than the original document depending on the document scanned or part of the image may appear missing Example When the contents are printed to fit in A5 size in the center of an A4 size document the scanned image is output in A5 size To output the s...

Страница 199: ...l Multiple Carrier Sheets can be loaded in the ADF paper chute cover and scanned Scanning Documents with iX1500 199 ...

Страница 200: ...age 205 l Scanning Long Pages iX500 page 211 l Scanning Documents of Different Widths or Lengths in One Batch iX500 page 215 l Scanning Documents Larger Than A4 or Letter Size iX500 page 221 l Scanning Documents Such as Photographs and Clippings iX500 page 225 Scanning Documents with iX500 200 ...

Страница 201: ...4 86 mm Paper weight 40 to 209 g m2 10 7 to 55 7 lb Long page documents 52 to 128 g m2 13 9 to 33 9 lb A8 size 52 72 mm or less 128 to 209 g m2 33 9 to 55 7 lb Plastic cards 0 76 mm 0 03 in or less embossed cards can be used Paper size Width 50 8 to 216 mm 2 to 8 5 in Length 50 8 to 360 mm 2 to 14 17 in For long page 1 up to 863 mm 34 in 1 Scanning starts when you hold down the Scan button on the ...

Страница 202: ... colored credit card When you scan embossed cards put the embossed side down and load the card in landscape orientation If the embossed characters are not coated in gold or silver and the background color of the card and the color of the embossed characters are similar it may be difficult for the ScanSnap to recognize embossed characters In which case performing the following may result in an impr...

Страница 203: ...30 l Carbonless paper Because carbonless paper may contain chemicals that can harm the ScanSnap internal rollers it is recommended that you use the Carrier Sheet to scan such documents Make sure to clean the rollers occasionally to maintain the scanner performance when scanning carbonless paper directly without using the Carrier Sheet For details about how to perform cleaning refer to Cleaning the...

Страница 204: ...ed at once It is recommended that you scan such documents one at a time If paper jams occur frequently feed about 50 sheets of PPC paper recycled paper before scanning with the Carrier Sheet The PPC paper can either be blank or printed l Storing the Carrier Sheet Be careful of the following when you store the Carrier Sheet Do not leave your document inside the Carrier Sheet for a long time Otherwi...

Страница 205: ...f the document stack under 5 mm 0 2 in ATTENTION If you try to scan more than the maximum amount that can be loaded the following problems may occur l Files cannot be properly created due to excessive file size l Paper jams occur during scanning 2 Fan the documents 1 Hold both ends of the documents and fan them a few times 2 Rotate the documents 90 degrees and fan them in the same manner 3 Straigh...

Страница 206: ...ormally when document scanning is enabled In addition the ScanSnap Manager icon in the notification area located at the far right of the taskbar changes from to 5 Pull the stacker towards you Stacker 6 Depending on documents to scan pull out the extension on the ADF paper chute cover and open the stacker Scanning Documents with iX500 206 ...

Страница 207: ...ce marks and are kept within the side guides when they are loaded Side Guide ATTENTION l Do not accumulate more than 50 sheets with paper weight of 80 g m2 20 lb in the stacker l When the Place document face up checkbox is selected in the Scanning mode option window load the documents face up and bottom edge down To open the Scanning mode option window click the Option button in the Scanning tab o...

Страница 208: ...N Do not perform the following operations during scanning Doing so will stop scanning l Connect or disconnect the ScanSnap and other USB devices l Close the ADF paper chute cover l Switch users l Allow the computer to enter sleep mode a The Scan button on the ScanSnap flashes in blue while the documents are being scanned The ScanSnap Manager Image scanning and file saving window appears Scanning D...

Страница 209: ...plications with ScanSnap Manager refer to Useful Usages page 353 l Save Documents l Save Business Cards l Save Receipts l Save Photos HINT The following applications are displayed in the Quick Menu when ScanSnap Organizer and CardMinder are installed l When ScanSnap Organizer is installed ScanSnap Organizer l When CardMinder is installed CardMinder Scanning Documents with iX500 209 ...

Страница 210: ...e or rename scanned images using other applications while the Quick Menu is displayed HINT l Clicking displays the description of an application Placing the mouse cursor over the icon of another application displays the description of the application l Performing a scan while an application that can be automatically linked with is active automatically starts the linkage between ScanSnap Manager an...

Страница 211: ...ng Documents iX500 page 205 1 Open the ADF paper chute cover of the ScanSnap ADF Paper Chute Cover a The Scan button flashes in blue The button returns to being lit normally when document scanning is enabled In addition the ScanSnap Manager icon in the notification area located at the far right of the taskbar changes from to 2 Pull the stacker towards you Stacker 3 Pull out the extension on the AD...

Страница 212: ...ver 5 Press the Scan button on the ScanSnap for three seconds or longer until the button flashes in blue to start a scan ATTENTION l Secure enough space where the scanned documents are ejected from the ScanSnap and pick up the documents with your hands to prevent them from falling off the unit where the ScanSnap is placed on Scanning Documents with iX500 212 ...

Страница 213: ...nue scanning the subsequent documents are also scanned as long pages a The Scan button on the ScanSnap flashes in blue while the documents are being scanned The ScanSnap Manager Image scanning and file saving window appears a The Quick Menu appears when the scanning is completed 6 In the Quick Menu click the icon of the application to link with ScanSnap Manager When you select Save Documents you c...

Страница 214: ... the Quick Menu is displayed Either select an icon from the Quick Menu and finish the process or close the Quick Menu before you perform the next scan l Do not move delete or rename scanned images using other applications while the Quick Menu is displayed HINT l Clicking displays the description of an application Placing the mouse cursor over the icon of another application displays the descriptio...

Страница 215: ...te cover of the ScanSnap ADF Paper Chute Cover a The Scan button flashes in blue The button returns to being lit normally when document scanning is enabled In addition the ScanSnap Manager icon in the notification area located at the far right of the taskbar changes from to 2 Pull the stacker towards you Stacker 3 Depending on documents to scan pull out the extension on the ADF paper chute cover a...

Страница 216: ...rea located at the far right of the taskbar and select the Scan Button Settings from the Right Click Menu page 86 a The ScanSnap setup window appears 5 In the Paper tab select Automatic detection in Paper size 6 Select None in Multifeed Detection Scanning Documents with iX500 216 ...

Страница 217: ...canSnap 1 Align the edges of the documents 2 Load the documents at the center of the ADF paper chute cover ATTENTION l Load all documents over one another above the pick roller center Documents that are not loaded above the pick roller cannot be fed Scanning Documents with iX500 217 ...

Страница 218: ...nded that you select the Continue scanning after last page checkbox in the Scanning tab of the ScanSnap Setup Window page 88 separate the documents by their widths and scan them in different batches 9 Press the Scan button on the ScanSnap to start a scan ATTENTION Do not perform the following operations during scanning Doing so will stop scanning l Connect or disconnect the ScanSnap and other USB ...

Страница 219: ... by folder with ScanSnap Home For details refer to Managing Paper Documents by Folder on a Computer with ScanSnap Home page 354 HINT ScanSnap Organizer is displayed in the Quick Menu when ScanSnap Organizer is installed To manage scanned images by folder with ScanSnap Organizer refer to Managing Paper Documents by Folder on a Computer with ScanSnap Organizer page 357 Scanning Documents with iX500 ...

Страница 220: ...e or rename scanned images using other applications while the Quick Menu is displayed HINT l Clicking displays the description of an application Placing the mouse cursor over the icon of another application displays the description of the application l Performing a scan while an application that can be automatically linked with is active automatically starts the linkage between ScanSnap Manager an...

Страница 221: ...tion button in the Scanning tab of the ScanSnap Setup Window page 88 HINT Both sides of a double sided A4 Letter size document or smaller can also be scanned and merged into a single image 1 Right click the ScanSnap Manager icon in the notification area located at the far right of the taskbar and select the Scan Button Settings from the Right Click Menu page 86 a The ScanSnap setup window appears ...

Страница 222: ...ingle sided is selected the ScanSnap outputs the same result as performing a simplex scan in two separate images front and back mode 5 Place the document inside the Carrier Sheet 1 Fold the document in half with the sides to be scanned facing out Fold it tightly and smooth out any creases Scanning Documents with iX500 222 ...

Страница 223: ...et has a black and white pattern at the top and a thick vertical line in the upper right hand corner 6 Place the end with the black and white pattern as the leading edge in the direction of the arrow Secure the Carrier Sheet with the side guides to avoid skewing 7 Press the Scan button on the ScanSnap to start a scan a Both sides of the document are scanned and saved as one double page spread imag...

Страница 224: ...rier Sheet Settings window an optimal size will be selected automatically from the available standard sizes A3 B4 or 11 17 in in Paper size Note that the size of the image may become smaller than the original document depending on the document Example When characters and illustrations are printed to fit in A4 size in the center of an A3 size document the scanned image is output in B4 size To outpu...

Страница 225: ...o open the Scanning mode option window click the Option button in the Scanning tab of the ScanSnap Setup Window page 88 1 Right click the ScanSnap Manager icon in the notification area located at the far right of the taskbar and select the Scan Button Settings from the Right Click Menu page 86 a The ScanSnap setup window appears 2 In the Paper tab select Automatic detection in Paper size and then ...

Страница 226: ...et and place the top of the document against the top center of the Carrier Sheet 6 Place the end with the black and white pattern as the leading edge in the direction of the arrow Place the back side of the document towards you Secure the Carrier Sheet with the side guides to avoid skewing Scanning Documents with iX500 226 ...

Страница 227: ...ze will be selected automatically from the available standard sizes in Paper size Note that the size of the image may become smaller than the original document depending on the document scanned or part of the image may appear missing Example When the contents are printed to fit in A5 size in the center of an A4 size document the scanned image is output in A5 size To output the scanned image in its...

Страница 228: ...l Multiple Carrier Sheets can be loaded in the ADF paper chute cover and scanned Scanning Documents with iX500 228 ...

Страница 229: ...he Next Document While the Current Document Is Being Scanned iX100 page 239 l Scanning Documents Larger Than A4 or Letter Size by Directly Inserting Them in the ScanSnap iX100 page 246 l Scanning Documents Larger than A4 or Letter Size with the Carrier Sheet iX100 page 250 l Scanning Documents Such as Photographs and Clippings iX100 page 255 Scanning Documents with iX100 229 ...

Страница 230: ...6 mm 0 03 in or less embossed cards can be used 52 to 80 g m2 14 to 20 lb Paper size Width 25 4 to 216 mm 1 to 8 5 in For a dual scan a total width of 200 mm 7 87 in or less for two documents Length 25 4 to 863 mm 1 to 34 in When merging scanned images automatically 3 l A3 297 420 mm l B4 257 364 mm l Double Letter 11 17 in 279 4 432 mm 1 For details about the eject methods refer to Parts and Func...

Страница 231: ...d or silver and the background color of the card and the color of the embossed characters are similar it may be difficult for the ScanSnap to recognize embossed characters In which case performing the following may result in an improvement 1 Click the Option button in the Scanning tab of the ScanSnap Setup Window page 88 a The Scanning mode option window appears 2 Select the Increase text contrast...

Страница 232: ...36 l Carbonless paper Because carbonless paper may contain chemicals that can harm the ScanSnap internal rollers it is recommended that you use the Carrier Sheet to scan such documents Make sure to clean the rollers occasionally to maintain the scanner performance when scanning carbonless paper directly without using the Carrier Sheet For details about how to perform cleaning refer to Cleaning the...

Страница 233: ... such as photographs and postcards are placed inside the Carrier Sheet to be scanned at once It is recommended that you scan such documents one at a time l Storing the Carrier Sheet Be careful of the following when you store the Carrier Sheet Do not leave your document inside the Carrier Sheet for a long time Otherwise the ink on the document may be transferred onto the Carrier Sheet Do not leave ...

Страница 234: ...when there is not enough space where the document exits the ScanSnap open the output guide For details about documents that can be scanned with the output guide open refer to Documents to Scan iX100 page 230 Output Guide l How the document is ejected differs as below depending on whether the output guide is open or closed When the output guide is closed When the output guide is open a The Scan Sto...

Страница 235: ...ent by aligning it with the left edge of the feeding section You can configure the scan settings in the ScanSnap Setup Window page 88 l When you perform scanning with the output guide closed leave enough space at the back of the ScanSnap to allow the document to be completely ejected In addition when you scan long page documents hold the scanned documents with your hands to prevent them from falli...

Страница 236: ...NTION Do not perform the following operations during scanning Doing so will stop scanning l Connect or disconnect the ScanSnap and other USB devices l Close the feed guide l Switch users l Allow the computer to enter sleep mode a The Scan Stop button on the ScanSnap flashes in blue while the documents are being scanned The ScanSnap Manager Image scanning and file saving window appears a When scann...

Страница 237: ...on to link with ScanSnap Manager For details about linking the following applications with ScanSnap Manager refer to Useful Usages page 353 l Save Documents l Save Business Cards l Save Receipts l Save Photos HINT The following applications are displayed in the Quick Menu when ScanSnap Organizer and CardMinder are installed l When ScanSnap Organizer is installed ScanSnap Organizer l When CardMinde...

Страница 238: ...e or rename scanned images using other applications while the Quick Menu is displayed HINT l Clicking displays the description of an application Placing the mouse cursor over the icon of another application displays the description of the application l Performing a scan while an application that can be automatically linked with is active automatically starts the linkage between ScanSnap Manager an...

Страница 239: ...utomatic detection for Paper size in the Paper tab of the ScanSnap Setup Window page 88 the dual scan function is disabled l Use a dual scan to scan a document within the following ranges If one of the following ranges is exceeded a length error occurs and part of the document may not appear in the scanned image Maximum scanning length 863 mm 34 in 355 6 mm 14 in when Excellent is specified for Im...

Страница 240: ...ers as below depending on whether the output guide is open or closed When the output guide is closed When the output guide is open a The Scan Stop button flashes in blue The button returns to being lit normally when document scanning is enabled In addition the ScanSnap Manager icon in the notification area located at the far right of the taskbar changes from to 2 Insert the document straight into ...

Страница 241: ... hands to prevent them from falling off the unit where the ScanSnap is placed on Make sure that the area where the document exits the scanner is clear of any obstacles Otherwise paper jam may occur l If you scan the following documents with the output guide open a paper jam may occur and damage the documents Scan the following documents with the output guide closed Thick paper 80 g m2 20 lb or hea...

Страница 242: ...e saving window appears HINT When the ScanSnap Manager Image scanning and file saving window is maximized multiple scanned images are displayed in the preview area When you use a dual scan it is recommended that you maximize the ScanSnap Manager Image scanning and file saving window to check that scanned images are created correctly while scanning documents Scanning Documents with iX100 242 ...

Страница 243: ... To continue scanning insert the next document to be scanned When the document is inserted scanning starts automatically 4 Press the Scan Stop button on the ScanSnap to finish scanning a The Quick Menu appears 5 In the Quick Menu click the icon of the application to link with ScanSnap Manager Scanning Documents with iX100 243 ...

Страница 244: ...ration Guide ATTENTION l You cannot start scanning when the Quick Menu is displayed Either select an icon from the Quick Menu and finish the process or close the Quick Menu before you perform the next scan l Do not move delete or rename scanned images using other applications while the Quick Menu is displayed HINT l Clicking displays the description of an application Placing the mouse cursor over ...

Страница 245: ...For details refer to the Advanced Operation Guide Scanning Documents with iX100 245 ...

Страница 246: ...ed if the scanned images are not merged automatically you can use the ScanSnap Organizer Merge Pages function to merge the scanned images For details refer to the ScanSnap Organizer Help l For a document that will have scanned images which are not merged automatically you can use the optional Carrier Sheet to scan the document and merge the scanned images automatically For details refer to Scannin...

Страница 247: ...ocument in half so that the sides to be scanned are facing out ATTENTION Fold the long side of the document in half If the left and right areas of the folded document are different in size from each other the scanned images may not be merged automatically 3 Insert the document straight into the feeding section of the ScanSnap with the scanning side facing up a The document is pulled in until it is...

Страница 248: ...s displayed in the preview area 5 Turn over the document and insert it as described in step 3 ATTENTION Make sure to scan the front and back sides of the document folded in half consecutively a Scanning starts automatically HINT Repeat steps 2 to 5 to continue scanning more A3 B4 or Double Letter size documents You can also continue scanning documents smaller than A4 or Letter size For details abo...

Страница 249: ...de ATTENTION l You cannot start scanning when the Quick Menu is displayed Either select an icon from the Quick Menu and finish the process or close the Quick Menu before you perform the next scan l Do not move delete or rename scanned images using other applications while the Quick Menu is displayed HINT l Clicking displays the description of an application Placing the mouse cursor over the icon o...

Страница 250: ...on window click the Option button in the Scanning tab of the ScanSnap Setup Window page 88 HINT Both sides of a double sided A4 Letter size document or smaller can also be scanned and merged into a single image 1 Right click the ScanSnap Manager icon in the notification area located at the far right of the taskbar and select the Scan Button Settings from the Right Click Menu page 86 a The ScanSnap...

Страница 251: ...ocument in half with the sides to be scanned facing out Fold it tightly and smooth out any creases 2 Open the Carrier Sheet to bind the document Align the fold line with the right edge of the Carrier Sheet so that the document fits in the upper right hand corner of the Carrier Sheet Scanning Documents with iX100 251 ...

Страница 252: ... it is set inside the ScanSnap HINT If you perform a scan using the Carrier Sheet with the output guide open a paper jam may occur and damage the documents Make sure to close the output guide when you perform a scan using the Carrier Sheet Output Guide 7 Press the Scan Stop button on the ScanSnap to start scanning a Scanning starts and the ScanSnap Manager Image scanning and file saving window app...

Страница 253: ...cument inside the Carrier Sheet are displayed as a double page spread image in the preview area HINT Repeat steps 5 to 8 to scan more documents larger than A4 Letter size You can continue to scan documents that can be inserted directly in the ScanSnap For details about how to perform a scan refer to Scanning Documents iX100 page 234 9 Press the Scan Stop button on the ScanSnap to finish scanning a...

Страница 254: ...ion is specified for Paper size in the Carrier Sheet Settings window an optimal size will be selected automatically from the available standard sizes A3 B4 or 11 17 in in Paper size Note that the size of the image may become smaller than the original document depending on the document Example When characters and illustrations are printed to fit in A4 size in the center of an A3 size document the s...

Страница 255: ...led To open the Scanning mode option window click the Option button in the Scanning tab of the ScanSnap Setup Window page 88 1 Right click the ScanSnap Manager icon in the notification area located at the far right of the taskbar and select the Scan Button Settings from the Right Click Menu page 86 a The ScanSnap setup window appears 2 In the Paper tab select Automatic detection in Paper size and ...

Страница 256: ...en the Carrier Sheet and place the top of the document against the top center of the Carrier Sheet 6 Insert the part with the black and white pattern straight into the feeding section of the ScanSnap with the scanning side of the document inside the Carrier Sheet facing up Scanning Documents with iX100 256 ...

Страница 257: ... Output Guide 7 Press the Scan Stop button on the ScanSnap to start scanning a When scanning is complete the scanned image of the document that is inside the Carrier Sheet is displayed in the preview area HINT Repeat steps 5 to 7 to scan more documents such as photographs and clippings You can continue to scan documents that can be inserted directly in the ScanSnap For details about how to perform...

Страница 258: ...t depending on the document scanned or part of the image may appear missing Example When the contents are printed to fit in A5 size in the center of an A4 size document the scanned image is output in A5 size To output the scanned image in its original size specify the document size in Paper size HINT In the following cases place a blank white sheet of paper underneath the document when scanning l ...

Страница 259: ... SV600 page 264 l Scanning Books SV600 page 269 l Scanning Multiple Documents at Once SV600 page 274 l Scanning Books Using Page Turning Detection SV600 page 279 l Scanning Documents Using Timed Mode SV600 page 283 l Scanning Documents with Two ScanSnaps Connected to a Computer SV600 page 286 Scanning Documents with SV600 259 ...

Страница 260: ...TENTION l When you scan a glossy document the scanned image may be affected as follows Part of the scanned image appears brighter or darker than the original Glare from the lamp is caught in the scanned image l If a document has wrinkles curls or folds smooth it out before scanning Otherwise the scanned image may be affected as follows The scanned image is distorted The scanned image is blurred Pa...

Страница 261: ... 261 l When Placing a Standard Size Document page 262 l When Placing a Book page 262 l When Placing Multiple Documents at Once page 262 Scan Area Place documents with the scanned side face up in the following scan area Use the following to determine the scan area l Area Reference marks of the Background Pad l Height Lines on the base of the ScanSnap 30 mm 1 18 in Line 5 mm 0 2 in 300 mm 11 81 in 4...

Страница 262: ... centering mark l Hold the book down with fingers within the appropriate areas When holding the book down use your fingers as follows Keep your fingers straight When using multiple fingers to hold down the book keep fingers apart by at least 2 cm 0 79 in SV600 20 mm 0 79 in 50 mm 1 97 in 20 mm 0 79 in Appropriate Areas for Holding the Book Down When Placing Multiple Documents at Once To scan multi...

Страница 263: ...l The number of documents placed must not exceed 10 SV600 15 mm 0 59 in or More 15 mm 0 59 in or More Scanning Documents with SV600 263 ...

Страница 264: ...n the ScanSnap Manager icon in the notification area changes from to 2 Place the Background Pad on the front side of the ScanSnap Place the Background Pad so that it is in contact with the ScanSnap 3 Place a document in the scan area of the ScanSnap and press the Scan button For details refer to Documents to Scan SV600 page 260 Scanning Documents with SV600 264 ...

Страница 265: ...age will be affected l Do not shake the table or desk when the ScanSnap is being used or move the documents while they are being scanned Doing so may distort the scanned image or blur the color HINT You can also start scanning documents by right clicking the ScanSnap Manager icon in the notification area and then selecting Scan from the Right Click Menu page 86 a The power LED on the ScanSnap flas...

Страница 266: ...Continue Scanning button in the ScanSnap Manager Image scanning and file saving window l Pressing the Scan button on the ScanSnap 4 To finish scanning click the Finish Scanning button or press the Stop button on the ScanSnap a A window is displayed for selecting how to save the scanned images In the preview area the scanned images are cropped and displayed 5 Select Crop and save flat document imag...

Страница 267: ...ick Menu appears 6 In the Quick Menu click the icon of the application to link with ScanSnap Manager When you select Save Documents you can manage scanned images by folder with ScanSnap Home For details refer to Managing Paper Documents by Folder on a Computer with ScanSnap Home page 354 HINT ScanSnap Organizer is displayed in the Quick Menu when ScanSnap Organizer is installed To manage scanned i...

Страница 268: ...e or rename scanned images using other applications while the Quick Menu is displayed HINT l Clicking displays the description of an application Placing the mouse cursor over the icon of another application displays the description of the application l Performing a scan while an application that can be automatically linked with is active automatically starts the linkage between ScanSnap Manager an...

Страница 269: ...nap Place the Background Pad so that it is in contact with the ScanSnap 3 Place a book in the scan area of the ScanSnap and press the Scan button For details refer to How to Place Documents SV600 page 261 HINT You can also enable page turning detection by holding down the Scan button on the ScanSnap for 2 seconds or longer When page turning detection is used turning a book s page automatically sta...

Страница 270: ...s being used or move the documents while they are being scanned Doing so may distort the scanned image or blur the color HINT l You can also start scanning a book by right clicking the ScanSnap Manager icon in the notification area and then selecting Scan from the Right Click Menu page 86 l When timed mode is used after the specified time the ScanSnap automatically starts scanning For details refe...

Страница 271: ...ning button in the ScanSnap Manager Image scanning and file saving window l Pressing the Scan button on the ScanSnap 4 To finish scanning the book click the Finish Scanning button or press the Stop button on the ScanSnap a A window is displayed for selecting how to save the scanned images In the preview area the scanned images of the book are cropped and displayed 5 Select Correct and save double ...

Страница 272: ...87 a The Quick Menu appears 6 In the Quick Menu click the icon of the application to link with ScanSnap Manager When you select Save Documents you can manage scanned images by folder with ScanSnap Home For details refer to Managing Paper Documents by Folder on a Computer with ScanSnap Home page 354 HINT ScanSnap Organizer is displayed in the Quick Menu when ScanSnap Organizer is installed To manag...

Страница 273: ...e or rename scanned images using other applications while the Quick Menu is displayed HINT l Clicking displays the description of an application Placing the mouse cursor over the icon of another application displays the description of the application l Performing a scan while an application that can be automatically linked with is active automatically starts the linkage between ScanSnap Manager an...

Страница 274: ...p Manager icon in the notification area located at the far right of the taskbar changes from to 2 Place the Background Pad on the front side of the ScanSnap Place the Background Pad so that it is in contact with the ScanSnap 3 Place documents in the scan area of the ScanSnap and press the Scan button For details refer to How to Place Documents SV600 page 261 Scanning Documents with SV600 274 ...

Страница 275: ...age will be affected l Do not shake the table or desk when the ScanSnap is being used or move the documents while they are being scanned Doing so may distort the scanned image or blur the color HINT You can also start scanning documents by right clicking the ScanSnap Manager icon in the notification area and then selecting Scan from the Right Click Menu page 86 a The power LED on the ScanSnap flas...

Страница 276: ...n in the ScanSnap Manager Image scanning and file saving window l Pressing the Scan button on the ScanSnap 4 To finish scanning click the Finish Scanning button or press the Stop button on the ScanSnap a A window is displayed for selecting how to save the scanned images In the preview area the scanned images are cropped and each scanned image is displayed as a separate document 5 Select Crop and s...

Страница 277: ...s SV600 page 398 a The Quick Menu appears 6 In the Quick Menu click the icon of the application to link with ScanSnap Manager When you select Save Business Cards you can manage the card data with ScanSnap Home For details refer to Saving Business Card Data to a Computer with ScanSnap Home page 360 HINT Scan to CardMinder is displayed in the Quick Menu when ScanSnap CardMinder is installed To manag...

Страница 278: ...e or rename scanned images using other applications while the Quick Menu is displayed HINT l Clicking displays the description of an application Placing the mouse cursor over the icon of another application displays the description of the application l Performing a scan while an application that can be automatically linked with is active automatically starts the linkage between ScanSnap Manager an...

Страница 279: ...hat emits infrared light such as a heater is placed near the ScanSnap Movement of shadow such as a person appears on the Background Pad l Book specifications Books that are smaller than A4 210 297 mm Letter 8 5 11 in 216 279 4 mm when opened in a double page spread Example Comic books or pocket edition books HINT When scanning a document you can also enable page turning detection by holding down t...

Страница 280: ... next scan checkbox and then Page turning detection mode 4 Click the OK button to close all the windows 5 Open the page of a book you want to scan and place the book in the scan area of the ScanSnap For details refer to How to Place Documents SV600 page 261 Scanning Documents with SV600 280 ...

Страница 281: ...ow appears a Once the scanning of the book page is complete Turn the page appears on the ScanSnap Manager Image scanning and file saving window 7 Open the next page to be scanned Turn the pages at a constant speed The recommended page turning speed is approximately one to two seconds per page Scanning Documents with SV600 281 ...

Страница 282: ... window or press the Scan button on the ScanSnap HINT l To make page turning easy to detect turn each page as follows Pinch the bottom part of the page and turn it Keep the page straight when turning it l You can change the time before the ScanSnap starts to scan a document after page turning is detected On the Scanning mode option window shown in step 3 select the Specify the waiting time to star...

Страница 283: ...he ScanSnap setup window appears 2 In the ScanSnap Setup Window page 88 select the Scanning tab and click the Option button a The Scanning mode option window appears 3 Set the time period before the ScanSnap starts scanning a document l To set the time period before the ScanSnap starts scanning a document after the Scan button is pressed Select the Specify the waiting time to start scanning after ...

Страница 284: ...anSnap to start the next scan when a document is scanned continuously 1 Select the Configure settings for starting the next scan checkbox and then select Timed interval Timed mode 2 Specify Scan interval Scanning Documents with SV600 284 ...

Страница 285: ...s after the time period specified in Waiting time passes 7 Place the next document to be scanned with the scanned side face up in the scan area For details refer to How to Place Documents SV600 page 261 a Scanning starts after the time period specified in Scan interval passes HINT To continue scanning repeat step 7 8 To finish scanning click the Finish Scanning button or press the Stop button on t...

Страница 286: ...a document to linking the ScanSnap with an application has been completed The following ScanSnap models can be connected to a computer and used together with SV600 l iX1500 l iX500 l iX100 l S1300i l S1100i l S1100 HINT When you want to create a single PDF file from multiple PDF files created by scanning documents with each of the ScanSnap models you can use the following applications to merge the...

Страница 287: ...0i l Documents to Scan S1300i page 288 l Scanning Documents S1300i page 290 l Scanning Long Pages S1300i page 295 l Scanning Documents of Different Widths or Lengths in One Batch S1300i page 299 Scanning Documents with S1300i 287 ...

Страница 288: ...d to treat with caution l Documents written in pencil When you scan documents written in pencil there may be black traces left on them Also dirt accumulating on the rollers may cause feeding errors Clean the rollers occasionally when you scan such documents For details about how to perform cleaning refer to Troubleshooting in the ScanSnap Manager Help l Carbonless paper Carbonless paper may contai...

Страница 289: ...s Paper weight 64 to 326 g m2 17 to 87 lb Paper size Width 50 8 to 100 mm 2 to 3 9 in Length 50 8 to 148 mm 2 to 5 8 in ATTENTION l All conditions below must be satisfied when scanning picture postcards Otherwise paper jam may occur Power cable connection Normal room temperature and humidity levels Load the picture postcard face down in the ScanSnap l When you scan photographs or picture postcards...

Страница 290: ...k under 1 mm 0 04 in ATTENTION If you try to scan more than the maximum amount that can be loaded the following problems may occur l Files cannot be properly created due to excessive file size l Paper jams occur during scanning 2 Fan the documents 1 Hold both ends of the documents and fan them a few times 2 Rotate the documents 90 degrees and fan them in the same manner 3 Straighten the edges of t...

Страница 291: ...a located at the far right of the taskbar changes from to 5 Pull out the extension Extension 6 Load the documents in the ADF paper chute cover Load the document face down and head first with the back facing you when loading multiple documents the last page is on the top Adjust the number of documents so that they do not go beyond the reference marks and are kept within the side guides when they ar...

Страница 292: ...ab of the ScanSnap Setup Window page 88 7 Adjust the side guides to the width of the documents Hold each side guide in the middle to adjust them Otherwise the documents may be fed skewed Documents 8 Press the Scan button on the ScanSnap to start a scan ATTENTION Do not perform the following operations during scanning Doing so will stop scanning l Connect or disconnect the ScanSnap and other USB de...

Страница 293: ... Quick Menu click the icon of the application to link with ScanSnap Manager For details about linking the following applications with ScanSnap Manager refer to Useful Usages page 353 l Save Documents l Save Business Cards l Save Receipts l Save Photos HINT The following applications are displayed in the Quick Menu when ScanSnap Organizer and CardMinder are installed l When ScanSnap Organizer is in...

Страница 294: ... or rename scanned images using other applications while the Quick Menu is displayed HINT l Clicking displays the description of an application Placing the mouse cursor over the icon of another application displays the description of the application l Performing a scan while an application that can be automatically linked with is active automatically starts the linkage between ScanSnap Manager and...

Страница 295: ...en the ADF paper chute cover of the ScanSnap ADF Paper Chute Cover a The Scan button flashes in blue The button returns to being lit normally when document scanning is enabled In addition the ScanSnap Manager icon in the notification area located at the far right of the taskbar changes from to 2 Pull out the extension Extension 3 Load only one document in the ADF paper chute cover Hold the documen...

Страница 296: ...perform the following operations during scanning Doing so will stop scanning Connect or disconnect the ScanSnap and other USB devices Close the ADF paper chute cover Switch users Allow the computer to enter sleep mode HINT When you scan the first page as a long page and continue scanning the subsequent documents are also scanned as long pages a The Scan button on the ScanSnap flashes in blue while...

Страница 297: ...by folder with ScanSnap Home For details refer to Managing Paper Documents by Folder on a Computer with ScanSnap Home page 354 HINT ScanSnap Organizer is displayed in the Quick Menu when ScanSnap Organizer is installed To manage scanned images by folder with ScanSnap Organizer refer to Managing Paper Documents by Folder on a Computer with ScanSnap Organizer page 357 Scanning Documents with S1300i ...

Страница 298: ... or rename scanned images using other applications while the Quick Menu is displayed HINT l Clicking displays the description of an application Placing the mouse cursor over the icon of another application displays the description of the application l Performing a scan while an application that can be automatically linked with is active automatically starts the linkage between ScanSnap Manager and...

Страница 299: ...he Scan button flashes in blue The button returns to being lit normally when document scanning is enabled In addition the ScanSnap Manager icon in the notification area located at the far right of the taskbar changes from to 2 Pull out the extension Extension 3 Right click the ScanSnap Manager icon in the notification area located at the far right of the taskbar and select the Scan Button Settings...

Страница 300: ... 5 Select None in Multifeed Detection 6 Click the OK button to close the ScanSnap setup window 7 Load documents in the ScanSnap 1 Align the edges of the documents 2 Load the documents at the center of the ADF paper chute cover Scanning Documents with S1300i 300 ...

Страница 301: ... does not appear in the scanned image Slant lines appear in the scanned image The documents are scanned in a wrong paper size If the documents are not scanned straight it is recommended that you select the Continue scanning after last page checkbox in the Scanning tab of the ScanSnap Setup Window page 88 separate the documents by their widths and scan them in different batches 8 Press the Scan but...

Страница 302: ...e application to link with ScanSnap Manager When you select Save Documents you can manage scanned images by folder with ScanSnap Home For details refer to Managing Paper Documents by Folder on a Computer with ScanSnap Home page 354 HINT ScanSnap Organizer is displayed in the Quick Menu when ScanSnap Organizer is installed To manage scanned images by folder with ScanSnap Organizer refer to Managing...

Страница 303: ... or rename scanned images using other applications while the Quick Menu is displayed HINT l Clicking displays the description of an application Placing the mouse cursor over the icon of another application displays the description of the application l Performing a scan while an application that can be automatically linked with is active automatically starts the linkage between ScanSnap Manager and...

Страница 304: ...he Next Document While the Current Document Is Being Scanned S1100i page 314 l Scanning Documents Larger Than A4 or Letter Size by Directly Inserting It in the ScanSnap S1100i page 321 l Scanning Documents Larger than A4 or Letter Size with the Carrier Sheet S1100i page 325 l Scanning Documents Such as Photographs and Clippings S1100i page 330 Scanning Documents with S1100i 304 ...

Страница 305: ...6 mm 0 03 in or less embossed cards can be used 52 to 80 g m2 14 to 20 lb Paper size Width 25 4 to 216 mm 1 to 8 5 in For a dual scan a total width of 200 mm 7 87 in or less for two documents Length 25 4 to 863 mm 1 to 34 in When merging scanned images automatically 3 l A3 297 420 mm l B4 257 364 mm l Double Letter 11 17 in 279 4 432 mm 1 For details about the eject methods refer to Parts and Func...

Страница 306: ...or silver and the background color of the card and the color of the embossed characters are similar it may be difficult for the ScanSnap to recognize embossed characters In which case performing the following may result in an improvement 1 Click the Option button in the Scanning tab of the ScanSnap Setup Window page 88 a The Scanning mode option window appears 2 Select the Increase text contrast c...

Страница 307: ...48 l Carbonless paper Because carbonless paper may contain chemicals that can harm the ScanSnap internal rollers it is recommended that you use the Carrier Sheet to scan such documents Make sure to clean the rollers occasionally to maintain the scanner performance when scanning carbonless paper directly without using the Carrier Sheet For details about how to perform cleaning refer to Cleaning the...

Страница 308: ...such as photographs and postcards are placed inside the Carrier Sheet to be scanned at once It is recommended that you scan such documents one at a time l Storing the Carrier Sheet Be careful of the following when you store the Carrier Sheet Do not leave your document inside the Carrier Sheet for a long time Otherwise the ink on the document may be transferred onto the Carrier Sheet Do not leave t...

Страница 309: ...ScanSnap open the output guide For details about documents that can be scanned with the output guide open refer to Documents to Scan S1100i page 305 Output Guide l How the document is ejected differs as below depending on whether the output guide is open or closed When the output guide is closed When the output guide is open a The Scan Stop button flashes in blue The button returns to being lit no...

Страница 310: ...e output guide closed leave enough space at the back of the ScanSnap to allow the document to be completely ejected In addition when you scan long page documents hold the scanned documents with your hands to prevent them from falling off the unit where the ScanSnap is placed on Make sure that the area where the document exits the scanner is clear of any obstacles Otherwise paper jam may occur l If...

Страница 311: ...nect the ScanSnap and other USB devices l Close the feed guide l Switch users l Allow the computer to enter sleep mode a The Scan Stop button on the ScanSnap flashes in blue while the documents are being scanned The ScanSnap Manager Image scanning and file saving window appears a When scanning is complete the ScanSnap Manager Image scanning and file saving window displays a scanning standby status...

Страница 312: ...n to link with ScanSnap Manager For details about linking the following applications with ScanSnap Manager refer to Useful Usages page 353 l Save Documents l Save Business Cards l Save Receipts l Save Photos HINT The following applications are displayed in the Quick Menu when ScanSnap Organizer and CardMinder are installed l When ScanSnap Organizer is installed ScanSnap Organizer l When CardMinder...

Страница 313: ... or rename scanned images using other applications while the Quick Menu is displayed HINT l Clicking displays the description of an application Placing the mouse cursor over the icon of another application displays the description of the application l Performing a scan while an application that can be automatically linked with is active automatically starts the linkage between ScanSnap Manager and...

Страница 314: ...utomatic detection for Paper size in the Paper tab of the ScanSnap Setup Window page 88 the dual scan function is disabled l Use a dual scan to scan a document within the following ranges If one of the following ranges is exceeded a length error occurs and part of the document may not appear in the scanned image Maximum scanning length 863 mm 34 in 355 6 mm 14 in when Excellent is specified for Im...

Страница 315: ...ers as below depending on whether the output guide is open or closed When the output guide is closed When the output guide is open a The Scan Stop button flashes in blue The button returns to being lit normally when document scanning is enabled In addition the ScanSnap Manager icon in the notification area located at the far right of the taskbar changes from to 2 Insert the document straight into ...

Страница 316: ...s with your hands to prevent them from falling off the unit where the ScanSnap is placed on Make sure that the area where the document exits the scanner is clear of any obstacles Otherwise paper jam may occur l If you scan the following documents with the output guide open a paper jam may occur and damage the documents Scan the following documents with the output guide closed Thick paper 80 g m2 2...

Страница 317: ...ing and file saving window appears HINT When the ScanSnap Manager Image scanning and file saving window is maximized multiple scanned images are displayed in the preview area When you use a dual scan it is recommended that you maximize the ScanSnap Manager Image scanning and file saving window to check that scanned images are created correctly while scanning documents Scanning Documents with S1100...

Страница 318: ... To continue scanning insert the next document to be scanned When the document is inserted scanning starts automatically 4 Press the Scan Stop button on the ScanSnap to finish scanning a The Quick Menu appears 5 In the Quick Menu click the icon of the application to link with ScanSnap Manager Scanning Documents with S1100i 318 ...

Страница 319: ...ration Guide ATTENTION l You cannot start scanning when the Quick Menu is displayed Either select an icon from the Quick Menu and finish the process or close the Quick Menu before you perform the next scan l Do not move delete or rename scanned images using other applications while the Quick Menu is displayed HINT l Clicking displays the description of an application Placing the mouse cursor over ...

Страница 320: ...For details refer to the Advanced Operation Guide Scanning Documents with S1100i 320 ...

Страница 321: ... document is scanned if the scanned images are not merged automatically you can use the ScanSnap Organizer Merge Pages function to merge the scanned images For details refer to the ScanSnap Organizer Help l For a document that will have scanned images which are not merged automatically you can use the optional Carrier Sheet to scan the document and merge the scanned images automatically For detail...

Страница 322: ...om to 2 Fold the document in half so that the sides to be scanned are facing out ATTENTION Fold the long side of the document in half If the left and right areas of the folded document are different in size from each other the scanned images may not be merged automatically 3 Insert the document straight into the feeding section of the ScanSnap with the scanning side facing up a The document is pul...

Страница 323: ... displayed in the preview area 5 Turn over the document and insert it as described in step 3 ATTENTION Make sure to scan the front and back sides of the document folded in half consecutively a Scanning starts automatically HINT Repeat steps 2 to 5 to continue scanning more A3 B4 or Double Letter size documents You can also continue scanning documents smaller than A4 or Letter size For details abou...

Страница 324: ...e ATTENTION l You cannot start scanning when the Quick Menu is displayed Either select an icon from the Quick Menu and finish the process or close the Quick Menu before you perform the next scan l Do not move delete or rename scanned images using other applications while the Quick Menu is displayed HINT l Clicking displays the description of an application Placing the mouse cursor over the icon of...

Страница 325: ...on window click the Option button in the Scanning tab of the ScanSnap Setup Window page 88 HINT Both sides of a double sided A4 Letter size document or smaller can also be scanned and merged into a single image 1 Right click the ScanSnap Manager icon in the notification area located at the far right of the taskbar and select the Scan Button Settings from the Right Click Menu page 86 a The ScanSnap...

Страница 326: ...cument in half with the sides to be scanned facing out Fold it tightly and smooth out any creases 2 Open the Carrier Sheet to bind the document Align the fold line with the right edge of the Carrier Sheet so that the document fits in the upper right hand corner of the Carrier Sheet Scanning Documents with S1100i 326 ...

Страница 327: ...it is set inside the ScanSnap HINT If you perform a scan using the Carrier Sheet with the output guide open a paper jam may occur and damage the documents Make sure to close the output guide when you perform a scan using the Carrier Sheet Output Guide 7 Press the Scan Stop button on the ScanSnap to start scanning a Scanning starts and the ScanSnap Manager Image scanning and file saving window appe...

Страница 328: ...ument inside the Carrier Sheet are displayed as a double page spread image in the preview area HINT Repeat steps 5 to 8 to scan more documents larger than A4 Letter size You can continue to scan documents that can be inserted directly in the ScanSnap For details about how to perform a scan refer to Scanning Documents S1100i page 309 9 Press the Scan Stop button on the ScanSnap to finish scanning a...

Страница 329: ...ion is specified for Paper size in the Carrier Sheet Settings window an optimal size will be selected automatically from the available standard sizes A3 B4 or 11 17 in in Paper size Note that the size of the image may become smaller than the original document depending on the document Example When characters and illustrations are printed to fit in A4 size in the center of an A3 size document the s...

Страница 330: ...led To open the Scanning mode option window click the Option button in the Scanning tab of the ScanSnap Setup Window page 88 1 Right click the ScanSnap Manager icon in the notification area located at the far right of the taskbar and select the Scan Button Settings from the Right Click Menu page 86 a The ScanSnap setup window appears 2 In the Paper tab select Automatic detection in Paper size and ...

Страница 331: ...n the Carrier Sheet and place the top of the document against the top center of the Carrier Sheet 6 Insert the part with the black and white pattern straight into the feeding section of the ScanSnap with the scanning side of the document inside the Carrier Sheet facing up Scanning Documents with S1100i 331 ...

Страница 332: ...Output Guide 7 Press the Scan Stop button on the ScanSnap to start scanning a When scanning is complete the scanned image of the document that is inside the Carrier Sheet is displayed in the preview area HINT Repeat steps 5 to 7 to scan more documents such as photographs and clippings You can continue to scan documents that can be inserted directly in the ScanSnap For details about how to perform ...

Страница 333: ...t depending on the document scanned or part of the image may appear missing Example When the contents are printed to fit in A5 size in the center of an A4 size document the scanned image is output in A5 size To output the scanned image in its original size specify the document size in Paper size HINT In the following cases place a blank white sheet of paper underneath the document when scanning l ...

Страница 334: ...ation procedure of software related to the ScanSnap and gives an overview of its functions l What You Can Do with ScanSnap Home page 335 l What You Can Do with the ScanSnap Organizer page 337 l What You Can Do with CardMinder page 344 What You Can Do with Related Software 334 ...

Страница 335: ... from the documents that you scanned with the ScanSnap Editing scanned images by using ScanSnap Home viewer You can perform a variety of editing operations such as rearranging adding or rotating a page on an image created from a document that you scanned by using ScanSnap Home viewer Categorizing content data records by adding tags You can display the content data records for each record that is t...

Страница 336: ...ap Home you can send images to those cloud services Also adding a business card management application to ScanSnap Home allows you to import contact information on a business card in a format such as CSV to the added application and use it with the application What You Can Do with ScanSnap Home 336 ...

Страница 337: ...es without opening them create folders and arrange files for various uses Pages of a PDF file can also be flipped through in thumbnails to verify the scanned image data Main Window Scan documents with the ScanSnap Check thumbnails and organize files for various uses l Basic Operation Procedure of ScanSnap Organizer page 338 l Managing Files page 340 l Editing Files page 342 l Using Files page 343 ...

Страница 338: ...ScanSnap Organizer by double clicking the ScanSnap Organizer icon on the desktop 2 Scan documents with the ScanSnap a A list of scanned images is displayed in ScanSnap Organizer 3 Start up ScanSnap Organizer Viewer Double click a scanned image to start up the Viewer Window for displaying and editing scanned images What You Can Do with the ScanSnap Organizer 338 ...

Страница 339: ...s that are not oriented correctly Delete any unnecessary pages Make other edits such as inserting a page where necessary 5 Exit ScanSnap Organizer Viewer To exit ScanSnap Organizer Viewer click the Application button and then click the Exit button in the menu that appears What You Can Do with the ScanSnap Organizer 339 ...

Страница 340: ...en you search for PDF files When black and white documents that have been marked are scanned by the ScanSnap the marked character strings are set as keywords for the PDF file Mark the characters on a document Proposal can be used as a keyword to search for the file Document PDF file with a keyword Proposal Proposal Scan the document with the ScanSnap For other keyword setting methods refer to Scan...

Страница 341: ...ethods of Adobe Acrobat search and Windows Desktop Search Automatically Distributing Files According to Set Conditions You can use the keyword distribution function so that PDF files are automatically distributed into cabinets and folders according to the keywords that have been set Proposal Proposal PDF files with keywords Main Window Statistical Table Statistical Table What You Can Do with the S...

Страница 342: ...recting a book distortion If you scan a book with SV600 you can correct distorted images by using book image correction in ScanSnap Organizer Viewer For details about other image correction functions refer to the ScanSnap Organizer Help What You Can Do with the ScanSnap Organizer 342 ...

Страница 343: ...EG file that contains only the marked section Document Main Window Scan the document with the ScanSnap Using Files by Syncing with a Mobile Device By using the ScanSnap Sync function an image file scanned by the ScanSnap can be synced automatically with a mobile device and can be used easily anytime or anywhere via a cloud service The files are organized and managed in the ScanSnap Sync folder in ...

Страница 344: ...to recognize text on cards and shares the data with Personal Information Manager PIM applications CardMinder contains two separate functions CardMinder Viewer to enable business card data to be quickly searched from other applications and CardMinder Mobile Viewer to enable scanned business card data to be viewed on a computer in which CardMinder is not installed Share the recognized data with PIM ...

Страница 345: ...l Searching Card Data with CardMinder Viewer page 351 l Attaching a File to Card Data page 352 What You Can Do with CardMinder 345 ...

Страница 346: ...t scanning a card When scanning is complete the information printed on the card such as name company and address is automatically recognized as text and displayed in the Edit Data pane The image data scanned from the card is displayed in the Card Image pane ATTENTION ScanSnap Manager must be installed on your computer when you want to recognize the following languages l Chinese simplified l Chines...

Страница 347: ...hanges to the selected language 3 Click the icon for the Recognize button Example To recognize English click a A confirmation message for the recognition process is displayed 4 Click the Yes button a Character strings on the card data will be recognized as the selected language 5 Correct the card data if necessary The card data can be corrected in the following ways For details refer to the CardMi...

Страница 348: ...in the card image and then clicking the buttons of the appropriate fields in the Edit Data pane you can redo the recognition process on the selected areas 3 You can directly correct the text of each field in the Edit Data pane 6 Exit CardMinder To exit CardMinder click the application button and then click the Exit button in the menu that appears What You Can Do with CardMinder 348 ...

Страница 349: ...earch the URL specified in Website for the card data with a web browser 3 Linking card data with another application You can link card data with another application such as Outlook or Salesforce CRM to use the card data in the linked application You can also link card data with USB media to use the card data on a different computer 4 Outputting card data in a different format You can output card d...

Страница 350: ...h cards Basic Search Toolbar To search card data type in a search term such as an individual name or a company name in the Basic Search Toolbar The search results are displayed in the main window If multiple cards match the search conditions click to display the next result of the search in the main window What You Can Do with CardMinder 350 ...

Страница 351: ...ring you want to search for 2 Press Alt F3 keys on the keyboard at the same time a CardMinder Viewer starts and the card data found based on the search conditions entered such as an individual name and a company name is displayed in the window If multiple cards match the search conditions click to display the next result of the search in the CardMinder Viewer window HINT Click to display in the Ca...

Страница 352: ...Attaching a File to Card Data A file can be attached to card data easily by dragging and dropping it What You Can Do with CardMinder 352 ...

Страница 353: ...r on a Computer with ScanSnap Home page 354 l Managing Paper Documents by Folder on a Computer with ScanSnap Organizer page 357 l Saving Business Card Data to a Computer with ScanSnap Home page 360 l Saving Business Cards to a Computer with CardMinder page 363 l Saving Receipt Data to a Computer page 366 l Creating a Photo Album and Saving it to a Computer page 369 Useful Usages 353 ...

Страница 354: ...ether with meta information such as character strings that were recognized by the text recognition function and the date when you scanned it of a document that you scanned is saved as a content data record in ScanSnap Home In addition the main window of ScanSnap Home appears so that you can check the content data record created from the document that you scanned HINT A scanned image together with ...

Страница 355: ...r is created 5 Rename the created folder HINT To create multiple folders repeat steps 3 to 5 6 In the list that is displayed when you select Recent scans select a content data record and drag and drop it onto the created folder Managing Paper Documents by Folder on a Computer with ScanSnap Home 355 ...

Страница 356: ...ecord is moved to the folder HINT ScanSnap Home has various functions for using saved content data records For details refer to the ScanSnap Home Help Managing Paper Documents by Folder on a Computer with ScanSnap Home 356 ...

Страница 357: ... by folder in ScanSnap Organizer 1 Scan a paper document with the ScanSnap For details about how to perform a scan refer to Scanning Documents page 169 a The Quick Menu appears 2 Click the ScanSnap Organizer icon in the Quick Menu a The ScanSnap Organizer window appears Managing Paper Documents by Folder on a Computer with ScanSnap Organizer 357 ...

Страница 358: ...the folder list 4 Rename the created cabinet HINT To create multiple cabinets repeat steps 3 to 4 5 Select the scanned image from the file list and drag and drop it to the cabinet Managing Paper Documents by Folder on a Computer with ScanSnap Organizer 358 ...

Страница 359: ...e is moved to the cabinet HINT ScanSnap Organizer has various functions for using saved files For details refer to the ScanSnap Organizer Help Managing Paper Documents by Folder on a Computer with ScanSnap Organizer 359 ...

Страница 360: ...nned image together with meta information such as character strings that were recognized by the text recognition function and the date when you scanned it of a business card that you scanned is saved as a content data record in ScanSnap Home In addition the main window of ScanSnap Home appears so that you can check the content data record created from the business card that you scanned HINT A scan...

Страница 361: ...n the image that is displayed in View are entered in Business card information correctly If the card information must be corrected click the text to be corrected and then directly edit it Saving Business Card Data to a Computer with ScanSnap Home 361 ...

Страница 362: ...HINT For details about ScanSnap Home operations refer to the ScanSnap Home Help Saving Business Card Data to a Computer with ScanSnap Home 362 ...

Страница 363: ...th Administrator privileges you may not be able to link the ScanSnap with another application properly 1 Scan business cards with the ScanSnap For details about how to perform a scan refer to Scanning Documents page 169 a The Quick Menu appears 2 Click the Scan to CardMinder icon in the Quick Menu a The CardMinder window appears Saving Business Cards to a Computer with CardMinder 363 ...

Страница 364: ...a pane If the card data must be corrected click the text to be corrected and then directly edit it Edit Data Pane Card Image Pane HINT When you scan double sided business cards you must scan one side of each card and edit the card data in CardMinder Saving Business Cards to a Computer with CardMinder 364 ...

Страница 365: ...For details refer to the CardMinder Help Saving Business Cards to a Computer with CardMinder 365 ...

Страница 366: ...ed image together with meta information such as character strings that were recognized by the text recognition function and the date when you scanned it of a receipt that you scanned is saved as a content data record in ScanSnap Home In addition the main window of ScanSnap Home appears so that you can check the content data record created from the receipt that you scanned HINT A scanned image toge...

Страница 367: ...er characters in the image that is displayed in View are entered in Receipt information correctly If the receipt information must be corrected click the text to be corrected and then directly edit it Saving Receipt Data to a Computer 367 ...

Страница 368: ...HINT For details about ScanSnap Home operations refer to the ScanSnap Home Help Saving Receipt Data to a Computer 368 ...

Страница 369: ... scanned image together with meta information such as the date when you scanned it of a photo that you scanned is saved as a content data record in ScanSnap Home In addition the main window of ScanSnap Home appears so that you can check the content data record created from the photo that you scanned HINT A scanned image together with meta information is referred to as content data record in ScanSn...

Страница 370: ... Enter key a A content data record created from the photo that you scanned is tagged with the specified name used to categorize the photo 6 Select a tag that you specified as a name used to categorize the photo in Tag Creating a Photo Album and Saving it to a Computer 370 ...

Страница 371: ... The tagged content data record created from the photo is displayed HINT For details about ScanSnap Home operations refer to the ScanSnap Home Help Creating a Photo Album and Saving it to a Computer 371 ...

Страница 372: ...nap Manager is linked with an application The scanned images can be corrected in the following cases l When a Document Is Scanned SV600 page 373 l When a Book Is Scanned SV600 page 378 l When Multiple Documents Are Scanned at Once SV600 page 390 Correcting Scanned Images SV600 372 ...

Страница 373: ...0 When a document is scanned with the ScanSnap the following correction can be made on the scanned image l Filling in Fingers Captured in a Scanned Image When a Document Is Scanned SV600 page 374 When a Document Is Scanned SV600 373 ...

Страница 374: ...icial nails Figure 2 When you hold down a document to be scanned with your fingers bent Figure 3 When fingers that are used to hold down a document to be scanned are captured 1 cm 0 39 in or more Figure 4 When there is text or an image within 5 mm 0 2 in around the fingers that are used to hold down a document to be scanned Figure 5 When a document that has a background color other than white is s...

Страница 375: ...Snap Manager View cropped images window is displayed 2 Select a scanned image to fill in fingers captured in the image 3 Select the Continue with Point Retouch checkbox and click the Next button HINT The orientation of the scanned image and the crop area cannot be corrected in the ScanSnap Manager Book Image Viewer window Modify them in the ScanSnap Manager View cropped images window beforehand Wh...

Страница 376: ... detected it is indicated with a red dashed outline To change a range of the outline drag the white dot on the outline HINT When a finger captured in a scanned image is not detected a default outline is displayed around the finger In that case drag the white dot on the outline to align the outline with the shape of the finger When a Document Is Scanned SV600 376 ...

Страница 377: ...5 Click the Apply button a The finger captured in a scanned image is filled in When you have completed filling in the captured finger click the Save and Exit button When a Document Is Scanned SV600 377 ...

Страница 378: ... making the following corrections to the images scanned from books with the ScanSnap l Correcting Distorted Book Images SV600 page 379 l Splitting a Double Page Spread Image into Two Page Images SV600 page 384 l Filling in Fingers Captured in a Scanned Image When a Book Is Scanned SV600 page 387 When a Book Is Scanned SV600 378 ...

Страница 379: ...face down Figure 3 When a book to be scanned is placed in a vertical orientation Figure 4 When a book that is not rectangular or square is scanned Figure 5 When a book that has a background color other than white such as a comic magazine is scanned Figure 6 When a book that has a narrow margin space such as a catalogue or a magazine is scanned Figure 7 When a book that is smaller than A5 size 148 ...

Страница 380: ...d click the Check Correct button For details about how to perform a scan refer to Scanning Books SV600 page 269 a The ScanSnap Manager Book Image Viewer window appears 2 Select the page to correct the distortion in Final image 3 Click a The shape of the book is automatically detected and the following items are displayed on the page l Corner points Corner points are displayed around the corners of...

Страница 381: ...r parallel to the right and left outlines If the outline of the book is not aligned with the shape of the book in the scanned image drag the upper part and lower part of the outline to correct each position HINT If the shape of the book was not detected the corner points and the outline are displayed on the entire window If this is the case align the corner points and the outline with the shape of...

Страница 382: ...the book If it is hard to align the outline with the shape of the book position the outline little by little To make it easy click an outline near the corner points and drag and drop the outline to align it with the shape of the book repeatedly 5 Click the Apply button a A message for confirming the correction target appears 6 Click the Selected Pages button a The page distortion is corrected When...

Страница 383: ...e are curved slanted lines or graphics with curved slanted lines on the document the scanned image of the document may not be corrected properly and the layout may not look right When a Book Is Scanned SV600 383 ...

Страница 384: ...a distorted book image l Splitting a double page spread image 2 Edit in point retouch mode l Filling in the captured fingers in image If you edit in the book image correction mode after editing in the point retouch mode the edited results in point retouch mode are overridden 1 On the window that appears after a book is scanned select Correct and save double page spread document images book magazin...

Страница 385: ...lect the page to be split in Final image 3 Click and then click or a The split line is indicated with a green dashed line If the split line is not aligned with the gutter of the book drag the corner points to correct the position When a Book Is Scanned SV600 385 ...

Страница 386: ...button a A message for confirming the split target appears 5 Click the Selected Pages button a The page is split When you have completed splitting the page click the Save and Exit button When a Book Is Scanned SV600 386 ...

Страница 387: ...s bent Figure 3 When fingers that are used to hold down a book to be scanned are captured 1 cm 0 39 in or more Figure 4 When there is text or an image within 5 mm 0 2 in around the fingers that are used to hold down a book to be scanned Figure 5 When a book that has a background color other than white such as a comic magazine is scanned Figure 6 When a book is scanned after Gray B W or Color high ...

Страница 388: ... that appears after a book is scanned select Correct and save double page spread document images book magazine and click the Check Correct button For details about how to perform a scan refer to Scanning Books SV600 page 269 a The ScanSnap Manager Book Image Viewer window appears 2 Select the page for filling in captured fingers in Final image 3 Click 4 Click on a finger captured in a scanned imag...

Страница 389: ...he finger In that case drag the white dot on the outline to align the outline with the shape of the finger 5 Click the Apply button a The finger captured in a scanned image is filled in When you have completed filling in the captured finger click the Save and Exit button When a Book Is Scanned SV600 389 ...

Страница 390: ...e following corrections can be made on the scanned images l Correcting the Scanned Image Orientation SV600 page 391 l Modifying the Crop Area SV600 page 394 l Adding the Necessary Scanned Images SV600 page 396 l Deleting Unnecessary Scanned Images SV600 page 398 When Multiple Documents Are Scanned at Once SV600 390 ...

Страница 391: ...ts are scanned at once select Crop and save flat document images as is and click the Check Correct button For details about how to perform a scan refer to Scanning Multiple Documents at Once SV600 page 274 a The ScanSnap Manager View cropped images window is displayed 2 Select which scanned image to correct the orientation for When Multiple Documents Are Scanned at Once SV600 391 ...

Страница 392: ...3 Click or a The scanned image is rotated by 90 degrees When you have completed correcting the orientation click the Save and Exit button When Multiple Documents Are Scanned at Once SV600 392 ...

Страница 393: ...e following operations Drag the green operating point that appears at the top of the crop frame by as little or as much as you want Click or l If the Next button is displayed clear the Continue with Point Retouch checkbox The Next button changes to the Save and Exit button When Multiple Documents Are Scanned at Once SV600 393 ...

Страница 394: ... document images as is and click the Check Correct button For details about how to perform a scan refer to Scanning Multiple Documents at Once SV600 page 274 a The ScanSnap Manager View cropped images window is displayed 2 Select the crop area of the scanned image to change the crop area 3 Drag the operating points of the crop frame to change the crop area When Multiple Documents Are Scanned at On...

Страница 395: ...nd Exit button HINT l To move a crop frame place the mouse inside the crop frame and drag it when all the operating points have turned red l If the Next button is displayed clear the Continue with Point Retouch checkbox The Next button changes to the Save and Exit button When Multiple Documents Are Scanned at Once SV600 395 ...

Страница 396: ...ndow that appears after multiple documents are scanned at once select Crop and save flat document images as is and click the Check Correct button For details about how to perform a scan refer to Scanning Multiple Documents at Once SV600 page 274 a The ScanSnap Manager View cropped images window is displayed 2 Frame the scanned image to be cropped by dragging the mouse When Multiple Documents Are S...

Страница 397: ...ed by dragging the mouse is added to the end of Cropped image After you have added a crop frame click the Save and Exit button HINT If the Next button is displayed clear the Continue with Point Retouch checkbox The Next button changes to the Save and Exit button When Multiple Documents Are Scanned at Once SV600 397 ...

Страница 398: ...the window that appears after multiple documents are scanned at once select Crop and save flat document images as is and click the Check Correct button For details about how to perform a scan refer to Scanning Multiple Documents at Once SV600 page 274 a The ScanSnap Manager View cropped images window is displayed 2 Select a scanned image to remove the crop frame When Multiple Documents Are Scanned...

Страница 399: ...nfirmation message appears 4 Click the Yes button a The crop frame is removed from the selected scanned image and the scanned image disappears from Cropped image When Multiple Documents Are Scanned at Once SV600 399 ...

Страница 400: ... unnecessary scanned image click the Save and Exit button HINT If the Next button is displayed clear the Continue with Point Retouch checkbox The Next button changes to the Save and Exit button When Multiple Documents Are Scanned at Once SV600 400 ...

Страница 401: ...ht click the ScanSnap Manager icon in the notification area and select Help Troubleshooting from the Right Click Menu page 86 l ScanSnap Support Site https scansnap fujitsu com g support en If you cannot solve the problem after referring to the above section contact your FUJITSU scanner dealer or an authorized FUJITSU scanner service provider l How to Find Your Solution page 402 l If Your First At...

Страница 402: ...llation complete Does the ScanSnap Manager icon appear in the notification area Have you installed the software before No Yes No Topic to Be Referred to 1 If Your First Attempt to Install Failed page 403 2 If You Have Installed the Software Before page 404 3 When the ScanSnap Manager Icon Does Not Appear page 408 4 When ScanSnap Manager Does Not Operate Normally page 410 How to Find Your Solution ...

Страница 403: ...he ScanSnap failed If any software related to the ScanSnap has been installed before refer to If You Have Installed the Software Before page 404 1 Restart the computer and log on as a user with Administrator privileges 2 Reinstall the software For details refer to Reinstalling the Software page 407 If Your First Attempt to Install Failed 403 ...

Страница 404: ...s how to troubleshoot if your attempt to reinstall the software related to the ScanSnap failed l Uninstalling the Software page 405 l Removing the Installation Information page 406 l Reinstalling the Software page 407 If You Have Installed the Software Before 404 ...

Страница 405: ...ot disable the anti virus software check if the software is set to lock the application 4 Uninstall the software The following software programs must be uninstalled l ScanSnap Manager l ScanSnap Home l ScanSnap Organizer l CardMinder For details refer to Uninstalling the Software page 483 l If the software was successfully uninstalled proceed to Reinstalling the Software page 407 l If the software...

Страница 406: ...e to remove the installation information For details on how to use the uninstall tool and details on the existing software which is to be uninstalled run a search for SSHomeClean exe in ScanSnap FAQ click the appropriate link that is listed in the search results and refer to the webpage Before you run the uninstall tool read Installation Information Cleanup Guide for ScanSnap Home that is on the d...

Страница 407: ...rograms ScanSnap Software Downloads https scansnap fujitsu com global dl 5 Select your model and operating system and click Display software list to display the list of software programs to be installed 6 Download a software program from the software list that is displayed in Those using ScanSnap Manager in Setup Programs and install it If you did not perform the procedure in Removing the Installa...

Страница 408: ...w to troubleshoot when the ScanSnap Manager icon does not appear in the notification area even though the software is installed and the ScanSnap is connected to the computer l Displaying the ScanSnap Manager Icon page 409 When the ScanSnap Manager Icon Does Not Appear 408 ...

Страница 409: ...setting so that ScanSnap Manager will start up automatically from the next time you log on to the computer The procedure is as follows 1 Right click the ScanSnap Manager icon in the notification area located at the far right of the task bar and select Preferences from the Right Click Menu page 86 a The ScanSnap Manager Preferences window appears 2 In the Auto Startup list select the Start up ScanS...

Страница 410: ...lled and the ScanSnap is connected to the computer perform the following procedures l Removing Unnecessary Icons from the Notification Area page 411 l Checking the Connection between the ScanSnap and the Computer page 412 l Checking If ScanSnap Manager Is Operating Normally page 413 l Removing the ScanSnap s Connection Information page 416 When ScanSnap Manager Does Not Operate Normally 410 ...

Страница 411: ...the Right Click Menu page 86 3 Start ScanSnap Manager l Windows 10 Select Start menu ScanSnap Manager ScanSnap Manager l Windows 8 1 Click on the lower left side of the Start screen and select ScanSnap Manager under ScanSnap Manager on the All apps screen l Windows 7 Select Start menu All Programs ScanSnap Manager ScanSnap Manager If the problem persists refer to Checking the Connection between th...

Страница 412: ... then plug it back in Make sure to leave at least 5 seconds between unplugging and plugging the cable If you are using a USB hub connect the USB cable to the computer directly If the problem persists refer to Checking If ScanSnap Manager Is Operating Normally page 413 When ScanSnap Manager Does Not Operate Normally 412 ...

Страница 413: ... step 5 5 If anti virus software is running disable the software temporarily ATTENTION If you cannot disable the anti virus software check if the software is set to lock the application If the problem persists proceed to step 6 6 Check the privileges to access the installation files 1 Start the ScanSnap Support Tool l Windows 10 Select Start menu ScanSnap Manager ScanSnap Support Tool l Windows 8 ...

Страница 414: ...connection with the ScanSnap 1 Start the ScanSnap Support Tool l Windows 10 Select Start menu ScanSnap Manager ScanSnap Support Tool l Windows 8 1 Click on the lower left side of the Start screen and select ScanSnap Support Tool under ScanSnap Manager on the All apps screen l Windows 7 Select Start menu All Programs ScanSnap Manager ScanSnap Support Tool a The ScanSnap Support Tool window appears ...

Страница 415: ...8 Turn off the ScanSnap and restart the computer If the problem persists refer to Removing the ScanSnap s Connection Information page 416 When ScanSnap Manager Does Not Operate Normally 415 ...

Страница 416: ...ninstall from the displayed menu l iX500 Select Imaging devices and right click on ScanSnap iX500 or Other devices ScanSnap iX500 and then select Uninstall from the displayed menu l iX100 Select Imaging devices and right click on ScanSnap iX100 or Other devices ScanSnap iX100 and then select Uninstall from the displayed menu l SV600 Select Imaging devices and right click on ScanSnap SV600 or Other...

Страница 417: ...m still persists perform the procedures described in When ScanSnap Manager Does Not Operate Normally page 410 once again If the above procedures do not solve the problem please attach the data of your system information to an email and send it to your FUJITSU scanner dealer or an authorized FUJITSU scanner service provider For details about how to collect system information refer to Troubleshootin...

Страница 418: ...ScanSnap Online Update 1 Restart the computer and log on as a user with Administrator privileges 2 Remove the installation information a For details refer to Removing the Installation Information page 406 3 Install the software a For details refer to Reinstalling the Software page 407 4 Uninstall the software a For details refer to Uninstalling the Software page 483 When You Cannot Uninstall the S...

Страница 419: ...ge 421 l Cleaning iX500 page 428 l Cleaning iX100 page 434 l Cleaning SV600 page 439 l Cleaning S1300i page 440 l Cleaning S1100i page 446 l Cleaning the Carrier Sheet iX1500 iX500 iX100 S1100i page 451 l Cleaning the Background Pad SV600 page 452 Cleaning the ScanSnap 419 ...

Страница 420: ...able Cotton swabs Commercially available Used to clean small parts such as the camera or infrared LED on SV600 1 Used with Cleaner F1 2 The cleaning wipes are wet tissues that have been soaked with Cleaner F1 In place of this product you can use a cloth soaked with Cleaner F1 3 Any lint free cloth can be used For details about purchasing the cleaning materials refer to Suppliers of Consumables Opt...

Страница 421: ...N The bottom part of the ScanSnap may become hot when the ScanSnap is being used but this does not affect ScanSnap operation or cause any physical harm Be careful not to drop the ScanSnap when carrying it l Cleaning the Outside of iX1500 page 422 l Cleaning the Inside of iX1500 page 423 Cleaning iX1500 421 ...

Страница 422: ...he ScanSnap l It may take a long time for Cleaner F1 to dry if an excessive amount is used Moisten the cloth with moderate quantity Wipe off the cleaner completely with a soft cloth to leave no residue on the cleaned parts Cleaner F1 or Mild Detergent Cloth Touch Panel To avoid the surface of the touch panel becoming dirty clean it regularly by gently wiping dirt and dust off with a soft dry cloth...

Страница 423: ...nSnap is being used Before you clean the inside of the ScanSnap you must unplug the power cable from the AC outlet and leave the ScanSnap for 15 minutes or more Do not use aerosol spray or spray that contains alcohol to clean the scanner Paper dust and other dust blown up by strong air from the spray may enter the inside of the scanner which may cause scanner failure or malfunction Also note that ...

Страница 424: ...towards you to open the ADF top section 5 Clean the following locations with a cloth moistened with Cleaner F1 Rubber Idler Roller x2 Ultrasonic Sensor x2 Brake Roller x1 Pick Roller x1 Plastic Idler Roller x2 Cleaning iX1500 424 ...

Страница 425: ...t and dust off the rollers as you rotate them manually Be careful not to damage the surface of the rollers Make sure that they are cleaned properly because residue on the rollers will affect the feeding performance l Pick roller 1 Remove the pick roller from the ScanSnap to clean them For details about how to remove the pick roller refer to Replacing Consumables for iX1500 page 457 Gently wipe off...

Страница 426: ...wer cable of the ScanSnap to the AC outlet 2 Press on the touch panel to display the Settings screen 3 Press to display the Maintenance screen 4 Press Roller cleaning to display the Roller cleaning screen 5 Keep pressing the Run button to rotate the feed rollers and the eject rollers HINT When you let go of the Run button the feed rollers and the eject rollers stop rotating 6 Clean the following l...

Страница 427: ... the roller Make sure that they are cleaned properly because residue on the rollers will affect the feeding performance 7 Close the ADF top section Close the ADF top section until it locks in place Make sure that the ADF top section is completely closed Otherwise paper jams or other feeding errors or image faults may occur Cleaning iX1500 427 ...

Страница 428: ...ON The bottom part of the ScanSnap may become hot when the ScanSnap is being used but this does not affect ScanSnap operation or cause any physical harm Be careful not to drop the ScanSnap when carrying it l Cleaning the Outside of iX500 page 429 l Cleaning the Inside of iX500 page 430 Cleaning iX500 428 ...

Страница 429: ...with Cleaner F1 mild detergent ATTENTION l Never use paint thinner or any other organic solvents The shape or color may be changed l When cleaning the ScanSnap prevent liquids from entering the ScanSnap l It may take a long time for Cleaner F1 to dry if an excessive amount is used Moisten the cloth with moderate quantity Wipe off the cleaner completely with a soft cloth to leave no residue on the ...

Страница 430: ...d leave the ScanSnap for 15 minutes or more Do not use aerosol spray or spray that contains alcohol to clean the scanner Paper dust and other dust blown up by strong air from the spray may enter the inside of the scanner which may cause scanner failure or malfunction Also note that sparks generated by static electricity may cause a fire ATTENTION l Do not use water or mild detergent to clean the i...

Страница 431: ...Top Section 3 Clean the following locations with a cloth moistened with Cleaner F1 ATTENTION When cleaning be careful not to damage the document sensor with a cloth Document Sensor Brake Roller x2 Pick Roller x2 Ultrasonic Sensor x2 Scan Glass x2 Idler Roller x4 l Brake roller 2 Remove the brake rollers from the ScanSnap to clean them Cleaning iX500 431 ...

Страница 432: ...rtical lines on scanned images l Pick roller 2 Gently wipe off the dirt and dust along the grooves on the surface of rollers as you manually rotate them downward Be careful not to damage the surface of the rollers Make sure that they are cleaned properly because residue on the rollers will affect the feeding performance l Ultrasonic sensor 2 Gently wipe the dirt and dust off the surface of the ult...

Страница 433: ...use residue on the rollers will affect the feeding performance HINT Pressing the Scan button seven times will rotate the feed rollers and the eject rollers one revolution 3 Close the ADF top section ADF Paper Chute Cover ADF Top Section a It clicks when it returns to its original position ATTENTION Make sure that the ADF top section is completely closed Otherwise paper jams or other feeding errors...

Страница 434: ...Cleaning iX100 This section explains about the cleaning materials and how to clean the ScanSnap l Cleaning the Outside of iX100 page 435 l Cleaning the Inside of iX100 page 436 Cleaning iX100 434 ...

Страница 435: ...ATTENTION l Never use paint thinner or any other organic solvents The shape or color may be changed l When cleaning the ScanSnap prevent liquids from entering the ScanSnap l It may take a long time for Cleaner F1 to dry if an excessive amount is used Moisten the cloth with moderate quantity Wipe off the cleaner completely with a soft cloth to leave no residue on the cleaned parts Cleaner F1 or Mil...

Страница 436: ...ty may cause a fire ATTENTION l Do not use water or mild detergent to clean the inside of the ScanSnap l It may take a long time for Cleaner F1 to dry if an excessive amount is used Moisten the cloth with moderate quantity Wipe off the cleaner completely to leave no residue on the cleaned parts HINT To check the number of sheets scanned with the ScanSnap see Total Page Count in the ScanSnap Manage...

Страница 437: ... roller 12 located on the top cover Gently wipe the dirt and dust off the rollers as you rotate them manually Be careful not to damage the surface of the rollers Make sure that they are cleaned properly because residue on the rollers will affect the feeding performance 2 Clean the feed rollers and eject rollers 1 Press the Scan Stop button for 3 seconds with the top cover open 2 Clean the followin...

Страница 438: ...damage the surface of the roller Make sure that they are cleaned properly because residue on the roller will affect the feeding performance If the eject roller is difficult to clean try cleaning it from the back of the ScanSnap while you keep the top cover slightly open Eject Roller x 1 HINT Pressing the Scan Stop button seven times will rotate the feed roller and the eject roller one revolution 3...

Страница 439: ...s the camera or infrared LED of the ScanSnap ATTENTION l Never use paint thinner or any other organic solvents The shape or color may be changed l When cleaning the ScanSnap prevent liquids from entering the ScanSnap l It may take a long time for Cleaner F1 to dry if an excessive amount is used Moisten the cloth with moderate quantity Wipe off the cleaner completely with a soft cloth to leave no r...

Страница 440: ...Cleaning S1300i This section explains about the cleaning materials and how to clean the ScanSnap l Cleaning the Outside of S1300i page 441 l Cleaning the Inside of S1300i page 442 Cleaning S1300i 440 ...

Страница 441: ...leaner F1 mild detergent ATTENTION l Never use paint thinner or any other organic solvents The shape or color may be changed l When cleaning the ScanSnap prevent liquids from entering the ScanSnap l It may take a long time for Cleaner F1 to dry if an excessive amount is used Moisten the cloth with moderate quantity Wipe off the cleaner completely with a soft cloth to leave no residue on the cleane...

Страница 442: ...uter and leave the ScanSnap for 15 minutes or more l Do not use aerosol spray or spray that contains alcohol to clean the scanner Paper dust and other dust blown up by strong air from the spray may enter the inside of the scanner which may cause scanner failure or malfunction Also note that sparks generated by static electricity may cause a fire l While cleaning the ScanSnap pay attention to the i...

Страница 443: ...ick Roller Assembly White Backing Strip x 2 including the one on the ADF top section Glass x 2 including the one on the ADF top section Idler Roller x 4 l Idler roller 4 located on the ADF top section Gently wipe the dirt and dust off the rollers as you rotate them manually Be careful not to damage the surface of the rollers Make sure that they are cleaned properly because residue on the rollers w...

Страница 444: ... rollers and eject rollers 1 Connect the power connection cable power cable or USB bus power cable to the power supply source AC outlet or computer and press the Scan button for three seconds with the ADF top section open ATTENTION Connect the power connection cable power cable or USB bus power cable to the power supply source AC outlet or computer only when cleaning the feed rollers and eject rol...

Страница 445: ...DF Top Section a It clicks when it returns to its original position ATTENTION Make sure that the ADF top section is completely closed Otherwise paper jams or other feeding errors or image faults may occur Cleaning S1300i 445 ...

Страница 446: ...Cleaning S1100i This section explains about the cleaning materials and how to clean the ScanSnap l Cleaning the Outside of S1100i page 447 l Cleaning the Inside of S1100i page 448 Cleaning S1100i 446 ...

Страница 447: ...ATTENTION l Never use paint thinner or any other organic solvents The shape or color may be changed l When cleaning the ScanSnap prevent liquids from entering the ScanSnap l It may take a long time for Cleaner F1 to dry if an excessive amount is used Moisten the cloth with moderate quantity Wipe off the cleaner completely with a soft cloth to leave no residue on the cleaned parts Cleaner F1 or Mil...

Страница 448: ... may enter the inside of the scanner which may cause scanner failure or malfunction Also note that sparks generated by static electricity may cause a fire ATTENTION l Do not use water or mild detergent to clean the inside of the ScanSnap l It may take a long time for Cleaner F1 to dry if an excessive amount is used Moisten the cloth with moderate quantity Wipe off the cleaner completely to leave n...

Страница 449: ...f the rollers Make sure that they are cleaned properly because residue on the rollers will affect the feeding performance 2 Clean the feed rollers and eject rollers 1 Connect the USB cable to the USB connector on the ScanSnap and the USB port on the computer and press the Scan Stop button for three seconds with the top cover open ATTENTION Connect the USB cable to the USB port on the computer only...

Страница 450: ...ure that they are cleaned properly because residue on the roller will affect the feeding performance If the eject roller is difficult to clean try cleaning it from the back of the ScanSnap while you keep the top cover slightly open Eject Roller x 1 HINT Pressing the Scan Stop button seven times will rotate the feed roller and the eject roller one revolution 3 Close the top cover and the output gui...

Страница 451: ...h a dry cloth or a cloth moistened with Cleaner F1 mild detergent ATTENTION l Do not use paint thinner or any other organic solvents l Do not apply too much force when rubbing Doing so may damage or deform the Carrier Sheet l Be careful not to leave any crease on the Carrier Sheet l After cleaning the inside of the Carrier Sheet with a cloth moistened with Cleaner F1 mild detergent make sure that ...

Страница 452: ...d Pad with a dry or damp cloth ATTENTION l Do not use any detergent l Keep the Background Pad away from fire or high temperature objects l Do not wrinkle or fold the Background Pad l It is recommended that you store the Background Pad in the tube and bag in which the Background Pad was packaged l Keep the Background Pad out of direct sunlight when storing it Cleaning the Background Pad SV600 452 ...

Страница 453: ... of Consumables iX1500 iX500 S1300i page 454 l Checking the Status of Consumables iX500 S1300i page 456 l Replacing Consumables for iX1500 page 457 l Replacing Consumables for iX500 page 464 l Replacing Consumables for S1300i page 471 Consumables for the ScanSnap iX1500 iX500 S1300i 453 ...

Страница 454: ...d Only use the specified consumables For details about purchasing the consumables refer to Suppliers of Consumables Optional Parts in About Customer Support and Maintenance page 500 Consumables for iX1500 iX500 Product Name Part No Suggested replacement cycle Roller Set l Brake roller l Pick roller PA03656 0001 200 000 sheets or one year Consumables for S1300i Product Name Part No Suggested replac...

Страница 455: ...Product Name Part No Suggested replacement cycle PICK ROLLER PA03541 0001 100 000 sheets or one year Part Numbers and Replacement Cycle of Consumables iX1500 iX500 S1300i 455 ...

Страница 456: ...he far right of the taskbar and select Check consumable status from the Right Click Menu page 86 a The ScanSnap Manager Check consumable status window appears 2 Check the status of each consumable Refer to Suggested replacement cycle as a guideline and replace the consumables Example The ScanSnap Manager Check consumable status window for iX500 Checking the Status of Consumables iX500 S1300i 456 ...

Страница 457: ...nsumables you must turn off the ScanSnap and unplug the power cable from the AC outlet Not doing so may cause fire or electrical shock l Do not place internal parts such as the brake roller and the pick roller within reach of small children Doing so may cause injury ATTENTION The bottom part of the ScanSnap may become hot when the ScanSnap is being used but this does not affect ScanSnap operation ...

Страница 458: ... ends of the cover and open it in the direction of the arrow 2 Remove the shaft of the brake roller from the ScanSnap Lift the brake roller to remove the right side of the shaft and then pull out the shaft from the hole on the left Replacing Consumables for iX1500 458 ...

Страница 459: ...ert the shaft to the brake roller by aligning the protrusion on the shaft with the slot on the brake roller 5 Attach the shaft to the ScanSnap Insert the left end of the shaft in the hole properly and then attach the right side of the shaft into place Replacing Consumables for iX1500 459 ...

Страница 460: ...ise paper jams or other feeding errors may occur 6 Replace the pick roller 1 Open the sheet guide Slide the side guides all the way Open the sheet guide by hooking your finger in the dip of the sheet guide 2 Rotate the bushing in the direction of the arrow Replacing Consumables for iX1500 460 ...

Страница 461: ... lift it upward to pull out the pick roller ATTENTION Be careful not to touch the grease on the gear near the bushing 4 Attach a new pick roller to the ScanSnap Insert the left end of the shaft into the left side hole and then slowly attach the right end of the shaft into place Replacing Consumables for iX1500 461 ...

Страница 462: ...ON Make sure that the pick roller is attached firmly Otherwise paper jams or other feeding errors may occur 6 Close the sheet guide Make sure that both sides of the sheet guide are locked firmly 7 Close the ADF top section Replacing Consumables for iX1500 462 ...

Страница 463: ... the touch panel to display the Settings screen 2 Press to display the Maintenance screen 3 Press Check consumable status to display the Check consumable status screen 4 Press the Reset button 5 When a message is displayed press the OK button a The value of the current count for the Current Count Replacement Cycle is set to 0 Replacing Consumables for iX1500 463 ...

Страница 464: ...may cause injury ATTENTION The bottom part of the ScanSnap may become hot when the ScanSnap is being used but this does not affect ScanSnap operation or cause any physical harm Be careful not to drop the ScanSnap when carrying it 1 Unplug the power cable from the AC outlet 2 Remove any documents from the ADF paper chute cover 3 Pull the ADF release tab towards you to open the ADF top section ADF P...

Страница 465: ... and then pull out the shaft from the hole on the left Brake Roller Shaft 3 Remove the brake roller from the shaft Shaft Brake Roller 4 Attach the new brake roller to the shaft Insert the shaft to the brake roller by aligning the protrusion on the shaft with the slot on the brake roller Replacing Consumables for iX500 465 ...

Страница 466: ...aft into place Brake Roller Shaft 6 Close the brake roller cover ATTENTION Make sure that the shaft is attached firmly Otherwise paper jams or other feeding errors may occur 5 Replace the pick roller 1 Open the sheet guide Slide the side guides all the way Open the sheet guide by hooking your finger in the dip of the sheet guide Replacing Consumables for iX500 466 ...

Страница 467: ...e bushing in the direction of the arrow Bushing 3 Remove the pick roller Lift the right side of the bushing slightly about 5 mm move it toward the right and then lift it upward to pull out the pick roller Replacing Consumables for iX500 467 ...

Страница 468: ...the bushing 4 Attach a new pick roller to the ScanSnap Insert the left end of the shaft into the left side hole and then slowly attach the right end of the shaft into place Pick Roller 5 Rotate the bushing in the direction of the arrow Replacing Consumables for iX500 468 ...

Страница 469: ...Chute Cover ADF Top Section a It clicks when it returns to its original position 7 Connect the power cable to the AC outlet and turn on the ScanSnap 8 Reset the roller set count 1 Right click the ScanSnap Manager icon in the notification area located at the far right of the taskbar and select Check consumable status from the Right Click Menu page 86 a The ScanSnap Manager Check consumable status w...

Страница 470: ...2 Click the Reset button for Roller Set Count a A confirmation window appears 3 Click the Yes button a Roller Set Count is reset to 0 Replacing Consumables for iX500 470 ...

Страница 471: ...ay cause fire or electrical shock l Do not place internal parts such as the pad assy and the pick roller assembly within reach of small children Doing so may cause injury ATTENTION The bottom part of the ScanSnap may become hot when the ScanSnap is being used but this does not affect ScanSnap operation or cause any physical harm Be careful not to drop the ScanSnap when carrying it l Replacing the ...

Страница 472: ...uter 2 Remove any documents from the ADF paper chute cover 3 Pull the ADF release tab towards you to open the ADF top section ADF Paper Chute Cover ADF Release Tab ADF Top Section 4 Remove the pad assy Hold the both ends of the pad assy and remove it in the direction of the arrow ADF Top Section Pad Assy 5 Attach the new pad assy while pressing the pad plate Replacing Consumables for S1300i 472 ...

Страница 473: ...ining hook firmly ATTENTION Make sure that the pad assy is attached firmly Otherwise paper jams or other feeding errors may occur 7 Close the ADF top section ADF Paper Chute Cover ADF Top Section It clicks when it returns to its original position 8 Connect the power connection cable power cable or USB bus power cable to the power supply source AC outlet or computer and turn on the ScanSnap 9 Reset...

Страница 474: ...kbar and select Check consumable status from the Right Click Menu page 86 The ScanSnap Manager Check consumable status window appears 2 Click the Reset button for PAD ASSY Count A confirmation window appears 3 Click the Yes button PAD ASSY Count is reset to 0 Replacing Consumables for S1300i 474 ...

Страница 475: ...ter 2 Remove any documents from the ADF paper chute cover 3 Pull the ADF release tab towards you to open the ADF top section ADF Paper Chute Cover ADF Release Tab ADF Top Section 4 Remove the sheet guide While holding the squeeze clip on the right end and pressing it inward lift the sheet guide to remove it Squeeze Clip Squeeze Clip Sheet Guide 5 Turn the bushing that is on the left Replacing Cons...

Страница 476: ...ssembly Shaft ATTENTION There may be paper dust around the pick roller assembly Wipe off the paper dust with a cloth moistened with Cleaner F1 Not doing so may cause image faults Do not use water mild detergent or aerosol spray 7 Remove the pick roller assembly from the shaft While lifting the retaining clip of the pick roller assembly pull out the shaft Pick Roller Assembly Shaft Replacing Consum...

Страница 477: ...ssembly to the shaft Insert the drive pin of the shaft into the slot of the pick roller assembly Pick Roller Assembly Drive Pin Shaft 9 Attach the shaft to the ScanSnap Insert the right end of the shaft into the bushing on the right side and then slowly attach the left end of the shaft into place Pick Roller Assembly Shaft 10 Secure the bushing on the left Replacing Consumables for S1300i 477 ...

Страница 478: ...ht end attach the sheet guide to its original position Squeeze Clip Squeeze Clip Sheet Guide It clicks when the squeeze clip is locked in place ATTENTION Make sure that the sheet guide is attached firmly Otherwise paper jams or other feeding errors may occur 12 Close the ADF top section ADF Paper Chute Cover ADF Top Section It clicks when it returns to its original position Replacing Consumables f...

Страница 479: ...the ScanSnap Manager icon in the notification area located at the far right of the taskbar and select Check consumable status from the Right Click Menu page 86 The ScanSnap Manager Check consumable status window appears 2 Click the Reset button for PICK ROLLER Count A confirmation window appears 3 Click the Yes button PICK ROLLER Count is reset to 0 Replacing Consumables for S1300i 479 ...

Страница 480: ... Updating the Firmware page 482 l Uninstalling the Software page 483 l Part Number of the Background Pad SV600 page 485 l Part Number of the Carrier Sheet iX1500 iX500 iX100 S1100i page 486 l Specifications of the ScanSnap page 487 Appendix 480 ...

Страница 481: ...tails refer to the ScanSnap Online Update Help You can also manually check from ScanSnap Manager whether a newer version of the program is available and run the update 1 Right click the ScanSnap Manager icon in the notification area located at the far right of the task bar and click Help Online Update from the Right Click Menu page 86 a ScanSnap Online Update checks whether a newer version of Scan...

Страница 482: ...ware data may be corrupted Turning off the ScanSnap Disconnecting the ScanSnap from the Internet by turning off the wireless access point or changing the settings HINT l If you use the software related to the ScanSnap apply the latest updates to the software as well For details refer to Updating the Software page 481 1 Click the ScanSnap Manager icon in the notification area located at the far rig...

Страница 483: ... Show the Programs and Features window l Windows 10 Select Start menu Control Panel under Windows System Programs and Features under Programs l Windows 8 1 Click on the lower left side of the Start screen Control Panel under Windows System Uninstall a program under Programs l Windows 7 Select Start menu Control Panel Uninstall a program under Programs a The Programs and Features window appears wit...

Страница 484: ...l ScanSnap Manager l ScanSnap Organizer l CardMinder l ScanSnap Online Update HINT To uninstall more than one software program repeat steps 4 to 6 for each software program Uninstalling the Software 484 ...

Страница 485: ...Background Pad are as follows Product Name Qty Part No Background Pad 1 sheet PA03641 0052 For details about purchasing the Background Pad refer to Suppliers of Consumables Optional Parts in About Customer Support and Maintenance page 500 Part Number of the Background Pad SV600 485 ...

Страница 486: ...er Sheets 5 sheets PA03360 0013 The Carrier Sheet should be replaced approximately every 500 scans However replace it if damage or dirt is noticeable For details about purchasing the Carrier Sheet refer to Suppliers of Consumables Optional Parts in About Customer Support and Maintenance page 500 Part Number of the Carrier Sheet iX1500 iX500 iX100 S1100i 486 ...

Страница 487: ...ications of iX1500 page 488 l Specifications for iX500 page 490 l Specifications of iX100 page 492 l Specifications of SV600 page 494 l Specifications of S1300i page 496 l Specifications for S1100i page 498 Specifications of the ScanSnap 487 ...

Страница 488: ...B type Wireless LAN 2 IEEE802 11 a b g n ac 2 4 GHz 5 GHz 3 Input power Voltage 100 to 240 V 10 Phase Single phase Frequency range 50 60 Hz Power consumption USB connection During operation 17 W or less During sleep mode 1 5 W or less Wireless LAN connection During operation 17 W or less During sleep mode 1 6 W or less Temperature humidity allowable ranges Temperature During operation 5 to 35 degr...

Страница 489: ...rePoint PDF editing Kofax Power PDF Standard or Nuance Power PDF Standard 1 When the ScanSnap is connected to a USB 3 1 Gen1 port or a USB 3 0 port the ScanSnap may not be recognized by some computers In this case connect the ScanSnap to a USB 2 0 port 2 IPv6 is not supported 3 Depending on the country where the ScanSnap is purchased the ScanSnap may not support the 5 GHz SSID Change the settings ...

Страница 490: ...n compliant Input power Voltage 100 to 240 V 10 Phase Single phase Frequency range 50 60 Hz Power consumption USB connection During operation 20 W or less During sleep mode 1 6 W or less Wireless LAN connection During operation 20 W or less During sleep mode 2 5 W or less Temperature humidity allowable ranges Temperature During operation 5 to 35 degrees C 41 to 95 degrees F During standby 20 to 60...

Страница 491: ...BYY FineReader for ScanSnap Update management and application ScanSnap Online Update ECM linkage Scan to Microsoft SharePoint PDF editing Nuance Power PDF Standard 1 When the ScanSnap is connected to a USB 3 0 port the ScanSnap may not be recognized by some computers In this case connect the ScanSnap to a USB 2 0 port 2 IPv6 is not supported Specifications of the ScanSnap 491 ...

Страница 492: ...B 2 0 USB 1 1 connector USB Micro B type 3 Wireless LAN 4 IEEE802 11b g n compliant Input power Voltage 5 V USB bus power Power consumption During operation 4 7 W or less During sleep mode 2 2 W or less Temperature humidity allowable ranges Temperature During operation 5 to 35 degrees C 41 to 95 degrees F During standby 20 to 60 degrees C 4 to 140 degrees F During storage transportation 20 to 60 d...

Страница 493: ... Text recognition ABBYY FineReader for ScanSnap Update management and application ScanSnap Online Update ECM linkage Scan to Microsoft SharePoint 1 When the output guide is open 2 When the output guide is closed 3 When the ScanSnap is connected to a USB 3 0 port the port operates as a USB 2 0 port 4 IPv6 is not supported Specifications of the ScanSnap 493 ...

Страница 494: ...0 mm 17 01 11 81 in minimum 25 4 25 4 mm 1 00 1 00 in Magnification in vertical scanning length 1 5 Document thickness 30 mm 1 18 in or less Interface USB 2 0 USB 1 1 connector B type 1 Input power Voltage 100 to 240 V 10 Phase Single phase Frequency range 50 60 Hz Power consumption During operation 20 W or less During sleep mode 2 6 W or less Temperature humidity allowable ranges Temperature Duri...

Страница 495: ...t CardMinder Text recognition ABBYY FineReader for ScanSnap Update management and application ScanSnap Online Update ECM linkage Scan to Microsoft SharePoint PDF editing Kofax Power PDF Standard or Nuance Power PDF Standard 1 When the ScanSnap is connected to a USB 3 0 port the port operates as a USB 2 0 port Specifications of the ScanSnap 495 ...

Страница 496: ...ment thickness Number of sheets allowed to be loaded Up to 10 sheets A4 80 g m2 20 lb Interface USB USB 2 0 USB 1 1 connector USB Mini B type 1 Input power Voltage 100 to 240 V 10 or 5 V USB bus power Phase Single phase Frequency range 50 60 Hz Power consumption Power cable connection During operation 9 W or less During sleep mode 2 6 W or less USB bus power cable connection During operation 5 W o...

Страница 497: ...anager File management l ScanSnap Home l ScanSnap Organizer Business card management CardMinder Text recognition ABBYY FineReader for ScanSnap Update management and application ScanSnap Online Update ECM linkage Scan to Microsoft SharePoint 1 When the ScanSnap is connected to a USB 3 0 port the port operates as a USB 2 0 port Specifications of the ScanSnap 497 ...

Страница 498: ...ickness Interface USB 2 0 USB 1 1 connector USB Mini B type 3 Input power Voltage 5 V USB bus power Power consumption During operation 2 5 W or less During sleep mode 1 0 W or less Temperature humidity allowable ranges Temperature During operation 5 to 35 degrees C 41 to 95 degrees F During standby 20 to 60 degrees C 4 to 140 degrees F During storage transportation 20 to 60 degrees C 4 to 140 degr...

Страница 499: ...t CardMinder Text recognition ABBYY FineReader for ScanSnap Update management and application ScanSnap Online Update ECM linkage Scan to Microsoft SharePoint 1 When the output guide is open 2 When the output guide is closed 3 When the ScanSnap is connected to a USB 3 0 port the port operates as a USB 2 0 port Specifications of the ScanSnap 499 ...

Страница 500: ...art screen and select User s Guide under ABBYY FineReader for ScanSnap TM on the All apps screen Technical Support Windows 7 Select Start menu All Programs ABBYY FineReader for ScanSnap TM User s Guide Technical Support Suppliers of Consumables Optional Parts https scansnap fujitsu com Maintenance Contact the distributor dealer where you purchased this product Refer to the contact information in t...

Отзывы: