background image

AMILO Pro 


10 

A26391-K149-Z100-1-7619, Edition 2 


Battery 

!


The battery in the notebook is not fully charged at the time of delivery. You must first 
charge the battery with the power adapter connected to the mains supply (see the section 
"Connecting the power adapter"). 


The battery supplies your notebook with the necessary power during mobile use. The battery 
indicator 

- +

 displays the current state of the battery. 

Information on how to install and remove the battery, how to maintain and service it, and how to 
optimise the battery operating time can be found in the "EasyGuide" manual. 

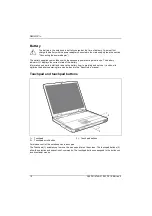
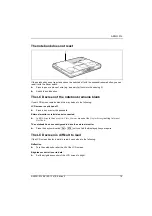
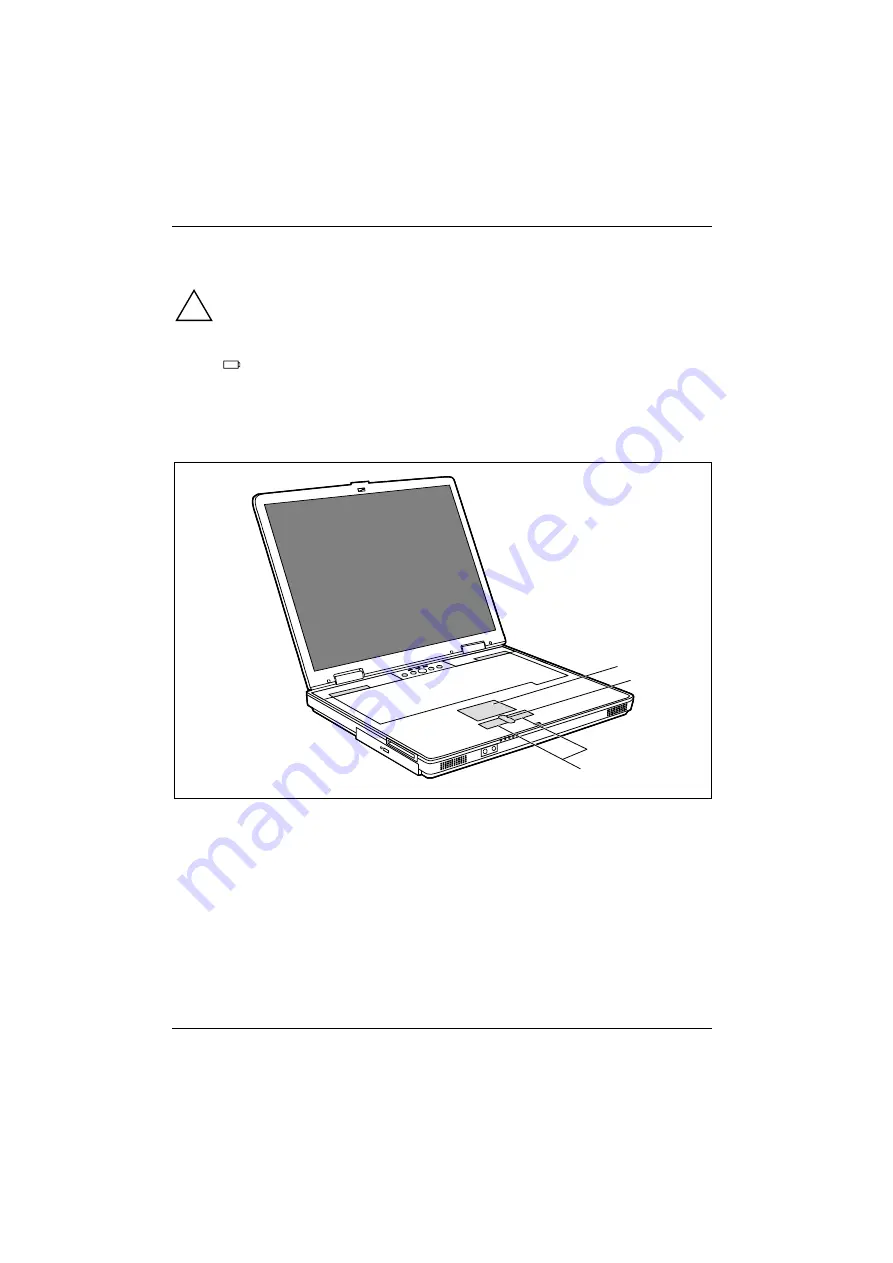
Touchpad and touchpad buttons 

1

2

3


1 =   Touchpad 
2 =   Touchpad scroll button 

3 =   Touchpad buttons 


For mouse control, the notebook has a touchpad.  
The Touchpad (1) enables you to move the mouse pointer on the screen. The touchpad buttons (3) 
allow the selection and execution of commands. The touchpad buttons correspond to the buttons on 
a conventional mouse. 

Содержание Siemens AMILO Pro answers 2

Страница 1: ...Getting Started AMILO Pro English answers2 ...

Страница 2: ...partner your sales outlet Additional information is contained in the Help Desk list and the Warranty manual The Warranty manual can be found on the Drivers Utilities CD provided with your computer The latest information on our products tips updates etc can be found on the internet under http www fujitsu siemens com ...

Страница 3: ......

Страница 4: ... sobre papel reciclado Questo manuale è stato stampato su carta da riciclaggio Denna handbok är tryckt på recyclingpapper Dit handboek werd op recycling papier gedrukt Herausgegeben von Published by Fujitsu Siemens Computers GmbH Bestell Nr Order No A26391 K149 Z100 1 7619 Ausgabe Edition 2 Printed in the Federal Republic of Germany AG 0804 08 04 A26391 K149 Z100 1 7619 ...

Страница 5: ...AMILO Pro August 2004 edition ...

Страница 6: ...eferenced are trademarks or registered trademarks of their respective owners whose protected rights are acknowledged Copyright Fujitsu Siemens Computers GmbH 2004 All rights including rights of translation reproduction by printing copying or similar methods in part or in whole are reserved Offenders will be liable for damages All rights including rights created by patent grant or registration of a...

Страница 7: ... contents under Windows Recovery 15 The notebook cannot be started 16 The notebook stops working 16 No display appears on the screen the power on indicator flashes 17 The notebook switches off 17 The battery indicator flashes or is off 17 The battery discharges too quickly 18 The Suspend Resume button does not respond properly 18 The notebook does not react 19 The LCD screen of the notebook remain...

Страница 8: ......
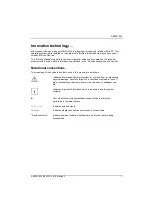
Страница 9: ...Notational conventions The meanings of the symbols and fonts used in this manual are as follows Indicates information which is important for your health or for preventing physical damage Failure to follow the instructions may lead to loss of data invalidate your warranty destroy the notebook or endanger your life i Indicates important information which is required to use the system properly Text w...

Страница 10: ...nstalled to be able to open the EasyGuide manual If the installation file can be found in the menu Start All Programs AddOn install the programme by double clicking on the installation file If you cannot find the installation file the programme Adobe Acrobat Reader has already been preinstalled The EasyGuide manual can be opened from the menu Start All Programs AddOn or by double clicking on the s...

Страница 11: ...g aids Switch off the notebook when you are in an aircraft or driving in a car Switch off the radio components on the notebook the Wireless LAN indicator must be dark when you are in a hospital an operating room or near a medical electronics system The transmitted radio waves can impair the operation of the medical devices Keep the notebook at least 20 cm from a pacemaker as otherwise the proper o...

Страница 12: ...ould you need to restore your hard disk the instructions are provided on the case of the Recovery CD delivered with your system i All hard disk contents are deleted during hard disk restoration Operating system drivers and software utilities must be reinstalled It is therefore recommended to save important data to a backup medium before restoring the hard disk contents ...

Страница 13: ...ces Keep the original packing material in case you need to ship the equipment again Selecting a location Select a suitable location for the notebook before setting it up Consider the following points when looking for a location Do not place it on a soft surface e g a carpet or soft furnishings The space between the notebook s feet must be clear Place the notebook on a stable flat nonslippery surfa...

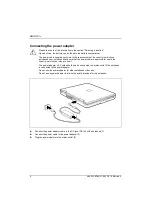
Страница 14: ...Make sure that the power cable is approved for use in the country in which you intend to use it The power adapter s AC cord should only be connected to a mains outlet if the notebook is connected to the power adapter Do not use the power adapter for other notebooks or devices Do not use a power adapter that is not specially intended for this notebook 1 2 3 Connect the power adapter cable to the DC...

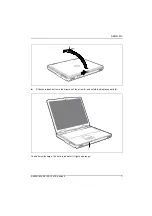
Страница 15: ...MILO Pro A26391 K149 Z100 1 7619 Edition 2 7 2 Slide the release button in the direction of the arrow 1 and unfold the display upward 2 1 The battery will charge The battery indicator 1 lights up orange ...

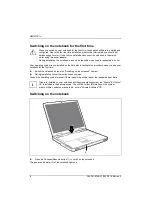
Страница 16: ...re installed on the hard disk to facilitate the procedure when you use your notebook for the first time Switch the notebook on see the Switching on the notebook section During installation follow the instructions on screen Consult the operating system manual if there is anything unclear about the requested input data i If there is installed on your notebook a Windows operating system the Drivers U...

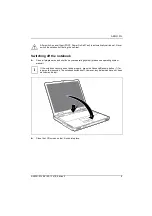
Страница 17: ... self test Switching off the notebook Close all programmes and shut down your operating system please see operating system manual i If the notebook cannot be shut down properly press the Suspend Resume button 1 for approx four seconds The notebook switches off However any data which have not been saved may be lost 1 2 Close the LCD screen so that it locks into place ...

Страница 18: ...tor displays the current state of the battery Information on how to install and remove the battery how to maintain and service it and how to optimise the battery operating time can be found in the EasyGuide manual Touchpad and touchpad buttons 1 2 3 1 Touchpad 2 Touchpad scroll button 3 Touchpad buttons For mouse control the notebook has a touchpad The Touchpad 1 enables you to move the mouse poin...

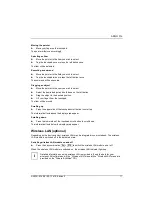
Страница 19: ...will be moved Scrolling up Press the upper side of the touchpad scroll button to scroll up The information texts above the display area appear Scrolling down Press the lower side of the touchpad scroll button to scroll down The information texts below the display area appear Wireless LAN optional Depending on the device variant wireless LAN may be integrated in your notebook The wireless LAN modul...

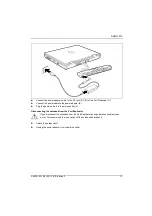
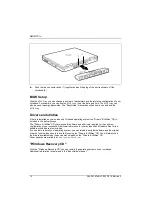
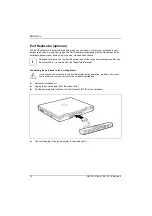
Страница 20: ...ditional information on the Port Replicator and on the various external devices that can be connected to it is contained in the EasyGuide manual Connecting the notebook to the Port Replicator If you connect the notebook to the Port Replicator during operation problems can occur We recommend that you switch off the notebook beforehand Switch the notebook off Unplug the power adapter from the mains ...

Страница 21: ...er cable to the power adapter 2 Plug the power cable into the mains outlet 3 Disconnecting the notebook from the Port Replicator If you disconnect the notebook from the Port Replicator during operation problems can occur We recommend that you switch off the notebook beforehand Switch the notebook off Unplug the power adapter from the mains outlet ...

Страница 22: ...ities CD is included in the delivery scope The Drivers Utilities CD contains useful software and all drivers required for the optimum configuration of your notebook Additional information for your notebook and Readme files for the software provided are also included If you need to reinstall your operating system you can reload the original software and the original drivers of your notebook onto th...

Страница 23: ...g the notebook Any changes you have made to the BIOS Setup settings after receiving the notebook Your system configuration and all peripheral devices connected to your system Your sales contract Restoring the hard disk contents under Windows Recovery All hard disk contents are deleted during hard disk restoration Operating system drivers and software utilities must be reinstalled It is therefore r...

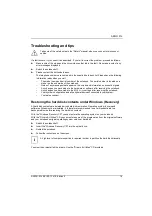
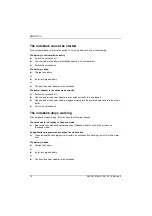
Страница 24: ...ook off Check whether the power adapter is connected correctly to the notebook Check whether the power cable is plugged properly into the power adapter and into the mains outlet Switch the notebook on The notebook stops working If the notebook stops working this may have the following reasons The notebook is in Standby or Suspend mode Reactivate the notebook by pressing a key Standby mode or by sw...

Страница 25: ...hat the picture only appears on the external screen Press the key combination Fn F10 to switch over the display to the LCD screen or to specify the simultaneous display on the LCD screen and the external screen The notebook switches off If you are operating the notebook with a battery you may have overlooked the reference to the low battery level and the notebook has switched over to Standby mode ...

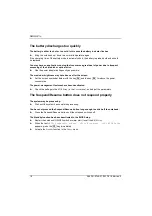
Страница 26: ...e screen somewhat darker with the key Fn and the key F6 to reduce the power consumption The power management features have been deactivated Check the settings in the BIOS Setup in the Power menu and adjust the parameters The Suspend Resume button does not respond properly The system may be processing Wait until the system has completed processing You have not pressed the Suspend Resume button long...

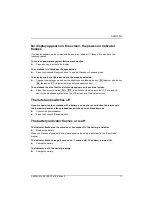
Страница 27: ...CD screen is switched off Press a key or enter the password External monitor or television set connected In BIOS Setup in the Advanced Video Features menu set the Display Settings setting to Internal Flat Panel The notebook has been configured to drive the external monitor Press the key combination Fn F10 until you find the display option you require The LCD screen is difficult to read If the LCD ...

Страница 28: ... data cable is properly connected to the notebook and the external monitor if it is plugged in with a connector Switch on the external monitor and the notebook The external monitor is blank or the image is unstable The wrong external monitor has been selected or the wrong screen resolution has been set for the application programme Terminate the application programme in Windows with Alt F4 If the ...

Страница 29: ...alled and is present before the application programme is started Detailed information can be found in the User guides for the mouse or application programme Mouse is not connected Switch the notebook off Check whether the mouse cable is correctly connected to the notebook If you use an adapter or extension lead with the mouse cable check the connections Switch the notebook on The printer does not ...

Страница 30: ...en you switch on the notebook the buffer battery that supplies the internal clock is dead Connect the notebook via its power adapter to a grounded mains outlet or install a fresh battery The buffer battery will take approximately two days to complete its recharge If that problem exists further more please contact our service You have forgotten your user and or supervisor password If you have forgo...

Страница 31: ...ebook off Switch the notebook on Enter the BIOS Setup programme by pressing F2 Select the Exit menu in the BIOS Setup Select the entry Load Setup Defaults Select OK and press the Enter key If the error message appears repeatedly please contact the place of purchase or our customer service centre Extended memory failed at offset xxxx Failing Bits zzzz zzzz When testing the extended memory an error ...

Страница 32: ...to SETUP This error message appears if an error occurs during the self test before starting the operating system Press the F1 function key to start the operating system Enter the BIOS Setup programme by pressing F2 Previous boot incomplete Default configuration used Due to an error during the previous system boot default values were used for certain settings Check the BIOS Setup and the settings P...

Отзывы: