Fujitsu Lifebook P701 Скачать руководство пользователя страница 60

Connecting external devices

Connecting an external monitor to the DisplayPort

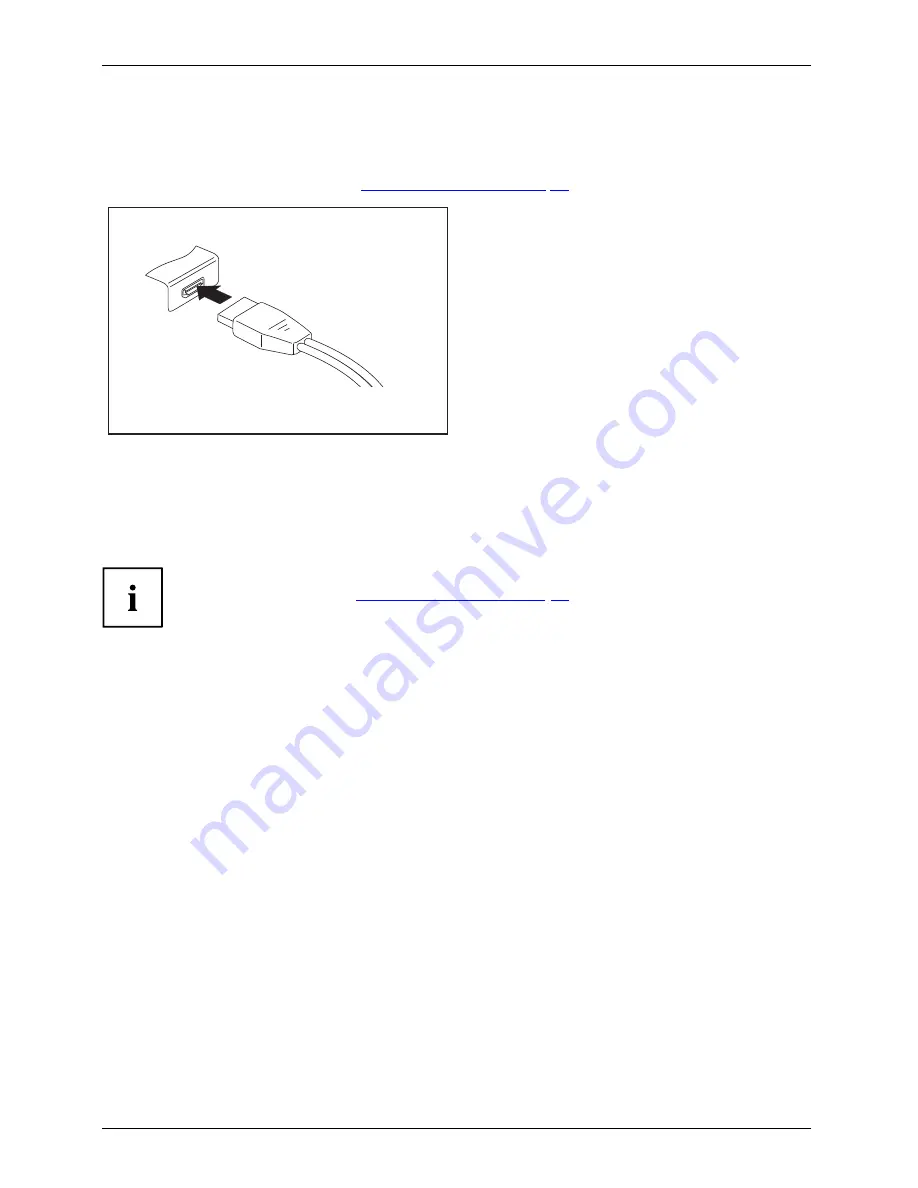
It is possible to connect a digital monitor to the DisplayPort. Screen output is limited to a maximum
of two screens at any one time (see

"Key combinations", Page 23

, section "Toggle output screen").

Digital DisplayPort

Switch off the notebook and the external monitor.

Plug the data cable of the external monitor into the monitor port.

First switch on the external monitor and then the notebook.

You can also switch between the external monitor and the LCD monitor of the
notebook, see chapter

"Key combinations", Page 23

.

You can display the same picture on the external monitor and the
notebook LCD monitor simultaneously.

56

Fujitsu Technology Solutions

Содержание Lifebook P701

Страница 1: ...System Operating Manual LIFEBOOK P701 ...

Страница 2: ...ebsite http ts fujitsu com For automatic driver updates go to http support ts fujitsu com com support index html Should you have any technical questions please contact our Hotline Service Desk see Service Desk list or visit http ts fujitsu com support servicedesk html Your sales partner Your sales office We hope you really enjoy using your new Fujitsu system ...

Страница 3: ......

Страница 4: ... to availability No warranty is offered or liability accepted in regard of the completeness correctness or current applicability of any data or illustrations Brand names may be protected trademarks of the respective manufacturer and or protected by copyright Use of these by third parties for their own purposes may constitute an infringement of the holders rights Further information can be found at...

Страница 5: ...es 12 First time setup of your device 15 Working with the notebook 18 Security functions 48 Connecting external devices 54 Removing and installing components during servicing 61 Settings in BIOS Setup Utility 69 Troubleshooting and tips 71 Technical data 78 Manufacturer s notes 79 Index 80 ...

Страница 6: ...ed are trademarks or registered trademarks of their respective owners whose protected rights are acknowledged Copyright Fujitsu Technology Solutions GmbH 2012 All rights reserved including rights of translation reproduction by printing copying or similar methods in part or in whole In the event of violations perpetrators will be liable to prosecution for damages All rights reserved including right...

Страница 7: ...the notebook 20 Notebook switching off 20 Keyboard 21 Virtual numeric keypad 23 Key combinations 23 Country and keyboard settings 25 Application keys 25 Programming the application keys 26 Touchpad and touchpad buttons 27 Moving the pointer 27 Selecting an item 27 Executing commands 27 Dragging items 28 ScrollWheel 28 Scrolling downwards or forwards 29 Scrolling upwards or backwards 29 Back one pa...

Страница 8: ...Setup Utility supervisor and user password 49 Password protection for booting of the operating system 51 SmartCard reader 52 Inserting the SmartCard 52 Trusted Platform Module TPM device dependent 53 Enabling TPM 53 Disabling TPM 53 Connecting external devices 54 Connecting an external monitor 55 Connecting an external monitor to the DisplayPort 56 Connecting USB devices 57 USB port with charging ...

Страница 9: ...d tips 71 Help if problems occur 71 Restoring the hard disk contents under Windows 72 The notebook s date or time is incorrect 72 When certain characters are entered on the keyboard only numerals are written 72 The notebook s LCD screen remains blank 73 The LCD screen is difficult to read 73 The external monitor remains blank 73 The external monitor is blank or the image is unstable 74 The noteboo...

Страница 10: ...Contents 6 Fujitsu Technology Solutions ...

Страница 11: ... Information on the connections and user components of your notebook can be found in Ports and controls Page 9 Further information The Windows drivers for your device can be found on our Internet site The factory installation of your device does not support any other operating system Fujitsu Technology Solutions accepts no liability whatsoever if any other operating system is used Software oriente...

Страница 12: ...a command used to start a program start exe This font indicates information that is displayed on the screen by a program e g Installation is complete This font indicates terms and texts used in a software interface e g Click on Save names of programs or files e g Windows or setup exe This font indicates cross references to another section e g Safety information cross references to an external sour...

Страница 13: ... Please familiarise yourself with these components before you start to work with the device Front 1 2 4 3 5 6 12 11 4 8 9 10 7 1 Microphone 2 WebCam 3 ON OFF switch 4 Loudspeakers 5 Status indicators 6 Application keys 7 ScrollWheel 8 Status indicators 9 Fingerprint sensor 10 ON OFF switch for radio components 11 Touchpad buttons 12 Touchpad Fujitsu Technology Solutions 9 ...

Страница 14: ...or DC IN 2 LAN port 3 Kensington lock device 4 USB port 5 SmartCard reader 6 Memory card reader Right side 1 2 3 4 7 5 6 1 ExpressCard slot 2 DisplayPort 3 USB port 4 USB port 5 Headphone port 6 Microphone port 7 Monitor port VGA 10 Fujitsu Technology Solutions ...

Страница 15: ... and controls Bottom 1 2 3 4 5 6 1 Battery release 2 Memory service compartment 3 Hard disk service compartment 4 Rechargeable battery 5 Port Replicator port 6 Battery release Fujitsu Technology Solutions 11 ...

Страница 16: ...fer to the notes in the chapter Removing and installing components during servicing Page 61 This notebook complies with the relevant safety regulations for data processing equipment If you have questions about using your notebook in a particular area please contact your sales outlet or our Hotline Service Desk Additional safety notes for devices with radio components Radiocomponent WirelessLAN Blu...

Страница 17: ...the radio component for data security reasons With data traffic via a wireless connection it is also possible for unauthorised third parties to receive data Information on activating data encryption is provided in the documentation for your radio component If you wish to use your notebook during a flight first check with the flight attendants if it is OK to do so When travelling in other countries...

Страница 18: ...r computers Normal household cleaners and polishes can damage the markings on the keyboard and the device the paintwork or the notebook itself Ensure that no liquid enters the notebook The LCD screen very sensitive to scratches Only clean the display surface with a very soft slightly damp cloth Switch the notebook off Cleaning Notes Notebook Keyboard Touchpad LCDscreen CrystalViewdisplay In order ...

Страница 19: ...ur device during the first time setup process On delivery the battery can be found in the battery compartment or in the accessories kit The battery must be charged if you want to operate your device using the battery When used on the move the built in battery provides the device with the necessary power You can increase the operating time by using the available energy saving functions For instruct...

Страница 20: ...at the rubber feet of the device may mark certain types of delicate surfaces Keep other objects at least 100 mm away from the device and its mains adapter to ensure adequate ventilation Never cover the ventilation slots of the device Do not expose the device to extreme environmental conditions Protect the device from dust humidity and heat Mains adapter connecting Preparingforoperation Mainsadapte...

Страница 21: ...ough time for it to be fully completed and connect the device to the mains using the mains adapter During the installation process DO NOT restart the device unless you are requested to do so To make it easier to use your device for the first time the operating system is pre installed on the hard disk Switch on your device During installation follow the instructions on screen If a Windows operating...

Страница 22: ...titled Connecting external devices Page 54 for instructions on how to connect devices such as a mouse and a printer to the notebook Please refer to the notes in Important notes Page 12 Status indicators Statusindicators The status indicators provide information about the status of the power supply the drives and the keyboard functions E 18 Fujitsu Technology Solutions ...

Страница 23: ...tween 50 and 100 of its maximum capacity The indicator lights up orange The battery is charged to between 13 and 49 of its maximum capacity The indicator lights up red The battery is charged to between 0 and 12 of its maximum capacity Indicator flashes red An error has occured Energy saving functions indicator Indicator is illuminated None of the energy saving functions have been activated Indicat...

Страница 24: ...ook switching off Back up your data and close all applications before you switch off your device Otherwise data might be lost Shut down the operating system properly e g from the Windows Start menu by clicking on Start Shut Down OK Notebook If the notebook is not switched off automatically press the ON OFF switch for approx five seconds Close the LCD screen 20 Fujitsu Technology Solutions ...

Страница 25: ...f an enhanced keyboard Some enhanced keyboard functions are mapped with key combinations The following description of keys refers to Windows Additional functions supported by the keys are described in the relevant manuals supplied with your application programs The figure below shows how to access the different characters on keys with overlaid functions The example applies when the Caps Lock key h...

Страница 26: ... of overlay keys the character printed on the upper left of the key will appear when that key is pressed To cancel the Caps Lock function simply press the Caps Lock key again Shiftkey CapsLock Shift key The Shift key causes uppercase characters to appear In the case of overlay keys the character printed on the upper left of the key appears when that key is pressed Shiftkey Shift Fn button The Fn k...

Страница 27: ...ivated Further information about the status indicators can be found in chapter Status indicators Page 18 Key combinations Keycombinations The following description of key combinations applies to Windows operating systems Some of the following key combinations may not function in other operating systems or with certain device drivers Other key combinations are described in the relevant manuals supp...

Страница 28: ...reen Use this key combination to select which screen s is are used for display if an external monitor is connected Screen output is possible only on the notebook s LCD screen on the LCD screen of the notebook and the external monitor at the same time only on the external monitor This setting is useful if you would like a high resolution and a high refresh rate on an external monitor Fn F10 Toggleo...

Страница 29: ...d as follows Enter the settings by clicking Start Settings Control Panel Time Regional and Language Options Application keys Applicationkeys Your notebook is equipped with five application keys All application buttons are freely programmable see Programming the application keys Page 26 E Fujitsu Technology Solutions 25 ...

Страница 30: ...cator Red Minimum battery power Amber Medium battery power Green Medium to full battery power Wireless Components key This application key is used to start the WirelessSelector software The wireless components that have been activated in the BIOS Setup can be switched on and off individually Programming the application keys With the Application Panel you can assign various functions to the applica...

Страница 31: ...execute commands They correspond to the buttons on a conventional mouse You can use a key combination to disable the touchpad to avoid accidentally moving the pointer on the screen see also Key combinations Page 23 Moving the pointer Move your finger on the touchpad Touchpad The pointer will move Selecting an item Move the pointer to the item you wish to select Touchpad Tap the touchpad once or pr...

Страница 32: ...item will be moved ScrollWheel The ScrollWheel 1 is an innovative and extremely convenient control The ScrollWheel allows you to scroll up or down in the active window e g on a website or forwards and backwards in a document with a single finger movement It makes it very easy for you to display and read websites documents and the content of windows 1 28 Fujitsu Technology Solutions ...

Страница 33: ...You will scroll downwards or forwards Scrolling upwards or backwards Move the cursor to the window you wish to select Move your finger anticlockwise on the ScrollWheel You will scroll upwards or backwards Back one page in Web browser Tap the centre of the ScrollWheel The Web browser returns to the previous page displayed Fujitsu Technology Solutions 29 ...

Страница 34: ...ts of three subpixels red green and blue so there are almost 3 million subpixels in total According to ISO 9241 3 class II a maximum of 2 light and 2 dark pixels and an additional 5 light or 10 dark subpixels or a corresponding mix may be defective 1 light subpixel counts as 2 dark subpixels Pixel A pixel consists of 3 subpixels normally red green and blue A pixel is the smallest element that can ...

Страница 35: ...vel is adjusted Further information on using the webcam and on the additional settings which are possible for your webcam can be found in the help function of the program which uses the webcam If you wish to carry out a function test with your webcam you can use the corresponding test software available at http ts fujitsu com support Rechargeable battery Rechargeablebattery Battery Life battery Re...

Страница 36: ...p the battery pack between 0 C and 30 C The lower the temperature at which the batteries are stored the lower the rate of self discharge If you will be storing batteries for a longer period longer than two months the battery charge level should be approx 30 To prevent exhaustive discharge which would permanently damage the battery check the level of charge of the battery at regular intervals To be...

Страница 37: ...ee chapter Preparing to remove components Page 62 1 2 3 Slide the release button in the direction of the arrow 1 and hold it in place Slide the release button in direction of the arrow 2 Remove the battery from the battery compartment 3 Fujitsu Technology Solutions 33 ...

Страница 38: ...ng of the components in your notebook you should periodically clean the ventilation slot of the heatsink This ensures optimum fan performance You can achieve the best cleaning results with a small hand held vacuum cleaner If necessary you can also use a dry brush to release dust from the ventilation slots Do not use any cleaning liquids Ensure that no liquid enters the device To avoid overheating ...

Страница 39: ...cover 1 and remove it from its slot 2 Clean the dust chamber 1 Insert the ventilation slot cover into the slot 1 at an angle as shown and ensure that you feel it click into place Complete the removal see chapter Finishing component removal Page 68 Fujitsu Technology Solutions 35 ...

Страница 40: ... minutes Hibernate mode S4 After 1 hour After 30 minutes Select the power management functions in your Control Panel Select the Screen Saver in your Control Panel or Right click on the desktop Switch on the screen saver by clicking Personalization Change screen saver If you need further information about an option you can get help with most settings by pressing F1 to open the Microsoft Help When t...

Страница 41: ...ormats Your notebook supports the following format Secure Digital SDTM card Inserting the memory card Carefully slide the memory card into the slot The label should be facing upward Do not apply excessive force as otherwise the delicate contact surfaces could be damaged Memorycard Depending on the particular type used the memory card may protrude slightly from the slot Fujitsu Technology Solutions...

Страница 42: ...at it is now safe to remove the memory card 1 2 On devices with card locking Press on the storage card 1 Memorycard The storage card is released and can now be removed Pull the storage card out of the slot 2 ExpressCards Slot ExpressCard An ExpressCard slot allows an ExpressCard 34 to be used with the computer Consult the documentation supplied by the ExpressCard s manufacturer and follow the inst...

Страница 43: ...ke the card placeholder protrude from the notebook s case Pull the card placeholder out of the slot 2 Insert the card into the slot guide with the connection contacts first Gently push the card into the slot until you feel it click into place Do not use any force Depending on the particular type used the card may protrude slightly from the slot Please see the documentation relating to the card for...

Страница 44: ...Insert the card placeholder into the slot guide Gently slide the card placeholder into the slot until you feel it click into place Loudspeakers and microphones Microphone Loudspeakers Bassloudspeaker subwoofer Volumecontrol Information on the exact position of the speakers and microphone can be found in Ports and controls Page 9 Please refer to chapter Key combinations Page 23 for information on s...

Страница 45: ...ge 62 1 Slide the SIM card into the slot 1 until it is felt to engage as shown in the battery compartment Complete the installation see chapter Finishing component removal Page 68 Removing the SIM card Prepare for removal of the SIM card see chapter Preparing to remove components Page 62 1 Press on the edge of the SIM card so that it jumps up slightly out of the slot Pull the SIM card out of the s...

Страница 46: ... the BIOS Setup In order to be able to do this you will either need to know the supervisor password if one has been assigned or no password must have been assigned Pay attention to the additional safety notes for devices with radio components provided in the Safety Regulations manual Details on using Wireless LAN can be found in the online help system included in the Wireless LAN software You can ...

Страница 47: ...ernet and LAN EthernetLAN The internal network module of your notebook supports Ethernet LAN You can use it to establish a connection to a local network LAN Local Area Network 2 1 Connect the network cable to the LAN port of the notebook 1 Connect the network cable to your network connection 2 Your network administrator can help you to configure and use the LAN connections The network cable is not...

Страница 48: ... ports 2 e SATA port 3 LAN port 4 DVI port 5 VGA monitor port 6 Kensington Lock 7 DC input connector DC IN 8 Connector on the Port Replicator for the docking port on the underside of the notebook 9 DisplayPort The DVI port and DisplayPort cannot be used at the same time 44 Fujitsu Technology Solutions ...

Страница 49: ...d with the LCD screen closed when the notebook is connected to the Port Replicator The resulting overheating can cause reduced performance and increased activity of the integrated fan PortReplicator Switch the notebook off Remove the mains plug for the mains adapter from the mains socket Disconnect the mains adapter cable from the DC socket DC IN of the notebook 1 Position the notebook so that it ...

Страница 50: ...or output This profile will be loaded as soon as the notebook is connected to a Port Replicator of the same type Switching on the notebook via the port replicator Press the ON OFF switch on the port replicator to switch the notebook on The power on indicator of the Port Replicator lights up Switching off notebook via Port Replicator Close all applications and shut down your operating system please...

Страница 51: ...Replicator during operation We recommend that the notebook is switched off or that the appropriate undocking function provided by the operating system is executed Switch the notebook off 2 1 Pull the unlocking lever in the direction of the arrow 1 until you hear the notebook unlatch Lift off the notebook 2 Fujitsu Technology Solutions 47 ...

Страница 52: ...rives CDs DVDs or Blu ray Discs Some security functions need you to choose passwords Make a note of the passwords and keep them in a safe place If you forget your passwords you will need to contact the our Service Desk Deletion or resetting of passwords is not covered by your warranty and a charge will be made for assistance Configuring the fingerprint sensor Fingerprintsensor Fingerprintsensor Th...

Страница 53: ...ess your notebook Passwords are not covered by your warranty and a charge will be made for assistance Passwordprotection Your password can be up to eight characters long and contain letters and numbers No distinction is made between uppercase and lowercase Protecting BIOS Setup Utility supervisor and user password If you have opened these operating instructions on the screen we recommend that you ...

Страница 54: ...Setup Utility Please note that the user password only provides access to a few of the BIOS settings Changing the supervisor or user password You can only change the supervisor password when you have logged into the BIOS Setup Utility with the supervisor password Password Supervisorpassword Userpassword Call the BIOS Setup Utility and go to the Security menu When changing the password proceed exact...

Страница 55: ...ed option Disabled First Boot or Every Boot and press the Enter key Select the Save Changes Exit option under Exit The notebook will reboot You will be prompted to enter your password the supervisor password Deactivating system protection Start the BIOS Setup Utility and go to the Security menu Operatingsystem Select the Password on Boot option and press the Enter key Select the Disabled option an...

Страница 56: ...vantage of all the security features of your notebook you will need a CardOS SmartCard from Fujitsu Technology Solutions The SmartCard can only be used with a PIN offering maximum protection even if you lose the SmartCard In order to maximise your security the CardOS SmartCard is disabled if three incorrect attempts are made to enter the PIN When you use the CardOS SmartCard for the first time you...

Страница 57: ...er in the TPM By clicking on Enabled all secret keys e g SRK Storage Root Keys AIK Attestation Identity Keys etc generated by applications are deleted Please note that you will then no longer be able to access the data you have encrypted with the keys based on that holder Select the Exit Saving Changes option in the Exit menu Press the Enter key and select Yes The notebook will restart and TPM wil...

Страница 58: ...ore information about whether or not devices need to be switched off please refer to the documentation supplied with the external device Some of the external devices require special drivers see the operating system and external device documentation Connecting devices to the notebook 1 Turn off your notebook and all external devices 2 Unplug your notebook and all devices from the mains sockets 3 Co...

Страница 59: ...s Page 23 section Toggle output screen Monitor VGAconnectionsocket Screenport Monitorport Digital DVI monitor port Analogue VGA monitor port Switch off the notebook and the external monitor Plug the data cable of the external monitor into the monitor port First switch on the external monitor and then the notebook You can also switch back and forth between the external monitor and the notebook s LC...

Страница 60: ...put screen Digital DisplayPort Switch off the notebook and the external monitor Plug the data cable of the external monitor into the monitor port First switch on the external monitor and then the notebook You can also switch between the external monitor and the LCD monitor of the notebook see chapter Key combinations Page 23 You can display the same picture on the external monitor and the notebook...

Страница 61: ...vices while your operating system is running USB 1 x has a maximum data transfer rate of 12 Mbit s USB 2 x has a data transfer rate of up to 480 Mbit s Additional information can be found in the documentation for the USB devices Connect the data cable to the external device Connect the data cable to a USB port of the notebook Device drivers USB devices will be automatically recognised and installe...

Страница 62: ...book is switched off as otherwise the USB charging function will be disabled and the connected USB devices will not be charged Some USB devices e g mobile telephones require a driver in order to utilise the USB charging function In this case the USB charging function will not work when the notebook is switched off as no drivers are active when the notebook is switched off You can use this USB port...

Страница 63: ...onnect the data cable to the external device Connect the data cable to the eSATA port Device drivers The eSATA hard disk is automatically recognised by your operating system and installed You will find more information in the documentation for the external SATA hard disk and the operating system Safe removal of eSATA and USB devices Always correctly remove the device according to the rules describ...

Страница 64: ...Line In of the notebook Headphone port Connectingaudiodevices Audioports Connectingheadphones You can connect headphones or external loudspeakers to your notebook via the headphone port Connect the audio cable to the external device Connect the audio cable to the headphone port of the notebook The internal loudspeakers are disabled If you purchase a cable from a retailer please note the following ...

Страница 65: ...notebook off and pull the power plug out of the mains socket Always remove the battery Take care when you use the locking mechanisms on the battery and any other component Never use sharp objects such as screwdrivers scissors or knives as leverage to remove covers Notes Board ESD Boards with electrostatic sensitive devices ESD are marked with the label shown When handling boards fitted with ESDs y...

Страница 66: ...e 12 When installing removing memory modules the battery must be removed from the notebook and the notebook must not be connected to the power supply see Preparing to remove components Page 62 Only use memory expansion modules that have been approved for your notebook see Technical data Page 78 Never use force when installing or removing a memory extension Make sure that foreign objects do not fal...

Страница 67: ...rews for the individual components separate from each other If you install the wrong screws components may be damaged Lift the cover off the notebook 2 Removing memory modules 3 2 1 1 Carefully push the two mounting clips outwards 1 Memoryexpansion Memorymodule The memory module snaps upwards 2 Pull the memory module out of its slot in the direction of the arrow 3 Fujitsu Technology Solutions 63 ...

Страница 68: ...mory module downwards until you feel it click into place 2 Attaching the cover 2 1 Place the cover in the correct mounting position 1 If you remove more than one component at the same time keep the screws for the individual components separate from each other and make sure that you use the correct screws If you install the wrong screws components may be damaged Tighten the screw 2 64 Fujitsu Techn...

Страница 69: ... 2 Remove the screws 1 Keep the screws in a safe place If you are removing more than one component at the same time store the screws for the individual components separate from each other If you install the wrong screws components may be damaged Lift the cover off the notebook 2 Fujitsu Technology Solutions 65 ...

Страница 70: ...and installing components during servicing Removing a hard disk Lift the hard disk out of the service compartment in the direction of the arrow Ensure that the contacts disengage 66 Fujitsu Technology Solutions ...

Страница 71: ...Removing and installing components during servicing Installing a hard disk Place the hard disk into the service compartment Ensure that the contacts engage Fujitsu Technology Solutions 67 ...

Страница 72: ...component removal After you have removed or changed the system components as you required please prepare your device for operation again as follows Install the battery again see Installing a battery Page 34 Turn the notebook the right way up again and place it on a flat surface Reconnect the cables that you disconnected before 68 Fujitsu Technology Solutions ...

Страница 73: ...he BIOS Setup Utility Reboot the notebook switch off on or reboot the operating system BIOSSetupUtility The following or a similar display appears on the screen at start up F2 BIOS Setup F12 Boot Menu Press the function key F2 If a password has been assigned enter the password and press the Enter key If you have forgotten the password contact your system administrator or contact our customer servi...

Страница 74: ...es for all menus of the BIOS Setup Utility choose Load Setup Defaults and Yes Discard Changes Discard changes without exiting the BIOS Setup Utility To discard the changes you have made select Discard Changes and Yes The settings in place when BIOS Setup Utility was called remain effective You can now make additional settings in the BIOS Setup Utility If you want to exitBIOS Setup Utilitywith thes...

Страница 75: ...tract Our notebooks have been designed primarily with mobile applications in mind This means that considerable effort has been made to optimise components and equipment in terms of weight space and energy requirements Depending on the particular configuration you have purchased it is possible that functionality may be slightly reduced compared to a desktop PC if you are running processor intensive...

Страница 76: ...installed hardware components will not be correctly supported until this has been done Insert the Drivers Utilities CD DVD into the optical drive The CD starts automatically Click on the Desk Update button Select Automatic driver installation Express and click on Start installation Follow the instructions on the screen Restart your notebook when the driver installation is completed The notebook s ...

Страница 77: ...itor is switched off Switch the external monitor on Power saving has been activated monitor is blank Press any key to continue Brightness is set to dark Adjust the brightness of the monitor Screen output is set to the notebook s LCD screen Press the key combination to switch the screen output see Key combinations Page 23 The external monitor s power cable or data cable is not connected properly Sw...

Страница 78: ...ng setting Set the screen resolution Set the screen resolution as described in the documentation for your operating system Select monitor Select monitor 1 or 2 as described in the documentation for your operating system The notebook cannot be started Notebook Cause Troubleshooting The battery is not installed correctly Check whether the battery is installed correctly in its compartment Switch the ...

Страница 79: ...er is not connected correctly Check that the data cable connecting the notebook to the printer is properly connected The printer driver is faulty or not correctly installed or it is the wrong printer driver Check that the data cable connecting the notebook to the printer is properly connected Check whether the correct printer driver is loaded refer to the printer documentation The radio connection...

Страница 80: ...MOS checksum bad default configuration used The system configuration information is incorrect Switch the notebook off Switch the notebook on Press the function key F2 to access the BIOS Setup In the BIOS Setup select the Exit menu Select the entry Load Setup Defaults Select OK and press the Enter key Extended memory failed at offset xxxx Failing Bits zzzz zzzz When testing the extended memory an e...

Страница 81: ...efault configuration used Due to an error during the previous system boot default values were used for certain settings Check the settings in the BIOS Setup Press the F1 function key when prompted to do so Real time clock error Contact your sales outlet or our customer service centre nnnnK Shadow RAM failed at offset xxxx Failing Bits zzzz Contact your sales outlet or our customer service centre S...

Страница 82: ...ind the data sheet on your device or on the Internet at http ts fujitsu com support Rechargeable battery You can find information on the batteries used in your device on the Internet at http ts fujitsu com support 6 cell rechargeable battery 1 6 cell rechargeable battery 2 Rated voltage 10 8 V 10 8 V Rated capacity 6200 mAh 5800 mAh Mains adapter Technicaldata Electrical data Primary 80 W Rated vo...

Страница 83: ...e 1999 5 EC of the European Parliament and Commission from 9 March 1999 governing Radio and Telecommunications Equipment and mutual recognition of conformity This equipment can be used in the following countries Belgium Bulgaria Denmark Germany Estonia Finland France Greece UK Ireland Iceland Italy Latvia Liechtenstein Lithuania Luxembourg Malta The Netherlands Norway Austria Poland Portugal Ruman...

Страница 84: ...Buffer battery load 72 Buttons 21 C Caps Lock 22 indicator 19 CE marking 79 Charging capacity battery 32 Cleaning 14 Components installing removing 61 Configuration BIOS Setup Utility 69 Connecting audio devices 60 Connecting headphones 60 Crystal View display cleaning 14 Ctrl Alt Del 24 Cursor control keys 22 Cursor keys 22 D Date is incorrect 72 Declaration of conformity 79 Device setting up 16 ...

Страница 85: ...xpansion installing 64 removing 63 Memory module important notes 62 installing 64 removing 63 Microphone 40 Microphone connecting 60 Mobile operation 13 Monitor connecting 55 drifting display 74 remains blank 73 Monitor port see VGA connection socket 55 N Notebook before you travel 13 cannot be started 74 cleaning 14 stops working 75 switching off 20 transporting 13 14 using 18 Notebook operation ...

Страница 86: ... ExpressCard 38 Memory cards 37 Standby indicator 19 Start key 22 Status indicators 18 Summer time 72 Supervisor password changing 50 entering 50 removing 50 Switching on the notebook 20 Switching on for the first time 17 System configuration 69 System expansion 62 see Adding memory 62 System settings BIOS Setup Utility 69 T Tab key 22 Technical data 78 Mains adapter 78 notebook 78 The radio conne...

Страница 87: ...connection socket 55 Virtual numeric keypad 23 Volume decrease 24 increase 24 Volume control 40 W Webcam 31 Wireless LAN Switching off 42 Switching on 42 Wireless LAN safety notes 12 Fujitsu Technology Solutions 83 ...

Отзывы: