48
4. Adjustment
FinePix S5100/S5500 Service Manual
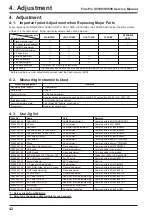
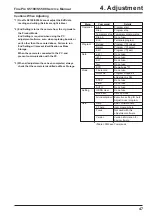
Cautions When Using the FinePix S5100/5500 Adjustment Software
1. Adjust as follows after replacing parts.
[F1]Battery [F4]CCD Defect Correction [F5]Camera [F6]AF [F7]Flash
[F8]Firmware Download [F9]AF-Assist [F11]Video [F12]End Setting
| – – – – – – – – – – – – – – – – – – – – – – – – – – – – – – – – – – – – |
| Replaced Parts Adjustment Procedure
|
| AF FRAME
: [F9]->[F12]
|
| LENS CONST : [F5]->[F4]->[F6]->[F1]->[F7]->[F12]
|
| MAIN PWB
: [F5]->[F4]->[F6]->[F1]->[F7]->[F11]->[F12]
|
| DCST PWB
: [F1]->[F7]->[F11]->[F12]
|
| STROBE
: [F7]->[F12]
|
|
|
| – – – – – – – – – – – – – – – – – – – – – – – – – – – – – – – – – – – – |
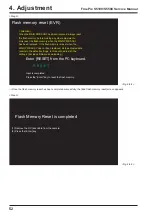
2. When the MAIN PWB ASSY has been replaced, always reset
the flash memory before making any other adjustments.
3. Always run End Setting after using this adjustment software.
4. Proceed with adjustment after reading the cautions here,
and the relevant cautions noted in the Service Manual.
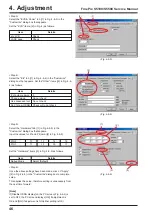
Press the [Enter] key to proceed to the Jig Mode Setup screen.
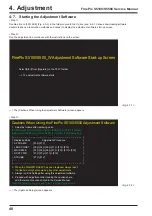
<Fig. 4-7-2>
FinePix S5100/5500_W Adjustment Software Start-up Screen
Select [Start] from [Operate] on the FFW Toolbar
—> The adjustment software starts
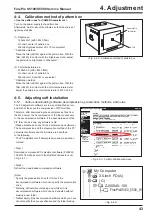
<Fig. 4-7-1>
4-7. Starting the Adjustment Software
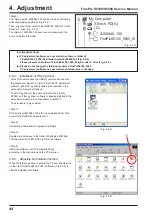
<Step 1>
Double-click on [FFW.EXE] (Fig. 4-5-3) in the folder copied to the C drive (see ‘4-5-1. Various downloading software
decompressions, preservation methods and notes’) to display the adjustment software start-up screen.
<Step 2>
Run the adjustment in accordance with the instructions on the screen.
—> The [Cautions When Using the Adjustment Software] screen appears.
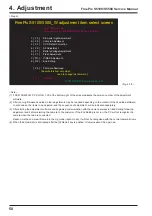
<Step 3>
—> The [Jig Mode Setup] screen appears.
Содержание FinePix S5100
Страница 23: ...23 3 Schematics FinePix S5100 S5500 Service Manual 3 6 Circuit Diagrams 3 6 1 CAM BLOCK ...
Страница 24: ...24 3 Schematics FinePix S5100 S5500 Service Manual 3 6 2 DCDC BLOCK ...
Страница 25: ...25 3 Schematics FinePix S5100 S5500 Service Manual 3 6 3 KSW BLOCK ...
Страница 26: ...26 3 Schematics FinePix S5100 S5500 Service Manual 3 6 4 LCD EVF BLOCK ...
Страница 27: ...27 3 Schematics FinePix S5100 S5500 Service Manual 3 6 5 MOTOR BLOCK ...
Страница 28: ...28 3 Schematics FinePix S5100 S5500 Service Manual 3 6 6 PROCESS BLOCK ...
Страница 29: ...29 3 Schematics FinePix S5100 S5500 Service Manual 3 6 7 CCD FPC BLOCK ...
Страница 30: ...30 3 Schematics FinePix S5100 S5500 Service Manual 3 6 8 IPS STROBE BLOCK ...
Страница 31: ...31 3 Schematics FinePix S5100 S5500 Service Manual 3 6 9 MSW BLOCK 3 6 10 RSW BLOCK ...
Страница 32: ...32 3 Schematics FinePix S5100 S5500 Service Manual 3 7 Mounted Parts Diagrams 3 7 1 DCST PWB ASSY SIDE A ...
Страница 33: ...33 3 Schematics FinePix S5100 S5500 Service Manual SIDE B ...
Страница 34: ...34 3 Schematics FinePix S5100 S5500 Service Manual 3 7 2 MAIN PWB ASSY SIDE A ...
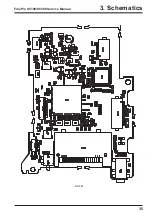
Страница 35: ...35 3 Schematics FinePix S5100 S5500 Service Manual SIDE B ...
Страница 36: ...36 3 Schematics FinePix S5100 S5500 Service Manual 3 7 3 KSW FPC ASSY SIDE A ...
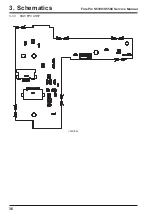
Страница 37: ...37 3 Schematics FinePix S5100 S5500 Service Manual SIDE B ...
Страница 38: ...38 3 Schematics FinePix S5100 S5500 Service Manual 3 7 4 MSW FPC ASSY SIDE A ...
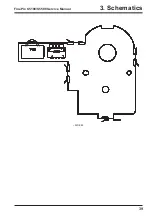
Страница 39: ...39 3 Schematics FinePix S5100 S5500 Service Manual SIDE B ...
Страница 40: ...40 3 Schematics FinePix S5100 S5500 Service Manual 3 7 5 RSW FPC ASSY SIDE A SIDE B ...
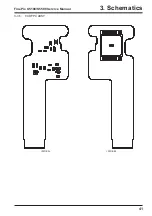
Страница 41: ...41 3 Schematics FinePix S5100 S5500 Service Manual SIDE A SIDE B 3 7 6 CCD FPC ASSY ...
Страница 96: ...26 30 Nishiazabu 2 chome Minato ku Tokyo 106 8620 Japan FUJI PHOTO FILM CO LTD ...


