background image

Thank you for purchasing this FUJIFILM product.

BL00155-200(1)

E

Software Quick Start Guide

EX3.1

EX Version 3.1 for Windows

®

and Macintosh™

• Refer to the web site given below for other information on this product. 

http://home.fujifilm.com/products/digital/index.html

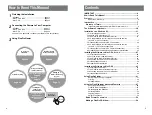
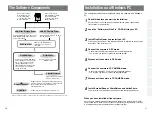
Learning More About

FinePixViewer

Launching FinePixViewer/Using Batch Format Conversion/Creating
FinePix CD Albums/Attaching Images to E-mails/Videoconferencing

Installing FinePixViewer

1

Connecting the Camera to Your Computer

2

Using FinePixViewer

Saving your camera shots on your computer and then printing them.

3

Содержание FINEPIX EX3.1

Страница 1: ...ation on this product http home fujifilm com products digital index html Learning More About FinePixViewer Launching FinePixViewer Using Batch Format Conversion Creating FinePix CD Albums Attaching Images to E mails Videoconferencing Installing FinePixViewer 1 Connecting the Camera to Your Computer 2 Using FinePixViewer Saving your camera shots on your computer and then printing them 3 ...

Страница 2: ...all not modify adapt or translate Software or Documentation You also shall not alter or remove copyright and other proprietary notices that appear on or in Software or Documentation 3 4 You shall not or shall not have any third party reverse engineer decompile or disassemble Software 4 Ownership All copyrights and other proprietary rights to Software and Documentation are owned and retained by FUJ...

Страница 3: ...ware on Mac OS X 35 1 Pre installation Checklist 36 2 From FinePixViewer installation to restart 37 3 Connecting the Camera as a Card Reader 39 4 Disconnecting the Camera 40 Using FinePixViewer 41 Saving Images on Your Computer 41 Printing 44 Deleting Images 45 Using the FinePixViewer Advanced Features 47 Launching FinePixViewer 48 FinePixViewer Components 50 Switching between Windows 51 Selecting...

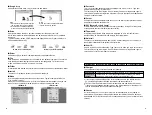
Страница 4: ...F A format used for recording information on SmartMedia that specifies which images are to be printed Left Double click Click Windows Macintosh Specifications for the images to be printed trimming data etc SmartMedia Images Symbols Used in This Guide The symbols listed below are used throughout this guide q Indicates a camera operation must be performed Refer to the Owner s Manual for your camera ...

Страница 5: ...t you are not observed as you type in your password Server A computer used on a computer network such as the Internet that provides services and data to connected network users SSL Secure Sockets Layer A communications format with enhanced security functions Using SSL allows you to exchange data over the Internet with greater safety Thumbnail A reduced image created when images are displayed as a ...

Страница 6: ...onnected QuickTime Software needed for playing back movies etc Software used to read PDF format documents on a personal computer This software is needed to read the User s Guides for FinePixViewer and VideoImpression etc Acrobat Reader R Used to download and edit movies you have shot VideoImpression TM FinePixViewer PictureHello Used for videoconferencing Windows only Allows you to display thumbna...

Страница 7: ...minimum 128 MB minimum for Windows XP Hard disk space Amount required for installation 140 MB minimum Amount required for operation 300 MB minimum When FinePix CD Album Maker is used 2 GB or better Display 800 600 pixels or better 16 bit color or better Internet connection 3 To use the FinePix Internet Service or mail attachment function An Internet connection and e mail transmission software To u...

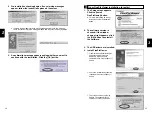
Страница 8: ... button 3 1 The Setup screen appears Click the Install FinePixViewer button For more information on what is installed click the Explanation button 2 The software version is checked If the window shown at right appears click the OK button to uninstall the software 3 The USB drivers are installed 4 Install FinePixViewer 1 FinePixViewer installation begins and notes and warnings are displayed When yo...

Страница 9: ...ad the Privacy Statement checkbox and then click the Next button When you click the Finish button your PC is restarted If the Connection speed window appears set the correct speed for your environment of connection and then click the Next button If you do not know your connection speed simply click the Next button Click Agree button in the Software License Agreement window 5 Install QuickTime as d...

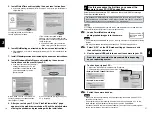
Страница 10: ...and name change to the FinePix icon and name TIP When FinePixViewer is not included in the list of actions to perform When FinePixViewer is included in the list of actions to perform Windows XP Proceed to Disconnecting the Camera DSC Connection on page 20 1 The New Hardware Found wizard appears The wizard will close when the settings are completed No action is required This step is not required fo...

Страница 11: ...age disappears from your PC screen wait a few moments before disconnecting the USB cable or removing the SmartMedia If a large amount of data is being copied camera access continues for a short time after the message displayed on the PC has gone off NOTE Windows XP Windows 2000 1 Exit any applications that are using the camera FinePixViewer etc Failure to carry out this step could cause your compu...

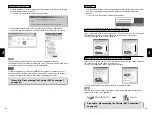
Страница 12: ...our PC or switching the camera off Do not perform any of the following when the camera is connected to a PC Disconnect the USB cable or AC power adapter Touch the camera controls power switch control buttons lens cover or slot cover 4 Check PC operation The installation procedure differs depending on the operating system running on your PC This step is not required for subsequent connections The N...

Страница 13: ...p is not required 1 Open the My Computer window right click the CD ROM icon and select Open to view the contents of the CD ROM 2 Double click SETUP or SETUP exe 3 In the installer window click the Install Acrobat Reader button 4 Proceed with the installation as directed by the on screen instructions 5 Use the same procedure to install PhotoDeluxe and ActiveShare When you have finished installing P...

Страница 14: ...t your Macintosh Click Install FinePixViewer and install the software as directed by the on screen instructions Then restart your Macintosh Connect the camera in DSC mode Disconnect the camera in DSC mode Install Acrobat Reader You must install this software as you need it to read the electronic manual Check the system software settings 26 When you have installed all the software Once you have fin...

Страница 15: ...tosh G4 iMac iBook Power Macintosh G4 Cube or PowerBook G4 Operating System Mac OS 8 6 to 9 2 2 RAM 64 MB minimum 3 Hard disk space Amount required for installation 110 MB minimum Amount required for operation 300 MB minimum When FinePix CD Album Maker is used 2 GB or better Display 800 600 pixels or better 16 bit color or better Internet connection 4 To use the FinePix Internet Service or mail at...

Страница 16: ...proceed with the installation If the Connection Speed window appears after your restart your Macintosh set the correct speed for your environment of connection and then click the Next button If you do not know your connection speed simply click the Next button 3 A confirmation message appears asking whether you want to continue with the installation Click the OK button 4 The Installer setup screen...

Страница 17: ...om your camera on a Macintosh as this may make the card unusable for taking pictures Use only SmartMedia containing shots taken on a FUJIFILM digital camera 2 Select DSC as the USB setting on the camera and then switch the camera off 3 Use the special USB cable to connect the camera to your Macintosh 4 Switch the camera back on Always use the correct procedure when disconnecting the camera from yo...

Страница 18: ...de PDF If you already have the latest version installed this step is not required 1 Double click the Installer for MacOS8 6 9 x icon to launch the installer 2 A confirmation message appears asking whether you want to continue with the installation Click the OK button 3 The installer setup window appears Click the Install Acrobat Reader button 4 Install Acrobat Reader as directed by the on screen i...

Страница 19: ...till be installed even if you do not have an Internet connection Connect the camera directly to the Macintosh using the special USB cable The software may not operate correctly if you use an extension cable or connect the camera via a USB hub Push the USB connector fully into the socket to ensure that it is securely connected The software may not operate correctly if the connection is faulty Addit...

Страница 20: ...artMedia or corrupt the data on the SmartMedia Disconnect the USB cable or AC power adapter Touch the camera controls power switch control buttons lens cover or slot cover 5 ImageCapture starts up and a removable disk icon appears on the desktop If ImageCapture does not start up double click the ImageCapture icon in the Application folder 6 Change the ImageCapture settings as shown below and then ...

Страница 21: ...era access continues for a short time after the message displayed on the Macintosh has gone off NOTE 41 This section gives a brief overview of how to use FinePixViewer Refer to these instructions while you are using FinePixViewer 1 Connect the camera to your computer in DSC mode 2 When you open the folders shown below in order the images in the camera are displayed in the thumbnail display area On...

Страница 22: ...ginal file using the following procedure First make a copy of the original file Save the file under a different name or in a different location Save the file in a format that does not lower the image quality Exif TIFF BMP or PICT 9 Close the image window NOTE 4 Check that the files are downloaded from the camera to your computer and that a folder with the photography date is created Open the folde...

Страница 23: ...int settings window Tick this checkbox to print the image in the center of the page Tick this checkbox to print the photography date Ensures that the image is not cropped during printing Prints with the minimum margins To set details such as the paper size and printing orientation select Page Setup in the File menu For more information refer to your printer s operation manual Print settings window...

Страница 24: ...ch FinePixViewer 2 Select a folder or thumbnail 3 Operations Double clicking Drag drop Clicking buttons Using menus Using the Internet menu Select a folder Select a thumbnail This manual describes steps 1 and 2 and part of step 3 For information on the other functions see How to Use FinePixViewer in the Help menu ...

Страница 25: ...launch automatically Windows XP In Windows XP you can select different automatic launch settings for each connection mode DSC connection mode 1 Open My Computer from the Start menu 2 Click the FinePix icon and then click Properties 3 Click the AutoPlay tab 4 Select Pictures 5 Select Select an action to perform 6 Select Take no action to disable automatic launching 7 Click the OK button Mac OS 8 6 ...

Страница 26: ...net Service display area Playback application display area Shows the folders on the camera and computer Shows reduced versions of the images in the selected folder The reduced images are referred to as thumbnails Shows a larger version of the image along with a range of information about the image Shows the FinePix Internet Service menu Allows you to register and switch between the application pro...

Страница 27: ...the folder Unselected Select The images in this folder are displayed Open close folder If no or is displayed the folder contains no subfolders Open close folder Click To open or close a folder click the arrow to the left of the folder Finding the camera SmartMedia on your computer Open the folders in the sequence shown below to display the images on the camera in the thumbnail display area Mac OS ...

Страница 28: ...e This section describes how FinePixViewer operates when you select a thumbnail Refer to the operation examples provided here When you click a thumbnail only that thumbnail is selected To select multiple images drag the mouse so that the images are enclosed To select additional thumbnails hold down the Ctrl key Windows or shift key Macintosh as you click the images Click in the background to desel...

Страница 29: ...Specify the save destination for the converted files Once you specify the destination and click the OK button the file format is converted The same settings are used for subsequent file format conversions This function allows you to convert the formats of multiple files at once You can use this for example when you want to make the file sizes smaller Select the thumbnails with the formats you want...

Страница 30: ...d a CD R drive and CD writing software If you use the Windows XP or Mac OS CD writing functions your disks may be unreadable when you give them to other people Still images in formats other than JPEG such as TIFF files cannot be viewed in the Internet browser You should use batch format conversion to save your images in JPEG format before creating a FinePix CD Album CD writing software for which o...

Страница 31: ... you have completed the settings click the Create button This type of display is created A B C D 7 Wait a few moments until data creation is completed Times vary depending on your computer s performance but writing takes about 15 minutes for around 600 MB of data approx 600 files TIP Do not drag and drop the CD icon to a location outside the CD writing software NOTE Actual screen may differ Actual...

Страница 32: ...x so that it is ticked When the confirmation message for the changed settings appears click the Yes button 5 Click the OK button to close the Options window and click the OK button again when the following message appears The Simple MAPI client has been changed You may need to restart your machine for this change to take effect 6 Exit Outlook Express and restart your computer When Using Outlook Ex...

Страница 33: ...he Settings menu 2 Place a tick in the Resize checkbox and specify the number of pixels height and width for resized images If you do not want to resize the image deselect the Resize checkbox TIP NOTE Attaching Images 1 Launch FinePixViewer In the Start menu select Programs FinePixViewer FinePixViewer 2 Click the folder containing the images you want to attach 3 Click the thumbnails for the images...

Страница 34: ...ot appear in the pull down list select OTHERS 67 66 User Registration Using the FinePix Internet Service Mac OS X users should refer to P 72 Using FinePixViewer also allows you to access the FinePix Internet Service via the Internet A working Internet connection is required A FinePix Internet Service fees do not include your Internet service provider ISP connection fees or any phone charges incurr...

Страница 35: ...iffer slightly in appearance from the sample shown here Move the mouse cursor over an Internet menu button to view information about the service 4 When you have finished using the Internet services disconnect from the Internet for dial up connections The connection speed will vary significantly depending on the quality of your phone line and the amount of traffic on the server to which you are con...

Страница 36: ...load the latest version of FinePixViewer and install it on your computer When you update your software your user ID and password for the FinePix Internet Service are deleted from your computer Ensure that you do not forget your registered user ID and password 1 When you click Software Update in the Help menu FinePixViewer connects to the Internet and looks for a new version of FinePixViewer 2 If a...

Страница 37: ...t already connected to the Internet connect now A dial up dialog box may be displayed Only select menu acquisition if you have already completed the user registration process and you have re installed FinePixViewer etc 1 2 3 4 4 The User s Registration dialog box opens Select the country or area where you are living and click the OK button The actual user registration page may differ slightly in a...

Страница 38: ...onnected to the Internet the software automatically attempts to connect for dial up connections Operation after you click the menu button differs depending on the button you click For instance you may jump to your service provider s web site or an upload dialog box may open The actual Internet menu may differ slightly in appearance from the sample shown here Move the mouse cursor over an Internet ...

Страница 39: ...are and software required for videoconferencing A FUJIFILM camera equipped with the PC Camera function A PC with an Internet connection 56kbps modem connection or better or an ISDN connection An established service contract with an Internet service provider ISP Depending on your type of Internet connection and or your modem connection speed video quality may deteriorate and some frames may be lost...

Страница 40: ... Use the special USB cable to connect the camera to your PC 4 Check that FinePixViewer has started up and the PictureHello window has opened automatically To open the PictureHello window manually click Videoconferencing in the FinePixViewer Tools menu You cannot use PictureHello and NetMeeting at the same time Do not attempt to launch NetMeeting when you are using PictureHello Do not switch off th...

Страница 41: ...K button 1Other party s name 2Other party s e mail address 3Comment not seen by the other party 1 2 3 Using the Address Book 2 A dialog box to confirm the save destination appears When you select Paste to address book and click the OK button the image in the address book is updated If you accept a call you can only select Copy to Clipboard during the call Ending a Call Click the End Call button If...

Страница 42: ...s in the procedure are as follows Main Functions Lights Camera Action Using VideoImpression Launch VideoImpression Add a storyboard Edit the movie Play back and check the edited movie Save the edited movie Store your movie in an album For more information on FinePixViewer functions not fully explained in this manual refer to How to Use FinePixViewer in the Help menu To read How to Use FinePixViewe...

Страница 43: ...les TIP The procedure for capturing live images differs depending on the operating system you are using Windows P 86 Mac OS 8 6 to 9 2 P 88 Drop images into here Drop sounds into here Making Your Own Movies FinePixViewer Store the movie in an album To work with still images video and sound you first have to import them into the album window 1 Launch VideoImpression Windows In the Start menu click ...

Страница 44: ...e OK button 2 When the album storage confirmation dialog box appears click the OK button TIP 1 3 4 2 Capturing Live Images Windows q See Connection in the camera Owner s Manual If your camera has a PC Camera function you can download live images to your PC 1 Connect the camera to your PC in PC Camera mode Always use the correct procedure when disconnecting the camera from your PC or switching the ...

Страница 45: ... the movie The name of the button changes to Stop Capture During recording only the Stop Capture button can be pressed 8 Click the Stop Capture button to stop recording The movie data will be automatically saved to a file and imported to the Album 9 Click the Done button to return to the Album window You must have a sound card installed and speakers and a microphone connected to your Macintosh to ...

Страница 46: ...Remove Programs in the Control Panel 6 The Add Remove Programs Properties window appears Select the software to be uninstalled FinePixViewer or the driver and then click the Add Remove button 7 When the confirmation message appears click the OK button Check your selection carefully since the process cannot be cancelled once you click OK 8 Automatic uninstallation begins When uninstallation ends cl...

Страница 47: ...camera Windows P 20 Mac OS 8 6 to 9 2 P 33 Mac OS X P 40 Only perform this operation when you no longer require the installed software or when the software was not installed correctly Mac OS 8 6 9 2 NOTE Macintosh Uninstalling Mass Storage Driver and PC Camera Driver 1 Check that the camera is not connected to your Macintosh 2 Drag all the files that begin with USB04CB to the Trash 3 Restart your ...

Страница 48: ...the correct hardware and software P 12 If the problem persists even though you are using the correct hardware and software refer to the table below and then see the reference page listed for your problem Page Videoconferencing Problem with 98 99 100 101 102 97 Other Problem I was asked for the disk labeled Windows the first time I connected the camera to my PC When I connect the camera to my PC th...

Страница 49: ...the special USB cable connected to the camera and to the computer Did you select the correct connection mode for what you want to do Are you using a compatible operating system Are PC Camera Driver and Mass Storage Driver not listed under Other Devices in the Device Manager Are the USB functions active Double click System in the Control Panel select Device Manager and check Universal Serial Bus co...

Страница 50: ... Sound Recorder Then adjust the microphone input level Solution The live image of the other party in videoconferencing is very jerky Use a high speed line with a connection speed of 56 kbps or better Possible cause Solution The PictureHello videoconferencing window does not open Is FinePixViewer installed Is FinePixViewer running Is the camera switched on Is PC CAM selected as the USB setting on t...

Страница 51: ...images 1 Exit VideoImpression and restart your PC 2 Select PC CAM as the USB setting on the camera 3 Connect the camera to your PC correctly using the special USB cable Possible cause Solution I can make calls but I cannot use videoconferencing Is the other party able to make or accept calls Are you or the other party trying to call outside from an in house LAN Are you or the other party trying to...

Страница 52: ...mail address You cannot sign on twice with the same user ID or e mail address Possible cause Solution My camera will no longer play back image files Did you rename any files or folders inside the DCIM folder Did you replace an image file inside the DCIM folder Change the file or folder names in the DCIM folder back to the original names Do not replace image files in the DCIM folder Solution My PC ...

Страница 53: ...the camera and format the SmartMedia For more information refer to the Owner s Manual for your camera Is File Exchange enabled Mac OS 8 6 9 2 only Enable File Exchange P 29 Possible cause Solution The camera and Macintosh are connected but no removable disk icon is displayed Is the camera switched on Is the SmartMedia loaded in the camera Is DSC selected as the USB setting on the camera Is the spe...

Страница 54: ...ge files Did you rename any files or folders inside the DCIM folder Did you replace an image file inside the DCIM folder Change the file or folder names in the DCIM folder back to the original names Do not replace image files in the DCIM folder Troubleshooting Other Problems Possible cause Solution The The tool could not be executed message appears Mac OS 8 6 9 2 Do you have enough system memory i...

Страница 55: ...nit 14 Shannon Industrial Estate Shannon Co Clare Ireland Tel 353 0 61 702087 Fax 353 0 61 702001 E Mail europe arcsoft com China ArcSoft Beijing Representative Office No 6 South Capital Gym Rd Beijing New Century Hotel 1910 Beijing 100044 P R China Tel 86 10 6849 1368 Fax 86 10 6849 1367 E Mail China arcsoft com Taiwan ArcSoft Taiwan Representative Office 1 5th Floor 164 North Fu Shin Road Taipei...

Отзывы: