134
Printing Basics
Using the Stored Print Feature
When you send a job to the printer, you can specify in the print driver to store the job in the memory or hard disk.
When you are ready to print the job, go to the printer and use the operator panel menus to identify which job in the
memory or hard disk you want to print.
NOTE:
•
The stored print feature is available when:
-
The optional 512MB memory is installed.
-
The RAM disk is enabled in the operator panel menu.
-
RAM Disk
is set to
Installed
in the print driver.
OR
-
The optional hard disk unit is installed.
-
Hard Disk
is set to
Installed
in the print driver.
•
The data in memory is cleared when the printer is turned off. The data on the optional hard disk unit is not cleared even when
the printer is turned off.
The stored print feature includes the following job types:
• "Secure Print" on page 134
• "Sample Print" on page 134
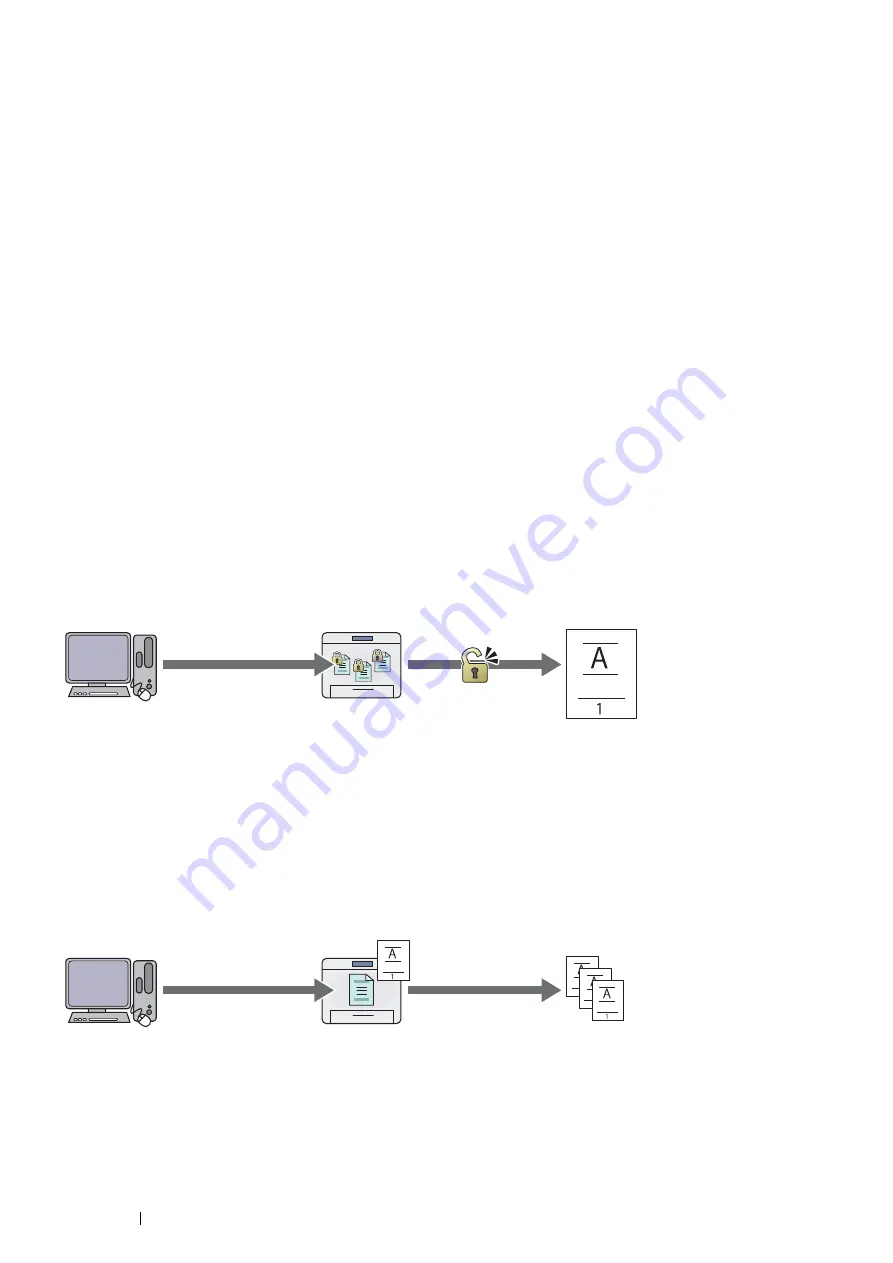
Secure Print
You can store print jobs secured with a passcode in the memory. Users with the passcode can print them from the
operator panel. This feature can be used to print confidential documents. You can select whether to delete the stored
job after printing. Otherwise, the stored jobs remain in the memory until you delete them from the operator panel or
turn off the printer, or in the hard disk until you delete them from the operator panel.
NOTE:
•
Secure Print is available when you use the PCL 6 or PS driver.
Sample Print
The collated print job is stored in the memory or hard disk, but a single copy is printed automatically so you can
check the print result. If you do not have problems with the print result, you can choose to print more copies. This
prevents large number of misprinted copies from being printed at one time.
NOTE:
•
Sample Print is available when you use the PCL 6 or PS driver.
Send confidential data.
Enter the passcode from
the operator panel.
Print data.
Confidential
Send data.
One set is
printed.
Check if the print result
is OK.
Print the rest of sets
from the operator panel.
Содержание DocuPrint P455 D
Страница 1: ...DocuPrint P455 d User Guide ...
Страница 4: ...4 Preface ...
Страница 10: ...10 Contents ...
Страница 68: ...68 Printer Management Software ...
Страница 106: ...106 Printer Connection and Software Installation 3 Click Wireless Network Kit b g n 4 Click Start wireless settings ...
Страница 107: ...Printer Connection and Software Installation 107 5 Click Wireless Configuration 6 Select Wizard and then click Next ...
Страница 114: ...114 Printer Connection and Software Installation ...
Страница 160: ...160 Printing Basics ...
Страница 200: ...200 Using the Operator Panel Menus ...
Страница 211: ...Troubleshooting 211 10 Press down the levers on both sides of the fusing unit and then close the rear door ...
Страница 252: ...252 Maintenance 8 Insert the bypass tray into the printer push until it stops and close the cover ...
Страница 259: ...Maintenance 259 5 Grasp the handle on the top of the drum cartridge with the other hand and then pull it out completely ...
Страница 269: ...Maintenance 269 8 Pull the tab toward you and pull the nudger roll upward to remove it from the shaft ...
Страница 294: ...294 Contacting Fuji Xerox ...
Страница 301: ......
Страница 302: ...DocuPrint P455 d User Guide Fuji Xerox Co Ltd ME5893E2 1 Edition 1 June 2012 Copyright 2012 by Fuji Xerox Co Ltd ...


