background image

Chapter 8

60

1

"

LGL LTR

" and "

LGL A4

" are displayed on DocuPrint M118 z only.

2

Auto sets the machine to calculate the reduction ratio that best fits the size of paper. Auto is only available when using 
the ADF.

Enlarge/Reduce

100%

*

97% LTR A4
94% A4 LTR
91% Full Page
85% LTR EXE

83% LGL A4

1

78% LGL LTR

1

70% A4 A5
50%
Custom(25-400%)

Auto

2

200%
141% A5 A4
104% EXE LTR

Page Layout

Off(1 in 1)

*

2 in 1 (P)

2 in 1 (L)

4 in 1 (P)

4 in 1 (L)

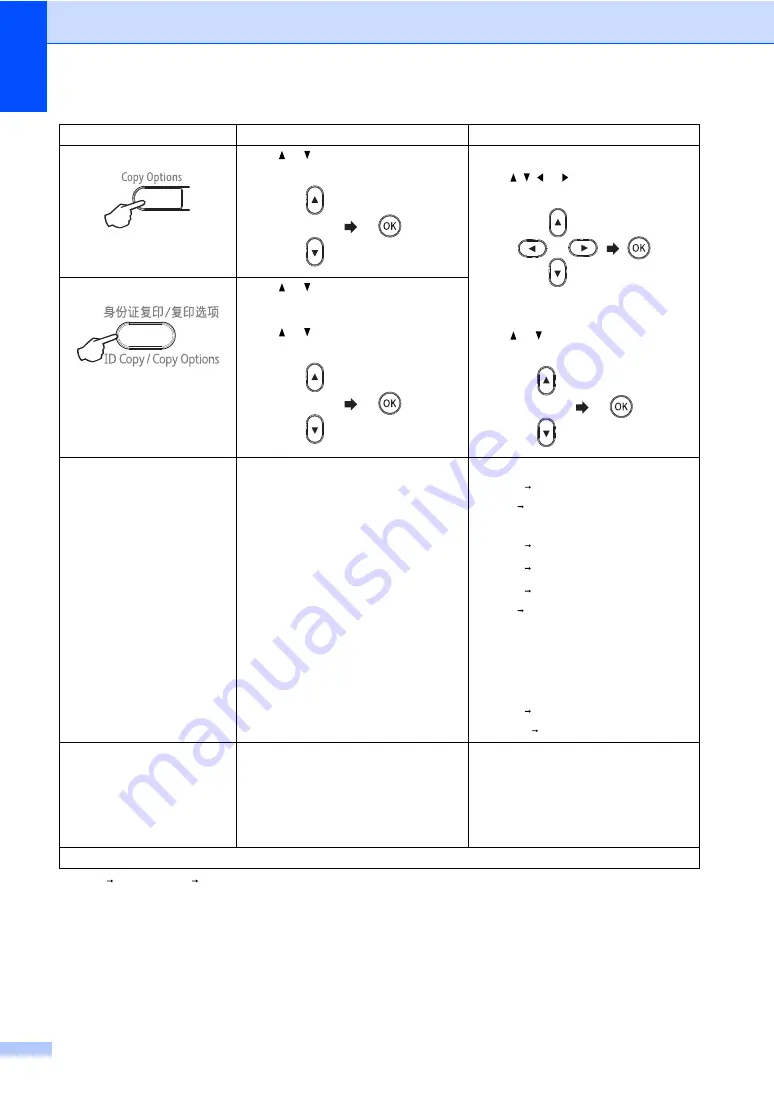
Press

Menu selections

Options

(DocuPrint M118 z)


8

Press   or  , then press OK


(DocuPrint M118 z)

Press  ,  ,   or  , then press OK


(DocuPrint M118 w)

Press   or  , then press OK.


(DocuPrint M118 w)


8

Press   or   to choose Copy Options.

Press OK.

Press   or  , then press OK.


The factory settings are shown in Bold with an asterisk.

Содержание DocuPrint M118 w

Страница 1: ...DocuPrint M118 w DocuPrint M118 z User s Guide...

Страница 2: ...ations properly 3 When the machine need replacing parts for the maintenance and repair please discard used circuit boards used electrical parts and products as disposed electrical materials 4 The powe...

Страница 3: ...Scanning Printing PC FAX and other operations that can be performed by connecting your Fuji Xerox machine to a computer You can also find useful information about using the Fuji Xerox ControlCenter ut...

Страница 4: ...eral Setup 13 2 Fax 15 3 Copy 21 4 Printer 22 5 Print Reports 23 6 Network 24 7 Machine Info 27 Menu and features for DocuPrint M118 w 28 On screen programming 28 Menu table 29 1 General Setup 30 2 Co...

Страница 5: ...49 Storing numbers 49 Storing Speed Dial numbers 49 Changing or Deleting Speed Dial numbers 49 How to dial 50 Manual dialling 50 Speed dialling 50 Search 50 Redial 50 Caller ID feature 50 7 Using PC...

Страница 6: ...DocuPrint M118 z 78 Paper Jams 79 Transferring your faxes or Fax Journal report DocuPrint M118 z 81 Transferring faxes to another fax machine 81 Transferring faxes to your PC 81 Transferring the Fax J...

Страница 7: ...s situation which if not avoided may result in damage to property or loss of product functionality NOTE NOTE specifies the operating environment conditions for installation or special conditions of us...

Страница 8: ...All Programs Fuji Xerox Fuji Xerox Utilities Windows 8 and Windows Server 2012 Tap or double click Fuji Xerox Utilities either on the Start screen or the desktop Windows 8 1 and Windows Server 2012 R...

Страница 9: ...ides Windows 8 Click Fuji Xerox Utilities and then click the drop down list and select your model name if not already selected Click Support in the left navigation bar and then click User s Guides If...

Страница 10: ...hine can be connected to a network Basic setup instructions see Quick Setup Guide If your wireless access point or router supports Wi Fi Protected Setup or AOSS see Quick Setup Guide For more informat...

Страница 11: ...General information 5 1...

Страница 12: ...ing a number manually FAX Auto Manual Switches the receive mode among PC FAX Fax Auto or Manual NOTE If you select PC FAX Receive using this key backup print function is not available To use the backu...

Страница 13: ...cess the Menu to program your settings in the machine OK Lets you store your settings and confirm LCD messages on the machine Volume keys or Press to scroll backwards or forwards through menu selectio...

Страница 14: ...s from a menu Press this key to cancel the print job 6 Start Lets you start making copies or scanning 7 ID Copy Copy Options You can copy both sides of your Identification card onto one page with the...

Страница 15: ...or Printer menu Press 5 for Print Reports menu Press 6 for Network menu Press 7 for Machine Info menu Press 9 for Service menu 1 1 This will appear only when the LCD shows an error message You can als...

Страница 16: ...ber keys or and to display different menu options Press OK to select an option In the below example the copy quality setting is changed from Auto to Text Press Menu Press 3 to choose Copy Press 1 to c...

Страница 17: ...r the time in 24 hour format e g Enter 1 5 2 5 for 15 25 2 Time Zone Sets the time zone for your country UTCXXX XX 2 Station ID Sets up your name and fax number to appear on each page you fax Fax Ente...

Страница 18: ...y default 1 Reset 2 Exit Cancel restore and exit the menu 2 Network Restores all network settings to the factory default 1 Reset 2 Exit Cancel restore and exit the menu 3 Address Fax Restores all stor...

Страница 19: ...o return to the default mode 0 Sec Return to the default mode at once 30 Secs Return to the default mode after the time you choose 1 Min 2 Mins 5 Mins Off The machine will stay in the mode you used la...

Страница 20: ...er Off 6 LCD Contrast Adjusts the contrast of the LCD Press to make the LCD darker or press to make the LCD lighter 7 Scan Size Adjusts the scan area to the size of the document A4 Letter 8 Replace To...

Страница 21: ...our machine automaticallytransfers received faxes to your computer 2 Ring Delay The Ring Delay setting sets the number of times the machine rings before it answers in Fax Auto and Fax Tel modes 00 10...

Страница 22: ...is available On Further incoming faxes will also be stored into memory until the memory is full When the memory is full the machine will stop automatically answering calls To print the faxes put fresh...

Страница 23: ...work and transmits slower than Fine resolution Photo Use when the document has varying shades of grey or is a photograph This has the slowest transmission time 3 Overseas Mode If you are having diffic...

Страница 24: ...Speed Dial numbers Press Address Book twice and enter the two digit Speed Dial number 5 Report Setting 1 Transmission You can use the Transmission Verification Report as proof that you sent a fax This...

Страница 25: ...Fax Receive feature and your machine stores received faxes in memory you can print a fax from the memory 7 Remaining Jobs You can check which jobs are in the memory and lets you cancel scheduled jobs...

Страница 26: ...ve a fax 3 Caller ID Type You can switch the mode if Caller ID cannot be displayed normally Auto FSK DTMF Caller ID has two modes FSK and DTMF for displaying your calls The default mode of this machin...

Страница 27: ...justs the copy brightness for copies Press to increase the brightness or press to decrease the brightness 3 Contrast Adjust the contrast to help an image look sharper and more vivid Press to increase...

Страница 28: ...ge 2 Auto Continue If this setting is enabled the machine will automatically clear a paper size error and will use the paper loaded in the paper tray On Off Size mismatch is displayed on the LCD and p...

Страница 29: ...mission Verification Report for your last 200 outgoing faxes 2 Print Report Print the last report 2 Address Book 1 Numeric Lists names and numbers stored in the Speed Dial memory Print in numerical or...

Страница 30: ...r the IP address 3 Subnet Mask Enter the Subnet mask 4 Gateway Enter the Gateway address 5 Node Name Enter the Node name Up to 32 characters 6 WINS Config Auto Static Chooses the WINS configuration mo...

Страница 31: ...address range 0 IPv6 On Off Enable or disable the IPv6 protocol 2 WLAN Assistant Windows only You can configure your wireless network settings using the Fuji Xerox CD ROM 3 Setup Wizard The Setup Wiz...

Страница 32: ...signal strength 3 SSID You can see the current SSID 4 Comm Mode You can see the current Communication Mode 7 MAC Address Shows the MAC address of the machine 8 Set to Default Restore the wireless netw...

Страница 33: ...e has printed during its life Total Displays the total page count Fax List Displays the page counter for faxes and lists Copy Displays the page counter for copies Print Displays the page counter for p...

Страница 34: ...ss the menu mode 1 Press Menu Scroll through each menu level by pressing or Press OK when the option you want appears on the LCD The LCD will then show the next menu level Press or to scroll to your n...

Страница 35: ...menu options Press OK to select an option In the below example the paper type setting is changed from Plain to Recycled Paper Press Menu Press or to choose 1 General Setup Press OK Press or to choose...

Страница 36: ...ve toner using this feature On Increases the page yield of the toner cartridge When you set Toner Save to On print appears lighter Off 2 Auto Power Off If the machine remains in Deep Sleep mode for th...

Страница 37: ...he function settings to factory default Reset Exit Cancel restore and exit the menu 2 Network Restores all network settings to the factory default Reset Exit Cancel restore and exit the menu 3 All Set...

Страница 38: ...he copy brightness for copies Press to increase the brightness or press to decrease the brightness 3 Contrast Adjust the contrast to help an image look sharper and more vivid Press to increase the con...

Страница 39: ...ints a test page 2 Auto Continue If this setting is enabled the machine will automatically clear a paper size error and will use the paper loaded in the paper tray On Off Size mismatch is displayed on...

Страница 40: ...r the IP address 3 Subnet Mask Enter the Subnet mask 4 Gateway Enter the Gateway address 5 Node Name Enter the Node name Up to 32 characters 6 WINS Config Auto Static Chooses the WINS configuration mo...

Страница 41: ...IPv6 protocol 2 WLAN Assistant Windows only You can configure your wireless network settings using the Fuji Xerox CD ROM 3 Setup Wizard The Setup Wizard guides you through the wireless network config...

Страница 42: ...Communication Mode 7 MAC Address Shows the MAC address of the machine 8 Set to Default Restore the wireless network setting to factory default Reset Exit 9 WLAN Enable Enable or Disable the Wireless L...

Страница 43: ...ts Copy Displays the page counter for copies Print Displays the page counter for printed pages 4 Parts Life 1 Toner You can check the percentage of Toner life that remains 2 Drum You can check the per...

Страница 44: ...o not allow lower case characters use the following table Inserting spaces To enter a space in a fax number press once between numbers To enter a space in a name press twice between letters Press numb...

Страница 45: ...cursor to the symbol or character you want Press OK to choose it The symbols and characters below will appear depending on your menu selection DocuPrint M118 w 1 When setting certain options such as t...

Страница 46: ...tup Press OK Press or to choose 2 Ecology Press OK Press or to choose 2 Auto Power Off Press OK Press or to choose how many hours before the machine goes into Power Off mode Choose 1 hour 2 hours 4 ho...

Страница 47: ...the fax is OK If the quality is not good choose 2 No The machine will keep the faxes stored in the memory so you can reprint them after you replace the toner cartridge with a new one If the print qua...

Страница 48: ...Press or to choose Plain or Recycled Paper Press OK Press Stop Exit Paper Size 2 For DocuPrint M118 z Press Menu 1 3 2 and go to step For DocuPrint M118 w Press Menu and then press or to choose 1 Gen...

Страница 49: ...es of paper may not perform well or may cause damage to your machine DO NOT use paper that is highly textured that is extremely smooth or shiny that is curled or warped 1 A curl of 2 mm or greater may...

Страница 50: ...ADF Document Sizes Supported 3 How to load documents 3 Lift up and unfold the ADF document output support flap Load your document face down top edge first in the ADF until the LCD message changes Adj...

Страница 51: ...the document guidelines on the left and top place the document face down in the upper left corner of the scanner glass Close the document cover IMPORTANT If the document is a book or is thick do not s...

Страница 52: ...the scanner glass the ADF must be empty If you want to change the fax resolution press and then press or to choose the fax resolution Enter the fax number Press Start to send a fax Cancelling a fax i...

Страница 53: ...oadcast is finished the machine will print a broadcast report to let you know the results Cancelling a Broadcast in progress 4 While broadcasting you can cancel the fax currently being sent or the who...

Страница 54: ...answering phone device to answer and talk 1 Fax Tel The machine will automatically determine whether the incoming call is a fax or telephone call The machine will perform a fast double ring to let you...

Страница 55: ...ollowing Enter the name using the dial pad up to 15 characters For help entering characters see Entering text on page 38 Press OK Press OK to store the number without a name If you want to change the...

Страница 56: ...nter a letter and press OK in step all registered names will appear Press or to scroll until you find the name you are looking for If the LCD shows No Contact Found when you enter the first few letter...

Страница 57: ...ar on the display If no ID is stored the beeper will sound and No Caller ID will appear on the display Go to step Press or to scroll through the Caller ID memory to choose the Caller ID you want to vi...

Страница 58: ...left navigation bar and then click Receive Windows 8 Click Fuji Xerox Utilities and then click the drop down list and select your model name if not already selected Click PC FAX Receive in the left na...

Страница 59: ...sure your PC is connected and turned on For more information see Software and Network User s Guide If your machine has an error and is unable to print faxes from memory you can use this setting to tra...

Страница 60: ...ax NOTE The PC FAX software can only send Black White fax documents in A4 size Please install Multi Function Suite software connect your machine and PC before using PC FAX sending Sending a file as a...

Страница 61: ...ress Book button and then choose a member or group from the Address Book If you make a mistake click All Clear to delete all the entries To include a cover page click Add Cover Page NOTE You can also...

Страница 62: ...om the scanner glass After placing the document on the scanner glass close the document cover NOTE To use the scanner glass the ADF must be empty For DocuPrint M118 z Use the dial pad to enter the num...

Страница 63: ...and go to step For DocuPrint M118 w Press Menu and then press or to choose 2 Copy Press OK Press or to choose 4 ID Copy Press OK Press or to choose 4 2in1 1in1 Press OK Press or to choose 2in1 for do...

Страница 64: ...Press or to choose 4 ID Copy Press OK Press or to choose 4 2in1 1in1 Press OK Press or to choose 1in1 for one sided copy as a default Press OK and then press Stop Exit For DocuPrint M118 z Press Copy...

Страница 65: ...xt copy Press Menu selections Options DocuPrint M118 z 8 Press or then press OK DocuPrint M118 z Press or then press OK DocuPrint M118 w Press or then press OK DocuPrint M118 w 8 Press or to choose Co...

Страница 66: ...Page 85 LTR EXE 83 LGL A4 1 78 LGL LTR 1 70 A4 A5 50 Custom 25 400 Auto 2 200 141 A5 A4 104 EXE LTR Page Layout Off 1 in 1 2 in 1 P 2 in 1 L 4 in 1 P 4 in 1 L Press Menu selections Options DocuPrint...

Страница 67: ...dows XP Windows Vista and Windows 7 Click Start All Programs Fuji Xerox Fuji Xerox Utilities and then click the drop down list and select your model name if not already selected Click SCAN in the left...

Страница 68: ...Chapter 9 62 Choose Advanced Mode and then click OK Click File in the Scan tab...

Страница 69: ...your preferred folder by clicking the Browse button When you select the SharePoint check box you can save the file to a SharePoint library by entering the address 4 You can choose a scanning resolutio...

Страница 70: ...o and then press OK Press Start The machine starts the scanning process SCAN key settings 9 You can change your machine s Scan key settings using ControlCenter4 Do one of the following Windows XP Wind...

Страница 71: ...drop down list 2 You can enter the file name you want to use for the document 3 You can save the file to the default folder or choose your preferred folder by clicking the Browse button 4 You can cho...

Страница 72: ...oner contact your local Fuji Xerox representative Never throw a toner cartridge into an open flame Remaining toner in the cartridge may catch fire and cause burn injuries or explosion If you have a us...

Страница 73: ...an Fuji Xerox Original cartridges with this machine or the refilling of empty cartridges with toner from other sources If damage is caused to the drum unit or other parts of this machine as a result o...

Страница 74: ...ce cables are securely connected to the machine and the computer If you did not solve your problem with the above checks identify your problem and then go to the page suggested below Telephone and Fax...

Страница 75: ...the drum unit The drum unit counter was not reset when a new drum was installed Replace the drum unit or reset the drum unit counter when a new drum is installed See the instructions that are supplied...

Страница 76: ...Fax Journal report DocuPrint M118 z on page 81 Toner Low If the LCD shows Toner Low you can still print however the machine is telling you that the toner cartridge is near the end of its life Order a...

Страница 77: ...d on 2 Connect one end of the telephone line cord to the area labelled LINE and then connect the other end of the telephone line cord directly to a telephone wall socket If you can send and receive fa...

Страница 78: ...to Can I set the machine not to print the Transmission Verification report This product will print a Transmission Verification report Even if the Transmission Verification report is set to Off a repor...

Страница 79: ...blems with print results check the following 1 The machine s environment Choose a location where the temperature remains between 10 C and 32 5 C and the humidity is between 20 to 80 without condensati...

Страница 80: ...h the drum unit for replacing the drum unit or see the instructions printed on the box of the toner cartridge for replacing the toner cartridge 5 Clean the inside of the machine Cleaning the scanner g...

Страница 81: ...t to right and right to left several times NOTE Be sure to return the tab to the home position 5 If you do not printed pages may have a vertical stripe Clean the drum unit if black or white dots appea...

Страница 82: ...76 Turn the drum unit gear by hand while looking at the surface of the drum roller 1 Wipe the surface of the drum gently with a dry cotton swab until the dust or glue on the surface comes off 1...

Страница 83: ...eck the printer driver settings Try changing the Print Settings in the Basic tab If the paper is curled or the toner is not fixed well on the paper you can adjust these settings in Improve Print Outpu...

Страница 84: ...cument out Close the ADF cover Lift the document cover Pull the jammed document out to the right Insert a piece of stiff paper such as cardstock into the ADF to push any small paper scraps through If...

Страница 85: ...more information Always remove all paper from the paper tray and straighten the stack when you add new paper This helps prevent multiple sheets of paper from feeding through the machine at one time an...

Страница 86: ...drum unit and toner cartridge assembly back in to the machine Close the top cover After lifting the scanner cover slightly pull the pull arm 1 on the left side of the machine down and then close the...

Страница 87: ...ress Menu 0 2 to register your fax number telephone number and name Transferring faxes to your PCA You can transfer the faxes from your machine s memory to your PC Make sure that you have installed Mu...

Страница 88: ...ee cloth When you replace the toner cartridge or the drum unit make sure that you clean the inside of the machine If printed pages are stained with toner clean the inside of the machine with a dry lin...

Страница 89: ...Troubleshooting and other information 83 A CAUTION When cleaning this product always switch off and unplug it Access to a live machine interior may cause electric shock...

Страница 90: ...ce 220 240 V AC 50 60 Hz Power Consumption Average Peak 1 Approx 1 180 W Printing 1 Approx 390 W at 25 C Copying 1 Approx 390 W at 25 C Ready 1 Approx 50 W at 25 C Deep Sleep 1 Approx 0 9W Approx 1 4...

Страница 91: ...ressure Printing LPAm 52 dB A Sound Power Printing LWAd 6 6 B A Temperature Operating 10 to 32 5 C 4 Storage 0 to 40 C Humidity Operating 20 to 80 without condensation Storage 35 to 85 without condens...

Страница 92: ...ight ADF 64 to 90 g m2 Scanner Glass Up to 2 0 kg Model DocuPrint M118 w DocuPrint M118 z Paper Input Paper Tray Paper Type Plain Paper Recycled Paper Paper Size A4 Letter Legal Folio 1 A5 A5 Long Edg...

Страница 93: ...inting Width Max 208 mm Greyscale 8 bit 256 levels Resolution Horizontal 8 dot mm Vertical Standard 3 85 line mm Fine 7 7 line mm Photo 7 7 line mm Superfine 15 4 line mm Speed Dial 99 stations Automa...

Страница 94: ...device from overheating but will result in a temporary reduction in print or copy speed 3 From Ready mode and standard tray Model DocuPrint M118 w DocuPrint M118 z Colour Yes TWAIN Compliant Yes Windo...

Страница 95: ...end 1 PC Fax Receive Windows only 1 and Remote Setup 1 2 Also included is BRAdmin Light 3 Network Management software Protocols IPv4 ARP RARP BOOTP DHCP APIPA Auto IP WINS NetBIOS name resolution DNS...

Страница 96: ...ion and settings verification of functionality of Fuji Xerox supplied products replacement of customer replaceable units clearing paper misfeeds and cleaning the unit and other prescribed routine and...

Страница 97: ...p mode 40 Dialling manual 50 Speed Dial 50 using the Search key 50 Dimensions 84 Document how to load 44 jam 78 Drum unit 66 cleaning 75 E Error messages on LCD 69 F FAX PC FAX Macintosh See Software...

Страница 98: ...ote setup See Software and Network User s Guide Resolution copy 87 fax 87 print 88 scan 88 S Scan a document to a computer 61 Scanner glass using 44 Scanning 61 See Software and Network User s Guide S...

Страница 99: ...DocuPrint M118 w DocuPrint M118 z User s Guide ME7165E3 1 Edition 1 October 2014 Copyright 2014 by Fuji Xerox Co Ltd Fuji Xerox Co Ltd...

Отзывы: