11 Using the Internet Fax Service
360
U
sin
g
the I
n
tern
et Fa
x
S
erv
ice
11
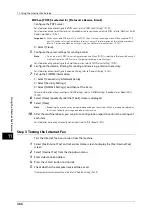
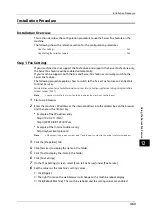
When [POP3] is selected for [Protocol to Receive E-mail]
Configure the POP3 server.
For information on how to configure the POP3 server, refer to "POP3 Server Settings" (P.193).
For information on how to set the machine's e-mail address when you receive e-mails via POP3, refer to "Machine's E-mail
Address/Host Name" (P.186).
Important •
When you enable POP over SSL in the POP3 Server Setting, receiving e-mail will be encrypted. POP
over SSL can be set using CentreWare Internet Services. For information on the setting procedure,
refer to "Configuring Machine Settings Using CentreWare Internet Services" (P.301).
3) Select [Close].
5
Configure the server settings for sending e-mails.
Note
•
To send e-mails, SMTP server settings are required. When [POP3] is selected in [Protocol to Receive E-
mail], configure the SMTP server in [Outgoing/Incoming E-mail Settings].
For information on how to configure the e-mail transmission, refer to "SMTP Server Settings" (P.193).
6
Configure the domain filtering for sending and receiving e-mails as necessary.
For information on how to configure the domain filtering, refer to "Domain Filtering" (P.204).
7
Set up the S/MIME information.
1) Select [Connectivity & Network Setup].
2) Select [Security Settings].
3) Select [S/MIME Settings], and then set the items.
For more information on how to configure S/MIME settings, refer to "S/MIME Settings (ApeosPort Series Models Only)"
(P.200).
8
Select [Close] repeatedly until the [Tools] screen is displayed.
9
Select [Close].
Note
•
Rebooting the machine may be required depending on the settings. When a message displayed on
the screen, follow the message and reboot the machine.
10
After the machine reboots, you can print a configuration report to confirm the settings of
each item.
For information on how to print a configuration report, refer to "Print Reports" (P.92).
Step 3 Testing the Internet Fax
Test the Internet fax transmission from the machine.
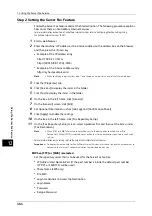
1
Select [Fax/Internet Fax] on the Services Home screen to display the [Fax/Internet Fax]
screen.
2
Select [Internet Fax] from the drop-down menu.
3
Enter a destination address.
4
Press the <Start> button to transmit.
5
Check whether the computer received the e-mail.
If the computer cannot receive the e-mail, refer to "Problem Solving" (P.409).
Содержание ApeosPort-V 6080
Страница 1: ...ApeosPort V 7080 ApeosPort V 6080 DocuCentre V 7080 DocuCentre V 6080 Administrator Guide ...
Страница 13: ...13 Activity Report 727 EP System 731 Glossary 732 Index 735 ...
Страница 14: ...14 ...
Страница 62: ...2 Paper and Other Media 62 Paper and Other Media 2 ...
Страница 88: ...3 Maintenance 88 Maintenance 3 ...
Страница 110: ...4 Machine Status 110 Machine Status 4 ...
Страница 296: ...5 Tools 296 Tools 5 ...
Страница 346: ...9 Scanner Environment Settings 346 Scanner Environment Settings 9 ...
Страница 354: ...10 Using IP Fax SIP 354 Using IP Fax SIP 10 ...
Страница 366: ...12 Using the Server Fax Service 366 Using the Server Fax Service 12 ...
Страница 382: ...13 Encryption and Digital Signature Settings 382 Encryption and Digital Signature Settings 13 ...
Страница 734: ...16 Appendix 734 Appendix 16 ...
Страница 744: ...Index 744 Index ...


