background image

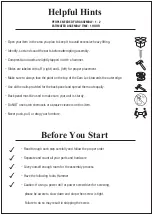
Helpful Hints

Before You Start

PEOPLE NEEDED FOR ASSEMBLY: 1 - 2

ESTIMATED ASSEMBLY TIME: 1 HOUR

 Open your item in the area you plan to keep it to avoid excessive heavy lifting.

 Identify, sort and count the parts before attempting assembly.

 Compression dowels are lightly tapped in with a hammer.

 Slides are labeled with a R (right) and L (left) for proper placement.

 Make sure to always face the point on the top of the Cam Lock towards the outer edge.

 Use all the nails provided for the back panel and spread them out equally.

 Back panel must be used to make sure your unit is sturdy.

 Do NOT use harsh chemicals or abrasive cleaners on this item.

 Never push, pull, or drag your furniture.

 Read through each step carefully and follow the proper order

 Separate and count all your parts and hardware

 Give yourself enough room for the assembly process

 Have the following tools: Hammer

 Caution: If using a power drill or power screwdriver for screwing, 

      please be aware to slow down and stop when screw is tight. 

      Failure to do so may result in stripping the screw.

Содержание KF21012

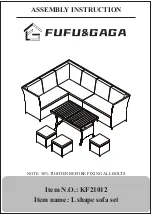
Страница 1: ...ASSEMBLY INSTRUCTION NOTE 50 TIGHTEN BEFORE FIXING ALL BOLTS Item N O KF21012 Item name L shape sofa set...

Страница 2: ...owards the outer edge Use all the nails provided for the back panel and spread them out equally Back panel must be used to make sure your unit is sturdy Do NOT use harsh chemicals or abrasive cleaners...

Страница 3: ......

Страница 4: ......

Страница 5: ......

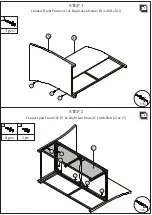
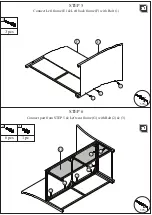
Страница 6: ...C B A 1 1 1 2 2 2 2 2 3 STEP 1 Connect Right Frame A Right back frame B with Bolt 1 STEP 2 Connect part from STEP 1 Right seat frame C with Bolt 2 3 50 50 3 pcs 1 6 pcs 2 1 pc 3 x2 x2...

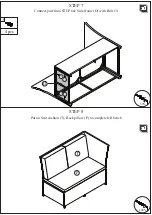
Страница 7: ...D P Q T 3 3 3 3 STEP 3 Connect part from STEP 2 Side frame D with Bolt 3 STEP 4 Put on Seat cushion T Back cushion P Small back cushion Q to complete right bench 50 100 4 pcs 3 x2 x1 x1 P T...

Страница 8: ...E F G 1 1 1 2 2 2 2 2 2 3 STEP 5 Connect Left frame E Left back frame F with Bolt 1 STEP 6 Connect part from STEP 5 Left seat frame G with Bolt 2 3 50 50 3 pcs 1 6 pcs 2 1 pc 3 x1 x1...

Страница 9: ...D 3 3 3 3 STEP 7 Connect part from STEP 6 Side frame D with Bolt 3 STEP 8 50 100 4 pcs 3 x1 x1 T P Put on Seat cushion T Back pillow P to complete left bench...

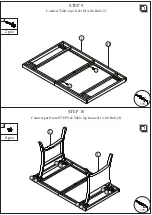
Страница 10: ...I H L L 2 2 4 4 4 4 4 4 4 4 STEP 9 Connect Table top I H with Bolt 2 STEP 10 Connect part from STEP 9 Table leg frame L with Bolt 4 50 50 2 pcs 1 8 pcs 4 x1 x1...

Страница 11: ...K J 4 4 4 4 4 4 4 4 STEP 11 Connect part from STEP 10 Table connecting J with Bolt 4 STEP 12 Connect part from STEP 11 Supporting bar K with Bolt 4 50 50 4 pcs 4 4 pcs 4 x1 x1...

Страница 12: ...le top R to complete table STEP 14 Connect Stool seat frame O Stool leg frame M Stool side frame N with bolt 3 STEP 15 Connect part from STEP 14 Stool leg frame M Stool side frame N with bolt 3 100 50...

Страница 13: ......

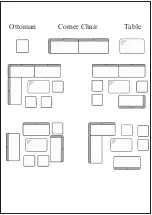
Страница 14: ...Ottoman Corner Chair Table...

Страница 15: ...time to assemble this FAFA GAGA product and to give us your valuable feedback If you have any questions about the product please do not hesitate to contact customer service Visit your local retailer s...

Отзывы: