


This system has pre-installed Tee fittings for measuring Post
Membrane and Post DI filter.
The Red lead (in) should be installed into the tee located at the back
of the system. The Blue lead (out) should be installed into the tee
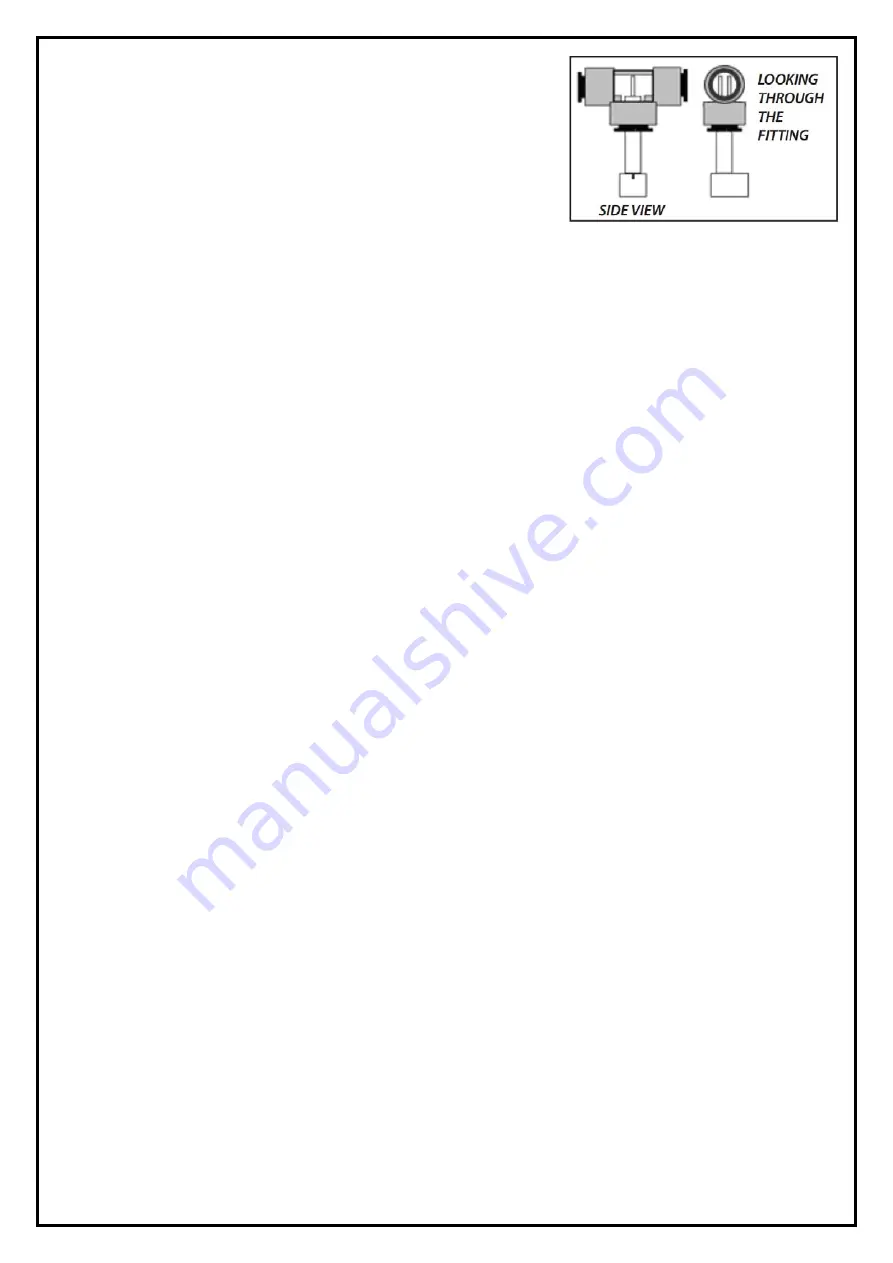
located on the outlet of the DI filter (right side). When inserting the
probes, you will need to push them in firmly until they pass the
internal o-ring and ‘lock’ into place. Try to orient the probes so that
the pins are perpendicular to the water flow (shown in photo).
You can mount the TDS monitor wherever it is convenient using the supplied adhesive tape.
III. Usage
1. Press the “POWER” button.
2. To display the TDS level of the feed (tap) water, slide the switch to the IN side. To display the TDS
level of the product (filtered) water, slide the switch to the OUT side.
3. The displayed TDS will be most accurate after approximately 10 seconds.
4. Determining filter effectiveness depends on your particular system. For an RO system, for example,
compare the IN water TDS levels with the OUT water TDS.
5. If the “x10” icon appears, this means the TDS level is above 999 ppm. Therefore, multiply the
reading by 10. For example, if the display shows 143 ppm with the ‘x10’ icon, the actual TDS level is
1430 ppm. (If the ‘x10’ icon does not appear, the reading on the display is the actual TDS level.) For
most drinking water, you will not see the ‘x10’ icon.
6. Turn off the unit. It will automatically shut off after 10 minutes.
IV. Calibration
Your monitor was factory calibrated to 342 ppm. This level is suitable for most tap water/filtered water
applications, so it is ready to use out of the box. However, you may need to re-calibrate based on your
needs, as well as from time-to-time to ensure best results. To calibrate:
1. Purchase a certified calibration solution that is correct for your needs. The calibration solution
should be NaCl. HM Digital’s 342 ppm NaCl is recommended.
2. Disconnect both T-fittings from their tubes. Do not remove the sensor from the T! Ensure the
orientation of the sensor to the fitting is correct, as in illustration #1. Shake any water out.
3. For better accuracy, calibrate to a flowing solution. If this is not possible, you can calibrate to a still
solution. Turn on the monitor and place one T-fitting (with the sensors in it) into the calibration
solution. You will get a reading. Ensure the fitting is completely filled with solution and there are no
air bubbles. This step is critical for proper calibration.
4. If the reading on the monitor (for the sensor in the solution) does not match the solution, adjust the
reading up or down by gently turning the plastic orange screw on the rear of the unit clockwise or
counter clockwise to raise or lower the reading.
5. There is one calibration screw to calibrate both the IN and OUT sensors simultaneously. You only
need to calibrate one sensor, and it does not matter which.
6. If calibrating to a still (not flowing) solution, calibrate to 3% above the level of the calibration
solution. This will accommodate for the lack of flowing water, which the monitor is programmed for.
For example, if the calibration solution is 342 ppm, adjust the screws until it reads 352 ppm. If you
are calibrating to a flowing solution, calibrate to the level of the solution.
7. Your monitor is now calibrated. There is no need to do anything else
V. Changing Batteries
If the display is fading or the readings are not correct, you may need to change the batteries.
1. Unscrew the three metal screws (not the orange plastic screw) on the rear of the unit and remove
the back panel.
2. Remove the batteries.
3. Replace both batteries with two fresh batteries (model 357A). Ensure the polarity is correct.
4. Close the back panel and replace the screws. You will not need to recalibrate.


