


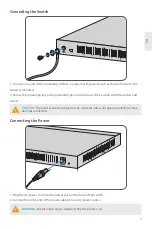


ON
OFF
VLAN
S1900-16T
Link/Act: Flash=Activity Port 15-16: Uplink (VLAN on)
1
2
3
4
5
6
7
8
9
10
11
12
13
14
15
16
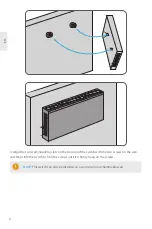
NOTE:
This switch can only be installed on a concrete or non-flammable wall.
4. Align the two wall-mounting slots on the bottom of the switch with the two screws on the wall,
and then slide the switch to fit in the screws until it is firmly hung on the screws.
EN
6


