


114
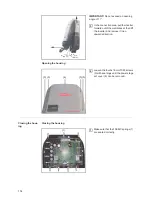
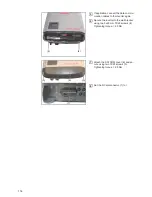
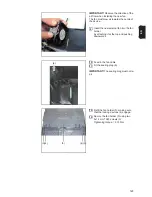
IMPORTANT!
Do not exceed an opening
angle of 11°.
In the connection area, pull the inverter
forward out of the wall bracket, then lift
the inverter and remove it in an
upwards direction.
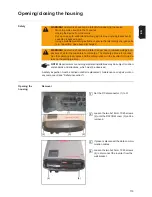
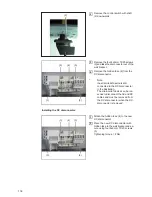
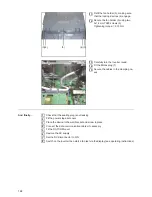
Opening the housing
Loosen the four 5x18 mm TX25 screws
(5) with seal rings until the power stage
set cover (6) can be removed.
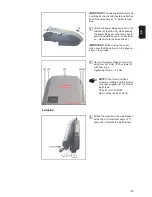
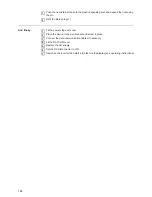
Closing the hous-
ing
Closing the housing
Make sure that the 15 EMC springs (1)
are seated correctly.
4.33 in.
110 mm
max. 11°
5
(5) (5)
(5)(5)
(6)
6
(1)
1
Содержание Primo 3.0-1
Страница 2: ...2 ...
Страница 5: ...Allgemeine Informationen ...
Страница 6: ......
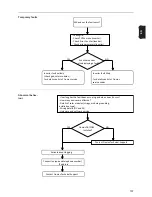
Страница 13: ...Fehler Suchhilfe ...
Страница 14: ......
Страница 32: ...32 ...
Страница 33: ...Komponenten austauschen ...
Страница 34: ......
Страница 54: ...54 DC Trenner auf ON stellen 6 ...
Страница 65: ...Sicherheitstechnische Überprüfung ...
Страница 66: ......
Страница 78: ...78 ...
Страница 81: ...General information ...
Страница 82: ......
Страница 89: ...Error location aid ...
Страница 90: ......
Страница 108: ...108 ...
Страница 109: ...Changing components ...
Страница 110: ......
Страница 130: ...130 Set the DC disconnector to ON 6 ...
Страница 141: ...Safety Inspections ...
Страница 142: ......
Страница 154: ...154 ...
Страница 155: ...Appendix ...
Страница 158: ...158 ...
Страница 159: ...159 ...