background image

10

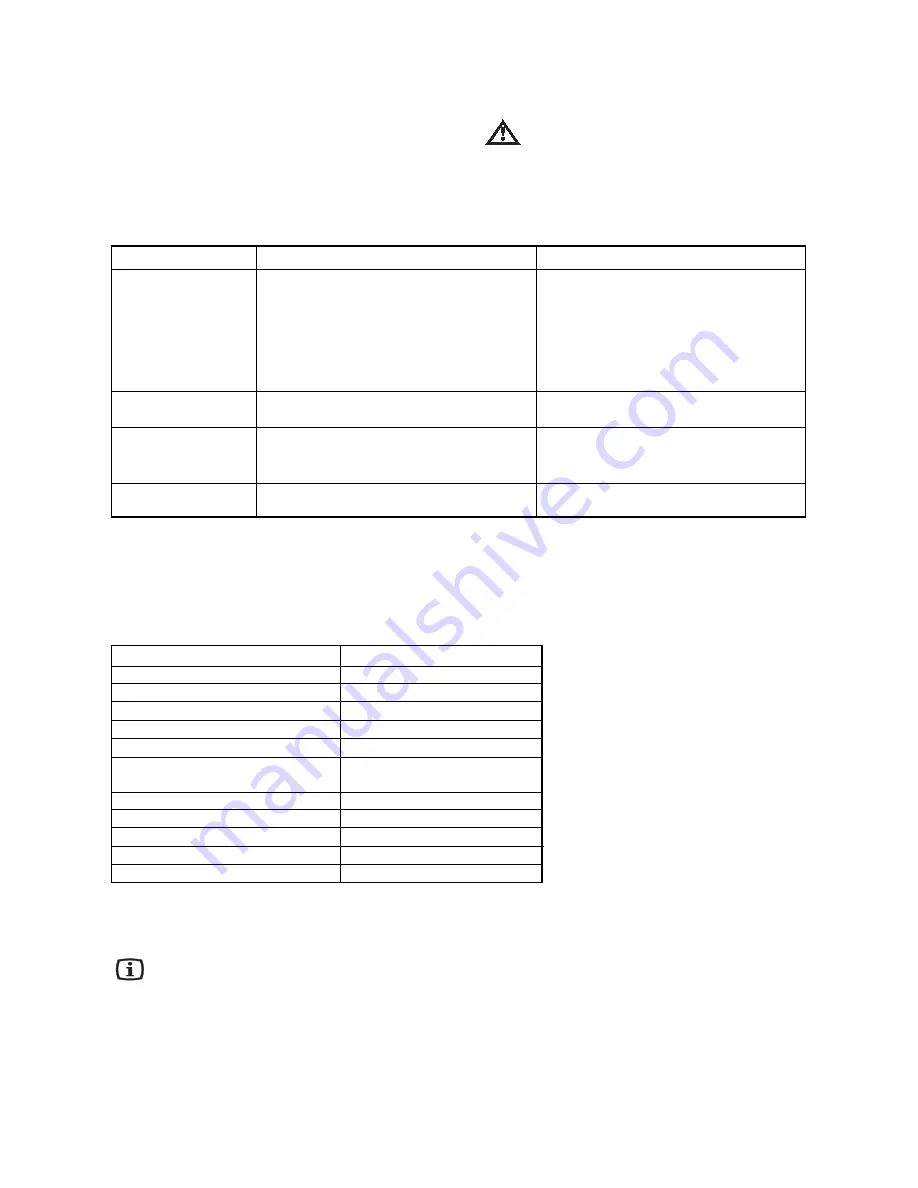
Trouble shooting

During operation of the appliance some smaller but

annoying trouble can often occur, which does not

require calling a technician out. In the following chart

information is given about them to avoid unnecessary

charges on service.
We draw your attention that operation of appliance goes

with certain sounds (compressor- and circulating

Inasmuch as the advice does not lead to result, call the nearest brand-mark service.

sound). This is not trouble, but means normal

operation.

We draw it to your attention again that the

appliance operates discontinuously, so the

stopping of compressor does not mean being no-

current. That is why you must not touch the

electrical parts of the appliance before removing it

from the mains socket.

Ins

Ins

tr

tr

uctions f

uctions f

or the Ins

or the Ins

t

t

aller

aller

Model/Type

Gross capacity (l)
Net capacity (l)
Width (mm)
Height (mm)
Depth (mm)
Energy consumption 

(kWh/day)
(kWh/year)

Energy class, according to EU Standards
Freezing capacity (kg/24h)
Rising time (h)
Rated power (W)
Weight (kg)

FV 3501 (TT 120 F)

117

100
550
850
600

0,75

274

B

15

25

120

39

Technical data

Installing the appliance

Transportation, unpacking

It is recommended to deliver the appliance in

original packaging, in vertical position

considering the protective warning on packaging.
After each transportation the appliance must not be

switched on for approx. 2 hours.
Unpack the appliance and check if there are damages

on it. Report possible damages immediately to the

place you bought it. In that case retain packaging.

Cleaning

Remove every adhesive tape, which ensure the

parts not to move in the appliance.
Wash the inside of the appliance using lukewarm

water and mild detergent. Use soft cloth.
After cleaning wipe out the inside of the appliance.

Problem

The appliance does not

cool sufficiently

The appliance cools too

hard
The appliance does not

cool at all

The appliance is noisy

Possible cause

Thermostatic control is set too low.
Before freezing the appliance was not precooled

sufficiently.
Large-sized food was put in.
Too many foods to be frozen were put in.
Warm foods were put in.
Door is not shut properly.
The thermostatic control is set too high.

Plug is not connected to the mains socket properly.
There is no voltage in the mains socket.
Thermostatic control is in „0” position.
The appliance is not supported properly.

Solution

Set higher position.
Pre-cool the appliance for enough time.

Cut up food.
Put fewer foods to be cooled.
Put foods max. at room temperature.
Check if the door is shut.
Set lower position.

Check if the connection is proper.
Check if there is voltage.
Check setting of thermostatic control.
Check if the appliance stands stable (all the four

feet should be on the floor).

Содержание FV 3501

Страница 1: ...A F 29 00 1305740 INSTRUCTION BOOK FREEZER FV 3501 TT 120 F ...

Страница 2: ...e with the instructions written it will operate properly and provide you with greatest satisfaction The symbols below help you to find things more easily Safety precautions Warnings and information at this symbol serve safety for you and your appliance Hints useful information Environmental information Symbol for ideas At this symbol ideas can be found according to food and its storing ...

Страница 3: ...perature 6 Freezing 7 Storing 7 How to make ice cubes 8 Some useful information and advice 8 Hints and ideas 8 How to save energy 8 The appliance and environment 8 Maintenance 8 Defrosting 8 Regular cleaning 9 When the refrigerator is not in use 9 Trouble shooting 10 Instructions for the Installer 10 Technical data 10 Installing the appliance 10 Transportation unpacking 10 Cleaning 10 Placement 11...

Страница 4: ...ith the frozen food manufacturer s instructions You must not make defrosting faster with any electric heating appliance or chemicals Do not make hot pot touch the plastic parts of the freezer Do not store flammable gas and liquid in the appliance because they may explode Do not put carbonated drinks bottled drinks and bottled fruits into the freezer Im Impor port tant saf ant safe et ty inf y info...

Страница 5: ...een different temperature limits according to the climate class The letter symbol for climate class can be found on the data plate Description of the appliance main parts 1 Freezing tray 2 Freezing compartment with ice tray 3 Storing compartments wire baskets 4 Data plate 5 Switch and indicator unit a Green lamp b Red lamp c Yellow lamp d Continuous operation fast freezer switch e Thermostat knob ...

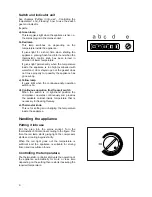
Страница 6: ...It gives light when the continuous duty operation switch is on d Continuous operation fast freezer switch When the switch is in right hand position the compressor operates continuously and provides the available coldest inside temperature that is necessary for freezing this way e Thermostat knob This is for setting and changing the temperature inside the appliance Handling the appliance Putting it...

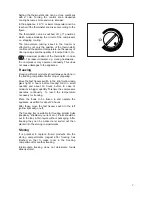
Страница 7: ...ways be done in the freezing compartment after proper preparing Move the fast freezer switch to the right yellow lamp gives light 4 hours before freezing food in small quantity and about 24 hours before in case of products in bigger quantity This time the compressor operates continually to reach the temperature necessary for freezing Place the foods to be frozen in and operate the appliance as wri...

Страница 8: ...energy Avoid putting the appliance in a sunny place and near anything that gives off heat Be sure that the condenser and the compressor are well ventilated Do not cover the sections where ventilation is Wrap products in tightly closing dishes or cling film to avoid building up unnecessary frost Avoid products put in the freezer compartment to touch foods already frozen Do not leave the door open l...

Страница 9: ...m of the appliance carefully in the direction of the arrow Defrost water will flow into the tray through the outlet Defrosting process can be made quicker by placing a pot or dish filled with warm water to the cooling plate formed as a shelf After defrosting wipe the surfaces and push defrost water outlet back Apply voltage to the appliance After the red light has gone out put the foods back Regul...

Страница 10: ... the protective warning on packaging After each transportation the appliance must not be switched on for approx 2 hours Unpack the appliance and check if there are damages on it Report possible damages immediately to the place you bought it In that case retain packaging Cleaning Remove every adhesive tape which ensure the parts not to move in the appliance Wash the inside of the appliance using lu...

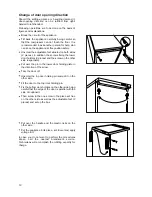
Страница 11: ...be achieved by two adjustable feet 1 at the bottom in front 1 1 piece of distance washers 2 are accessories of the adjustable feet If levelling the appliance requires these washers can be removed Do not stand the appliance on a sunny place or close to a radiator or cooker If it is unavoidable because of furnishing and the appliance has to be stood near a cooker take these minimum distances into co...

Страница 12: ...ieces and the screw on the other side respectively Put over the pin in the lower door holding plate in the direction of the arrow Take the door off Unscrew the top door holding pin and put it on the other side Fit the door to the top door holding pin Fix the bottom door holders on the other side being careful that the edge of the door is parallel with the side of cupboard Then screw in the one scr...

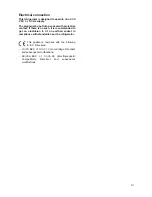
Страница 13: ...there is no such it is recommended to get an electrician to fit an earthed socket in compliance with standards near the refrigerator This appliance complies with the following E E C Directives 73 23 EEC of 19 02 73 Low Voltage Directive and subsequent modifications 89 336 EEC of 03 05 89 Electromagnetic Compatibility Directive and subsequent modifications ...

Страница 14: ...ing to its data label The data label of the appliance is stuck to the wall of the interior beside the vegetable box in the fresh food compartment in the bottom on the left side All necessary data are there which are needed to the service announcement type model serial number etc Note here the data from the data label of your appliance Model Product No Serial No Date of purchase The manufacturer re...

Страница 15: ......

Страница 16: ...Printed by Xerox Hungary Ltd Rev 2002 03 12 ...

Отзывы: