background image

6

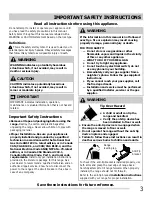
WARNING

See the 

INSTALLATION INSTRUCTIONS

 packaged with

this range for complete installation and grounding instructions.

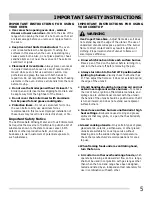
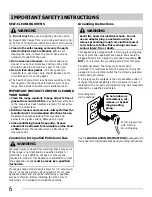
Grounding Instructions

Do not under any

circumstance, cut,

remove, or bypass

the grounding

prong.

Power supply cord

with 3-prong

grounding plug.

Grounding type

wall receptacle

IMPORTANT INSTRUCTIONS FOR CLEANING

YOUR RANGE

 Clean the range regularly to keep all parts free of

grease that could catch fire.

 Pay particular attention

to the area around each surface element. Do not allow

grease to accumulate.

• Kitchen cleaners and aerosols—Always follow the

manufacturer’s recommended directions for use.

Be aware that excess residue from cleaners and

aerosols may ignite causing damage and injury.

• Clean ventilating hoods frequently—Grease

should not be allowed to accumulate on the hood

or filter.

 Follow the manufacturer’s instructions for

cleaning hoods.

• Clean in the self-cleaning cycle only the parts

listed in this Use & Care Manual.

 Before self-

cleaning the oven, remove the broiler pan and any

utensils or foods from the oven.

• Do not use oven cleaners

—No commercial oven

cleaner or oven liner protective coating of any kind

should be used in or around any part of the oven.

• Do not clean door gasket

—The door gasket is

essential for a good seal. Care should be taken not to

rub, damage or move the gasket.

 The health of some birds is extremely sensitive to the

fumes given off during the self-cleaning cycle of any

range. Move birds to another well-ventilated room.

SELF-CLEANING OVENS

WARNING

• Do not touch

 the oven during the self-clean cycle.

Keep children away from oven during self-clean cycle.

Failure to follow these instructions can result in burns.

If your gas range model design allows for L.P. conversion,

the L.P. conversion kit may be obtained from your local

appliance dealer and should be installed by a qualified

service technician. Before installing the kit be sure to

follow the L.P. Installation Instructions carefully.

Personal injury or death from electrical shock may occur

if the range is not installed by a qualified installer or

electrician.  Any additions, changes or conversions

required in order for this appliance to satisfactorily meet

the application needs 

must be made by a qualified

technician.

Conversion to Liquefied Petroleum Gas

WARNING

Avoid fire hazard or electrical shock.  Do not

use an adapter plug, an extension cord, or

remove grounding prong from electrical power

cord. Failure to follow this warning can cause

serious injury, fire or death.

This appliance is equipped with a 3-prong grounding plug

for your protection against shock hazard and should be

plugged directly into a properly grounded receptacle.

 DO

NOT

 cut or remove the grounding prong from this plug.

For personal safety, the range must be properly

grounded. For maximum safety, the power cord must be

plugged into an electrical outlet that is correctly polarized

and properly grounded.
If a 2-prong wall receptacle is the only available outlet, it

is the personal responsibility of the consumer to have it

replaced with a properly grounded 3-prong wall receptacle

installed by a qualified electrician.

IMPORTANT SAFETY INSTRUCTIONS

Содержание FGGF3032MB

Страница 1: ...65 8352 Gas Range 316901219 Aug 2011 Important Safety Instructions 3 6 Before Setting Oven Controls 7 9 Before Setting Surface Controls 10 11 Setting Surface Controls 12 Oven Control Functions 330 probe 13 Setting Oven Controls 14 28 Self Cleaning 29 31 Care Cleaning 32 35 Before You Call 36 39 Major Appliance Warranty back cover ...

Страница 2: ...Save time and money Check the section Before You Call This section helps step you through some common problems that might occur If you do need service help is only a phone call away Call Frigidaire Customer Services at 1 800 944 9044 Be sure to visit us online at www frigidaire com for a complete line of accessories Product Registration 2 Important Safety Instructions 3 6 Before Setting Oven Contr...

Страница 3: ...tructions provided in the literature package for this range Ask your dealer to recommend a qualified technician and an authorized repair service Know how to disconnect the power to the range at the circuit breaker or fuse box in case of an emergency If the information in this manual is not followed exactly a fire or explosion may result causing property damage personal injury or death FOR YOUR SAF...

Страница 4: ...Stepping leaning or sitting on the door or drawers of a range can result in serious injuries and also cause damage to the appliance DO NOT allow children to climb or play around the range The weight of a child on an open oven door may cause the range to tip resulting in serious burns or other injury NEVER use this appliance as a space heater to heat or warm the room Doing so may result in carbon m...

Страница 5: ... IMPORTANT INSTRUCTIONS FOR USING YOUR COOKTOP Know which knob controls each surface burner Place a pan of food on the burner before turning it on and turn the burner off before removing the pan Always turn knob to the full LITE position when igniting top burners Visually check that burner has lit Then adjust the flame so it does not extend beyond the edge of the utensil Utensil handles should be ...

Страница 6: ...d room SELF CLEANING OVENS WARNING Do not touch the oven during the self clean cycle Keep children away from oven during self clean cycle Failure to follow these instructions can result in burns If your gas range model design allows for L P conversion the L P conversion kit may be obtained from your local appliance dealer and should be installed by a qualified service technician Before installing ...

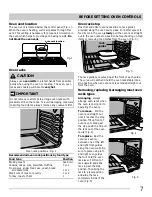
Страница 7: ...cookware still on the racks To avoid damaging cookware or spilling food items always remove any cookware first IMPORTANT rack guides Fig 3 Most flat and offset oven racks slide on rack guides provided along the oven cavity sides For better access to food items in the oven slowly pull the oven rack straight out to the oven rack stop position before checking on food items or removing food dishes fro...

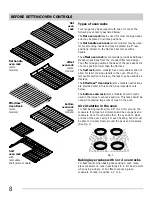
Страница 8: ...rtless Oven Rack some models instructions are provided later in this section See important note below The bottom oven rack some models should only be used in the lowest oven rack position This rack should be used when placing large cuts of meat in the oven flat oven rack flat handle oven rack some models offset oven rack some models Effortless Oven Rack some models half oven rack with removable sh...

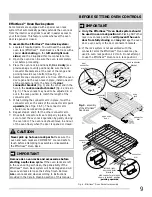
Страница 9: ... arm 7 Once both connector arms are properly in place be sure to test the oven rack operation by gently closing the oven door The oven rack should move in and out of the oven freely when the door is opened or closed Fig 6 Effortless Oven Rack after assembly BEFORE SETTING OVEN CONTROLS left and right door connector brackets with connector arm ends shown in locked position pointing upwards connecto...

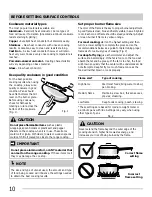
Страница 10: ...proper burner adjustment A good flame is clear blue and hardly visible in a well lighted room Each cone of flame should be steady and sharp Adjust or clean burner if flame is yellow orange CAUTION Correct flame setting Incorrect flame setting CAUTION IMPORTANT Do not place aluminum foil or ANY material that can melt on the range cooktop If these items melt they may damage the cooktop Fig 1 NOTE Co...

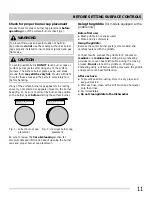
Страница 11: ...ossible rusting store in a dry place and keep uncovered After each use clean with a stiff brush and hot water only then rinse Dry immediately Do not clean griddle in the dishwasher Using the griddle Remove the center burner grate some models and carefully replace with the griddle For best results preheat the griddle for 5 minutes on medium or a medium low setting Slow preheating provides more even...

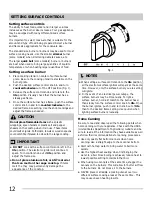
Страница 12: ...flame as needed Do not place flammable items such as plastic wrappings spoon holders or plastic salt and pepper shakers on the cooktop when it is in use These items could melt or ignite Potholders towels or wooden spoons could catch fire if placed too close to the range cooktop CAUTION DO NOT cook with a surface control knob left in the lite position The electronic ignitor will continue to spark T...

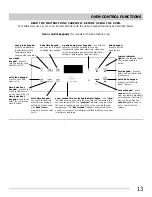
Страница 13: ...eat door locked indicator lights the oven indicator will glow each time the oven turns on to maintain the set oven temperature The preheat indicator will glow while the oven is heating up and turn off once the oven reaches set temperature The door locked indicator will glow when the oven door is locked This indicator will flash while the oven door is locking or unlocking feature indicator lights t...

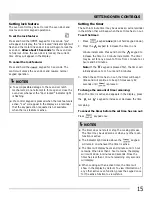
Страница 14: ... 5 seconds Setting the clock When the appliance is first powered up or when the power supply to the appliance has been interrupted and restored the display will flash the time of day Be sure to set the clock with the correct time of day before using the oven NOTE The clock cannot be set or adjusted when the oven is active including self clean Press and hold the keypad until the control beeps once ...

Страница 15: ...inute increments The timer may be set for any amount of time from 1 minute to 11 hours and 59 minutes Note If the keypad is pressed first the timer will initially advance to 11 hours and 59 minutes 3 When the set time has run out the timer will beep 3 times and will continue to beep 3 times every 60 seconds until is pressed To change the amount of time remaining When the timer is active and appear...

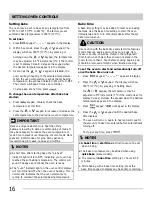
Страница 16: ...akes cookies and muffins To change the oven temperature after bake has started 1 Press keypad Visually check the bake temperature at this time 2 Press the or keypad to increase or decrease the set temperature to the desired new oven temperature Setting bake Bake time A bake time setting may be added to most oven baking features Use the bake time setting to start the oven immediately and to turn of...

Страница 17: ... the desired start time displays 8 The oven will turn ON at the specified start time begin to heat and will cook for the amount of bake time entered before automatically turning off To stop at any time press Use caution with the bake time and start time features Foods that can easily spoil such as milk eggs fish meat or poultry should be chilled in the refrigerator first Even when chilled they sho...

Страница 18: ...g quick bake Since quick bake cooks food faster reduce the cook time by 25 from the recommended cook time of your recipe Check the food at this time If necessary increase cook time until the desired doneness is obtained Do not cover foods when dry roasting this will prevent the air from circulating around the food Setting quick bake The oven may be programmed to quick bake at any temperature from ...

Страница 19: ...Do not use the probe without the probe properly inserted into the probe receptacle and the food To protect the probe when inserted in the receptacle the oven will automatically turn OFF if the probe temperature sensor reaches 300 F 149 C or more Minimum internal cooking temperatures Food type Internal Temp Beef veal lamb roasts steak chops Medium 160 F 71 C Well done 170 F 77 C Fresh pork roasts s...

Страница 20: ...ove food from oven and carefully remove the probe sensor from the food Always insert the probe so that the probe tip rests in the center of the thickest part of meat or food For best results do not allow probe temperature sensor tip to contact any bone fat gristle or the cookware For bone in ham or lamb insert the probe into the center of lowest large muscle or joint For dishes such as meat loaf o...

Страница 21: ...5 minutes before adding food 5 Place prepared food directly under upper element 6 Leave oven door open at broil stop position Fig 2 7 Broil food on one side until desired browness is obtained Turn food and broil on other side Use the broil feature to cook meats that require direct exposure to radiant heat for optimum browning results When broiling always remember to arrange the oven racks while th...

Страница 22: ...ld keypad until the 2 digit display appears Release keypad The display now indicates the amount of degrees offset between the original factory temperature setting and the current temperature setting If the oven control has the original factory calibration the display will read 0 4 The temperature may now be adjusted up or down 35 F 19 C in 5 F increments by pressing and holding the or keypad Adjus...

Страница 23: ...me models or warming drawer some models Be sure the oven light shield is in place Turn off the oven light Remove any excessive spillovers Spills on the oven bottom should be wiped up and removed before starting self clean To clean use hot soapy water and a cloth Large food spillovers can cause heavy smoke or a fire during self clean Remove any food spills from oven that have a high sugar or acid c...

Страница 24: ...as cooled and the oven door has unlocked set for another self clean cycle IMPORTANT To avoid possible burns use care when opening the oven door after the clean cycle is finished Stand to the side of the oven when opening the oven door to allow any hot air or steam to escape The oven bake and broil elements may appear to have cooled after they have turned OFF The elements may still be hot and burns...

Страница 25: ...ven for cleaning until reaching the delay start time On models equipped with cooktop lockout the cooktop will also lock You may add start time instructions to the self clean feature which will automatically start clean at a later time IMPORTANT To avoid possible burns use care when opening the oven door after the self clean cycle is finished Stand to the side of the oven when opening the oven door...

Страница 26: ... and be sure to squeeze excess water from dishcloth before wiping the control panel Control knobs some models Painted body parts Painted decorative trim Aluminum plasticorvinyltrim If your range finish is Easy Care Stainless Steel some models clean the stainless with warm soapy water using a clean sponge or cloth Rinse with clean water and dry with a soft clean cloth DO NOT use ANY store bought cl...

Страница 27: ...mmediately after the grates are cool Thoroughly dry grates immediately following cleaning Always check for proper burner cap placement before operating any surface burner Also be sure and check for correct burner cap placement after having removed and replaced the burner caps for cleaning Checking for proper burner cap placement IMPORTANT When placing burner caps be sure that all burner caps are s...

Страница 28: ...arts are COOL before replacing oven light Wear a leather faced glove for protection against possible broken glass CAUTION Aluminum foil and oven liners Using a liner in the oven restricts the heat and air flow needed to obtain the best possible cooking results for any oven including the warmer drawer on some models Do not use oven bottom liners or use aluminum foil to cover the oven bottom or any ...

Страница 29: ...re fully positioned inside the oven Do not hit door glass with cookware or other objects Scratching hitting jarring or stressing the glass may weaken its structure causing an increased risk of breakage at a later time Special door care instructions Most oven doors contain glass that can break To replace oven door 1 Firmly grasp both sides of oven door along the door sides Do not use the oven door ...

Страница 30: ...on oven rack Bake started with cold oven Incorrect oven rack position Adjust oven rack position upward or downward as needed Inadequate space around food items or air flow is blocked by oven liner or using aluminum foil as a liner Try centering food in oven for single items When cooking multiple food items space cookware to allow air to circulate completely around the food items Review Aluminum fo...

Страница 31: ...oor Convect fan turns on with features that should run without a fan some models For some models the convect fan may turn ON while preheating Oven control displays Prob ERR The probe is not recognized by the oven control If the error code persists the probe may be damaged or the probe cable has a short Floor is not level weak or unstable If floor under range is sagging or sloping contact a carpent...

Страница 32: ...tion instructions under Self cleaning Interrupted by power outage Once power is restored restart self clean Oven rack no longer slides in or out of oven easily Oven racks left inside oven during self clean Remove all oven racks from oven before starting self clean Clean after removing from the oven using a mild abrasive cleaner following manufacturer s instructions Thoroughly rinse and dry Oven ra...

Страница 33: ...ner head slots and ignition ports See Cleaning the cooktop and surface burners in the Care Cleaning section for additional cleaning instructions Burner caps are missing or not seated properly Check that all surface burner caps are level and seated correctly on surface burner heads See Cleaning the cooktop and surface burners in the Care Cleaning section Oven smokes excessively when broiling Oven d...

Страница 34: ...services performed by unauthorized service companies use of parts other than genuine Electrolux parts or parts obtained from persons other than authorized service companies or external causes such as abuse misuse inadequate power supply accidents fires or acts of God CUSTOMER S SOLE AND EXCLUSIVE REMEDY UNDER THIS LIMITED WARRANTY SHALL BE PRODUCT REPAIR OR REPLACEMENT AS PROVIDED HEREIN CLAIMS BA...

Отзывы: