background image

8

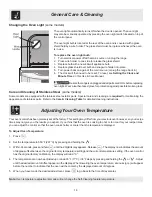
Setting Surface Controls

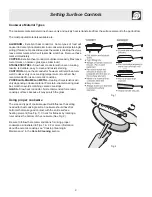
The suggested settings found in Fig. 3 are based
when cooking with medium-weight aluminum
pans with lids. Settings may vary when using
other types of pans.

Suggested Radiant Surface Element Settings Table

Fig. 3

Note: The size and type of utensil used, and
the amount and type of food being cooked will
influence the setting needed for best cooking
results.

RADIANT SURFACE ELEMENTS

Setting

Type of Cooking

HIGH (HI - 9)

Start most foods, bring water to a boil, pan broiling

MEDIUM HIGH (7 - 8)

Continue a rapid boil, fry, deep fat fry

MEDIUM (5 - 6)

Maintain a slow boil, thicken sauces and gravies or
steam vegetables

MEDIUM LOW (2 - 4)

Keep  foods  cooking,  poach,  stew

LOW (LO - 1)

Keep warm, melt, simmer

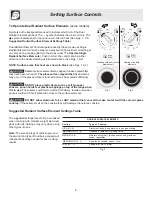
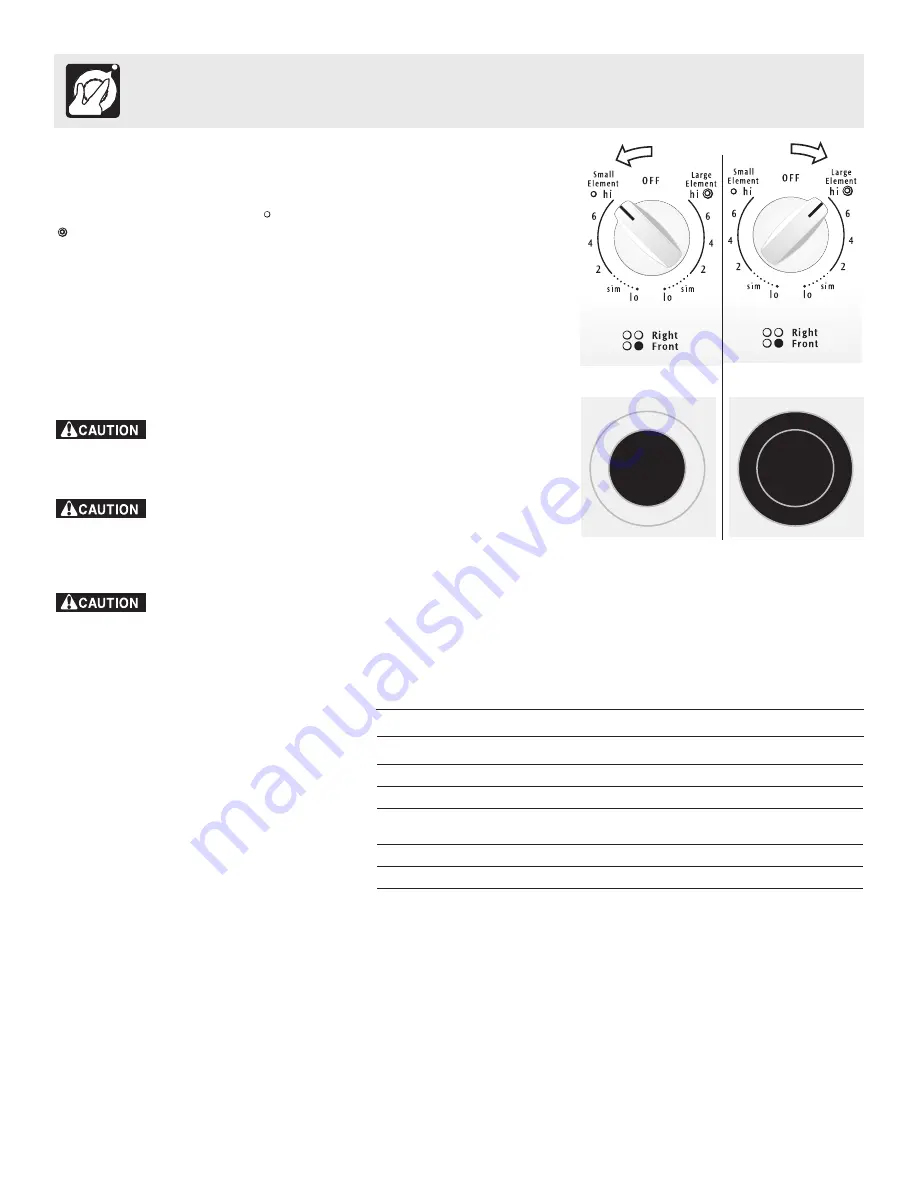
Heating withinner (small)

element only

Heating with both

elements

Fig. 1

Fig. 2

To Operate Dual Radiant Surface Elements (some models)

Symbols on the backguard are used to indicate which coil of the Dual
Radiant element will heat. The 

 symbol indicates the inner coil only. The

 symbol indicates both inner and outer coils will heat (See Figs. 1, 2 &

Suggested Radiant Surface Element Settings Table).

Dual Radiant Element Controls operate exactly the same way as Single
Radiant Element controls, except you may switch from either coil setting at
any time during cooking (Refer to the steps under “To Operate Single
Radiant Surface Elements
). Push in & turn the control knob in either
direction to the desired setting as instructed above (See Figs. 1 & 2)

NOTE: Surface areas that heat are shown in black (See Figs. 1 & 2).

 Radiant surface elements may appear to have cooled after

they have been turned off. The glass surface may still be hot and burns
may occur if the glass surface is touched before it has cooled sufficiently.

 DO NOT place plastic items such as salt & pepper

shakers, spoon holders or plastic wrappings on top of the range when
it is in use. 
These items could melt or ignite. Potholders, towels or wooden
spoons could catch fire if placed too close to the surface elements.

 DO NOT allow aluminum foil, or ANY material that can melt to make contact with the ceramic glass

cooktop. If these items melt on the cooktop they will damage the ceramic cooktop.

Содержание FEFL63FSB

Страница 1: ...elcome 2 Important Safety Instructions 3 4 Features at a Glance 5 Before Setting Oven Controls 6 7 Setting Surface Controls 8 9 Oven Control Functions 10 Setting Oven Controls 11 13 Self Cleaning 13 14 General Care Cleaning 15 18 Adjusting Oven Temperature 18 Before You Call Solutions to Common Problems 19 Warranty Back Page Questions 1 800 944 9044 United States 1 800 668 4606 Canada ...

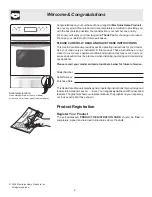
Страница 2: ...r choosing our product We hope you consider us for future purchases PLEASE CAREFULLY READ AND SAVE THESE INSTRUCTIONS This Use Care Manual provides specific operating instructions for your model Use your range only as instructed in this manual These instructions are not meant to cover every possible condition and situation that may occur Common sense and caution must be practiced when installing o...

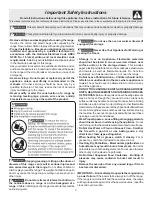
Страница 3: ...ting in serious burns or other injury Never Use Your Appliance for Warming or Heating the Room Storage in or on Appliance Flammable materials should not be stored in an oven warmer drawer near surface units or in the storage drawer This includes paper plasticandclothitems suchascookbooks plasticware and towels as well as flammable liquids Do not store explosives such as aerosol cans on or near the...

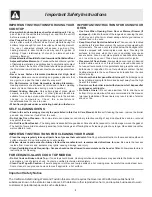
Страница 4: ...eme caution Use potholders and grasp the rack with both hands to reposition Do not let potholders contact the hot heating elements in the oven Remove all utensils from the rack before moving Do not use the broiler pan without its insert The broiler pan and its insert allow dripping fat to drain and be kept away from the high heat of the broiler Do not cover the broiler insert with aluminum foil Ex...

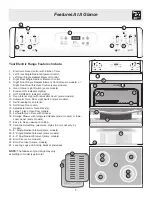
Страница 5: ...Switch some models 11 Self Cleaning Oven interior 12 Self Clean Door Latch 13 Adjustable Interior Oven Rack s 14 Large 1 piece Oven Door Handle 15 Full width Oven Door with Window 16 Storage Drawer with Integrated Handle some models or lower cover panel some models 17 Easy to clean upswept Cooktop 18 Ceramic Smoothtop elements styles color will vary by model 19 6 Single Radiant Element some models...

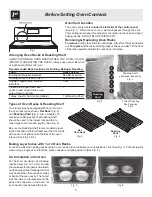
Страница 6: ... Fig 1 For best air circulation and baking results allow 2 4 5 10 cm around thecookwareforproperaircirculation andbesurepansandcookwaredonot toucheachother theovendoor sides or back of the oven cavity The hot air must be able to circulate around the pans and cookware in the oven for even heat to reach around the food Air Circulation in the Oven Fig 2 Baking Layer Cakes with 1 or 2 Oven Racks For b...

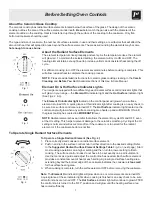
Страница 7: ...orm and consistent heat during the off cycle For efficient cooking turn OFF the element several minutes before cooking is complete This will allow residual heat to complete the cooking process The Element On indicator light located on the control panel will glow when a surface element is turned ON A quick glance at this indicator light after cooking is an easy check to be sure ALL surface controls...

Страница 8: ...The symbol indicates both inner and outer coils will heat See Figs 1 2 Suggested Radiant Surface Element Settings Table Dual Radiant Element Controls operate exactly the same way as Single Radiant Element controls except you may switch from either coil setting at any time during cooking Refer to the steps under To Operate Single Radiant Surface Elements Push in turn the control knob in either dire...

Страница 9: ...nt heat conductor Some types of food will cause it to darken Anodized aluminum cookware resists staining pitting Ifaluminumpansslideacrosstheceramiccooktop theymay leave metal marks which will resemble scratches Remove these marks immediately COPPER Excellent heat conductor but discolors easily May leave metal marks on ceramic glass see Aluminum STAINLESS STEEL Slow heat conductor with uneven cook...

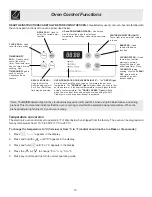
Страница 10: ... PAD Used to clear any function previously entered except the time of day and minute timer Press CLEAR OFF to stop cooking Also the CLEAR OFF pad is used to activate oven door lockout setting TIMERON OFF PAD Used to set or cancel the minute timer The minute timer does not start or stop cooking Also TIMER ON OFF pad is used to set the Continuous Bake feature Note The OVEN indicator light on the ele...

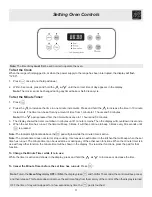
Страница 11: ...t of time from 1 minute to 11 hours and 59 minutes Note If the pad is pressed first the timer will advance to 11 hours and 59 minutes 3 The display shows the timer countdown in minutes until 1 minute remains Then the display will countdown in seconds 4 When the set time has run out the timer will beep 3 times it will then continue to beep 3 times every 60 seconds until is pressed Note The indicato...

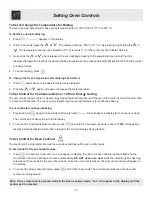
Страница 12: ...ven can be programmed to override this feature for continuous baking To set control for continuous baking 1 Press and hold down for 5 seconds until tone is heard hr will appear in display for continuous cooking The current time of day will return to the display 2 To cancel the Continuous Bake function press and hold for 5 seconds until tone is heard 12hr will appear in display indicating that the ...

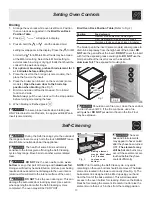
Страница 13: ... stop position beforeturningorremovingthefood 8 When broiling is finished press Broil Oven Rack Position Table Refer to Fig 2 Position Foodcategory 6 Medium steaks medium hamburgers 5 Fish medium well steaks pork chops 4 Well done foods such as chicken lobster Should an oven fire occur close the oven door and turn the oven OFF If the fire continues use a fire extinguisher DO NOT put water or flour...

Страница 14: ...ils NOTE The kitchen area should be well ventilated using an open window ventitlation fan or exhaust hood during the 1st Self Clean cycle This will help eliminate the normal odors associated with the 1st Self Clean cycle To Set the Controls for a Self Clean Cycle 1 Be sure the clock shows the correct time of day 2 Press appears in the display 3 Press the or once 3 00 appears in the display for a 3...

Страница 15: ...Knobs Painted Control Panels Display areas Porcelain Cooktop Surface Broiler Pan Insert some models Broiler Drawer some models Door Liner Oven Bottom How to Clean Surfaces Oven Racks Oven Door Remove oven racks See Removing Replacing Oven Racks under Before Setting Oven Controls Use a mild abrasive cleaner following the cleaner s recommendations Rinse with clean water let dry After cleaning the ra...

Страница 16: ...ktop cleaning cream leaves a protective finish on the glass to help prevent scratches and abrasions Note Additional cooktop cleaning cream may be ordered by visiting the Frigidaire website at www frigidaire com For light to moderate soil Apply a few drops of CookTop Cleaning Creme directly to the cooktop Use a paper towel or use a non abrasive plastic type no scratch cleaning pad to clean the enti...

Страница 17: ...theovendoor handle See Fig 3 2 Holdingtheovendooratthesameangleastheremovalposition seat the hookof thehingearmovertherollerpinslocatedoneachsideoftheovendoorframe See Fig 4 The hook of the hinge arms must be fully seated onto the roller pins 3 Fully open the oven door horizontal with floor See Fig 1 4 Pushthedoorhingelocksuptowardsandintotheovenframeonbothleftandright oven door hinges See Fig 2 t...

Страница 18: ... Refer to the Care Cleaning Table for detailed cleaning instructions Care and Cleaning of Stainless Steel some models Note Oven temperature adjustments made will not change the Self Cleaning feature temperature Yourovencontrolhasbeenpreciselysetatthefactory Thissettingmaydifferfromyourpreviousovenhowever soyourrecipe times may not give you the results you expect If you think that the oven is cooki...

Страница 19: ...broil stop position 3 Meat too close to the broil element Reposition the broil rack to provide proper clearance between the meat the element Preheat the broil element for searing 4 Meat not properly prepared Remove excess fat from meat Cut fatty edges to prevent curling but do not cut into lean 5 Insert on broiler pan wrong side up grease not draining Always place grid on the broiler pan with ribs...

Страница 20: ...vice companies or external causes such as abuse misuse inadequate power supply accidents fires or acts of God DISCLAIMER OF IMPLIED WARRANTIES LIMITATION OF REMEDIES CUSTOMER S SOLE AND EXCLUSIVE REMEDY UNDER THIS LIMITED WARRANTY SHALL BE PRODUCT REPAIR OR REPLACEMENT AS PROVIDED HEREIN CLAIMS BASED ON IMPLIED WARRANTIES INCLUDING WARRANTIES OF MERCHANTABILITY OR FITNESS FOR A PARTICULAR PURPOSE ...

Отзывы: