background image

30


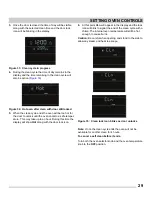
Cleaning Various Parts of Your Oven

Before cleaning any part of the oven, be sure all controls are turned off and the oven is cool. Remove spills and any 
heavy soiling as soon as possible. Regular cleaning will reduce the number of major cleanings later.

Surface Type

Recommendation

Aluminum and Vinyl

Use hot, soapy water and a cloth. Dry with a clean cloth.

Painted and plastic control knobs
Painted body parts
Painted decorative trims

Control panel

Control knobs

Using a soft cloth, clean with mild dish detergent and water or a 50/50 solution of 
vinegar and water. Follow by rinsing the area with clean water; dry and polish with a 
soft cloth. Glass cleaners may be used if sprayed on a soft cloth first. Do not spray 
liquids directly on the oven control and display area. 

Do not use large amounts of water on the control panel - excess water on the control 
area may cause damage to the appliance. Do not use other liquid cleaners, abrasive 
cleaners, scouring pads, or paper towels - they will damage the finish. 

To remove control knobs, turn to the OFF position; grasp firmly and pull straight off 
the shaft. To replace knobs after cleaning, line up the knob markings with the 
matching markings on the control panel; then push the knobs into place. On the 
single burner knobs line up the OFF markings before replacing the knobs.

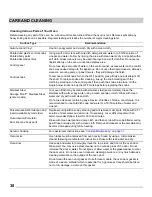
Stainless Steel

Smudge Proof™ Stainless Steel 
(some models)

Your oven finish may be made with stainless steel (some models). Clean the 
stainless with warm soapy water using a clean sponge or cloth. Rinse with clean 
water and dry with a soft clean cloth. 

Do not use cleaners containing any abrasive, chlorides, chlorine, or ammonia. It is 
recommended to use mild dish soap and water or a 50/50 solution of water and 
vinegar.

Porcelain enamel broiler pan and 
insert (available by mail order)

Oven interior (Porcelain)

Door liner and body parts

Gentle scouring with a soapy scouring pad will remove most spots. Rinse with a 1:1 
solution of clear water and ammonia. If necessary, cover difficult spots with an 
ammonia-soaked paper towel for 30 to 40 minutes. 

Rinse with clean water and a damp cloth, and then scrub with a soap-filled scouring 
pad. Rinse and wipe dry with a clean cloth. Remove all cleaners or the porcelain may 
become damaged during future heating.

Ceramic Cooktop

For special care instructions see 

“Cooktop Maintenance” 

on 

page 31

Oven racks

Oven racks must be removed from oven cavity. Clean by using a mild, abrasive 
cleaner following manufacturer’s instructions. Rinse with clean water and dry.

Oven door

Use soap and water to thoroughly clean the top, sides, and front of the oven door. 
Rinse well. You may use a glass cleaner on the outside glass of the door. Do not 
immerse the door in water. Do not spray or allow water or the glass cleaner to enter 
the door vents. Do not use oven cleaners, cleaning powders, or any harsh abrasive 
cleaning materials on the outside of the oven door.

Do not clean the oven door gasket. On self-clean models, the oven door gasket is 
made of a woven material which is essential for a good seal. Care should be taken 
not to rub, damage, or remove this gasket.

CARE AND CLEANING

Содержание CPEF3077QFA

Страница 1: ... 8352 Electric Range 809216802 Rev C December 2016 TABLE OF CONTENTS Product Record and Registration 2 Important Safety Instructions 3 Before Setting Surface Controls 8 Setting Surface Controls 11 Before Setting Oven Controls 14 Setting Oven Controls 15 Care and Cleaning 30 Before You Call 35 Warranty 38 ...

Страница 2: ...t occur If you do need service help is only a phone call away Call Frigidaire customer services at 1 800 944 9044 Product Registration Registering your product with Frigidaire enhances our ability to serve you You can register online at http www frigidaire com or by dropping your product registra tion card in the mail Record model and serial numbers here Purchase Date _____________________________...

Страница 3: ...or serious injury Indicates a potentially hazardous situation which if not avoided may result in minor or moderate injury Indicates installation operation maintenance or valuable information that is not hazard related Indicates a short informal reference something written down to assist the memory or for future reference WARNING CAUTION IMPORTANT NOTE WARNING Tip Over Hazard Range leveling leg Ant...

Страница 4: ...code requirements Install only per installation instructions provided in the literature package for this appliance For personal safety this appliance must be properly grounded For maximum safety the power cord must be securely connected to an electrical outlet or junction box that is the correct voltage is correctly polarized and properly grounded and protected by a circuit breaker in accordance w...

Страница 5: ... entire oven rack with materials such as aluminum foil or aftermarket oven liners Aluminum foil linings may trap heat causing a fire hazard WARNING Do not use oven or warmer drawer if equipped for storage Never use your appliance as a space heater to heat or warm the room Doing so may result in carbon monoxide poisoning and overheating of the appliance When heating fat or grease watch it closely G...

Страница 6: ...Cooktop If cooktop should break cleaning solutions and spill overs may penetrate the broken cooktop and create a risk of electric shock Contact a qualified technician immediately Clean cooktop glass with caution If a wet sponge or cloth is used to wipe spills on a hot cooking area be careful to avoid a steam burn Some cleaners can produce harmful fumes if applied to a hot surface Avoid scratching ...

Страница 7: ...drawer or warming drawer if equipped Remove oven racks unless otherwise instructed Some birds are extremely sensitive to the fumes given off during the self clean cycle of any oven Move birds to another well ventilated room IMPORTANT INSTRUCTIONS FOR SERVICE AND MAINTENANCE Do not repair or replace any part of the appliance unless specifically recommended in the manuals All other servicing should ...

Страница 8: ...oktop surfaces because it may scratch the glass The size and type of cook ware used will influence the radiant element power level setting needed for best cook ing results Be sure to follow the recommendations for using proper cookware as illustrated in Figure 1 and Figure 2 Figure 1 Testing cookware Figure 2 Proper cookware Flat bottom and straight sides Tight fitting lids Weight of handle does n...

Страница 9: ... glance at these indicator lights when cooking is finished is an easy check to be sure all surface elements are turned off The cooktop should not be used as a cutting board or work surface Dropping heavy or hard objects on the cooktop may crack it Pans with rough bottoms may scratch the cooktop surface Placing food directly on the smoothtop surface without cooking utensil is not recommended as dif...

Страница 10: ...the burner grates Start with hot tap water to bring water to boil more quickly Use the highest heat seating when first bringing the water to a boil Once boiling is achieved reduce heat to lowest possible setting to maintain that boil Use tested recipes and follow instructions carefully Check with your local Cooperative Agricultural Extension Service or a manufacturer of glass jars for the latest c...

Страница 11: ...ow boil thicken sauces and gravies steaming vegetables MEDIUM LOW 2 4 Keep foods cooking poaching and stewing LOW LO Keep warm melting and simmering Start most cooking operations on a higher setting and then turn to a lower setting to finish cooking A glowing red surface heating area extending beyond the bottom edge of the cookware indicates the cookware is too small for the surface heating area N...

Страница 12: ...es or breads the cover should have an opening to allow moisture to escape Do not use plastic wrap to cover food Plastic may melt onto the surface and be very difficult to clean Use only plates utensils and cookware recommended for oven and cooktop use on the warmer zone To set the keep warmer zone control 1 Turn the warmer zone control knob clockwise to the ON position The warmer zone uses a pre s...

Страница 13: ... is also on the entire left side of the cooktop can accommodate specialized cookware To operate the bridge element 1 Turn on the left rear element to the desired level of heat 2 Turn the bridge control to the on position 3 The bridge element will heat at the same level as the left rear element If the left rear control is turned off the bridge will also turn off Be sure to turn the bridge control t...

Страница 14: ...t the front of oven rack upward slightly and slide the oven rack back into place Be sure oven racks are level before using Figure 7 Do not block oven vent location Always use pot holders or oven mitts when using the oven When cooking the oven interior and exterior oven racks and cooktop will become very hot which can cause burns Protective Liners Do not use aluminum foil to line the oven bottom On...

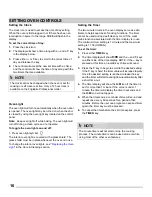
Страница 15: ...he CLEAN setting should only be used after reading all cautions and warnings in the Adjusting the Oven Temperature sections of this manual starting on page 26 User Preference Settings The default factory settings for sounds energy saving temperature offset and convection convert are pre set in the oven control These may be changed by accessing the user preference display while the oven is in the i...

Страница 16: ...ep track of cooking functions The timer cannot be used during a self clean cycle or if the meat probe function associated with the timer display is in use The minimum timer setting is 1 minute and the maximum setting is 11 59 HR MIN To set the timer 1 Press either TIMER key 2 The timer display will show 0 00 and the and keys on either side of the time display NOTE If the key is pressed at this tim...

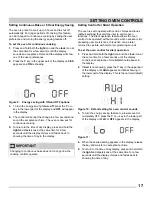
Страница 17: ...with certain chimes and tones default settings that alert the user to certain oven functions The silent operation feature allows the oven control to be operated without sounds when necessary By accessing user preferences this option can be later returned to operate with normal programming sounds To set the oven control for silent operation 1 Press and hold both the light icon and the clock icon at...

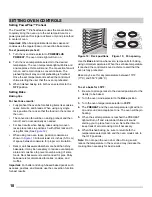
Страница 18: ...igure 13 Allow at least 2 4 inches 5 10 cm of space between cookware for proper air circulation Dark or dull bakeware absorbs more heat than shiny bakeware It may be necessary to reduce oven temper ature and cook time to prevent overbrowning of some foods Dark bakeware is recommended for pies Shiny bakeware is recommended for cakes cookies and muffins Important For batter and dough based baked goo...

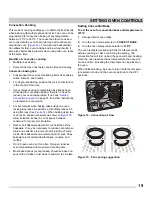
Страница 19: ...d 5 using flat rack See Figure 14 When baking using two oven racks position cookware as shown in Figure 15 Allow at least 2 inches 5 cm of space between cookware for proper air circulation Dark or dull bakeware absorbs more heat than shiny bakeware It may be necessary to reduce oven temper ature and cook time to prevent overbrowning of some foods Dark bakeware is recommended for pies Shiny bakewar...

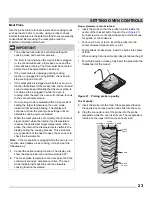
Страница 20: ...g speed is desired Convection roasting gently browns the exterior and seals in the juices Convection roasting uses the bake element convection element broil element and fan to circulate the heat evenly and continuously within the oven Convection roasting tips Use a broiler pan and grid as well as a roasting rack available by mail order The broiler pan will catch grease drippings and the grid will ...

Страница 21: ...e cooked ham 5 to 7 lb 325 F 163ºC 160 F 71ºC 30 40 The U S Department of Agriculture states Rare fresh beef is popular but you should know that cooking it to only 140 F 60 C means some food poisoning organisms may survive Source Safe Food Book Your Kitchen Guide USDA Rev June 1985 The lowest temperature recom mended by the USDA is 145 F 63 C for medium rare fresh beef For well done 170 F 77ºC Stu...

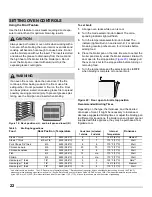
Страница 22: ...e high heat of the broiler into the broiler pan Do not cover the broil pan or insert with aluminum foil the exposed grease could ignite If an oven fire occurs close the oven door If the fire continues throw baking soda on the fire or use a fire extinguisher Do not put water or flour on the fire Flour can be explosive water can cause a grease fire to spread possibly causing personal injury To preve...

Страница 23: ...d before the probe temperature can be set If the meat probe is unplugged during cooking function or plugged in during BROIL the oven will stop cooking and turn off If the meat probe is plugged in while the oven is in a function that allows for the meat probe the control will sound a triple beep indicating that the meat probe is not allowed to be plugged in while the oven is running After the alert...

Страница 24: ...lly switch to keep warm 170 F and remain on for up to 3 hours before turning off automatically The display will continue to show the meat probe tempera ture until either keep warm is canceled or by disconnecting the meat probe from the receptacle Once turned off the probe icon and temperature will fade from the display Important If the meat probe temperature should exceed the maximum allowable tem...

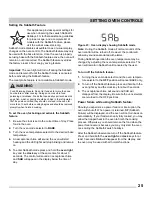
Страница 25: ...unds associated with alarms During Sabbath operation the oven temperature may be changed by adjusting the oven temperature selector The oven will remain in Sabbath until canceled by the user To turn off the Sabbath feature 1 Turning the oven mode selector and the oven tempera ture selector to the OFF position will cancel BAKE only 2 To turn off the Sabbath feature press and hold both the oven ligh...

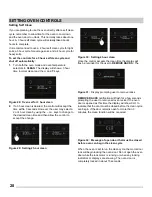
Страница 26: ...ress the key in the upper part of the display until UPO appears and the default setting of 0 or the last offset temperature is showing 3 Using the or key in the bottom of the display press until the desired temperature change offset is reached The display will change 5 with each key press to a maximum of 35 or a minimum of 35 F If a lower temperature offset is desired press the key in the bottom o...

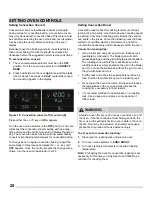
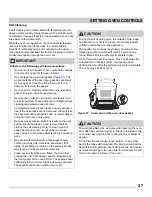
Страница 27: ...lean use hot soapy water and a cloth Large spills can cause heavy smoke or fire when subjected to high tempera tures Do not allow food spills with a high sugar or acid content such as milk tomatoes sauerkraut fruit juices or pie filling to remain on the surface as they may leave a dull spot even after cleaning Clean any soil from the oven frame the door liner outside the oven door gasket and the s...

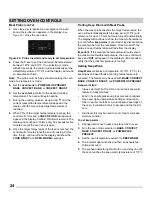
Страница 28: ...o the desired clean time and then allow the control to accept the change Once the control accepts the clean time the display will flash a reminder for the user to REMOVE RACKS The REMOVE RACKS notification will flash for a few seconds prompting the user to remove all oven racks If the oven door is opened as this time the display will show CLO to indicate that the door must be closed before the cle...

Страница 29: ...ay will show Hot along with the door lock icon 6 At this point CLn will appear in the display and the lock icon will blink to signal the end of the clean cycle with a chime The internal oven temperature will still be hot enough to cause burns Caution Be careful when opening and stand to the side to allow any steam and heat to escape Note Once the clean cycle ends the oven will not be available for...

Страница 30: ...ss with warm soapy water using a clean sponge or cloth Rinse with clean water and dry with a soft clean cloth Do not use cleaners containing any abrasive chlorides chlorine or ammonia It is recommended to use mild dish soap and water or a 50 50 solution of water and vinegar Porcelain enamel broiler pan and insert available by mail order Oven interior Porcelain Door liner and body parts Gentle scou...

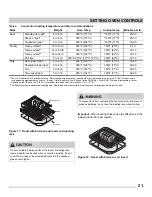
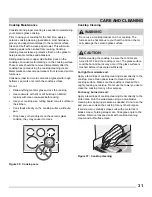
Страница 31: ...ctly on the cooktop surface without a pan Drop heavy or hard objects on the ceramic glass cooktop they may cause it to crack Cooktop Cleaning For light to moderate soil Apply a few drops of cooktop cleaning cream directly to the cooktop Use a clean paper towel to clean the entire cooktop surface Make sure the cooktop is cleaned thor oughly leaving no residue Do not use the towel you use to clean t...

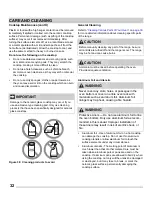
Страница 32: ...he cooktop Do not use thin aluminum cooking utensils or allow aluminum foil to touch the surface elements under any circumstances Aluminum utensils The melting point of aluminum is much lower than that of other metals Care must be taken when aluminum pots or pans are used on the cooktop If aluminum pans are allowed to boil dry when using the cooktop not only will the utensil be damaged or destroye...

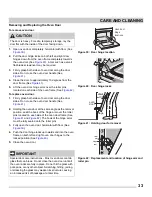
Страница 33: ... roller pins located on each side of the oven door frame See Figure 41 and Figure 42 The hook of the hinge arms must be fully seated onto the roller pins 3 Fully open the oven door horizontal with floor See Figure 39 4 Push the door hinge locks up towards and into the oven frame on both left and right oven door hinges to the locked position See Figure 40 5 Close the oven door The door is heavy For...

Страница 34: ...emoving the wire holder by carefully moving the wire to the side of the glass shield The tension from the wire holds the glass shield in place 3 Pull the shield straight out Do not twist or turn 4 Replace bulb with a new appliance bulb 5 Replace glass oven light shield Replace wire holder 6 Turn power back on again at the main source or plug the appliance back in 7 Be sure to reset the time of day...

Страница 35: ...25 F 13 C lower than recom mended Cakes not done in center Oven too hot Incorrect pan size Pan not centered in oven Glass cookware slow heat conductor Set oven temperature 25 F 13 C lower than recom mended Use pan size suggested in recipe Use proper rack position and place pan so there are 2 to 4 5 1 cm to 10 2 cm of space on all sides of pan Reduce temperature and increase cook time or use shiny ...

Страница 36: ... present when using broil see Using the Broil Feature on page 22 Self clean does not work Oven control not set properly See Setting Self Clean on page 28 Oven racks discolored or do not slide easily Oven racks left in oven cavity during self clean Remove oven racks from oven cavity before starting a self clean cycle Clean by using a mild abrasive cleaner following manufacturer s instructions Rinse...

Страница 37: ...n used Apply cooktop cleaning cream to the ceramic surface Buff with a non abrasive cloth or sponge Cookware with rough bottom was used Use smooth flat bottomed cookware Metal marks on the cooktop Sliding or scraping of metal utensils on cooktop surface Do not slide metal utensils on cooktop surface Apply cooktop cleaning cream to the ceramic surface Buff with a non abrasive cloth or sponge For mo...

Страница 38: ...other than authorized service companies or external causes such as abuse misuse inadequate power supply accidents fires or acts of God CUSTOMER S SOLE AND EXCLUSIVE REMEDY UNDER THIS LIMITED WARRANTY SHALL BE PRODUCT REPAIR OR REPLACEMENT AS PROVIDED HEREIN CLAIMS BASED ON IMPLIED WARRANTIES INCLUDING WARRANTIES OF MERCHANTABILITY OR FITNESS FOR A PARTICULAR PURPOSE ARE LIMITED TO ONE YEAR OR THE ...

Отзывы: