background image

Содержание CFGF366DBB

Страница 1: ... Self Cleaning 15 16 General Care Cleaning 17 19 Ill il I Visit the Frigidaire Web Site at http www frigidaire com Adjusting Oven Temperature 19 Before You Call Solutions to Common Problems 20 21 Warranty Back Page READ AND SAVE THESE INSTRUCTIONS pin 316435600 0409 ...

Страница 2: ...ot meant to cover every possible condition and situation that may occur Common sense and caution must be practiced when installing operating and maintaining any appliance Please record your model and serial numbers below for future reference Model Number Serial Number Purchase Date Serial plate location ooen storage drawer some models or removeou er lower 3ariel some moaets Product Registration Re...

Страница 3: ...r service Know how to disconnect the power to the range at the circuit breaker or fuse box in case of an emergency User servicing Do not repair or replace any part of the appliance unless specifically recommended in the manuals All other servicing should be done only by a qualified technician This may reduce the risk of personal injury and damage to the range Never modify or alter the construction...

Страница 4: ...d inward and does not extend over adjacent surface burners Never Leave Surface Burners Unattended at High Heat Settings Boilovers cause smoking and greasy spillovers that may ignite or a pan that has boiled dry may melt Protective Liners Do not use aluminum foil to line surface burner pans or oven bottom except as suggested in this manual Improper installation of these liners may result in risk of...

Страница 5: ...d directly into a properly grounded receptacle DO NOT cut or remove the grounding prong from this plug For personal safety the range must be properly grounded For maximum safety the power cord must be plugged into an electrical outlet that is correctly polarized and properly grounded If a 2 prong wall receptacle is the only available outlet it is the personal responsibility of the consumer to have...

Страница 6: ...n Interior Light with Shield some models 13 Self Cleaning Oven interior 14 Adjustable Oven Rack s 15 Speed Bake TM Cooking System Fan some models 16 Large 1 piece Oven Door Handle 17 Full width Oven Door styles vary with model 18 Storage Drawer with integrated Handle some models or lower cover panel some models 19 5 000 BTU Simmer Burner some models 20 9 500 BTU Burner some models 21 12 000 BTU Po...

Страница 7: ... or fish 1 2 or 3 Cookies cakes pies biscuits 3 or 4 Muffins Frozen pies angel food cake 6 yeast bread casseroles small cuts of meat or poultry Turkey roast or ham 6 Oven Racks Your range is equipped with one or more Flat Oven Rack s Place the rack s into the positions shown in Fig 2 See the Recommended Rack Positions in the chart above Baking Layer Cakes with 1 or 2 Oven Racks For best results wh...

Страница 8: ...Visually check that the burner has lit 4 Push the control knob in and turn counterclockwise to the desired flame size The control knobs do not have to be set at a particular setting Use the guides and adjust the flame as needed DO NOT cook with the surface control knob in the LITE position The electronic ignitor will continue to spark if the knob is left in the LITE position W Setting Proper Surfa...

Страница 9: ...e broil function SELF CLEAN PAD Used to select the Self Cleaning cycle A 2 or 3 hour Self Clean time may be selected CLEAR OFF PAD Used to clear any function previously entered except the time of day and minute timer Press CLEAR OFF to stop cooking Also the CLEAR OFF pad is used to activate oven door lockout setting Note The OVEN indicator light on the electronic display will turn ON and OFF When ...

Страница 10: ...me has run out the timer will beep 3 times it will then continue to beep 3 times every 60 seconds until is pressed Note The indicator light located above the pad will glow while the minute timer is active Note The minute timer does not start or stop cooking It serves as an extra timer in the kitchen that will beep when the set time has run out The minute timer can be used alone or during any of th...

Страница 11: ...inutes The oven can be programmed to override this feature for continuous baking To set control for continuous baking 1 Press and hold _ down for 5 seconds until tone is heard hr will appear in display for continuous cooking The current time of day will return to the display 2 To cancel the Continuous Bake function press and hold for 5 seconds until tone is heard 12hr will appear in display indica...

Страница 12: ...the food in the oven 3 Press _ appears in the display 4 Within 5 seconds press the _ or V The display will show 350 F 177 C By holding the _ or V the temperature can then be adjusted in 5 F increments 1 C if the control is set to display Celsius 5 Press 0 00 will flash in the display HR MIN 6 Press the _ or V until the desired baking time appears 7 Press The earliest possible start time will appea...

Страница 13: ...such as cookies biscuits and breads Reduce oven temperature 25 F from recipe s recommended oven temperature Follow the remainder of the recipe s instructions using the minimum recommended cook time When using 2 oven racks at the same time place in positions 2 5 for best results See Fig 2 Note Layer cakes will have better results using the normal Bake feature For Roasting 1 Preheating is not necess...

Страница 14: ...burgers 2nd rack position Fish medium steaks pork chops 3rd rack position Well done foods such as chicken lobster Fig 1 some models To insure proper results when broiling use ONLY Electrolux Home Products Inc approved Broil Pan Insert Fig 2 Should an oven fire occur close the oven door and turn the oven OFF If the fire continues use a fire extinguisher DO NOT put water or flour on the fire Flour m...

Страница 15: ...ng oven DO NOT clean the oven door gasket The woven material of the oven door gasket is essential for a good seal Care should be taken not to rub damage or remove the gasket DO NOT use any cleaning materials on the oven door gasket Doing so could cause damage Remove the broiler pan and insert all utensils and any aluminum foil These items cannot withstand high cleaning temperatures Oven racks do n...

Страница 16: ... to lock 6 CLn will appear in the display during the Self Clean cycle and the LOCK light will glow until the Self Cleaning cycle is complete or cancelled and the oven temperature has cooled When the Self Clean Cycle has Completed 1 The time of day _r__End__ wi__appear in the display wind_w and the _lean__and __L__K__ light will c_ntinue t_ gl_w 2 Once the oven has cooled down for about l HOUR and ...

Страница 17: ...nd wipe dry with a clean cloth Remove all cleaners orthe porcelain may become damaged during furture heating DO NOT use spray oven cleaners on the range top Stainless Steel Chrome Parts Clean with hot soapy water and a dishcloth Rinse with clean water and a cloth Do not use cleaners with high concentrations of chlorides or chlorines Do not use harsh scrubbing cleaners Only use kitchen cleaners tha...

Страница 18: ...open the oven door horizontal with floor See Fig 1 4 Push the door hinge locks up towards and into the oven frame on both left and right oven door hinges See Fig 2 to the locked position 5 Close the oven door Special Door Care Instructions Most oven doors contain glass that can break Read the following recommendations 1 Do not close the oven door until all the oven racks are fully in place 2 Do no...

Страница 19: ...residue still remains in these ports use a small gauge wire or needle to clean the slots or holes For proper flow of gas and ignition of the burner DO NOT ALLOW SPILLS FOOD CLEANING AGENTS OR ANY OTHER MATERIAL TO ENTER THE GAS ORIFICE HOLDER OPENING ALWAYS keep the surface burner cap and surface burner head in place whenever a surface burner is in use Adjusting Your Oven Temperature Your oven con...

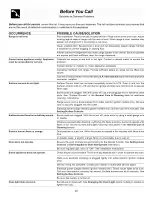
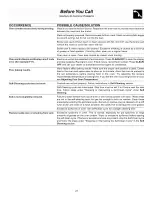
Страница 20: ...e wire or needle to clean ports See Surface Burners in the General Care Cleaning table for additional cleaning instructions Range power cord is disconnected from outlet electric ignition models only Be sure cord is securely plugged into the outlet Electrical power outage electric ignition models only Burners can be lit manually See Setting Surface Controls Burner ports are clogged With the burner ...

Страница 21: ...results Make sure the proper rack position is used Center food in the oven and space pans to allow air to circulate Allow the oven to preheat to the set temperature before placing food in the oven Try adjusting the recipe s recommended temperature or baking time If you feel the oven is cooking too hot or cool see Adjusting Your Oven Temperature Controls are not set properly Follow instructions in ...

Страница 22: ...se wiring 4 Expenses for making the appliance accessible for servicing such as removal of trim cupboards shelves etc which are not a part of the appliance when it was shipped from the factory 5 Damages to finish after installation 6 Replacement of light bulbs and or fluorescent tubes on models with these features EXCLUSIONS This warranty does not cover the following 1 CONSEQUENTIAL OR INCIDENTAL D...

Отзывы: