background image

5

Power On Light

The Power On Light indicates that the freezer is properly connected to electrical

power.  The light glows even when the temperature control is turned to OFF.  If the

light goes out, refer to "Freezer does not run" in the Avoid Service Checklist.

Security Lock with Pop-Out Key

This security lock fastens the door snugly, ensuring that stored food is secure.  To

lock or unlock the freezer, push the key into the lock and turn. The key pops out

of the lock after it has been turned.

Interior Light

The light comes on automatically when the lid is opened. To replace the light bulb,

turn the temperature control to OFF and unplug the electrical cord. Replace the old

bulb with a bulb of the same wattage.

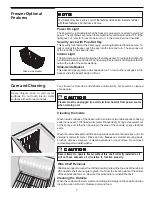
Slide-Aside Basket

This basket helps organize odd-shaped items. To reach other packages in the

freezer, slide the basket aside or lift out.

Freezer Optional
Features

Slide-Aside Basket

Your freezer is frost-free and defrosts automatically, but should be cleaned
occasionally.

Cleaning the Inside

Wash inside surfaces of the freezer with a solution of two tablespoons of baking
soda in one quart (1.136 litres) warm water. Rinse and dry. Wring excess water out
of the sponge or cloth when cleaning in the area of the controls, or any electrical
parts.

Wash the removable parts with the baking soda solution mentioned above, or mild
detergent and warm water. Rinse and dry.  

Never

 use metallic scouring pads,

brushes, abrasive cleaners, or alkaline solutions on any surface. Do not wash
removable parts in a dishwasher.

Care and Cleaning

Damp objects stick to cold metal
surfaces. Do not touch interior metal
surfaces with wet or damp hands.

 CA

 CA

 CA

 CA

 CAUTION

UTION

UTION

UTION

UTION

Freezer must be unplugged (to avoid electrical hazard) from power source
when cleaning unit.

NO

NO

NO

NO

NOTE

TE

TE

TE

TE

Your freezer may have some, or all of the features listed below. Become familiar
with these features, and their use and care.

Cleaning the Outside

Wash the cabinet with warm water and mild liquid detergent. Rinse well and wipe
dry with a clean soft cloth. Replace parts and food.

 CA

 CA

 CA

 CA

 CAUTION

UTION

UTION

UTION

UTION

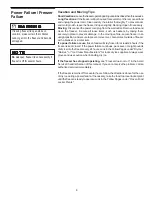
Never attempt to operate freezer without this shelf correctly installed as it
will not have adequate air circulation to function properly.

Wire Shelf Removal

Slide top prongs of wire shelf out of their locating holes in the top side of the cabinet.
Lift and slide shelf at an angle to guide it out from the locating slots at the bottom
of the cabinet and remove. Reverse this procedure to reinstall the shelf.

Содержание AFFC1466DW3

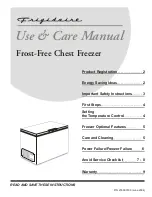
Страница 1: ...tration 2 2 4 3 4 5 5 6 7 8 9 Energy Saving Ideas Important Safety Instructions First Steps Setting the Temperature Control Freezer Optional Features Care and Cleaning Power Failure Freezer Failure Avoid Service Checklist Warranty Frost Free Chest Freezer Use Care Manual ...

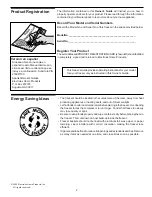
Страница 2: ...oon as possible The information contained in this Owner s Guide will instruct you on how to properly operate and care for your product Please read through the information contained in your literature pack to learn more about your new appliance Record Your Model and Serial Numbers Record the Model No and Serial No of this freezer in the space provided below ModelNo _________________________________...

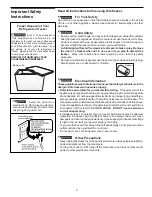
Страница 3: ... old refrigerator or freezer please follow the instructions below to help prevent accidents BEFOREYOUTHROWAWAYYOUR OLDREFRIGERATOR FREEZER Remove lid ElectricalInformation Theseguidelinesmustbefollowedtoensurethatsafetymechanismsinthe design of this freezer will operate properly Refer to the serial plate for correct electrical rating The power cord of the appliance is equipped with a three prong g...

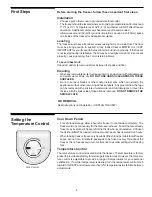
Страница 4: ...the appliance surface when removing adhesive labels Any glue left from the tape can be removed with a mixture of warm water and mild detergent or touch the residue with the sticky side of tape already removed DO NOT REMOVE THE SERIALPLATE LID REMOVAL See Instructions on Hinge label UNPLUGTHE UNIT Setting the Temperature Control Cool Down Period For safe food storage allow 4 hours for freezer to co...

Страница 5: ... the sponge or cloth when cleaning in the area of the controls or any electrical parts Washtheremovablepartswiththebakingsodasolutionmentionedabove ormild detergent and warm water Rinse and dry Never use metallic scouring pads brushes abrasive cleaners or alkaline solutions on any surface Do not wash removable parts in a dishwasher Care and Cleaning Damp objects stick to cold metal surfaces Do not...

Страница 6: ...failure continues pack seven or eight pounds ofdryiceintothefreezerevery24hours LookintheYellowPagesunder DryIce Dairies or Ice Cream Manufacturers for local dry ice suppliers Always wear gloves and use caution when handling dry ice If the freezer has stopped operating see Freezer does not run in the Avoid Service Checklist Section of this manual If you cannot solve the problem call an authorizeds...

Страница 7: ...o frequently Warm air enters the freezer every time the lid is opened Open the lid less often Freezer lid may be slightly open See OCCURRENCE Lid Problems Temperature control is set too cold Turn the control knob to a warmer setting Allow several hours for the temperature to stabilize Freezer gasket is dirty worn cracked or poorly fitted Clean or change gasket Leaks in the lid seal will cause free...

Страница 8: ...art of the freezer Freezer is touching the wall Level the freezer or move freezer slightly Refer to Leveling in the First Steps section Moisture forms on inside freezer walls Weather is hot and humid which increases internal rate of frost build up This is normal Lid is slightly open See OCCURRENCE Lid Problems Lid is kept open too long or is opened too frequently Open the Lid less often Moisture f...

Страница 9: ...by Electrolux Home Products Inc We authorize no person to change or add to any of our obligations under this warranty Our obligations for service and parts under this warranty must be performed by us or an authorized Electrolux Home Products Inc servicer In Canada your appliance is warranted by Electrolux Canada Corp This warranty applies only to products in ordinary household use and the consumer...

Страница 10: ...10 Notes ...

Отзывы: