background image

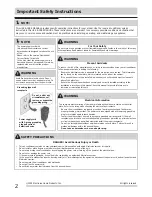
Important Safety Instructions

3

2009 Electrolux Home Products, Inc.

All rights reserved.

SAFETY PRECAUTIONS

Provide occasional ventilation during use. Do not direct airflow at fireplaces or other heat related sources as this could cause flare ups or make 
units run excessively.
Do not climb on or place objects on the unit.
Do not hang objects off the unit.
Do not place containers with liquids on the unit.
Turn off the air conditioner at the power source when it will not be used for an extended period of time.
Periodically check the condition of the unit’s installation accessories for any damage.
Do not apply heavy pressure to the radiator fins of the unit.
Operate the unit with air filter in place.
Do not block or cover the intake grille, discharge area and outlet ports.
Ensure that any electrical/electronic equipment is one yard away from the unit.
Do not use or store flammable gases near the unit.

CAUTION!  Avoid Injury or damage to the unit or other property 

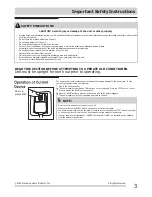
READ THIS SECTION BEFORE ATTEMPTING TO OPERATE AIR CONDITIONER.

Unit must be upright for one hour prior to operating.

Plug in &
press RESET

The power supply cord contains a current device that senses damage to the power cord. To test 
your power supply cord do the following:

Plug in the Air Conditioner.
The power supply cord will have TWO buttons on the plug head. Press the TEST button. You will
notice a click as the RESET button pops out.

Press the RESET button. Again you will notice a click as the button engages.
The power supply cord is now supplying electricity to the unit. 

NOTE:

Do not use this device to turn the unit on or off.

Always make sure the RESET button is pushed in for correct operation.
The power supply cord must be replaced if it fails to reset when either the TEST button is pushed,
or it cannot be reset. A new one can be obtained from the product manufacturer.

If power supply cord is damaged, it CANNOT be repaired. It MUST be replaced by one obtained
from the product manufacturer.

Содержание 2020252A0673

Страница 1: ...020252A0673 June 2009 Product Registration 4 Unit Description 5 Accessories Included 5 Installation Instructions 6 7 Important Safety Instructions 2 3 Air Conditioner Features 8 of your Portable Air Conditioner Operating Instructions 9 11 Care and Cleaning 11 Before You Call 12 Major Appliance Warranty 13 Normal Sounds 4 ...

Страница 2: ...t be used in a properly grounded wall receptacle If the wall receptacle you intend to use is not adequately grounded or protected by a time delay fuse or circuit breaker have a qualified electrician install the proper receptacle Do not run air conditioner without outside protective cover in place This could result in mechanical damage within the air conditioner Do not use an extension cord or an a...

Страница 3: ...le gases near the unit CAUTION Avoid Injury or damage to the unit or other property READ THIS SECTION BEFORE ATTEMPTING TO OPERATE AIR CONDITIONER Unit must be upright for one hour prior to operating Plug in press RESET The power supply cord contains a current device that senses damage to the power cord To test your power supply cord do the following Plug in the Air Conditioner The power supply co...

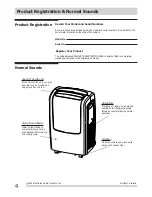
Страница 4: ... Normal Sounds Today s high efficiency compressors may have a high pitched chatter during the cooling cycle High pitched Chatter Unit may vibrate and make noise because of uneven floor Vibration Sound of Rushing Air At the front of the unit you may hear the sound of rushing air being moved by the fan Gurgle Hiss Gurgling or hissing noise may be heard due to refrigerant passing through evaporator d...

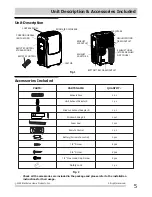
Страница 5: ...MIDIFYING DRAIN OUTLET BOTTOM TRAY DRAIN OUTLET EXHAUST HOSE STORAGE WHEN NOT IN USE EXHAUST ADAPTOR A Fig 2 Check all the accessories are included in the package and please refer to the installation instructions for their usage PARTS PARTS NAME QUANTITY Exhaust hose Unit Exhaust Adaptor A Window Exhaust Adaptor B Window Sliding Kit Foam Seal Remote Control Battery For remote control 1 pc 1 set 1 ...

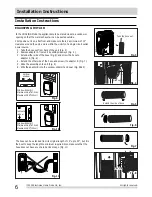
Страница 6: ...be placed close to a window or opening so that the warm exhaust air can be ducted outside First position unit on a flat floor and make sure there s a minimum of 12 clearance around the unit and is within the vicinity of a single circuit outlet power source The hose can be extended from its original length of 15 up to 55 but it is the best to keep the length to minimum required Also make sure that ...

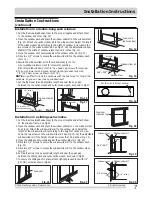
Страница 7: ...the window slider kit See Fig 19 Cut the adjustable window slider kit if the height of window is less than 26 6 inches Fig 14 6 Cut the foam seal to an appropriate length and seal the open gap between the sliding sash and outer window sash as shown in Fig 21 Fig 12 Foam seal A adhesive type Fig 18 Foam seal adhesive type Installation Instructions Installation Instructions Fig 21 Foam seal Fig 13 W...

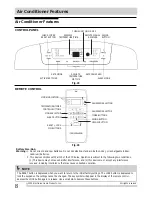
Страница 8: ...FCC Rules Operation is subject to the following two conditions 1 This device may not cause harmful interference and 2 this device must accept any interference received including interference that may cause undesired operation The RESET button is depressed when you want to return to the initial factory settings The LOCK button is depressed to lock the keypad so the settings cannot be changed The ke...

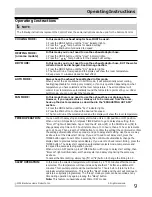
Страница 9: ...til the Heat indicator lights 2 Press the Temp buttons for the desired heat setting TIMER OPERATION You can set both delay stop and delay start while unit is in ON position or OFF position When unit is in ON position first press TIMER button to go to delay stop setting then timer off light will illuminate tap or hold the UP arrow or the DOWN arrow to change delay stop timer at 0 5 hour increments ...

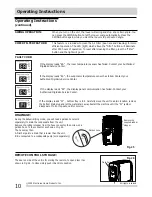
Страница 10: ...ODE If the display reads EA the room temperature sensor has failed Contact your Authorized Frigidaire Service Center If the display reads ES the evaporator temperature sensor has failed Contact your Authorized Frigidaire Service Center If the display reads E4 the display panel communication has failed Contact your Authorized Frigidaire Service Center If the display reads P1 bottom tray is full Car...

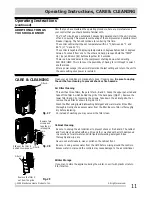
Страница 11: ...e lower filter B and C by loosening the screws Take down the air inlet grille then remove the air filter as shown in Fig 28 29 Air Filter Cleaning Wash the filter using liquid dishwashing detergent and warm water Rinse filter thoroughly Gently shake excess water from the filter Be sure filter is thoroughly dry before replacing Or instead of washing you may vacuum the filter clean If you plan to st...

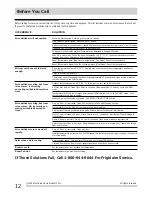
Страница 12: ... and off rapidly Dirty air filter air restricted Clean air filter Outside temperature extremely hot Set FAN speed to a faster setting to bring air through cooling coils more frequently Before You Call Air conditioner cooling but room is too warm ice forming on cooling coil behind decorative front Outdoor temperature below 60 F 16 C To defrost the coil set FAN ONLY mode O O Air filter may be dirty ...

Страница 13: ...S WRITTEN LIMITED WARRANTY OR ANY IMPLIED WARRANTY SOME STATES AND PROVINCES DO NOT ALLOW THE EXCLUSION OR LIMITATION OF INCIDENTAL OR CONSE QUENTIAL DAMAGES OR LIMITATIONS ON THE DURATION OF IMPLIED WARRANTIES SO THESE LIMITATIONS OR EXCLUSIONS MAY NOT APPLY TO YOU THIS WRITTEN WARRANTY GIVES YOU SPECIFIC LEGAL RIGHTS YOU MAY ALSO HAVE OTHER RIGHTS THAT VARY FROM STATE TO STATE If You Need Servic...

Отзывы: