


connect/Control
Connect: Network/LAN
• Click on box above NETWORK/LAN
• This device comes in DHCP and will connect to the DHCP server of the network
(No DHCP Server? 192.168.1.239 Default IP)
• Click the “CONNECT TO FRESCO” button under NETWORK/LAN settings
Connect: USB/RS-232
• Click on the box above USB/RS-232.
• For USB/RS-232, you can opt the connect via the ISP/CONTROL Micro USB
port on the front of the Fresco, or alternately use the 3-pin Phoenix control
connection on the back
• For USB/RS-232, click the “SEARCH/CONNECT TO FRESCO” button (Magnifying
Glass). The FRESCO COM PORT#, DEVICE ID, and NAME will automatically fill
the data fields
• If the Fresco is found, click the “CONTINUE TO MEASURE PAGE” button
underneath the USB/RS-232 settings
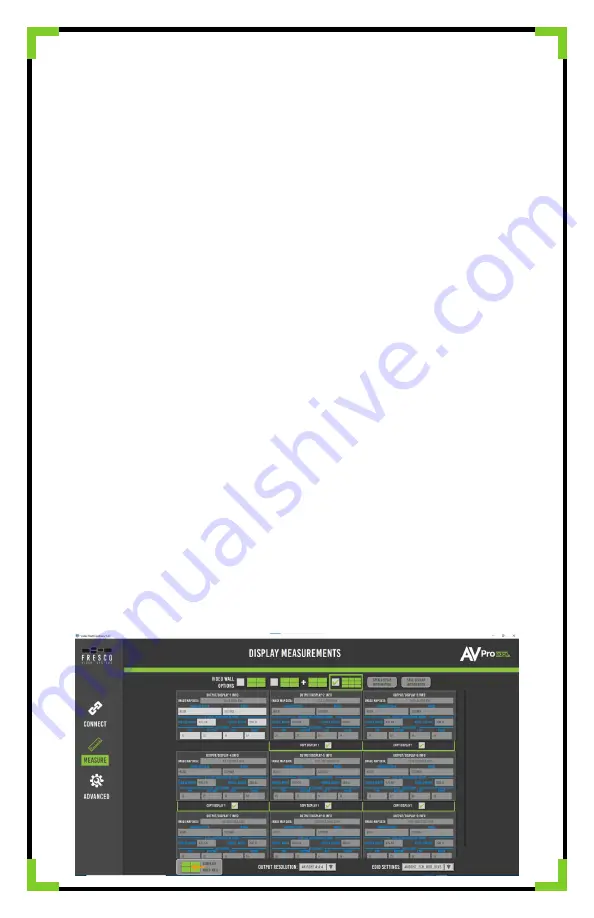
Measure
• Enter the MANUFACTURER and MODEL info.
• Use ONLY millimeters to take measurements (due to their added
precision)
• Take measurements of the visible width, height, and thicknesses of all
four bezels (TOP, BOTTOM, LEFT, RIGHT), flip bezel measurements for
flipped displays
• Click the “SAVE DISPLAY INFORMATION” button (This info will be saved
for future use).
• Click the “OPEN DISPLAY INFORMATION” button to load previously
saved display info. (IF NEEDED)


