12
13
ASSEMBLY INSTRUCTIONS
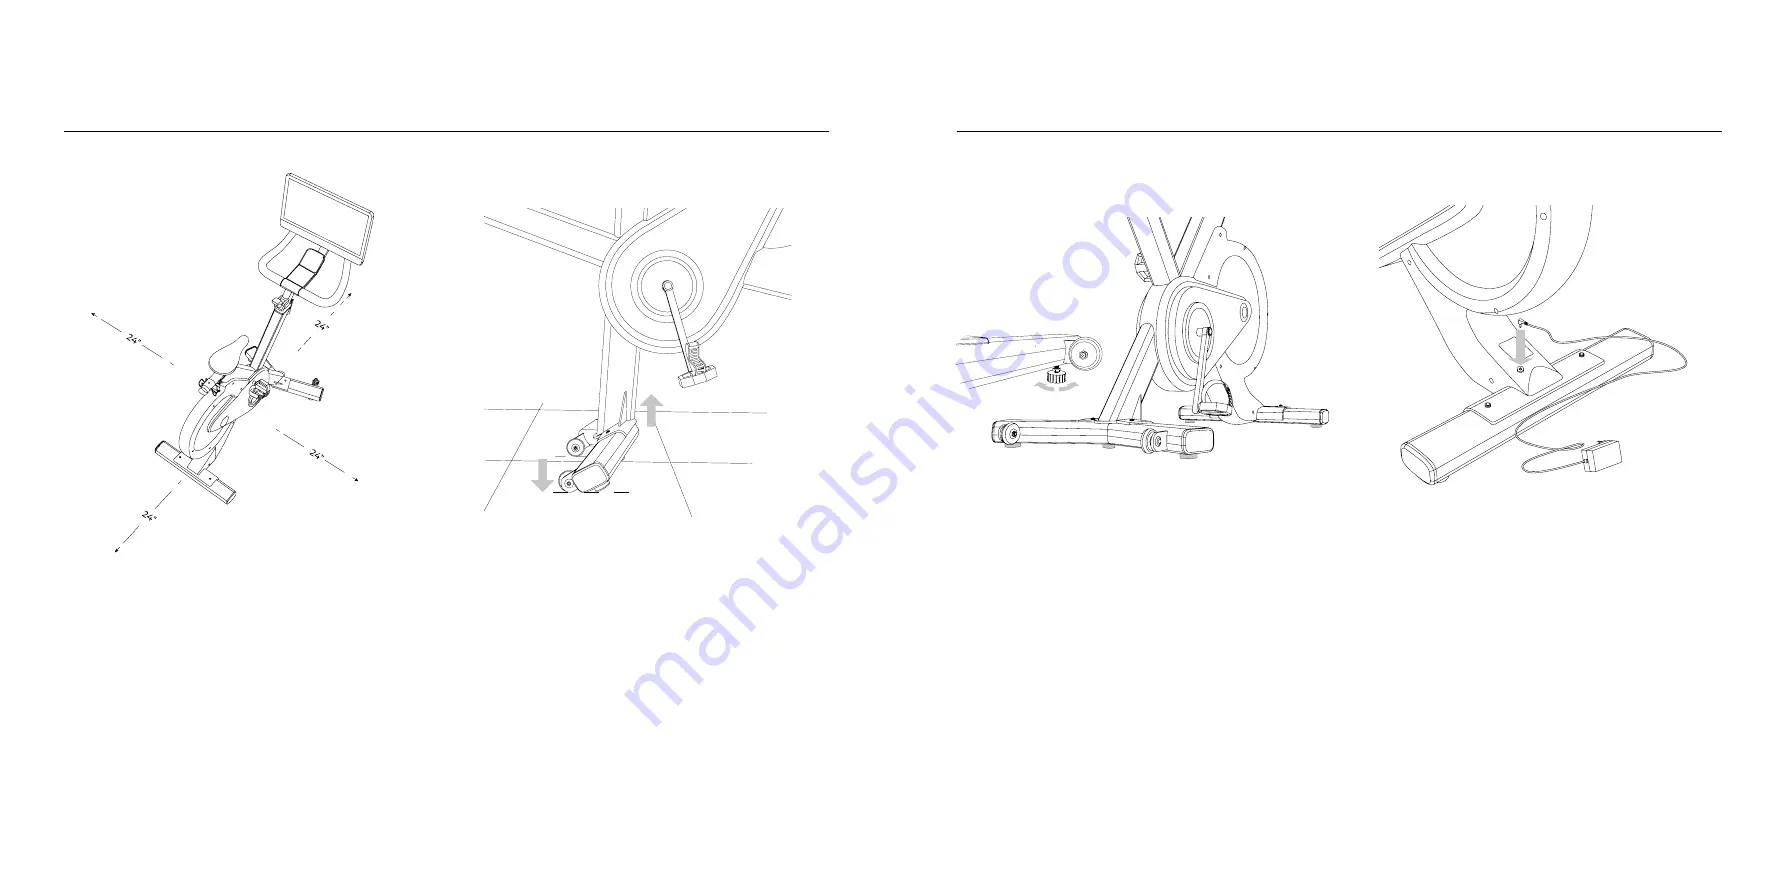
BIKE PLACEMENT
Place the bike on a solid, level, and firm surface to
prevent the risk of tipping. Use a mat to help keep the
bike in place and protect the floor.
Allow a clearance of 24'' on all sides of the bike for safety.
MOVING THE BIKE
Moving the bike requires two people for safety.
Ensure power cables are disconnected.
Using only handlebars, tilt the bike forward onto its
wheels.
While holding on to handlebars, have a second person
lift the rear stabilizer.
Carefully roll the bike to the new location, avoiding
uneven surfaces.
If the bike rocks after being set down, unscrew each
stabilizer foot until it rests firmly and steadily on the
floor.
ASSEMBLY INSTRUCTIONS
STABILIZER FEET ADJUSTMENT
The bike has adjustable stabilizer feet on each corner for
a steady, wobble-free installation. To ensure the bike is
level on the ground, adjust the stabilizer feet as follows:
Tighten the feet so they are screwed all the way into the
stabilizer.
Set the bike in its desired location. Loosen the feet to
remove all space between
the stabilizer feet and the floor. Adjust each foot on
both the front and rear stabilizer. When the bike is level,
lock the nut on all stabilizer feet.
CONNECTING THE POWER CABLES
Plug the power cable into the power adapter.
Plug the power adapter into the bike under the seat
post, near the rear stabilizer. Secure the power cable by
using either front-facing or rear-facing cable routing.
Содержание xbike
Страница 1: ...01 xbike Instruction Manual...


