background image

3

35

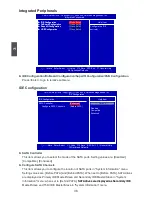
South Bridge Coniguration

 SMBUS Controller

The System Management Bus is a speciic implementation of an I

2

C bus. The SMBus speci-

ication describes the data protocols, device addresses, and electrical requirements that are 

superimposed on the I

2

C bus speciication. The SMBus is used to physically transport com

-

mands and information between the Smart Battery, SMBus Host, Smart Battery Charger, and 

other SMBus Devices. This item is used to enable/disable System Management Bus controller.

 SLP_S4# Min. Assertion Width

SLP_S4# is a signal for power plane control. This signal shuts off power to all non-critical 

systems when in the S4 (Suspend to Disk) or S5 (Soft Off) state.

This setting indicates the minimum assertion width of the SLP_S4# signal to ensure that the 

DRAMs have been safely power-cycled. Setting values are: [4 to 5 seconds],  [3 to 4 seconds],  
[2 to 3 seconds],  [1 to 2 seconds].

 ASPM

Active State Power Management (ASPM) allows power to be incrementally reduced to

individual serial links in a PCI Express fabric as a link becomes less active. ASPM is deined
in the PCI Express base speciication. Enables or disables ASPM for a Link, based on the

overall system power policy, the hardware capabilities of the Link, and the latency of the

Link. Hardware performs the actual power management operations of transitioning Links

between Link power states and resynchronizing Links. The coniguration of the PCI Express

implementation on a system affects the amount of power savings that can actually be

achieved.

This item is used to enable/disable this feature.

CMOS Setup Utility - Copyright (C) 1985-2008, American Megatrends, Inc.

South Bridge Coniguration

  South Bridge Chipset Coniguration

South Bridge Chipset Coniguration 


Help Item


  SMBUS Controller

[Enabled]

SMBUS Controller   


[Enabled]


  SLP_S4# Min. Assertion Width  [1 to 2 seconds] 

    Enabled


    Disabled

  ASPM 


[Disabled]

Disabled]]


:Move   Enter:Select    +/-/:Value    F10:Save      ESC:Exit     F1:General Help         

                                                 F9:Optimized Defaults

[Enabled]

Options

Содержание G41MD

Страница 1: ...л чит т нич ю н льт цию гл т чн Б з вы дны www sotmarket ru д бн я инф м ция т в тзывы бз ы и ы Инструкция для платы Foxconn G41MD материнской Перейти в карточку товара 8 800 775 98 98 ...

Страница 2: ...G41MD Series Motherboard User s Manual ...

Страница 3: ... indicates that this product may not be treated as household waste By ensuring this product is disposed of correctly you will help prevent potential negative consequences for the environment and human health which could other wise be caused by inappropriate waste handling of this product For more detailed information about recycling of this product please contact your local city ofice your househo...

Страница 4: ...adio disturbance characteristics of information technology equipment EN 61000 3 2 2000 Electromagnetic compatibility EMC Part 3 Limits Section 2 Limits for harmonic current emissions equipment input current 16A per phase EN 61000 3 3 A1 2001 Electromagnetic compatibility EMC Part 3 Limits Section 2 Limits of voltage luctuations and licker in low voltage supply systems for equipment with rated curr...

Страница 5: ...urer HON HAI PRECISION INDUSTRY COMPANY LTD Address 66 CHUNG SHAN RD TU CHENG INDUSTRIAL DISTRICT TAIPEI HSIEN TAIWAN R O C Supplementary Information This device complies with Part 15 of the FCC Rules Operation is subject to the following two conditions 1 this device may not cause harmful interference and 2 this device must accept any interference received including interference that may cause und...

Страница 6: ...e power please make sure the power supply AC input voltage setting has been conigured to the local standard To prevent damage to the motherboard do not allow screws to come in contact with the motherboard circuit or its components Also make sure there are no leftover screws or metal components placed on the motherboard or within the computer casing If you are uncertain about any installation steps...

Страница 7: ...ernal Connectors 14 Jumpers 17 Install driver and utility 20 Chapter 3 BIOS Setup Enter BIOS Setup 23 Main Menu 23 System Information 25 Advanced BIOS Features 27 Fox Central Control Unit Fox Central Control Unit 29 Advanced Chipset Features Advanced Chipset Features 33 Integrated Peripherals 36 Power Management Setup 40 PC Health Status 42 BIOS Security Features 43 Load Optimal Defaults 44 Save E...

Страница 8: ...port Website http www foxconnsupport com Worldwide online contact Support http www foxconnsupport com inquiry aspx CPU Support List http www foxconnsupport com cpusupportlist aspx Memory VGA Compatibility List http www foxconnsupport com complist aspx Support ...

Страница 9: ...only what you need for break through performance With advanced overclocking capability and a range of connectivity features for today multi media computing requirements G41MD enables you to unleash more power from your computer This chapter includes the following information Product Speciications Layout Back Panel Connectors ...

Страница 10: ...torage ICH7 chipset chipset 3 x SATAII connectors 300MB s data transfer rate 1 x IDE connector LAN Atheros 8151 BL1A Gigabit LAN chip Audio Realtek ALC662 audio chip High Deinition Audio 2 4 5 1 channel Support Jack Sensing function USB Support hot plug Supports up to 8 x USB 2 0 ports 4 rear panel ports 2 onboard USB upports up to 8 x USB 2 0 ports 4 rear panel ports 2 onboard USB headers support...

Страница 11: ...g shutdown CPU System fan speed control PCI Express x16 Support 8GB s 16GB s concurrent bandwidth Low power consumption and power management features Green Function Support ACPI Advanced Coniguration and Power Interface Support S0 normal S1 power on suspend S3 suspend to RAM S4 suspend to disk and S5 soft off Support EuP function Bundled Software FOX ONE FOX LiveUpdate FOX LOGO FOX DMI Operating S...

Страница 12: ...SBPWR1 Jumper 3 CPU_533 Jumper 4 SYS_FAN Header 5 MEM_OC_1333 Jumper 6 PCI Express x16 Slot 7 PCI Slots 8 Front Audio Connector 9 Speaker Connector 10 USBPWR2 Jumper 11 Front USB Connectors 12 South Bridge Intel ICH7 13 Front Panel Connector 14 SATA Connectors 15 IDE Connector 16 24 pin ATX Power Connector 17 DDR3 DIMM Slots 18 CPU_FAN Header 19 North Bridge Intel G41 20 LGA 775 CPU Socket 21 Clea...

Страница 13: ...an USB keyboard mouse USB printer USB lash drive and etc 6 Audio Ports For the deinition of each audio port please refer to the table below 7 RJ 45 LAN Port The Ethernet LAN port provides Internet connection at up to 10 100 1000Mb s data rate 1 3 Back Panel Connectors USB Ports LAN Port PS 2 Keyboard Port PS 2 Mouse Port Serial Port Audio Ports 7 1 4 5 2 3 VGA Port 6 Line Out Microphone In Line In...

Страница 14: ... Link LED LAN Type Left Active Right Link Status Description Status Description 1000M Off No Link Off No Link Green Blinking Data Activity Off 10 Mb s Connection Green 100 Mb s Connection Orange 1000 Mb s Connection ...

Страница 15: ...ut prior to any installation and read the contents in this chapter carefully This chapter includes the following information Install the CPU and CPU Cooler Install the Memory Install an Expansion Card Install other Internal Connectors Jumpers Please visit the following website for more supporting information about your motherboard CPU Support List http www foxconnsupport com cpusupportlist aspx Me...

Страница 16: ...otherwise overheating and damage of the CPU may occur Set the CPU host frequency in accordance with the CPU speciications It is not recommended that the system bus frequency be set beyond hardware speciications since it does not meet the standard requirements for the peripherals If you wish to set the frequency beyond the standard speciications please do so according to your hardware speciications...

Страница 17: ... When CPU is properly seated replace the metal cover and push the CPU socket lever back to its locked position 4 Check pin one marking triangle with the pin one corner of the CPU socket align the CPU notches with the socket alignment keys and gently put the CPU onto the socket Before installing the CPU make sure to turn off the computer and unplug the power cord from the power outlet to prevent da...

Страница 18: ...motherboard That s it 3 Check the solder side of the motherboard the push pin should be ixed as depicted in the picture 3 2 1 4 Attach the 4 wire CPU cooler connector to the CPU FAN header on the motherboard Release bolts of CPU cooler from motherboard 1 Turning the push pin bolt along with the direction of arrow counterclockwise 2 Pull the push pin straight up 3 Turning push pin clockwise to its ...

Страница 19: ... Memory It is recommended that memory of the same capacity brand speed and chips be used and please select dual channel irst to achieve optimum performance C A U T I O N Read the following guidelines before you begin to install the memory Make sure that the motherboard supports the memory It is recommended that memory of the same capacity brand speed and chips be used Always turn off the computer ...

Страница 20: ...emory socket Place the memory module onto the socket then put your ingers on top edge of the module and push it down irmly and seat it vertically into the memory socket Step 2 The clips at both ends of the socket will snap into place when the memory module is securely inserted Before installing a memory module make sure to turn off the computer and unplug the power cord from the power outlet to pr...

Страница 21: ...o make any required BIOS changes for your expansion card s 7 Install the driver provided with the expansion card in your operating system Installing and Removing a PCI Express x16 Graphics Card Installing a Graphics Card Gently insert the graphics card into the PCI Express x16 slot Make sure the graphics card is locked by the latch at the end of the PCI Express x16 slot Removing the Card Push the ...

Страница 22: ...into the connector and make sure it is secure 4 pin ATX 12 V Power Connector PWR2 Connect the 4 pin ATX 12V power supply to PWR2 and provides power to the CPU Pin Deinition Pin Deinition 1 3 3V 13 3 3V 2 3 3V 14 12V 3 GND 15 GND 4 5V 16 PS_ON Soft On Off 5 GND 17 GND 6 5V 18 GND 7 GND 19 GND 8 Power Good 20 NC 9 5V SB Stand by 5V 21 5V 10 12V 22 5V 11 12V 23 5V 12 3 3V 24 GND PWR1 24 13 12 1 We re...

Страница 23: ...By connecting through USB cables with them user can quickly expand another four USB ports on the front panel Serial ATA Connectors SATA_1 2 3 The Serial ATA connector is used to connect with SATA Hard Disk or CD devices which support this feature The current Serial ATA II interface allows up to 300MB s data transfer rate NC GND VCC D D D GND D VCC EMPTY 1 2 10 9 F_USB 1 2 PORT1_L PORT1_R PORT2_L S...

Страница 24: ...system gets into sleep mode S1 the LED is blinking When the system is in S3 S4 sleep state or power off mode S5 the LED is off This 2 pin connector is directional with sign Power Switch Connector PWR SW Connect to the power button on the front panel of the chassis Push this switch allows the system to be turned on and off rather than using the power supply button IDE Connector PIDE With the provid...

Страница 25: ...Jumper CLR_CMOS The motherboard uses CMOS RAM to store the basic hardware information such as BIOS data date time information hardware password etc Clear CMOS data is the fast way to go back to factory default when the BIOS settings were mistakenly modiied The steps to clear CMOS data are 1 Turn off the computer unplug the power cord from the power outlet 2 Remove jumper cap from pins 2 3 put it o...

Страница 26: ...S3 to Enabled USBPWR1 2 5V Default 1 2 3 5VSB 1 2 3 USBPWR1 is for the internal USB connectors USBPWR2 is for the rear USB ports The USB device wake up feature requires a power supply that can provide 500mA on 5VSB lead for each USB port otherwise the system will not power up The total current consumed must not exceed the power supply capability 5VSB whether under normal condition or in sleep mode...

Страница 27: ... memory frequency will be 1066MHz This is default status Set the jumper to pins 1 2 as Status 2 memory frequency will be up to 1333MHz MEM_OC_1333 Status1 Default Status1 1 2 3 1 2 3 To overclock memory up to 1333MHz you also need to use CPU which supports 1333 As a result of the memory brand and the chip s difference we do not guarantee that the 1066MHz memory you used all can work steadily under...

Страница 28: ...ll all the drivers for your system You must click Intel Chipset Driver to install it irst After that you can click One Click Setup and then choose the items you want to install or you can click on each individual driver to install it manually Manual Instal lation Step by Step Automatic Installation by One Click Select to Install Utilities Select to Install Drivers Click to visit Foxconn s website ...

Страница 29: ...21 2 21 2 Utility Use these options to install additional software programs ...

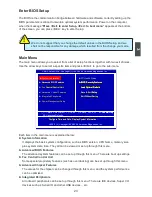
Страница 30: ...n Advanced BIOS Features Fox Central Control Unit Advanced Chipset Features Advanced Chipset Features Integrated Peripherals Integrated Peripherals Power Management Setup Power Management Setup PC Health Status PC Health Status BIOS Security Features Load Optimal Defaults Load Optimal Defaults Save Exit Setup Exit Without Saving Since BIOS could be updated some other times the BIOS information des...

Страница 31: ... chipset can be changed through this menu and the system performance can be optimized Integrated Peripherals All onboard peripherals can be set up through this menu There are IDE devices Super I O devices such as Serial I O and other USB devices etc We do not suggest that you change the default values in the BIOS Setup and we shall not be responsible for any damage which resulted from the change y...

Страница 32: ...e boot or access to Setup Load Optimal Defaults The optimal performance settings can be loaded through this menu However it may offer bet ter performance in some ways such as less I O cards less memory etc still it may cause problem if you have more memory or I O cards installed It means if your system loading is heavy set to optimal default may sometimes come out an unstable system What you need ...

Страница 33: ...p All Errors All errors can result in system halt All Errors But All errors but keyboard or mouse or loppy can result in system halt The halt condition can be enabled disabled in the next three settings Keyboard The system boot will not stop for a keyboard error if you enabled this item Mouse The system boot will not stop for a mouse error if you enabled this item Model Name CMOS Setup Utility Cop...

Страница 34: ... version User can check this information and discuss with the ield service people if a BIOS upgrade is needed Memory This item shows the information of the system memory determined by POST Power On Self Test of the BIOS MAC Address This item shows the onboard LAN MAC address ...

Страница 35: ...128 160 192 224 248 This feature controls how long each PCI device can hold the bus before another takes over The larger the value the longer the PCI device can retain control of the bus Low values for the PCI Latency Timer will reduce the effective PCI bandwidth while higher values means every PCI device will have to wait longer before they can get access to the bus but when they do get access th...

Страница 36: ...llows BIOS to skip certain tests while booting this will shorten the time needed to boot the system Bootup Num Lock This item deines if the keyboard Num Lock key is active when your system is started The available settings are On default and Off ...

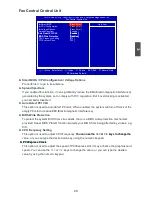
Страница 37: ...quency Setting This option is used to adjust CPU Frequency You can use the or keys to change the You can use the or keys to change the value or you can type the desired value by using the numeric keypad PCI Express Clock PCI Express Clock This option is used to adjust the speed of PCI Express slot It may enhance the graphics card speed You can use the or keys to change the value or you can type th...

Страница 38: ...rrent CPU speed Current FSB Speed This item displays the current Front Side Bus clock Current CPU Multiplier This item displays the current CPU Ratio Current DRAM Speed This item displays the current DRAM Speed System Status Power LED Status Stop Blinking Condition Normal Always On Always On No Memory Continue blinking On 1sec Off 1sec Reboot Memory OK Post Error Message Quick blinking twice 1 3se...

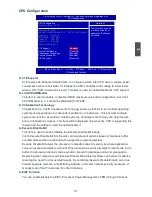
Страница 39: ... combined with a supporting operating system Execute Disable Bit allows the processor to classify areas in memory by where application code can execute and where it cannot When a malicious worm attempts to insert code in the buffer the processor disables code execution preventing damage and worm propagation Replacing older computers with Execute Disable Bit enabled systems can halt worm attacks re...

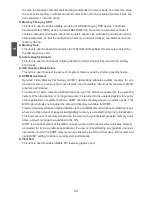
Страница 40: ... allows the system to dynamically adjust processor voltage and core frequency which can result in decreased average power consumption and decreased average heat production There are some system requirements must be met including CPU chipset motherboard BIOS and operation system Please refer to Intel website for more information C A U T I O N Voltage Options DRAM Voltage Control This item is used t...

Страница 41: ...MIO Allocation 4GB To 3328MB remapping of DRAM Frequency Auto overlapped PCI memory Auto overlapped PCI memory Memory Command Rate Auto above the total Memory Command Rate Auto above the total Auto above the total Memory Timing by SPD Enabled physical memory Enabled physical memory Memory Hole Disabled Initate Graphic Adapter PEG PCI DISABLE Do not allow PEG PCI DISABLE Do not allow IGD GTT Graphi...

Страница 42: ...mically allocates system memory for use as video memory to ensure the most eficient use of available resources for maximum 2D 3D graphics performance The amount of video memory allocated depends upon the amount requested by the operating system When the memory is no longer required it is returned to the operating system for use by other applications or system functions DVMT allocates memory based ...

Страница 43: ...ds ASPM Active State Power Management ASPM allows power to be incrementally reduced to individual serial links in a PCI Express fabric as a link becomes less active ASPM is deined in the PCI Express base speciication Enables or disables ASPM for a Link based on the overall system power policy the hardware capabilities of the Link and the latency of the Link Hardware performs the actual power manag...

Страница 44: ...Secondary IDE SATA drives are displayed as Secondary IDE Master Slave and Third IDE Master Slave in System Information menu CMOS Setup Utility Copyright C 1985 2008 American Megatrends Inc IDE Coniguration IDE Coniguration Help Item SATA Controller Enhanced Conigure SATA Channels Before PATA Disabled Compatible Enhanced Move Enter Select Value F10 Save ESC Exit F1 General Help F9 Optimized Default...

Страница 45: ...ess workstation on the network By installing a boot ROM in the network board you can enable a client PC system on the network to be booted remotely CMOS Setup Utility Copyright C 1985 2008 American Megatrends Inc OnBoard Coniguration OnBoard Configuration Help Item OnBoard Configuration Help Item OnBoard Audio Controller Enabled OnBoard LAN Controller Enabled OnBoard LAN Boot ROM OnBoard LAN Boot ...

Страница 46: ...ransfer mode of the serial port 1 CMOS Setup Utility Copyright C 1985 2008 American Megatrends Inc SuperIO Coniguration SuperIO Configuration Help Item SuperIO Configuration Help Item Serial Port1 Address 3F8 IRQ4 Allows BIOS to Select Serial Port1 Mode Normal Serial Port1 Base Addresses Addresses Addresses Addresses Move Enter Select Value F10 Save ESC Exit F1 General Help F9 Optimized Defaults 3...

Страница 47: ...m is used to enable or disable the Enhanced Host Controller Interface for USB CMOS Setup Utility Copyright C 1985 2008 American Megatrends Inc USB Coniguration USB Coniguration Help Item Module Version 2 24 3 13 4 Enables support for legacy USB AUTO AUTO USB Devices Enabled option disables None legacy support if no USB devices are Legacy USB Support connected USB 1 1 Controller Enabled USB 2 0 Con...

Страница 48: ... called Suspend to RAM S4 The S4 sleeping state is the lowest power longest wake latency sleeping state supported by ACPI In order to reduce power to a minimum it is assumed that the hardware platform has powered off all devices Platform context is maintained also called Suspend to Disk S5 The S5 state is similar to the S4 state except that the OS does not save any context The system is in the sof...

Страница 49: ...ve access to it and therefore falls back to less accurate timing methods This item is used to enable or disable the HPET Support Resume by Ring This item is used to enable disable the modem of serial port to generate a wake up from an ACPI sleep state Resume by LAN This item is used to enable disable the LAN device to generate a wake up Resume by PCI Card This item is used to enable disable a PCI ...

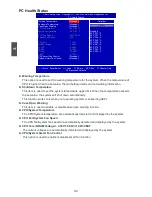
Страница 50: ...cted and displayed by the system CPU Core DRAM Voltage 3 30V 5 00V 12 0V VBAT The current voltages are automatically detected and displayed by the system CPU System Smart Fan Control This option is used to enable or disable smart fan function CMOS Setup Utility Copyright C 1985 2008 American Megatrends Inc PC Health Status Warning Temperature Help Item Shutdown Temperature Disabled Case Open Warni...

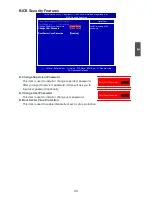
Страница 51: ...d to enable disable boot sector virus protection CMOS Setup Utility Copyright C 1985 2008 American Megatrends Inc BIOS Security Features Supervisor Password Not Installed Help Item User Password Not Installed Change Supervisor Password Install or change the Change User Password Change User Password Press Enter password Boot Sector Virus Protection Disabled Boot Sector Virus Protection Disabled Mov...

Страница 52: ...rameters to be set cannot be supported by your hardware devices for example too many expansion cards were installed the system might fail to work Save Exit Setup When you select this option and press Enter a message will be displayed in the center of the screen Select O to save your changes to CMOS and exit the program select Cancel or ESC to return to the main menu Exit Without Saving If you sele...

Страница 53: ...л т з з любым д бным б м гл т чн я л жб дд ж и Д т в з з в в ии ф мл ни дит нл н з 2 мин ты м нии Д т в и л т вин и тзывы ции и ид и платы Foxconn G41MD материнской Описание Характеристики ...

Отзывы: