background image

3

4.Press <F10>to save the BIOS setting and exit the BIOS setup program.

2.Installing SATA Hard Disks

Different RAID mode needs different number of the SATA hard disks.You need
two SATA hard disks to support  RAID 0 and RAID1. And RAID 0+1 needs four
SATA hard disks. For JBOD,  two, three or four SATA hard disks are all right .

STEP1: 

Install the SATA hard disks into the drive bays.

STEP2: 

Connect one end of the SATA data cable or the 90   to the

  motherboard

s primary SATA connector.

STEP3:


Connect the other end of the SATA data cable to the master SATA hard

  disk.

   Please connect the other SATA hard disks as 

STEP2

 and 

STEP3

.

3.BIOS Configration

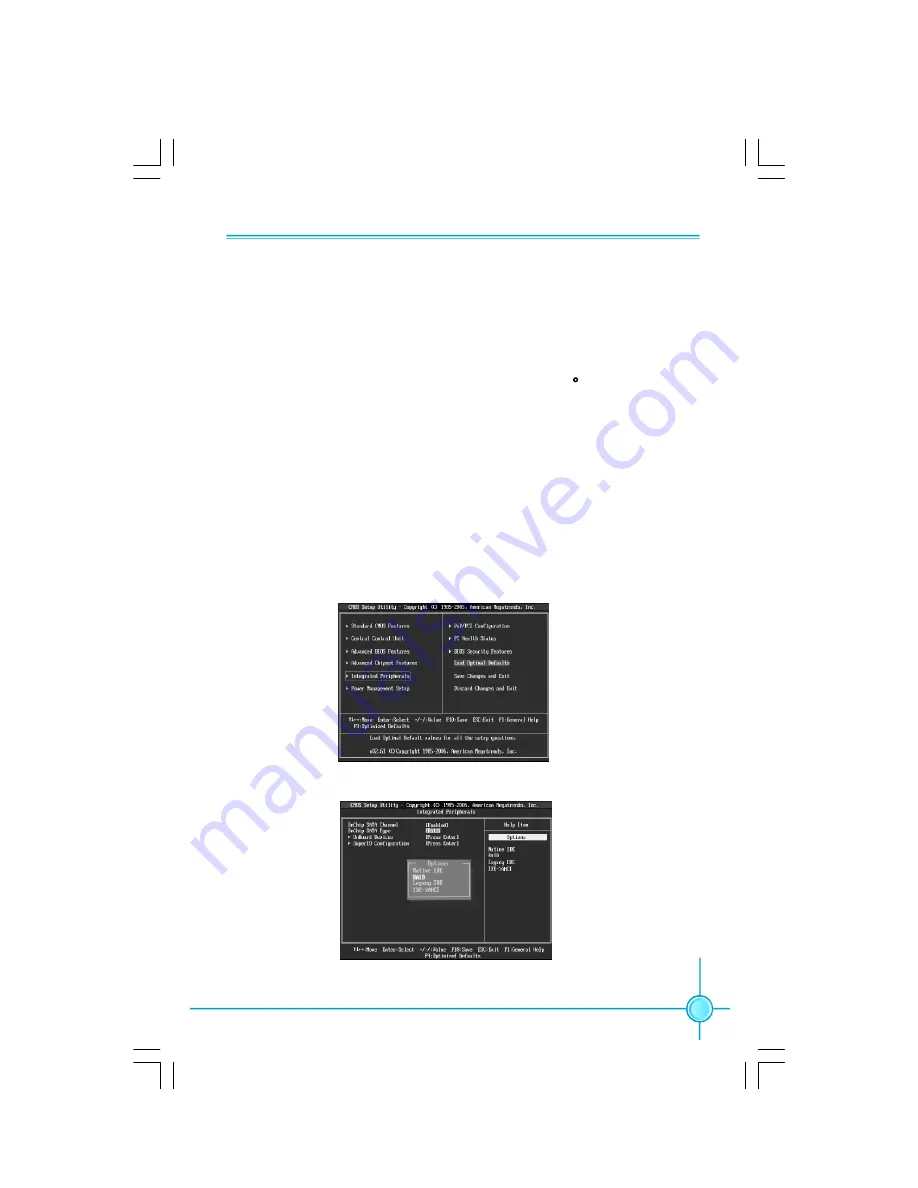
Enter BIOS Setup program

1

.Start up the computer,then enter the BIOS setup program by pressing the

<Del>key  during the POST(Power-On Self-Test).
2.Select the

 Integrated Peripherals

 item,then press<Enter>.

3.Switch the 

Onchip SATA Type 

option to

 [RAID].

PDF 

文件使用

 "pdfFactory" 

试用版本创建


www.fineprint.com.cn

Содержание A690GM2MA

Страница 1: ...1 A690GM2MA A690VM2MA SATA RAID User Guide Edition V1 0 Trademarks All brand or product names mentioned are trademarks or registered trade marks of their respective holders ...

Страница 2: ...TARAID 1 1 Introduction 1 2 Installing SATA Hard Disks 3 3 BIOS Configration 3 4 RAID BIOS Setup 4 5 Install operating system with RAID Mode 7 6 How to create RAID driver floopy disk 9 7 Initializing and Using the Disk Array 10 ...

Страница 3: ...ctor that identifies the drive as a member All disk members in a formed disk array are recognized as a singal phsical drive to the oprating system Hard disk drives can be combined together through a few different methods The different methods are reffered to as different RAID levels Different RAID levels represent different performance levels security levels and implementation costs The RAID level...

Страница 4: ...all drives when the drives used are having different capacities Spanning stores data onto a drive until it is full then proceeds to store files onto the next drive in the array When any disk member fails the failure affects the entire array JBOD is not really a RAID and does not support fault tolerance Summary of Raid Configrations Array Advantages Drawbacks Hard Disks Fault Tolerance RAID0 RAID1 ...

Страница 5: ...SATA hard disks into the drive bays STEP2 Connect one end of the SATA data cable or the 90 to the motherboard s primary SATA connector STEP3 Connect the other end of the SATA data cable to the master SATA hard disk Please connect the other SATA hard disks as STEP2 and STEP3 3 BIOS Configration Enter BIOS Setup program 1 Start up the computer then enter the BIOS setup program by pressing the Del ke...

Страница 6: ...s as part of the system POST and boot process prior to loading OS Press Cntrl F key to enter User Window The main menu of FastBuild tm utility is as below A Delete LD Before creating the new RAID mode Please delete the old RAID mode at first You can use the following steps STEP1 In the mian menu of FastBuild tm utility press 3 then you will see the Delete LD Menu ...

Страница 7: ...D The AMD SB600 supports RAID 0 RAID 1 RAID 0 1 and JBOD Select 2 to enter Define LD Menu and select the LD number Press Enter to create RAID STEP2 In the Delete LD Menu select a member of an array and press Del Then a warning message will show up and press Y to delete it or press N to cancel ...

Страница 8: ...se Press Cntl Y to save the RAID model C View Drives Assignments In the main menu of FastBuild tm utility press 1 You will enter the View Drives Assignments This page is used to tell you the basic information of the drives assignments To Create RAID 0 Press the Space key to select the RAID 0 model in Define LD Menu Then press the key to set the assignments To create RAID 0 you need set at least on...

Страница 9: ...eration System b The driver CD will automatically display main menu screen c Click Utility button d Click Create RAID Driver Floppy button then you will see the RAID Flpy txt e Read the ATI section of the RAID Flpy txt and find the path of Raid Tool exe f Insert one floppy into your 3 5 inch standard model FDD g Double click the Raid Tool exe then you will see the following picture Click Go to sta...

Страница 10: ...odel FDD is used i Select floopy drive from the list then click OK i RAID floppy tool will format your floppy j Then start to create RAID driver After finished RAID floppy creation complete message will be displayed Click OK to finish the steps ...

Страница 11: ...o the CD ROM c Press the F6 when the following pictures appear d Press S key to specify additional equipment when below picture appears e Insert the RAID installation disk into floppy disk drive following the on screen instructions and press Enter to select ATI AHCI Compatible RAID Controller X86 platform f Follow screen instructions to install the RAID drivers ...

Страница 12: ...ent The actual disks listed will depend on your system and the unallocated partition is the total combined storage of two hard disks You must format the unallocated disk space in order to use it 3 Format the unallocated disk space Right click Unallocated space select New Partition and follow the wizard After the drive has been formatted it is ready for use 2 Follow screen instructions to install W...

Отзывы: