FastIron Hardware Installation Guide for the FSX, FSX 800, and FSX 1600
7 - 30
© 2008 Foundry Networks, Inc.
December 2008
Figure 7.15
Removing the extra screws used for shipment
4.
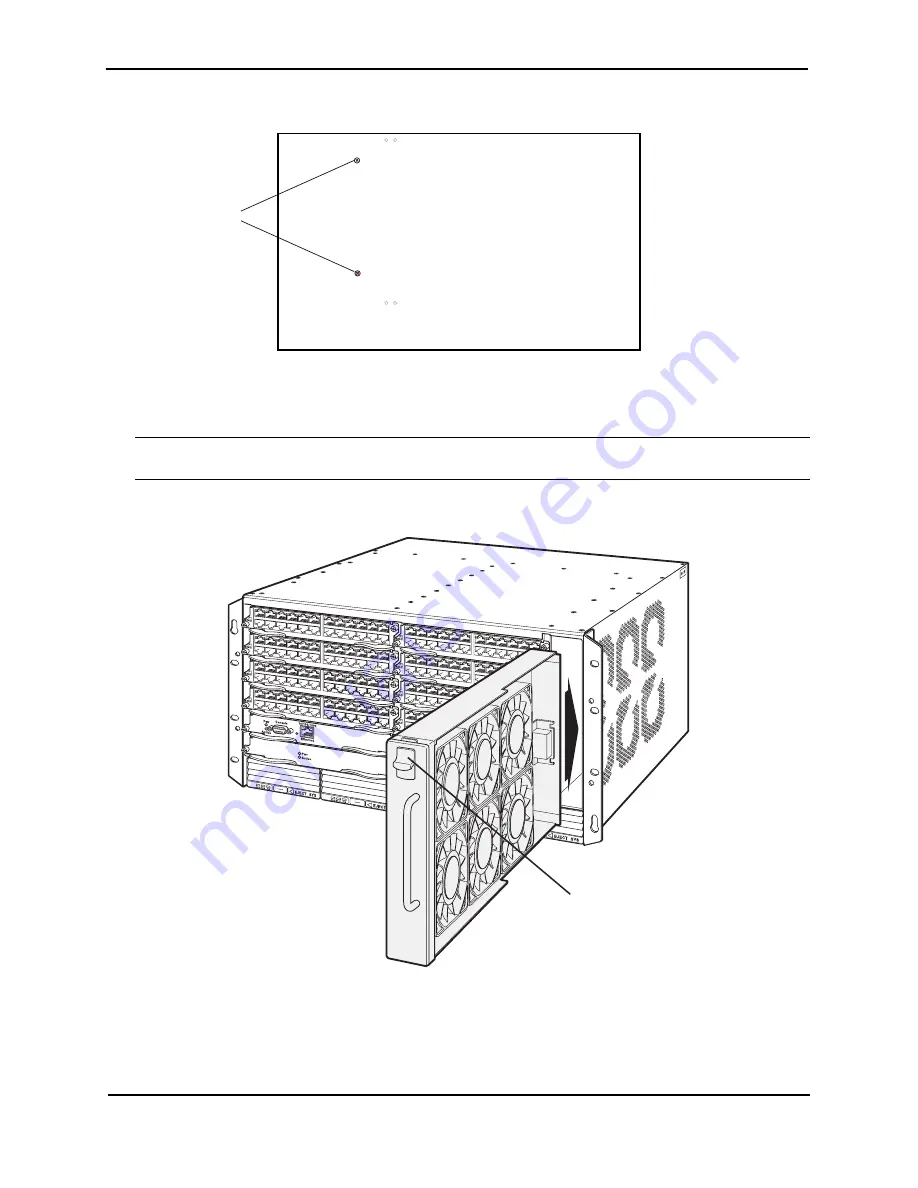
Remove the fan tray from the chassis by pressing the fan tray latch inward, towards the center of the fan tray
(see Figure 7.16). While pressing the latch inward, gently pull on the handle until the fan connector unfastens
from the chassis connector. Once unfastened, pull the fan tray out of the chassis.
WARNING:
Be careful not to accidentally insert your fingers into the fan tray while removing it from the chassis.
The fans may still be spinning at a high speed.
Figure 7.16
Removing the Fan Tray
5.
Insert the new fan tray into the fan slot and push on the latch until the face plate is flush with the chassis.
Pushing the latch in seats the fan connector with the chassis connector.
6.
Re-connect the AC power cord(s) to the chassis rear panel and connect the power cord(s) to the wall outlet.
7.
Access the CLI, and enter the
show chassis
command to verify that the new fan is operating normally.
Chassis front
Chassis rear
Shipping
screws
F
a
n Tr
a
y
F
a
n Tr
a
y L
a
tch
Содержание FastIron SuperX
Страница 139: ...Maintaining the Hardware December 2008 2008 Foundry Networks Inc 7 25 AC1 AC2 AC3 AC4 Cord Retainer Cord Retainer...
Страница 148: ...FastIron Hardware Installation Guide for the FSX FSX 800 and FSX 1600 7 34 2008 Foundry Networks Inc December 2008...
Страница 168: ...FastIron Hardware Installation Guide for the FSX FSX 800 and FSX 1600 8 20 2008 Foundry Networks Inc December 2008...
Страница 198: ...FastIron Hardware Installation Guide for the FSX FSX 800 and FSX 1600 C 16 2008 Foundry Networks Inc December 2008...


