


FOS Technologies Ltd.
User’s Manual
5
3. OPERATION
3.1 Pairing
If your fixture can be controlled via wireless DMX system, you need first to pair your fixtures to
wireless DMX transmitter - AirLink Pro.
If your fixtures have no function of wireless DMX, you need to use another AirLink Pro. Connect this AirLink
Pro to your fixture with XLR cable, set up this AirLink Pro as receiver (RX).
3.1.1 Use AirLink Pro as Transmitter
Switch on the AirLink Pro, set it up as transmitter (TX) by pressing down the green button. Connect AirLink
Pro to your lighting desk with XLR cable.
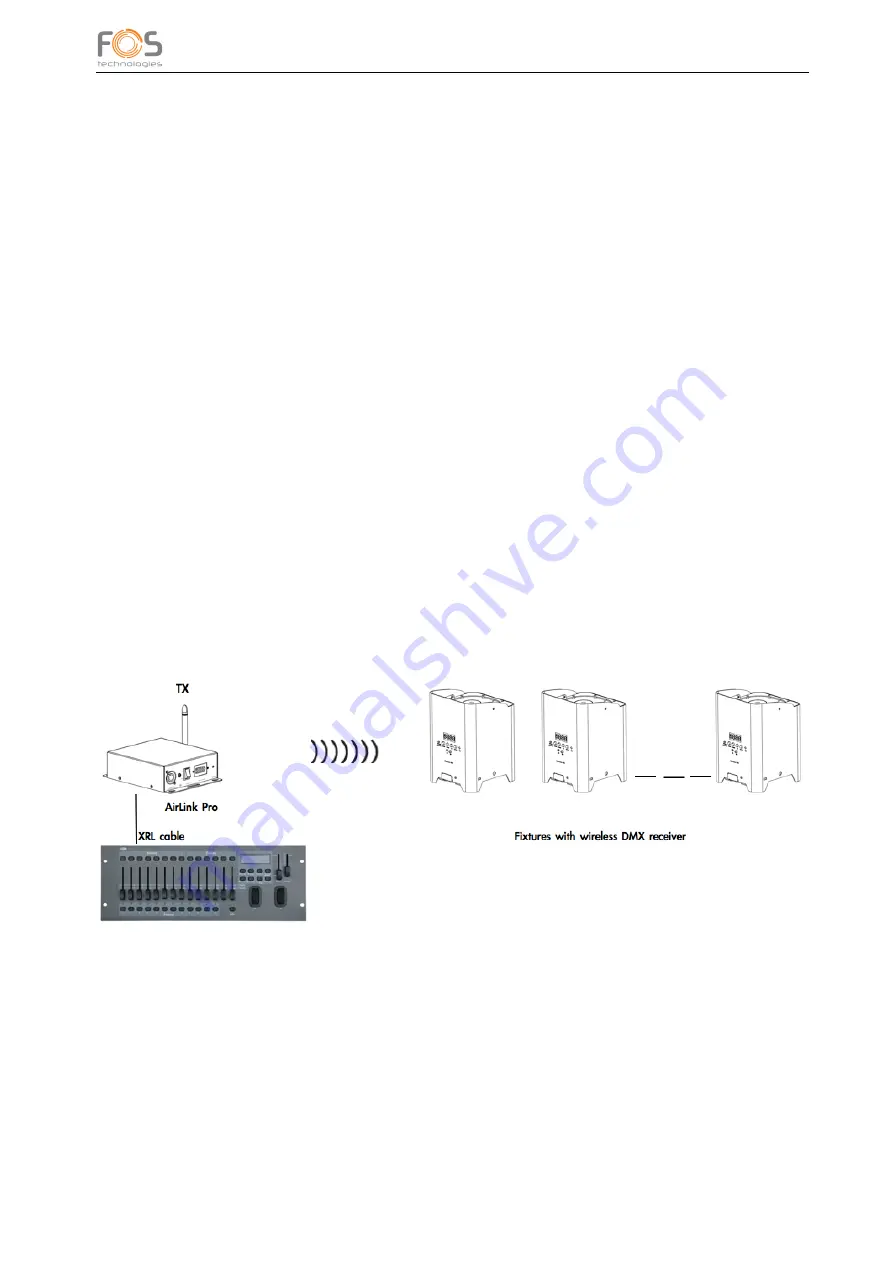
If you are going to control fixtures with wireless DMX receiver, make sure your fixtures are ready to receive
wireless DMX signal by either clearing their old wireless DMX memory.
Now press the “Pairing” button on the AirLink Pro. The yellow indicator on the transmitter and your fixtures
will start to flash at the same time. After a few seconds the wireless DMX indicators will stay On, this means
pairing succeeds. Now you can control your fixtures with your lighting desk.
3.1.2 Use AirLink Pro as Transmitter & Receiver
If you are going to control fixtures that have no wireless DMX receiver, you need to use another AirLink Pro,
and connect it to the first fixture. Set up this AirLink Pro as receiver by keeping the GREEN button RX. This
AirLink Pro can receive wireless DMX from transmitter.
AirLink Pro allows to create piont-to-point and point-to-points connection as below:


