

QUESTIONS OR TROUBLE? Contact Forney Industries at 1-800-521-6038
[email protected] • askforney.com • forneyind.com
EN_v1
TROUBLESHOOTING TIPS
• Usually due to low input power.
• Pulse settings may be causing poor fusion. Increase the Pulse (% On) setting or set the
Pulse (Hz) to 2 Hz or higher.
• Welder should be only thing plugged into circuit.
• Avoid using extension cords. If one must be used, it must be #12 AWG (120V) or
#10 AWG (240V) or larger; 25’ (8m) or shorter.
• Generators must be 10,500 W (240 V) or 4,000 W (120 V) continuous output and
not have a low-idle function (or have it disabled).
Low weld output or poor fusion
Frequently tripping circuit breaker or exceeding
duty cycle
Connect ground clamp to clean, bare metal. No rust,
paint or other coatings. Attach the ground clamp
directly to the workpiece if you are experiencing
issues.
Workpiece grounding
• Not recommended for this machine.
• Output is DC only which is not suitible for TIG welding
aluminum.
Aluminum welding
DC
ONLY
Fault Codes
Duty-cycle exceeded or
insufficient air flow. Allow
machine to cool. Ensure vents
are clear of obstacles. See
manual.
Incorrect input power. Verify
machine is plugged into an
appropriate power source. Use
proper extension cords. See
manual.
Electrode is shorted or stuck to
workpiece. Separate the
electrode or tungsten from the
workpiece and fault will clear.
See manual.
Use 5/32” diameter electrodes or smaller. Some 5/32” will draw too much
amperage (stick).
Trying to weld single pass on material larger than 3/8” thick is not possible with
this machine. Multi-pass recommended for thicker materials.
Welding machine should be the only thing plugged into the circuit.
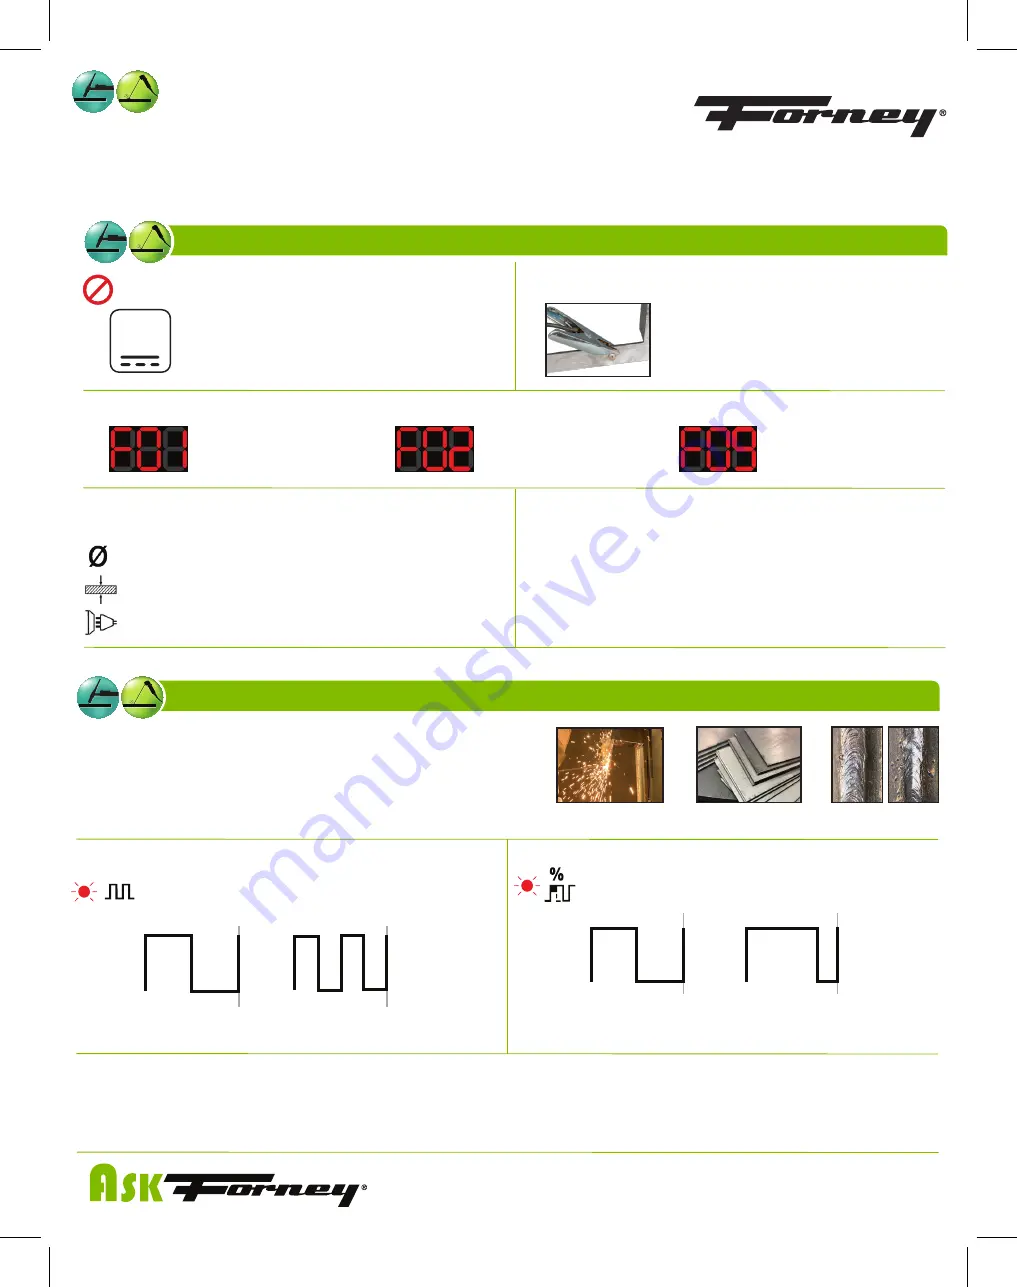
PULSE WELDING TIPS
• A higher frequency creates a focused puddle and a tight ripple bead pattern. A lower frequency creates a broader puddle and unique ripple bead pattern.
• A higher setting for Pulse (% On) will increase penetration while a lower value is better for thin material.
• Keep Hz over 2 and % On over 40 when stick welding to avoid arc loss and sticking.
• Read the manual for more information.
Expert-Tech Tips:
Why Pulse Weld?
Out of Position
Thin Material
Visually Appealing
How to set up Pulse Welding:
Set pulse frequency from 0.1 up to 10 Hz
changes how fast the arc pulses
Set pulse % On from 10 to 90. Changes
what percent of the pulse is at the user set
output amperage
TROUBLESHOOTING TIPS
180 ST+ WELDER
(NOT RECOMMENDED FOR ALUMINUM)
ITEM# 321
Down to 16 gauge
Pulse welding alternates between the set output amperage and a
reduced amperage. This allows the weld puddle to cool and solidify
during each low amp cycle. This has many benefits such as:
PULSE (Hz)
PULSE (% On)
1 sec
1 sec
1 sec
1 sec
Pulse (Hz) = 1
Pulse (Hz) = 2
Pulse (Hz) = 1
Pulse (% On) = 50
Pulse (Hz) = 1
Pulse (% On) = 75