background image

Canadian customers who require roadside assistance, call
1–800–665–2006.

If you need to arrange roadside assistance for yourself, Ford Motor
Company will reimburse a reasonable amount. To obtain reimbursement
information, U.S. Ford or Mercury vehicles customers call
1-800-241-3673; Lincoln vehicle customers call 1–800–521–4140.

Canadian customers who need to obtain reimbursement information, call
1–800–665–2006.

Roadside coverage beyond basic warranty

In the United States, you may purchase additional roadside assistance
coverage beyond this period through the Ford Auto Club by contacting
your Ford or Lincoln Mercury dealer.

Similarly in Canada, for uninterrupted Roadside Assistance coverage, you
may purchase extended coverage prior to your Basic Warranty’s Roadside
Assistance expiring. For more information and enrollment, contact
1–877–294–2582 or visit our website at www.ford.ca.

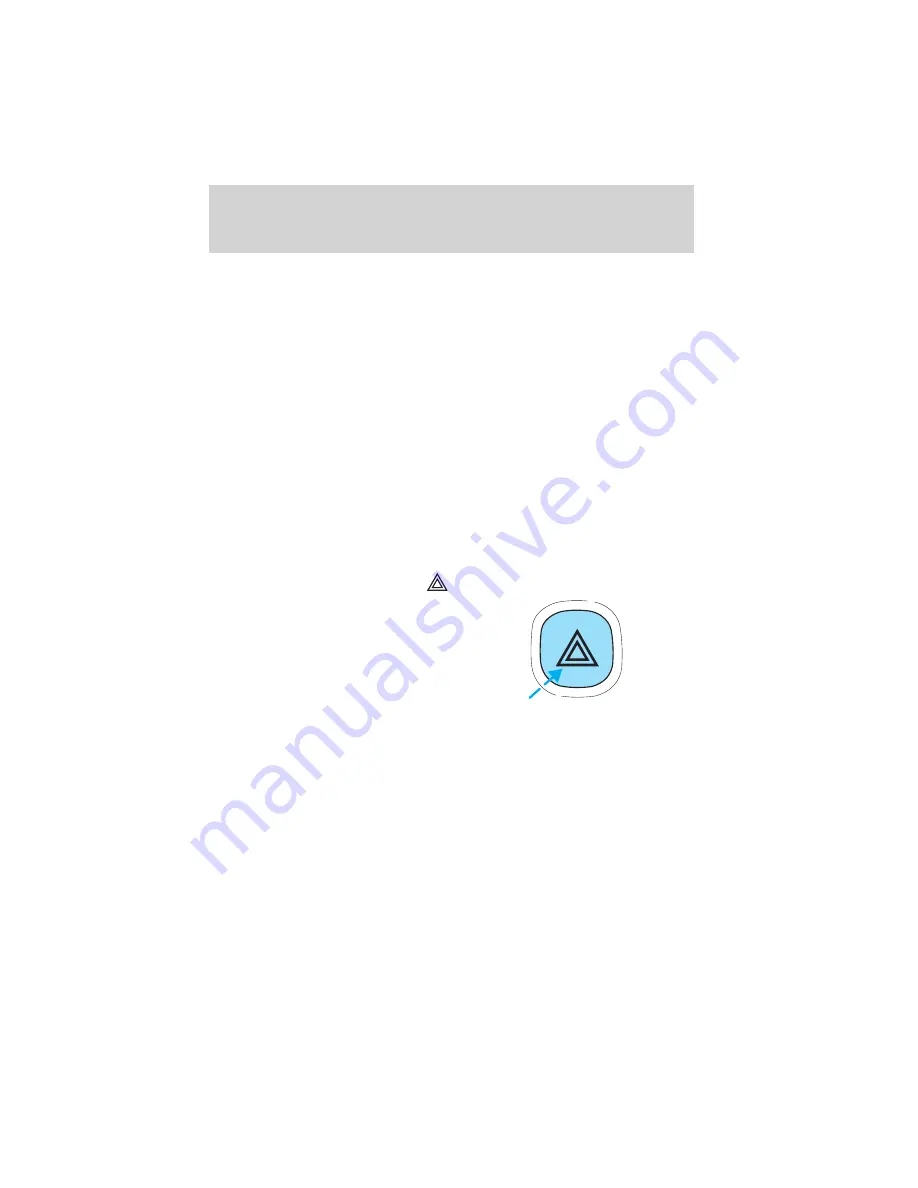
HAZARD FLASHER CONTROL

The hazard flasher is located on the
instrument panel by the radio. The
hazard flashers will operate when
the ignition is off.

Push in the flasher control and all
front and rear direction signals will
flash. Press the flasher control again
to turn them off. Use it when your vehicle is disabled and is creating a
safety hazard for other motorists.

Note:

With extended use, the flasher may run down your battery.

FUEL PUMP SHUT-OFF SWITCH

FUEL

RESET

This device stops the electric fuel pump from sending fuel to the engine
when your vehicle has had a substantial jolt.

After an accident, if the engine cranks but does not start, this switch
may have been activated.

Roadside Emergencies

149

Содержание 2003 Escape

Страница 1: ...2 20 AM www carburetor manual com Would you like some Free Manuals http carburetor manual com free shop manual club t 13 html Also visit http freeshopmanual com for more Free Manuals Also Visit my web...

Страница 2: ...stereo cassette with CD 18 Climate Controls 31 Heater only 31 Manual heating and air conditioning 32 Lights 34 Headlamps 34 Turn signal control 37 Bulb replacement 39 Driver Controls 44 Windshield wip...

Страница 3: ...3 Driving 115 Starting 115 Brakes 119 Transmission operation 121 Trailer towing 143 Roadside Emergencies 148 Getting roadside assistance 148 Hazard flasher switch 149 Fuel pump shut off switch 149 Fus...

Страница 4: ...sories 229 Index 233 All rights reserved Reproduction by any means electronic or mechanical including photocopying recording or by any information storage and retrieval system or translation in whole...

Страница 5: ...on Ford Motor Company and its products visit the following website In the United States www ford com In Canada www ford ca In Australia www ford com au In Mexico www ford com mx Additional owner info...

Страница 6: ...le usage and the authorized disposal of waste cleaning and lubrication materials are significant steps towards this aim Information in this respect is highlighted in this guide with the tree symbol BR...

Страница 7: ...h as the use of restraint systems including seat belts by the driver and passengers information about the performance of various systems and modules in the vehicle and information related to engine th...

Страница 8: ...operate this vehicle correctly may result in loss of vehicle control vehicle rollover personal injury or death Be sure to read Driving off road in the Driving chapter Using your vehicle with a snowpl...

Страница 9: ...eat Child Seat Installation Warning Child Seat Lower Anchor Child Seat Tether Anchor Brake System Anti Lock Brake System Brake Fluid Non Petroleum Based Traction Control AdvanceTrac Master Lighting Sw...

Страница 10: ...l Panic Alarm Engine Oil Engine Coolant Engine Coolant Temperature Do Not Open When Hot Battery Avoid Smoking Flames or Sparks Battery Acid Explosive Gas Fan Warning Power Steering Fluid Maintain Corr...

Страница 11: ...iagnostics System OBD II has detected a malfunction Refer to On board diagnostics OBD II in the Maintenance and Specifications chapter If the light is blinking engine misfire is occurring which could...

Страница 12: ...decrease in braking performance may occur It will take you longer to stop the vehicle Have the vehicle checked by your dealer immediately Anti lock brake system Illuminates indicating an ABS fault If...

Страница 13: ...iately Four wheel drive indicator if equipped Illuminates when four wheel drive is engaged Anti theft system Flashes when the Securilock Passive Anti theft System has been activated Speed control Illu...

Страница 14: ...Speedometer Indicates the current vehicle speed Engine coolant temperature gauge Indicates engine coolant temperature At normal operating temperature the needle will be in the normal range between H...

Страница 15: ...rip odometer to zero Tachometer Indicates the engine speed in revolutions per minute Driving with your tachometer pointer continuously at the top of the scale may damage the engine Fuel gauge Indicate...

Страница 16: ...CD tracks Press again to stop 4 CLK To set the hour press and hold CLK and press SEEK to decrease or increase the hours To set the minute press and hold CLK and press TUNE to decrease or increase the...

Страница 17: ...th six station memory preset controls which allow you to set up to six AM stations and 12 FM stations six in FM1 and six in FM2 9 CD Press and hold until desired selection is reached 10 CD Press and h...

Страница 18: ...ain recordable and re recordable compact discs may not function correctly when used in Ford CD players Irregular shaped CDs CDs with a scratch protection film attached and CDs with homemade paper adhe...

Страница 19: ...p 3 CD Door Insert a CD with the label side up CD unit are designed to play commercially pressed 12 cm 4 75 in audio compact discs only Due to technical incompatibility certain recordable and re recor...

Страница 20: ...CD The radio will resume playing 6 Tape Press to start tape play Press to stop tape during rewind fast forward CD Press to start CD play With the dual media audio press CD to toggle between single CD...

Страница 21: ...until sound returns 12 Shuffle CD Press to play tracks in random order 13 Compression CD Press to bring soft and loud passages together for a more consistent listening level 14 Dolby noise reduction W...

Страница 22: ...19 Bass Press BASS then press SEL to decrease increase the bass output Treble Press TREB then press SEL to decrease increase the treble output 20 Tune Works in radio mode only Press TUNE to change fr...

Страница 23: ...ND SYSTEM 1 Seek Press and release SEEK for previous next strong station selection or track LOAD EJ SHUF MUTE SEL BAL BASS FADE TREB SCAN PUSH ON CD 1 2 3 4 5 6 MENU AM FM SEEK REW FF DISC TUNE 2 3 4...

Страница 24: ...he feeling of being there to your music creating increased clarity as well as an open and spacious feel to the music Press DSP to access the ambiance menu Press SEL to engage disengage Turn the volume...

Страница 25: ...ations for a certain category of music format Classic Country Info Jazz Oldies R B Religious Rock Soft Top 40 Show TYPE Displays the station s call letters and format Compression Brings soft and loud...

Страница 26: ...wind noise The recommended level is 1 3 Level 0 turns the speed sensitive volume off and level 7 is the maximum setting Press and hold the volume control for five seconds Then press the SEL control t...

Страница 27: ...radio stations CD or MP3 tracks Press again to stop 4 CLK To set the clock press and hold the CLK control for the following functions To set the hour press SEEK control to decrease or increase to the...

Страница 28: ...selection point is reached This function is not enabled in MP3 mode 10 CD Rewind Press and hold until the desired selection point is reached This function is not enabled in MP3 mode 11 MP3 directory A...

Страница 29: ...d release SEEK for previous next strong station selection or CD and MP3 tracks 17 Power volume Press to turn ON OFF turn to increase or decrease volume levels 18 CD Press CD to play a CD or MP3 disc W...

Страница 30: ...rfere with your reception Station overload When you pass a broadcast tower a stronger signal may overtake a weaker one and play while the weak station frequency is displayed CASSETTE PLAYER CARE Do Us...

Страница 31: ...rtain recordable and re recordable compact discs may not function correctly when used in Ford CD players Irregular shaped CDs CDs with a scratch protection film attached and CDs with homemade paper ad...

Страница 32: ...Controls the temperature of the airflow in the vehicle Operating tips To reduce fog build up on the windshield during humid weather place the air flow selector in the position To reduce humidity buil...

Страница 33: ...h control MAX A C Uses recirculated air to cool the vehicle Air flows from the instrument panel vents only A C Uses outside air to cool the vehicle Air flows from the instrument panel vents only Distr...

Страница 34: ...r 1 Select 2 Select A C 3 Modulate the temperature control to maintain comfort 4 Set the fan speed to 4 5 Direct the outer instrument panel vents towards the side windows To increase airflow to the ou...

Страница 35: ...control of the exterior lights normally controlled by the headlamp control The autolamp system also keeps the lights on for approximately 20 seconds after the ignition switch is turned to the OFF pos...

Страница 36: ...conditions Failure to activate your headlamps under these conditions may result in a collision High beams Push the lever toward the instrument panel to activate Pull the lever towards you to deactiva...

Страница 37: ...rtical wall or screen directly in front of it 1 Eight feet 2 Center height of lamp to ground 3 Twenty five feet 4 Horizontal reference line 2 Measure the height from the center of your headlamp to the...

Страница 38: ...ust down or clockwise to adjust up aligning the upper edge of the light pattern to the horizontal line 6 Move the opaque cloth to cover the right hand headlamp and repeat steps 4 and 5 for the left ha...

Страница 39: ...ress the controls on either side of each map lamp to activate the lamps If equipped with a moon roof the map lamps are located on the moon roof control panel Press the controls on either side of each...

Страница 40: ...rranty and will provide quality bulb burn time Function Number of bulbs Trade number Park turn lamps front 2 3157 AK amber Headlamps 2 HB2 Rear stop tail sidemarker 2 3157K Rear turn lamps 2 3156K Bac...

Страница 41: ...ctrical connector from the bulb 4 Remove the rubber boot from the lamp assembly by pulling on one of the tabs 5 Press the retainer spring forward and spread the spring releasing it from bulb hooks and...

Страница 42: ...touched it should be cleaned with rubbing alcohol before being used 7 Insert the glass end of the new bulb into the headlamp assembly When the bulb s three metal tabs are aligned with the grooves in t...

Страница 43: ...lamp assembly by pulling it rearward to disengage snap features on the outward side of the lamp 4 Twist the bulb socket counterclockwise and remove from lamp assembly 5 Pull the bulb straight out of...

Страница 44: ...rews and move the lamp assembly away from the liftgate 2 Remove the bulb holder from the lamp assembly by depressing the snaps 3 Pull the bulb straight out of the socket and push in the new bulb To co...

Страница 45: ...high speed wiper operation move control down three positions from OFF Mist function To mist push control up from the OFF position and release to get one wipe Windshield washer To activate the windshie...

Страница 46: ...ull the blade down toward the windshield to remove it from the arm 2 Attach the new blade to the arm loop and pull it into place until a click is heard 3 Replace wiper blades every 6 months for optimu...

Страница 47: ...orage compartment if equipped Press the OPEN control to open the storage compartment The door will open slightly and can be moved to full open The storage compartment may be used to secure sunglasses...

Страница 48: ...cut too long the storage compartment door 3 will not close properly Excessive force to close the storage compartment door 3 may cause the door latch to break Per the table below cut the rubber actuato...

Страница 49: ...ride the autolamp 2 Turn the ignition to the ON position or start the vehicle 3 An illuminated green LED to the left of the autolamp button indicates the autolamp is ON If the green LED is not illumin...

Страница 50: ...anty The auxiliary power point is located on the instrument panel Do not plug optional electrical accessories into the cigarette lighter Use the power point POWER WINDOWS IF EQUIPPED When closing the...

Страница 51: ...e control NOTE The window switches will not illuminate when the window control is in the LOCKED position Press the left side to restore the window controls POWER SIDE VIEW MIRRORS The ignition must be...

Страница 52: ...se actions could cause damage to the glass and mirrors SPEED CONTROL IF EQUIPPED With speed control set you can maintain a speed of 48 km h 30 mph or more without keeping your foot on the accelerator...

Страница 53: ...nd release it This will automatically return the vehicle to the previously set speed The RSM control will not work if the vehicle speed is not faster than 48 km h 30 mph Increasing speed while using s...

Страница 54: ...desired vehicle speed is reached press the SET ACC control Turning off speed control There are two ways to turn off the speed control Depress the brake pedal or the clutch pedal if equipped This will...

Страница 55: ...os A driver s first responsibility is the safe operation of the vehicle The most important thing you can do to prevent a crash is to avoid distractions and pay attention to the road Wait until it is s...

Страница 56: ...also opened both liftgate and glass could be damaged against a low ceiling Do not leave the liftgate or liftgate glass open while driving Doing so could cause serious damage to the liftgate and its c...

Страница 57: ...n a sudden stop or accident if it is not securely installed Do not place any objects on the cargo area shade They may obstruct your vision or strike occupants of vehicle in the case of a sudden stop o...

Страница 58: ...at both ends of the cross bar To remove the cross bar assembly if equipped from the roof rack side rails 1 Loosen the thumbwheel at both ends of the cross bar both cross bars are adjustable 2 Slide th...

Страница 59: ...e installed with the F front arrow facing towards the front of the vehicle 2 Use a long flat object to depress the tongue in the endcaps on both sides of the cross bar 3 Slide the cross bar assemblies...

Страница 60: ...locked position Distribute the loads as evenly as possible on both the roof and inner rack when extended or stowed Always secure loads by using the tie down loops or rack accessories available from yo...

Страница 61: ...pivoting at the hinges of the rack Do not pivot the inner rack downward until it has been completely extended Failure to fully extend the inner rack could result in improper positioning of the rack a...

Страница 62: ...the vehicle if the inner roof rack is extended and loaded with cargo but is not secured into the receivers This can cause dangerous driving conditions Do not attempt to move or store the inner rack w...

Страница 63: ...of the arrows on the handle and pull the inner rack away from the bumper 2 Lift the inner rack pivoting at the hinges 3 Continue lifting the inner rack until it is parallel with the roof 4 Slide the...

Страница 64: ...ss bar to the desired location keeping the cross bar parallel with the upper bar 3 Tighten the screws with the T 25 Torx driver 4 Ensure that the cross bar is tightened and secured into place before a...

Страница 65: ...your vehicle Use additional care when driving with reduced visibility Only load cargo in the designated area Loading outside of the approved area could result in personal injury as well as vehicle da...

Страница 66: ...e control on the overhead lamp is in the DOOR position the flashers will flash twice and the perimeter alarm system if equipped will deactivate 2 Turn the key in the door cylinder again within three s...

Страница 67: ...r edge of each rear door and must be set separately for each door Setting the lock for one door will not automatically set the lock for both doors Rotate lock control in the direction of arrow to enga...

Страница 68: ...ll the interior lamps for 30 seconds or until the ignition is turned to the RUN position If the dome lamp control if equipped is in the off position the illuminated entry feature will not work The ins...

Страница 69: ...Twist a thin coin between the two halves of the remote entry transmitter near the key ring DO NOT TAKE THE FRONT PART OF THE REMOTE ENTRY TRANSMITTER APART 2 Remove the old battery 3 Insert the new ba...

Страница 70: ...ition 5 The doors will lock then unlock to confirm that the programming mode has been activated 6 Within 20 seconds press any button on the remote entry transmitter Note If more than 20 seconds have p...

Страница 71: ...ehicle is used The use of the wrong type of coded key may lead to a no start condition Your vehicle comes with two coded keys additional coded keys may be purchased from your dealer The dealer can pro...

Страница 72: ...CC position The THEFT indicator will flash every two seconds when the vehicle is armed Automatic disarming Switching the ignition to the 3 ON position with a coded key disarms the vehicle The THEFT in...

Страница 73: ...Keep the ignition in the 3 ON position for at least one second but no more than 10 seconds 3 Turn the ignition to the 1 LOCK position and remove the coded key from the ignition 4 Within ten seconds in...

Страница 74: ...rized entry is attempted When unauthorized entry occurs the system will flash the headlamps and parking lamps and will sound the horn The system is ready to arm whenever key is removed from the igniti...

Страница 75: ...ns Unlock the doors by pressing the control on your remote entry transmitter Unlock the doors with a key Turn the key full travel toward the front of the vehicle to ensure the alarm disarms Triggering...

Страница 76: ...justable head restraints if equipped The purpose of these head restraints is to help limit head motion in the event of a rear collision To properly adjust your head restraints lift the head restraint...

Страница 77: ...forward or backward Pull lever up to adjust seatback Adjusting the front power seat if equipped The control is located on the outboard side of the seat cushion Press to raise or lower the front porti...

Страница 78: ...tivate when the ignition is in the RUN position When activated they will turn off automatically after 10 minutes or when the ignition is turned to the OFF position REAR SEATS Head restraints The purpo...

Страница 79: ...traint Reclining the second row seatback Locate the release strip located on the outboard side of the seat cushion bottom and lift gently to allow the seatback to be adjusted to the desired position R...

Страница 80: ...rear seat head restraint and remove 2 Place the head restraint under the front seat for storage 3 Pull the seat release control NOTE Make sure the floor is clear of all objects before folding the sea...

Страница 81: ...release strap is pulled use your other hand to guide the seatback 6 Rotate seatback down into load floor position Make sure seat belt buckle heads are not trapped underneath the seatback and that the...

Страница 82: ...the release and push seatback backward into the desired position 2 Rotate seat cushion down into the seating position making sure that the seat cushion is locked into place and that the seat belt buck...

Страница 83: ...oard side of the vehicle To install the rear cushion 1 Push the cushion to the inboard side of the vehicle 2 Make sure that the hinges are locked into place Folding down rear bench seats if equipped 1...

Страница 84: ...2 Place the head restraint under the front seat for storage 3 Pull the seat release control on each side of the seat to release the locks 4 Flip the seat forward Seating and Safety Restraints 83...

Страница 85: ...rning the rear seats to upright position 1 Pull seatback up and into upright position making sure seatback locks into place While holding the seatback pull the release and push seatback backward into...

Страница 86: ...o the locking tabs 2 Make sure that the hinges are locked into place SAFETY RESTRAINTS Safety restraints precautions Always drive and ride with your seatback upright and the lap belt snug and low acro...

Страница 87: ...se the shoulder belt on the outside shoulder only Never wear the shoulder belt under the arm 2 Never swing the safety belt around your neck over the inside shoulder 3 Never use a single belt for more...

Страница 88: ...in the buckle 2 To unfasten push the release button and remove the tongue from the buckle The front outboard and rear outboard safety restraints in the vehicle are combination lap and shoulder belts...

Страница 89: ...if equipped Children 12 years old and under should be properly restrained in the rear seat whenever possible Refer to Safety restraints for children or Safety seats for children later in this chapter...

Страница 90: ...embly automatic locking retractor feature or any other seat belt function is not operating properly when checked according to the procedures in Workshop Manual Failure to replace the Belt and Retracto...

Страница 91: ...that results in the activation of the safety belt pretensioners Refer to the Safety belt maintenance section in this chapter Failure to replace the safety belt assembly under the above conditions coul...

Страница 92: ...ou when fully extended Do not use extensions to change the fit of the shoulder belt across the torso Safety belt warning light and indicator chime The safety belt warning light illuminates in the inst...

Страница 93: ...fety belt is not buckled approximately 5 seconds after the safety belt warning light has turned off and vehicle speed exceeds 8km h 3 mph The BeltMinder feature is activated the safety belt warning li...

Страница 94: ...If you are uncomfortable try different positions for the safety belt upper anchorage and seatback which should be as upright as possible this can improve comfort I was in a hurry Prime time for an acc...

Страница 95: ...ety belt will increase the risk of injury in an accident To disable one time or deactivate the Belt Minder feature please follow the directions stated below One time disable Any time the safety belt i...

Страница 96: ...s 5 Uncoil then retract the safety belt three times ending with the safety belt retracted After step 5 the safety belt warning light will be turned on for three seconds 6 Within seven seconds of the s...

Страница 97: ...However if the collision was minor and a qualified technician finds that the belts do not show damage and continue to operate properly they do not need to be replaced Safety belt assemblies not in us...

Страница 98: ...fic Safety Administration NHTSA recommends a minimum distance of at least 25 cm 10 inches between an occupant s chest and the driver air bag module Never place your arm over the air bag module as a de...

Страница 99: ...the risk of injury Please refer to the Body Builders Layout Book for instructions about the appropriate installation of additional equipment Children and air bags Children must always be properly res...

Страница 100: ...y residue or smell the burnt propellant This may consist of cornstarch talcum powder or sodium compounds which may irritate the skin and eyes but none of the residue is toxic While the SRS is designed...

Страница 101: ...ystem is indicated by one or more of the following The readiness light will either flash or stay lit The readiness light will not illuminate immediately after ignition is turned on A series of five be...

Страница 102: ...bag system consists of the following An inflatable nylon bag air bag with a gas generator concealed behind the outboard bolster of the driver and front passenger seatbacks A special seat cover design...

Страница 103: ...em components get hot after inflation Do not touch them after inflation If the side air bag has deployed the air bag will not function again The side air bag system including the seat must be inspecte...

Страница 104: ...re four years old or younger and who weigh 18 kg 40 lbs or less ride in your vehicle you must put them in safety seats made especially for children Check your local and state or provincial laws for sp...

Страница 105: ...tor Company recommends use of a belt positioning booster Booster seats position a child so that safety belts fit better They lift the child up so that the lap belt rests low across the hips and the kn...

Страница 106: ...would be a better choice Both can be used in any vehicle in a seating position equipped with lap shoulder belts if your child is over 40 lbs The shoulder belt should cross the chest resting snugly on...

Страница 107: ...towels to boost a child They can slide around and increase the likelihood of injury or death in a collision SAFETY SEATS FOR CHILDREN Child and infant or child safety seats Use a safety seat that is...

Страница 108: ...ack in upright position Put the safety belt in the automatic locking mode Refer to Automatic locking mode passenger side front and outboard rear seating positions if equipped section in this chapter F...

Страница 109: ...d seat in front of an active air bag If you must use a forward facing child seat in the front seat move the seat all the way back 1 Position the child safety seat in a seat with a combination lap and...

Страница 110: ...ction the tongue is coming from for that seating position until you hear a snap and feel the latch engage Make sure the tongue is latched securely by pulling on it 5 To put the retractor in the automa...

Страница 111: ...re the retractor is in the automatic locking mode you should not be able to pull more belt out If the retractor is not locked unbuckle the belt and repeat steps two through nine Check to make sure the...

Страница 112: ...d safety seat on the seat cushion 2 Route the child safety seat tether strap over the back of the seat For vehicles with adjustable head restraints remove the head restraints first place under the fro...

Страница 113: ...o the manufacturer s instructions If the safety seat is not anchored properly the risk of a child being injured in a collision greatly increases Attaching safety seats with LATCH Lower Anchors and Tet...

Страница 114: ...anchors Install a child seat onto the lower anchors at the center rear seat ONLY IF the child restraint manufacturer recommends that the child seat can be installed to anchors that are spaced up to 5...

Страница 115: ...front of the child seat Keeping the child seat just touching the vehicle seat gives the best protection in a severe crash Each time you use the safety seat check that the seat is properly attached to...

Страница 116: ...radio noise When starting a fuel injected engine don t press the accelerator before or during starting Only use the accelerator when you have difficulty starting the engine For more information on st...

Страница 117: ...s not slow down automatically have the vehicle checked Before starting the vehicle 1 Make sure all vehicle occupants buckle their safety belts For more information on safety belts and their proper usa...

Страница 118: ...clutch pedal to the floor 3 Turn the key to 3 RUN without turning the key to 4 START Make sure the corresponding lights illuminate or illuminate briefly If a light fails to illuminate have the vehicl...

Страница 119: ...ck heater is strongly recommended if you live in a region where temperatures reach 23 C 10 F or below For best results plug the heater in at least three hours before starting the vehicle The heater ca...

Страница 120: ...lock Braking System ABS This system helps you maintain steering control during emergency stops by keeping the brakes from locking Noise from the ABS pump motor and brake pedal pulsation may be observ...

Страница 121: ...ssion STEERING To prevent damage to the power steering system Never hold the steering wheel at its furthest turning points until it stops for more than a few seconds when the engine is running Do not...

Страница 122: ...ad conditions Avoid sharp turns excessive speed and abrupt maneuvers in these vehicles Failure to drive cautiously could result in an increased risk of loss of vehicle control vehicle rollover persona...

Страница 123: ...rew driver into the access hole to override the brake shift interlock Apply the brake and shift into Neutral while holding down the override tab If it is necessary to use the above procedure to move t...

Страница 124: ...aler or a qualified service technician Driving with an automatic overdrive transaxle Your automatic overdrive transaxle provides fully automatic operation in either D Overdrive or with the O D OFF swi...

Страница 125: ...ttery is disconnected or a new battery installed the strategy must be relearned P Park This position locks the transaxle and prevents the rear wheels from turning To put your vehicle in gear Start the...

Страница 126: ...cept overdrive O D OFF lamp is illuminated Provides engine braking Use when driving conditions cause excessive shifting from O D to other gears Examples city traffic hilly terrain heavy loads trailer...

Страница 127: ...r Drive Depress the accelerator to the floor Allows transmission to select an appropriate gear If your vehicle gets stuck in mud or snow If your vehicle gets stuck in mud or snow it may be rocked out...

Страница 128: ...4 START release the ignition as soon as the engine starts 5 Let the engine idle for a few seconds 6 Release the brake pedal then slowly release the clutch pedal while pressing down slowly on the acce...

Страница 129: ...5 61 km h 38 mph Reverse Make sure that your vehicle is at a complete stop before you shift into R Reverse Failure to do so may damage the transaxle Put the gearshift lever into the neutral position...

Страница 130: ...Parking your vehicle 1 Apply the brake and shift into the neutral position 2 Set the parking brake 3 Shift into 1 First 1 2 4 R 3 5 1 2 4 R 3 5 Driving 129...

Страница 131: ...FOUR WHEEL DRIVE 4X4 SYSTEM IF EQUIPPED For important information regarding safe operation of this type of vehicle see Preparing to drive your vehicle in this chapter 4x4 supplies power to all wheels...

Страница 132: ...ter than the road tires should never be used Such a tire could result in damage to driveline components and make the vehicle difficult to control Shifting between 4x4 Auto and ON modes You can move th...

Страница 133: ...reducing your speed Do not turn the steering wheel too sharply while returning to the road surface It may be safer to stay on the apron or shoulder of the road and slow down gradually before returnin...

Страница 134: ...ng properly See your dealer or a qualified service technician Do not spin the wheels at over 56 km h 35 mph The tires may fail and injure a passenger or bystander Emergency maneuvers In an unavoidable...

Страница 135: ...r gear and drive steadily through the terrain Apply the accelerator slowly and avoid spinning the wheels If you must reduce the tire pressure for whatever reason in sand make sure you re inflate the t...

Страница 136: ...and the Bureau of Land Management in encouraging you to help preserve our national forest and other public and private lands by treading lightly Driving on hilly or sloping terrain Although natural ob...

Страница 137: ...can skid like any other vehicle Should you start to slide while driving on snowy or icy roads turn the steering wheel in the direction of the slide until you regain control Avoid sudden applications o...

Страница 138: ...ehicle are of the same size type tread design brand and load carrying capacity If you have questions regarding tire replacement see an authorized Ford or Lincoln Mercury dealer If you nevertheless dec...

Страница 139: ...nted and inspected in case it needs to be repaired or replaced Maintenance and Modifications The suspension and steering systems on your vehicle have been designed and tested to provide predictable pe...

Страница 140: ...is section Reverse sensing is only an aid for some generally large and fixed objects when moving in reverse on a flat surface at parking speeds Inclement weather may also affect the function of the RS...

Страница 141: ...allows the driver to turn the RSS on and off To turn the RSS off the ignition must be ON and the gear selector in R Reverse An indicator light on the control will illuminate when the system is turned...

Страница 142: ...equals the gross vehicle weight rating minus base curb weight GVW Gross Vehicle Weight Base curb weight plus payload weight GVWR Gross Vehicle Weight Rating Maximum allowable total weight of the base...

Страница 143: ...he certification label Exceeding any vehicle weight rating limitation could result in serious damage to the vehicle loss of vehicle control vehicle rollover and or personal injury Do not use replaceme...

Страница 144: ...e vehicle performance be sure to use the proper equipment while towing Follow these guidelines to ensure safe towing procedure Stay within your vehicle s load limits Thoroughly prepare your vehicle fo...

Страница 145: ...mbined weight of the completed towing vehicle and the loaded trailer must not exceed the GCWR 4x4 GCWR Gross Combined Weight Rating Trailer Weights Engine Maximum GCWR kg lbs Trailer Weight Range kg l...

Страница 146: ...railer is on the tongue Safety chains Always connect the trailer s safety chains to hook retainers on the vehicle To connect the trailer s safety chains cross the chains under the trailer tongue and a...

Страница 147: ...e frequent service intervals Refer to your scheduled maintenance guide for more information Trailer towing tips Practice turning stopping and backing up before starting on a trip to get the feel of th...

Страница 148: ...tomatic transmission equipped with a 4x2 front wheel drive only configured powertrain recreational towing is permitted by trailering the vehicle with its front wheels on a dolly This protects the tran...

Страница 149: ...one tow per disablement Even non warranty related tows like accidents or getting stuck in the mud or snow are covered some exclusions apply such as impound towing or repossession Canadian customers re...

Страница 150: ...u may purchase extended coverage prior to your Basic Warranty s Roadside Assistance expiring For more information and enrollment contact 1 877 294 2582 or visit our website at www ford ca HAZARD FLASH...

Страница 151: ...few seconds and return the key to OFF 6 Make another check of leaks FUSES AND RELAYS Fuses If electrical components in the vehicle are not working a fuse may have blown Blown fuses are identified by...

Страница 152: ...A Blue Blue 20A Yellow Yellow Yellow Blue Blue 25A Natural Natural 30A Green Green Green Pink Pink 40A Orange Green Green 50A Red Red Red 60A Blue Yellow 70A Tan Brown 80A Natural Black Passenger comp...

Страница 153: ...l Pressure switch to PCM 3 10A Rear wiper motor Rear washer motor Rear wiper relay coil 4 10A Four wheel drive control module Cluster restraints control warning 5 5A ABS unit EVAC FILL ASC unit Restra...

Страница 154: ...10A ACC relay coil Key interlock solenoid GEM 12 5A Radio 13 Not used 14 20A Cigar lighter 15 15A Park lamp relay Front position lamps License lamps Tail lamps Park lamp relay coil Trailer fuse Illum...

Страница 155: ...A GEM Audio Cluster Interior lamp Map lamp Cargo lamp Datalink connector ACC Accessory relay Power distribution box The power distribution box is located in the engine compartment The power distributi...

Страница 156: ...ght High beams EEC 5A EEC KPWR HEGO 15A HEGO 1 2 CMS 1 2 VMV FUEL 20A Fuel pump EEC FPM DIODE DIODE MAIN 120A HEGO 15A HORN 15A FUEL 20A DIODE DIODE H L LH 15A H L RH 15A EEC 5A INJ 30A HTR 40A BTN 1...

Страница 157: ...power point FOG 20A Foglamps Foglamp indicator A C 15A A C clutch ABS 25A Anti Lock Brake System ABS SOL EVAC FILL PWR 2 15A Auxiliary power point IG MAIN 40A Starter HTR 40A Blower motor Blower moto...

Страница 158: ...ed fan control relay 2 3 0L engine Medium speed fan control relay 2 0L engine FOG RELAY MICRO Foglamp relay A C RELAY MICRO A C clutch relay CHANGING THE TIRES If you get a flat tire while driving do...

Страница 159: ...of vehicle Use of a temporary spare tire at any one wheel location can lead to impairment of the following handling stability and braking performance comfort and noise ground clearance and parking at...

Страница 160: ...rking brake and turn engine OFF 3 Block the diagonally opposite wheel 4 Lift the cargo cover and remove the tool bag with jack handle lug nut wrench and long spare tire rod and spare tire from the whe...

Страница 161: ...spension arm Rear jacking notches are located under the rear trailing arm 6 Lower the jack from its stored height to fit under the jacking notches Position the jack according to the following guides a...

Страница 162: ...hanging the tire 7 Remove the lug nuts with the lug nut wrench 8 Replace the flat tire with the spare tire making sure the valve stem is facing outward Reinstall lug nuts until the wheel is snug again...

Страница 163: ...not be reattached to the back seat clips when a full size tire is stowed 13 Install cargo cover over the flat tire and secure with the plastic nut 14 Unblock the wheels JUMP STARTING YOUR VEHICLE The...

Страница 164: ...electrical system 3 Park the booster vehicle close to the hood of the disabled vehicle making sure the two vehicles do not touch Set the parking brake on both vehicles and stay clear of the engine coo...

Страница 165: ...2 Connect the other end of the positive cable to the positive terminal of the assisting battery 3 Connect the negative cable to the negative terminal of the assisting battery Roadside Emergencies 164...

Страница 166: ...of the battery to be jumped A spark may cause an explosion of the gases that surround the battery 5 Ensure that the cables are clear of fan blades belts moving parts of both engines or any fuel deliv...

Страница 167: ...ey were connected 1 Remove the jumper cable from the ground metal surface Note In the illustrations lightning bolts are used to designate the assisting boosting battery 2 Remove the jumper cable on th...

Страница 168: ...ery 4 Remove the jumper cable from the positive terminal of the disabled vehicle s battery After the disabled vehicle has been started and the jumper cables removed allow it to idle for several minute...

Страница 169: ...mpany has not approved a slingbelt towing procedure If your vehicle is to be towed from the rear using wheel lift equipment it is recommended that the front wheels drive wheels be placed on a dolly to...

Страница 170: ...n be flat towed all wheels in the ground under the following conditions Place the transmission in N Neutral Maximum speed is not to exceed 56 km h 35 mph Maximum distance is 80 km 50 miles Ford Motor...

Страница 171: ...satisfied with the service you are receiving follow these steps 1 Contact your Sales Representative or Service Advisor at your selling servicing dealership 2 If your inquiry or concern remains unresol...

Страница 172: ...1 800 521 4140 TDD for the hearing impaired 1 800 232 5952 www ford com In Canada Customer Relationship Centre Ford Motor Company of Canada Limited P O Box 2000 Oakville Ontario L6J 5E4 1 800 565 3673...

Страница 173: ...a in Canada It provides the following Benefits during the warranty period depending on the plan you purchase such as reimbursement for rentals coverage for certain maintenance and wear items Protectio...

Страница 174: ...ord dealership sales disputes between customer and dealer except those associated with warranty repairs or concerns with the vehicle s performance as designed a request for reimbursement of consequent...

Страница 175: ...your application The toll free phone number of the DSB s independent administrator Your dealership and a Ford Motor Company representative will then be asked to submit statements To properly review yo...

Страница 176: ...a month it may take longer for the Board to consider some cases After a case is reviewed the Board mails you a decision letter and a form on which to accept or reject the Board s decision The decisio...

Страница 177: ...sions are fast fair and final the arbitrator s award is binding both to you and Ford of Canada CAMVAP services are available in all territories and provinces For more information without charge or obl...

Страница 178: ...ate outside of the U S or Canada register your vehicle identification number VIN and new address with Ford Motor Company Worldwide Direct Market Operations ORDERING ADDITIONAL OWNER S LITERATURE To or...

Страница 179: ...ad a reasonable number of attempts to conform the vehicle to its applicable express warranties if within the first 18 months of ownership of a new vehicle or the first 29 000 km 18 000 miles whichever...

Страница 180: ...gation and if it finds that a safety defect exists in a group of vehicles it may order a recall and remedy campaign However NHTSA cannot become involved in individual problems between you your dealer...

Страница 181: ...remove and cause damage to the vehicle Immediately remove items such as gasoline diesel fuel bird droppings and insect deposits because they can cause damage to the vehicle s paintwork and trim over t...

Страница 182: ...car washes may cause damage to the finish on your wheel rims or covers Chemical strength cleaners or cleaning chemicals in combination with brush agitation to remove brake dust and dirt could wear aw...

Страница 183: ...ngine may cause internal damage PLASTIC NON PAINTED EXTERIOR PARTS Use only approved products to clean plastic parts These products are available from your dealer For routine cleaning use Motorcraft D...

Страница 184: ...Be sure to replace wiper blades when they appear worn or do not function properly INSTRUMENT PANEL AND CLUSTER LENS Clean the instrument panel with a damp cloth then dry with a dry cloth Avoid cleane...

Страница 185: ...ts or strong detergents when cleaning the seat mounted side air bag Such products could contaminate the side air bag system and affect performance of the side air bag in a collision LEATHER SEATS IF E...

Страница 186: ...C 93 Motorcraft Vinyl Conditioner Canada only CXC 94 Motorcraft Deluxe Leather and Vinyl Cleaner not available in Canada ZC 11 A Ford Extra Strength Tar and Road Oil Remover not available in Canada B7...

Страница 187: ...NS WHEN SERVICING YOUR VEHICLE Do not work on a hot engine Make sure that nothing gets caught in moving parts Do not work on a vehicle with the engine running in an enclosed space unless you are sure...

Страница 188: ...d and do not remove it while the engine is running OPENING THE HOOD 1 Inside the vehicle pull the hood release handle located under the bottom of the instrument panel 2 At the front of the vehicle lif...

Страница 189: ...wer steering fluid reservoir 2 Engine coolant reservoir 3 Brake Clutch fluid reservoir 4 Air filter assembly 5 Power distribution box 6 Battery 7 Engine oil filler cap 8 Engine oil dipstick 9 Windshie...

Страница 190: ...ant reservoir 3 Automatic transmission fluid dipstick 4 Brake fluid reservoir 5 Air filter assembly 6 Power distribution box 7 Battery 8 Engine oil dipstick 9 Engine oil filler cap 10 Windshield washe...

Страница 191: ...ratures below 4 5 C 40 F use washer fluid with antifreeze protection Failure to use washer fluid with antifreeze protection in cold weather could result in impaired windshield vision and increase the...

Страница 192: ...utomatic transmissions or 1 First manual transmissions 4 Open the hood Protect yourself from engine heat 5 Locate and carefully remove the engine oil level indicator dipstick 2 0L DOHC I4 Zetec engine...

Страница 193: ...a service technician 7 Put the indicator back in and ensure it is fully seated Adding engine oil 1 Check the engine oil For instructions refer to Checking the engine oil in this chapter 2 If the engi...

Страница 194: ...eting all requirements for your vehicle s engine Do not use supplemental engine oil additives oil treatments or engine treatments They are unnecessary and could under certain conditions lead to engine...

Страница 195: ...h distilled water If the battery needs water often have the charging system checked If your battery has a cover shield make sure it is reinstalled after the battery has been cleaned or replaced For lo...

Страница 196: ...alled the engine must relearn its idle and fuel trim strategy for optimum driveability and performance To begin this process 1 With the vehicle at a complete stop set the parking brake 2 Put the gears...

Страница 197: ...nt of 36 C 34 F Coolant concentration testing is possible with a hydrometer or antifreeze tester such as the Rotunda Battery and Antifreeze Tester 014 R1060 The level of coolant should be maintained a...

Страница 198: ...angeable do not use engine coolant antifreeze or windshield washer fluid outside of its specified function and vehicle location Adding engine coolant When adding coolant make sure it is a 50 50 mixtur...

Страница 199: ...e engine damage from overheating or freezing Do not add extra inhibitors or additives to the coolant These can be harmful and compromise the corrosion protection of the engine coolant For vehicles wit...

Страница 200: ...ext few times you drive the vehicle If necessary add enough 50 50 concentration of engine coolant and distilled water to bring the liquid level to the proper level If you have to add more than 1 0 lit...

Страница 201: ...still necessary to maintain the coolant concentration above 40 NEVER decrease the coolant concentration below 40 Decreased engine coolant concentrations below 40 will decrease the corrosion protectio...

Страница 202: ...e serious injury or death if misused or mishandled Gasoline may contain benzene which is a cancer causing agent Observe the following guidelines when handling automotive fuel Extinguish all smoking ma...

Страница 203: ...sult If fuel is splashed on the skin promptly wash skin thoroughly with soap and water Consult a physician immediately if you experience an adverse reaction When refueling always shut the engine off a...

Страница 204: ...a cold engine start up followed by mixed city highway driving If you must replace the fuel filler cap replace it with a fuel filler cap that is designed for your vehicle The customer warranty may be v...

Страница 205: ...a different brand of Regular unleaded gasoline Premium unleaded gasoline is not recommended particularly in the United States because it may cause these problems to become more pronounced If the probl...

Страница 206: ...nomy is you the driver You must gather information as accurately and consistently as possible Fuel expense frequency of fill ups or fuel gauge readings are NOT accurate as a measure of fuel economy We...

Страница 207: ...etely and record the initial odometer reading in kilometers or miles 2 Each time you fill the tank record the amount of fuel added in liters or gallons 3 After at least three to five tank fill ups fil...

Страница 208: ...the speed control in hilly terrain if unnecessary shifting between third and fourth gear occurs Unnecessary shifting of this type could result in reduced fuel economy Warming up a vehicle on cold mor...

Страница 209: ...ndow sticker Every new vehicle should have the EPA window sticker Contact your dealer if the window sticker is not supplied with your vehicle The EPA window sticker should be your guide for the fuel e...

Страница 210: ...and potentially lethal fumes into the passenger compartment Do not make any unauthorized changes to your vehicle or engine By law vehicle owners and anyone who manufactures repairs services sells leas...

Страница 211: ...ting In some localities it may be a legal requirement to pass an I M test of the on board diagnostics system If your indicator is on refer to the description in the Warning lights and chimes section o...

Страница 212: ...area between H and C 2 While the engine idles turn the steering wheel left and right several times 3 Turn the engine off 4 Check the fluid level in the reservoir It should be between the MIN and MAX...

Страница 213: ...roximately 30 km 20 miles If your vehicle has been operated for an extended period at high speeds in city traffic during hot weather or pulling a trailer the vehicle should be turned off for about 30...

Страница 214: ...ansmission fluid may cause shift and or engagement concerns and or possible damage High fluid levels can be caused by an overheating condition Adjusting automatic transmission fluid levels Before addi...

Страница 215: ...the filler opening so that the fluid level is at the bottom of the opening 8 Install and tighten the fill plug securely Use only fluid that meets Ford specifications Refer to the Refill capacities in...

Страница 216: ...ect the tube from the cover 2 Release the clamps that secure the air filter housing cover 3 Carefully separate the two halves of the air filter housing 4 Remove the air filter element from the air fil...

Страница 217: ...Federal Regulations Part 575 104 c 2 U S Department of Transportation Tire quality grades The U S Department of Transportation requires Ford to give you the following information about tire grades ex...

Страница 218: ...ed by law The temperature grade for this tire is established for a tire that is properly inflated and not overloaded Excessive speed underinflation or excessive loading either separately or in combina...

Страница 219: ...d or bias type tires Use only the tire sizes that are listed on the Certification Label Make sure that all tires are the same size speed rating and load carrying capacity Use only the tire combination...

Страница 220: ...ow these guidelines when using snow tires and traction devices SAE class S cable should be used only on front axle for P235 70R16 tires With P225 70R15 and P215 70R16 tires SAE class S cables can be u...

Страница 221: ...I decal for spark plug gap information 3 If a spark plug is to be removed for inspection it must be reinstalled in the same cylinder If a spark plug needs to be replaced use only spark plugs with the...

Страница 222: ...al transaxle 2WD 2 7L 2 85 quarts 2 Manual transaxle 4X4 2 2L 2 32 quarts 2 Motorcraft MERCON ATF 2 0L engine with Automatic transaxle and oil cooler 8 5L 9 0 quarts 3 0L engine with Automatic transax...

Страница 223: ...terchangeable DO NOT mix MERCON and MERCON V Refer to your scheduled maintenance guide to determine the correct service interval 2 Service refill capacity is determined by filling the transmission to...

Страница 224: ...alfshaft CV joints Motorcraft Premium Long Life Grease XG 1 C or XG 1 T or XG 1 K ESA M1C75 B Engine coolant 1 Motorcraft Premium Gold Engine Coolant yellow colored VC 7 A WSS M97B51 A1 Engine oil Mot...

Страница 225: ...rect automatic transmission fluid is used Transmission fluid requirements are indicated on the dipstick or on the dipstick handle MERCON and MERCON V are not interchangeable DO NOT mix MERCON and MERC...

Страница 226: ...52 inch 1 32 1 42 mm 0 052 0 056 inch Ignition system DIS Coil on plug Compression ratio 9 6 1 10 0 1 VEHICLE DIMENSIONS Dimensions 4 Door mm in 1 Vehicle height Maximum height 1755 69 1 1774 69 8 2 F...

Страница 227: ...3 2 1 Maintenance and Specifications 226...

Страница 228: ...Safety Administration Regulations require that a Certification label be affixed to a vehicle and prescribe where the Certification label may be located The Certification label is located on the front...

Страница 229: ...entification number 1 World manufacturer identifier 2 Brake type and gross vehicle weight rating GVWR 3 Vehicle line series body type 4 Engine type 5 Check digit 6 Model year 7 Assembly plant 8 Produc...

Страница 230: ...ry The accessory will be warranted for whichever provides you the greatest benefit 12 months or 20 000 km 12 000 miles whichever occurs first or the remainder of your new vehicle limited warranty This...

Страница 231: ...headlamps with DRL Daytime Running Lights Daytime running lights Factory luggage rack adaptors bike ski snowboard First aid kit Framed luggage cover Highway safety kit Hitch mounted bike rack Luggage...

Страница 232: ...nce equipment Air bag anti theft locks All weather floor mats Bumper guards Car truck covers Cargo liners interior soft and rigid Carpet floor mats Door edge guards Front end covers full and sport Gri...

Страница 233: ...only by a qualified service technician Mobile communications systems may harm the operation of your vehicle particularly if they are not properly designed for automotive use or are not properly insta...

Страница 234: ...utomatic overdrive 124 fluid refill capacities 220 fluid specification 225 Auxiliary power point 49 Axle lubricant specifications 223 225 refill capacities 220 B Battery 194 acid treating emergencies...

Страница 235: ...ed control 51 Customer Assistance 148 Ford accessories for your vehicle 185 Ford Extended Service Plan 172 Getting assistance outside the U S and Canada 176 Getting roadside assistance 148 Getting the...

Страница 236: ...filter specifications 205 220 fuel pump shut off switch 149 improving fuel economy 205 octane rating 204 225 quality 204 running out of fuel 205 safety information relating to automotive fuels 201 Fus...

Страница 237: ...eplacing bulbs 39 42 43 Lane change indicator see Turn signal 37 Liftgate 55 Lights warning and indicator 10 anti lock brakes ABS 119 Load limits 141 GAWR 141 GVWR 141 trailer towing 141 Loading instr...

Страница 238: ...tension assembly 91 for adults 86 89 for children 103 lap belt 90 safety belt maintenance 96 warning light and chime 91 Safety seats for children 106 Seat belts see Safety restraints 85 Seats 75 child...

Страница 239: ...efill capacities 220 lubricant specifications 223 225 Turn signal 37 V Vehicle dimensions 225 Vehicle Identification Number VIN 228 Vehicle loading 141 Ventilating your vehicle 118 W Warning lights se...

Страница 240: ...239...

Страница 241: ...240...

Отзывы: