background image

16

Step-by-step Guide

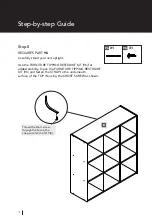
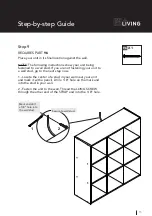
Step 10

REQUIRES PART 

96

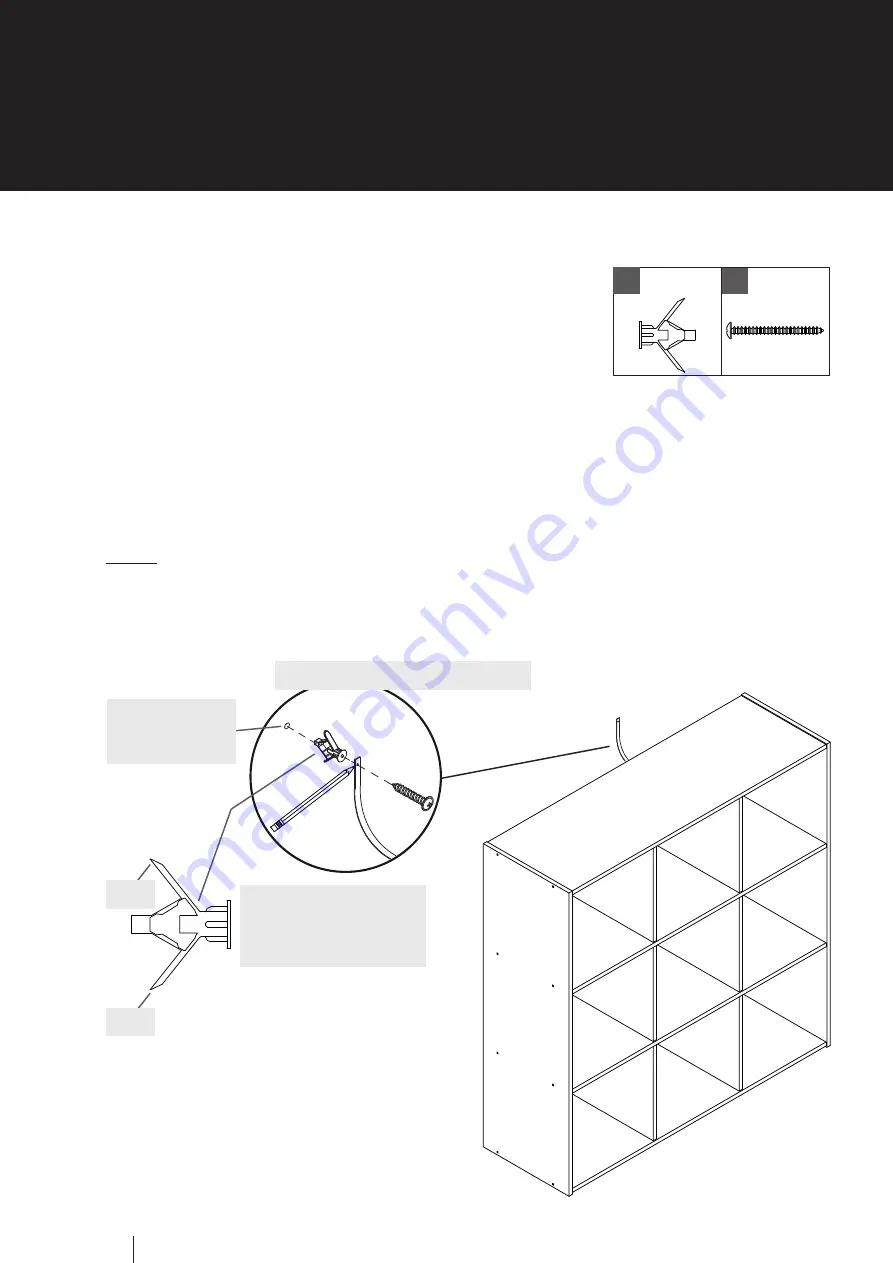
1 - With your pencil, strike a mark through the center of the 

hole in the SAFETY STRAP. Drill a 3/8” hole on 

the mark.


2 - While you squeeze the wings together, gently tap the 

WALL ANCHOR from the FURNITURE TIPPING RESTRAINT 

KIT (96) into the hole until it is even with the surface of 

the wall.
3 - Turn the LONG SCREW through the hole in the 

SAFETY STRAP and into the WALL ANCHOR.
NOTE: You will need to turn the LONG SCREW multiple 

turns to completely tighten and secure your unit to the wall. 

1

3

2

Mark and drill 

a 3/8” hole into 

the wall.

While you squeeze the 

wings together, gently 

tap the WALL ANCHOR 

into the hole in the wall.

96

X1

96

X1

Wing

Wing

Secure to wall with WALL ANCHOR

Содержание 068-0400-8

Страница 1: ...RTANT Please read this manual carefully before beginning assembly of this product Keep this manual for future reference NEED HELP GIVE US A CALL WE RE HERE FOR YOU TOLL FREE 1 877 483 6759 Product No 068 0400 8 9 Cube Organizer ...

Страница 2: ...our family home For Living is a great place to start Uncomplicate your life with timeless style and reliable quality that delivers everyday solutions for your home Let us know how our products work for you Rate and review at canadiantire ca 2 ...

Страница 3: ...quipped with casters Furniture can tip over or break if improperly moved Physical injury Furniture can be very heavy Unload shelves from top to bottom before moving the furniture Do not push furniture especially on a carpeted floor Have a friend help you lift the item and set it in place This unit must be positioned against a wall Children climbing on the shelves can cause the product to tip Risk ...

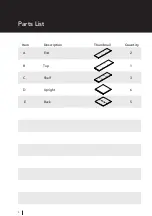
Страница 4: ...Parts List Item Description Thumbnail Quantity Parts List 4 E Back 5 D Upright 6 C Shelf 3 B Top 1 A End 2 ...

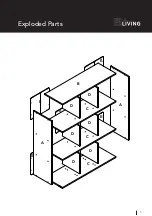
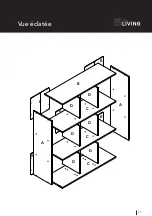
Страница 5: ...Exploded Parts Exploded Parts 5 E C D A B A D D C C E E D D D E E ...

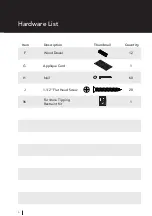
Страница 6: ...Hardware List Item Description Thumbnail Quantity 6 F Wood Dowel 12 G Applique Card 1 H Nail 60 J 1 1 2 Flat Head Screw 28 96 Furniture Tipping Restraint Kit 1 ...

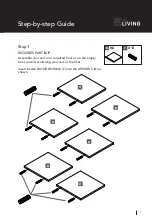
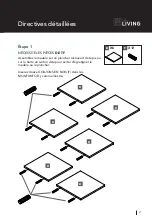
Страница 7: ...7 X D D X6 F X12 Step 1 REQUIRES PART D F Assemble your unit on a carpeted floor or on the empty box to avoid scratching your unit or the floor Insert twelve WOOD DOWELS F into the UPRIGHTS D as shown X D X D X D X D X D ...

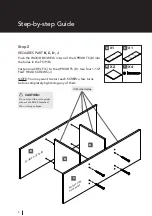
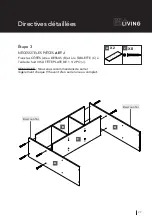
Страница 8: ...es in the TOP B Fasten one SHELF C to the UPRIGHTS D Use four 1 1 2 FLAT HEAD SCREWS J NOTE You may want to start each SCREW a few turns before completely tightening any of them Surface with holes Surface with more holes B D C D Unfinished edge CAUTION Do not stand the unit upright without the BACK fastened The unit may collapse ...

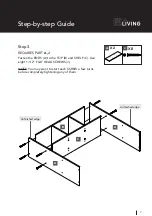
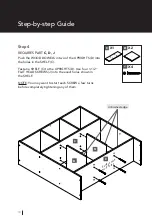
Страница 9: ...IRES PART A J Fasten the ENDS A to the TOP B and SHELF C Use eight 1 1 2 FLAT HEAD SCREWS J NOTE You may want to start each SCREW a few turns before completely tightening any of them B X2 X8 J A B C A A Unfinished edge Unfinished edge ...

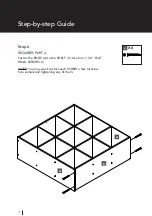
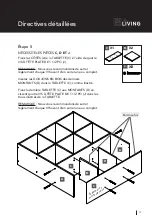
Страница 10: ...GHTS D into the holes in the SHELF C Fasten a SHELF C to the UPRIGHTS D Use four 1 1 2 FLAT HEAD SCREWS J into the exact holes shown in the SHELF NOTE You may want to start each SCREW a few turns before completely tightening any of them C X1 X4 J Surface with more holes D C C D Unfinished edge ...

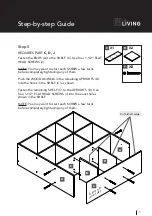
Страница 11: ...ghtening any of them Push the WOOD DOWELS in the remaining UPRIGHTS D into the holes in the SHELF C as shown Fasten the remaining SHELF C to the UPRIGHTS D Use four 1 1 2 FLAT HEAD SCREWS J into the exact holes shown in the SHELF NOTE You may want to start each SCREW a few turns before completely tightening any of them C A A C D D Surface with fewer holes C D X2 X1 X8 J Unfinished edge ...

Страница 12: ...p by step Guide Step 6 REQUIRES PART J Fasten the ENDS A to the SHELF C Use four 1 1 2 FLAT HEAD SCREWS J NOTE You may want to start each SCREW a few turns be fore completely tightening any of them C A X4 J A ...

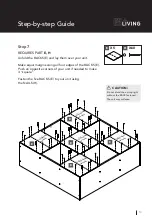
Страница 13: ...ers of your unit if needed to make it square Fasten the five BACKS E to your unit using the NAILS H H X60 E X5 U n fi n i s h e d s u r f a c e E E E U n fi n i s h e d s u r f a c e U n fi n i s h e d s u r f a c e E U n fi n i s h e d s u r f a c e E U n fi n i s h e d s u r f a c e CAUTION Do not stand the unit upright without the BACK fastened The unit may collapse ...

Страница 14: ...se the FURNITURE TIPPING RESTRAINT KIT 96 for added stability Open the FURNITURE TIPPING RESTRAINT KIT 96 and fasten the STRAP to the underneath surface of the TOP B using the SHORT SCREW as shown B Thread the short screw through the hole in the strap and into the TOP B 96 X1 96 X1 ...

Страница 15: ...u are not fastening your unit to a wall stud go to the next step now 1 Locate the center of a stud in your wall near your unit and mark it with a pencil Drill a 1 8 hole on the mark and into the stud in your wall 2 Fasten the unit to the wall Thread the LONG SCREW through the other end of the STRAP and into the 1 8 hole 1 2 Mark and drill a 1 8 hole into the wall stud Secure to wall stud ...

Страница 16: ...RAINT KIT 96 into the hole until it is even with the surface of the wall 3 Turn the LONG SCREW through the hole in the SAFETY STRAP and into the WALL ANCHOR NOTE You will need to turn the LONG SCREW multiple turns to completely tighten and secure your unit to the wall 1 3 2 Mark and drill a 3 8 hole into the wall While you squeeze the wings together gently tap the WALL ANCHOR into the hole in the ...

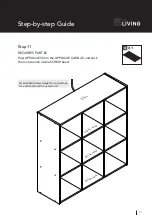
Страница 17: ...ES PART G Peel APPLIQUES from the APPLIQUE CARD G and stick them onto each visible SCREW head 3 0 l b s 6 0 l b s t o t a l 6 0 l b s t o t a l 6 0 l b s t o t a l Overall distributed weight for top surface for each shelf and the overall unit ...

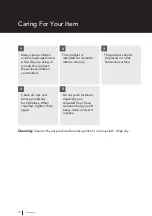
Страница 18: ...use only Cleaning Clean with your preferred furniture polish or a damp cloth Wipe dry Do not push furniture especially on a carpeted floor Have someone help you lift heavy items and set it in place The product should be placed on a flat horizontal surface Always keep children under close supervision while they are using or around this product Never leave children unattended ...

Страница 19: ... replace the defective product free of charge within the stated warranty period when returned by the original purchaser with proof of purchase This product is not guaranteed against wear or breakage due to misuse and or abuse Made in China Imported by Trileaf Distribution Trifeuil Toronto Canada M4S 2B8 Model No 068 0400 8 1 Year Limited Warranty ...

Страница 20: ......

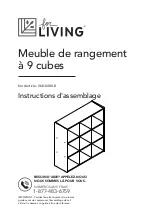
Страница 21: ...tentivement le présent guide avant de commencer l assemblage de cet article Conservez ce guide à titre de référence BESOIN D AIDE APPELEZ NOUS NOUS SOMMES LÀ POUR VOUS NUMÉRO SANS FRAIS 1 877 483 6759 No d article 068 0400 8 Meuble de rangement à 9 cubes ...

Страница 22: ...nt ou pour réduire la taille de votre maison familiale Optez pour la simplicité en choisissant des meubles fiables et d un style intemporel qui répondent aux besoins quotidiens de votre foyer Dites nous ce que vous pensez de nos articles Évaluez les sur le site canadiantire ca ...

Страница 23: ...à quelqu un de vous aider à soulever et à déplacer des articles lourds Ce meuble doit être appuyé contre un mur Meuble pouvant basculer si des enfants grimpent sur les tablettes Risque de blessures ou de décès Ne laissez pas les enfants grimper sur les tablettes Évitez de placer des objets comme des jouets ou des bonbons sur les tablettes du haut Utilisez toujours la trousse antibasculement fourni...

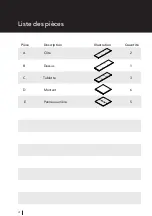
Страница 24: ...Parts List Liste des pièces 24 Description Quantité Illustration Pièce E Panneau arrière 5 D Montant 6 C Tablette 3 B Dessus 1 A Côté 2 ...

Страница 25: ...Exploded Parts Vue éclatée 25 E C D A B A D D C C E E D D D E E ...

Страница 26: ...Liste de la quincaillerie 26 Description Quantité Illustration Pièce F Goujon en bois 12 G Carte d autocollants 1 H Clou 60 J Vis à tête plate de 1 1 2 po 28 96 Trousse antibasculement pour meuble 1 ...

Страница 27: ...NÉCESSITE LES PIÈCES D ET F Assemblez le meuble sur un plancher recouvert de tapis ou sur la boîte en carton vide pour éviter d égratigner le meuble ou le plancher Insérez douze GOUJONS EN BOIS F dans les MONTANTS D comme illustré X D X D X D X D X D ...

Страница 28: ...BLETTE C au MONTANT D à l aide de quatre VIS À TÊTE PLATE DE 1 1 2 PO J REMARQUE Nous vous recommandons de serrer légèrement chaque VIS avant d en serrer une au complet Surface avec trous Surface avec plus de trous B D C D MISE EN GARDE Ne placez pas le meuble à la verticale sans d abord installer le PANNEAU ARRIÈRE car le meuble pourrait s effondrer Bord non fini ...

Страница 29: ...CES A ET J Fixez les CÔTÉS A au DESSUS B et à la TABLETTE C à l aide de huit VIS À TÊTE PLATE DE 1 1 2 PO J REMARQUE Nous vous recommandons de serrer légèrement chaque VIS avant d en serrer une au complet B X2 X8 J A B C A A Bord non fini Bord non fini ...

Страница 30: ...MONTANTS D dans la TABLETTE C Fixez une TABLETTE C aux MONTANTS D en vissant quatre VIS À TÊTE PLATE DE 1 1 2 PO J dans les trous illustrés de la TABLETTE REMARQUE Nous vous recommandons de serrer légèrement chaque VIS avant d en serrer une au complet C X1 X4 J Surface avec plus de trous D C C D Bord non fini ...

Страница 31: ...ant d en serrer une au complet Insérez les GOUJONS EN BOIS des derniers MONTANTS D dans la TABLETTE C comme illustré Fixez la dernière TABLETTE C aux MONTANTS D en vissant quatre VIS À TÊTE PLATE DE 1 1 2 PO J dans les trous illustrés de la TABLETTE REMARQUE Nous vous recommandons de serrer légèrement chaque VIS avant d en serrer une au complet C A A C D D Surface avec moins de trous C D X2 X1 X8 ...

Страница 32: ...s Étape 6 NÉCESSITE LES PIÈCES J Fixez les CÔTÉS A à la TABLETTE C à l aide de quatre VIS À TÊTE PLATE DE 1 1 2 PO J REMARQUE Nous vous recommandons de serrer légèrement chaque VIS avant d en serrer une au complet C A X4 J A ...

Страница 33: ...s du meuble s il est nécessaire de le rendre droit Fixez les cinq PANNEAUX ARRIÈRE E au meuble à l aide des CLOUS H H X60 E X5 E E E E E MISE EN GARDE Ne placez pas le meuble à la verticale sans d abord installer le PANNEAU ARRIÈRE car le meuble pourrait s effondrer S u r f a c e n o n fi n i e S u r f a c e n o n fi n i e S u r f a c e n o n fi n i e S u r f a c e n o n fi n i e S u r f a c e n o...

Страница 34: ...le à la verticale Utilisez la TROUSSE ANTIBASCULEMENT POUR MEUBLE 96 pour plus de stabilité Ouvrez la TROUSSE ANTIBASCULEMENT POUR MEUBLE 96 et fixez la SANGLE au dessous du DESSUS B avec la VIS COURTE comme illustré B Vissez la vis courte dans le trou de la sangle et le DESSUS A 96 X1 96 X1 ...

Страница 35: ...suivante si vous ne fixez pas votre appareil à un montant mural 1 Repérez le centre d un montant mural près de votre meuble et marquez son emplacement avec un crayon Percez un trou de 1 8 po sur la marque du montant mural 2 Fixez le meuble au mur Vissez la LONGUE VIS dans l autre extrémité de la SANGLE et le trou de 1 8 po 1 2 Faites une marque et percez un trou de 1 8 po dans le montant du mur Fi...

Страница 36: ... dans le trou jusqu à ce qu il soit à la surface du mur 3 Vissez la LONGUE VIS dans le trou de la SANGLE puis dans l ancrage mural REMARQUE Vous devrez tourner les LONGUES VIS plusieurs tours pour les serrer complètement et fixer votre meuble au mur 1 3 2 96 X1 96 X1 En serrant les ailettes ensemble insérez doucement l ANCRAGE MURAL dans le trou du mur Ailette Ailette Fixez le meuble au mur à l ai...

Страница 37: ...IÈCES G Apposez les AUTOCOLLANTS de la CARTE D AUTOCOLLANTS G sur les VIS visible 3 0 l b s T o t a l d e 6 0 l b T o t a l d e 6 0 l b T o t a l d e 6 0 l b Poids total distribué pour la surface supérieure pour chaque tablette et pour l ensemble du meuble ...

Страница 38: ...eubles surtout sur un plancher recouvert de tapis Demandez à quelqu un de vous aider à soulever et à déplacer des articles lourds Cet article doit être placé sur un sol plat Surveillez toujours attentivement les enfants lorsqu ils utilisent cet article ou jouent à proximité de celui ci Ne laissez jamais les enfants sans surveillance Nettoyage Nettoyer avec votre cire pour meubles préférée ou un ch...

Страница 39: ... article défectueux sans frais lorsqu il est retourné accompagné de la preuve d achat par l acquéreur initial au cours de la période de garantie convenue Cet article n est pas garanti contre l usure ou un bris causé par un usage abusif ou inapproprié Fabriqué en Chine Importé par Trileaf Distribution Trifeuil Toronto Canada M4S 2B8 No de modèle 068 0400 8 Garantie limitée de 1 an ...

Страница 40: ......

Отзывы: